Dedicated forum thread:
Demo page
Introduction
Our Payments Kit plugin will integrate PayPal payment processing capabilities into your application.
It provides both one-time payments and subscription-based transactions, being a comprehensive solution for e-commerce and subscription-based business models.
Features
- One-time payments processing
- Recurring subscriptions management
- Refunds and dispute handling
- Support multiple currencies
- Real-time payment status updates
- Error handling
- Webhook integration support
How to Setup
General
1. Install the plugin
2. Configure PayPal credentials and the used currency

3. Set up payment workflows or required webhooks
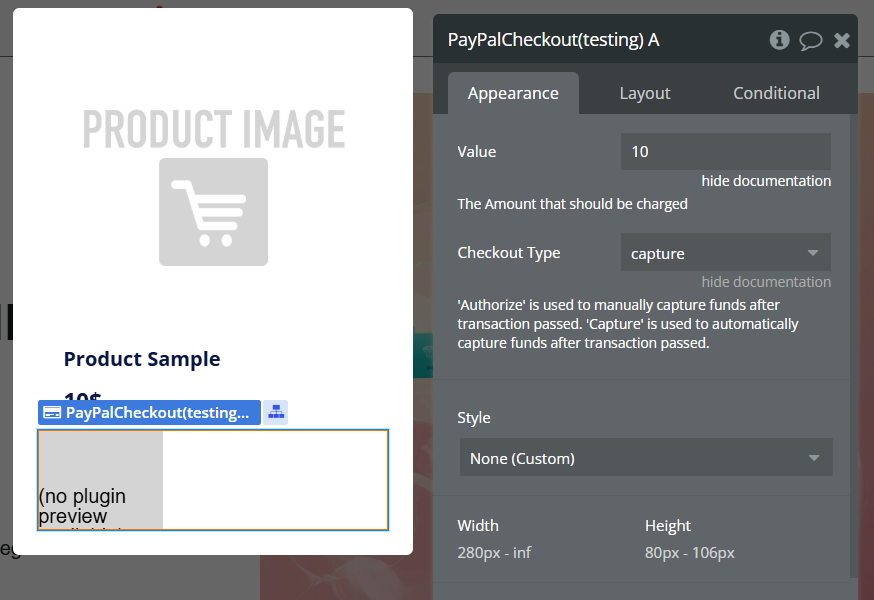
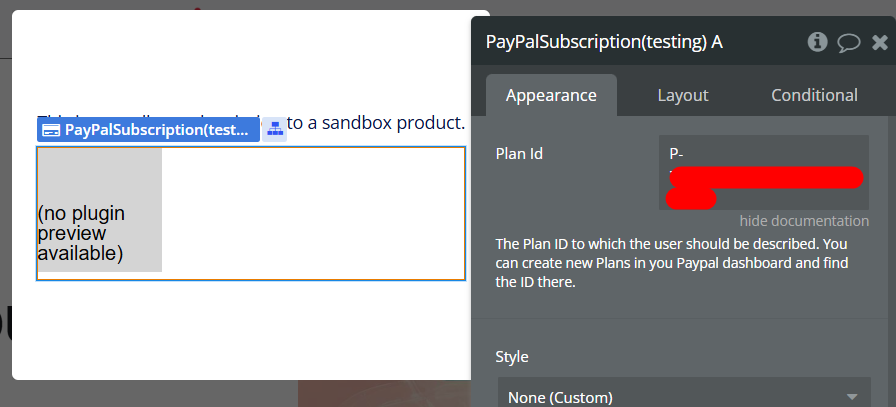
4. Customize payment buttons
- on direct payments
- on subscriptions
5. Test transactions
Webhooks
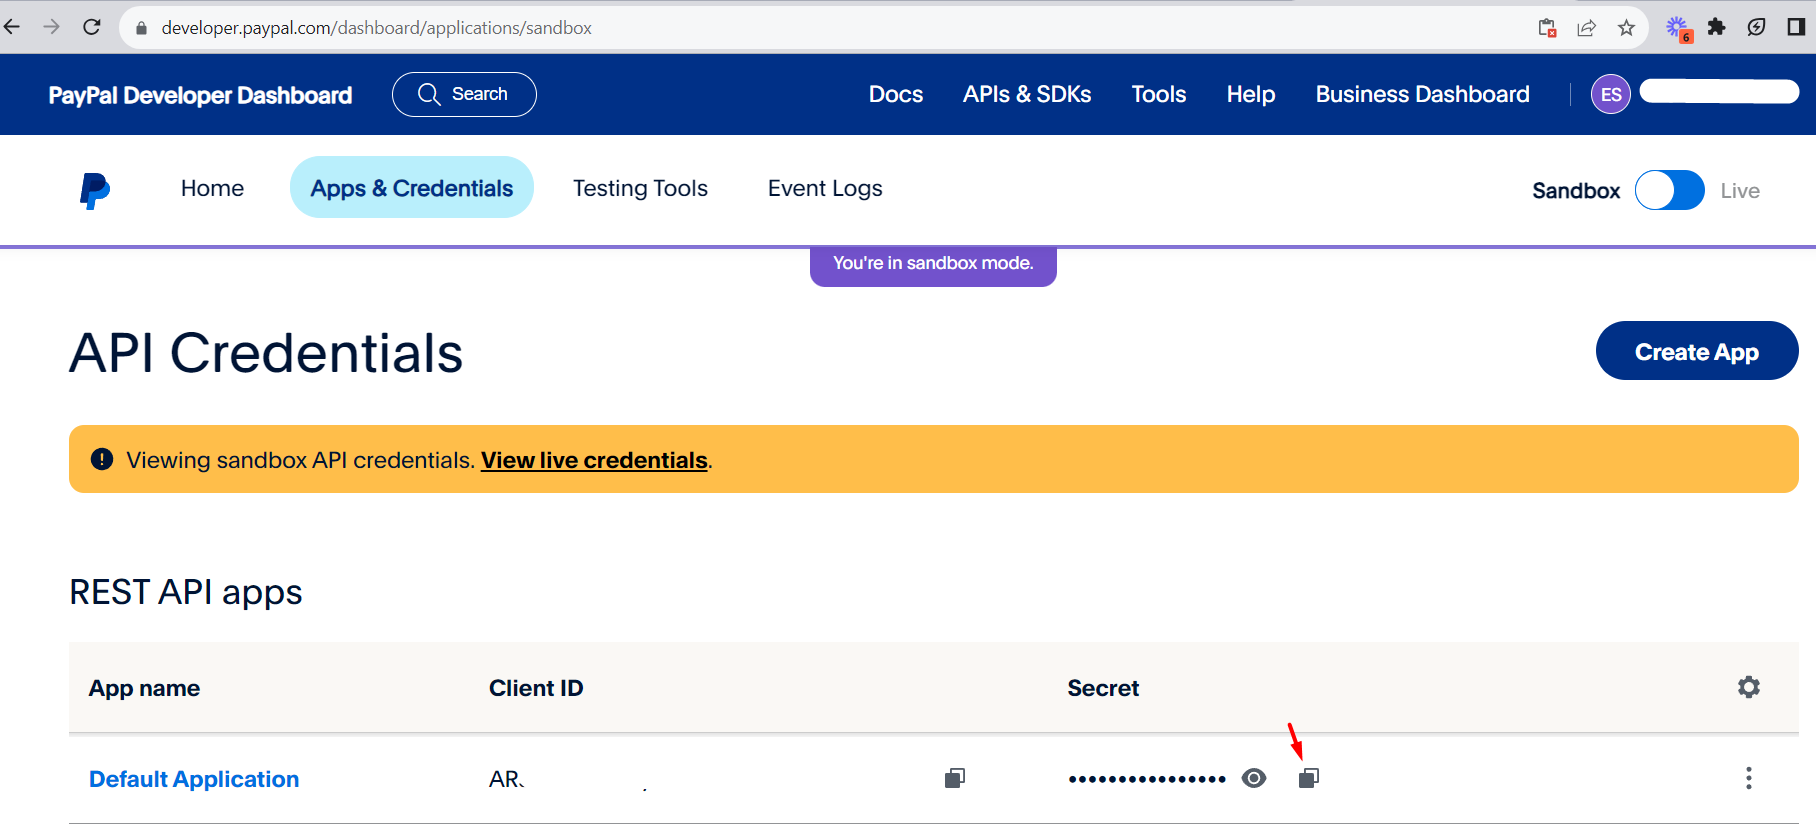
1. Go to your PayPal developer account and sign in
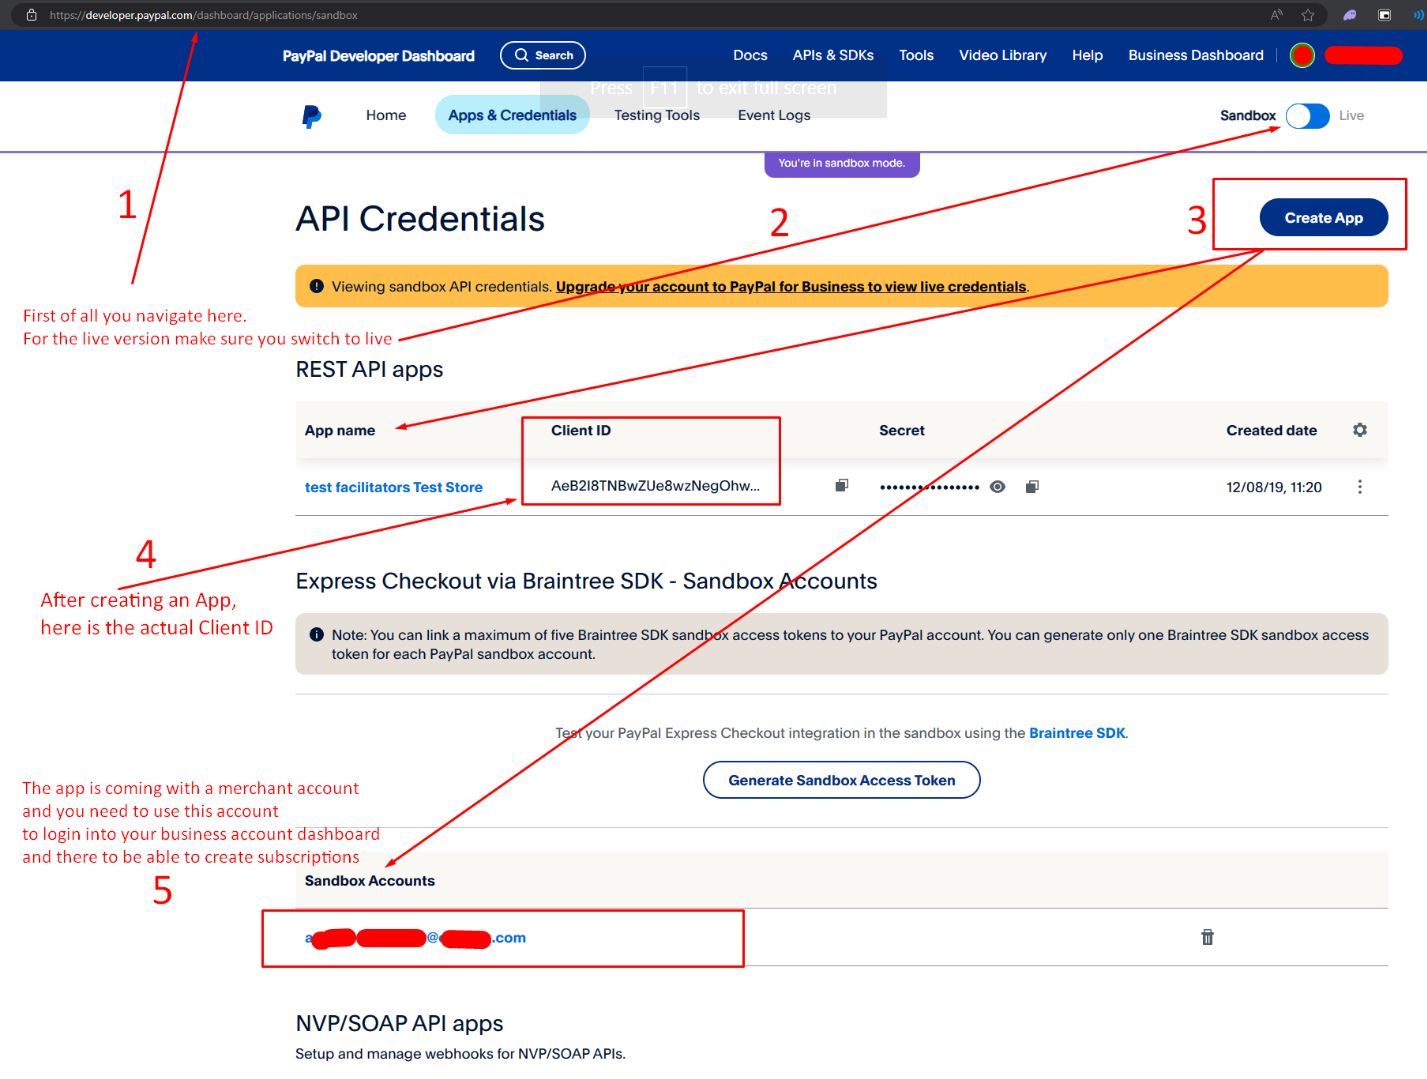
Sign in and navigate to the dashboard/applications:
https://developer.paypal.com/dashboard/applications/sandboxIn this section you'll get access to your Client ID / Client Secret

2. Get an access token
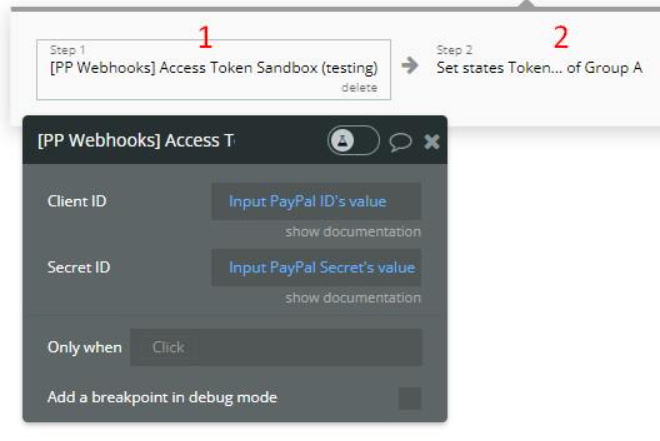
After grabbing the Client ID / Client Secret for your application, you'll be able to request an access token using plugin server-side actions "[PP Webhooks] Access Token Live" / "[PP Webhooks] Access Token Sandbox".
In most cases, you want to get this token once on page loading and store it in a state to use it later.
3. Show available webhooks (optional)
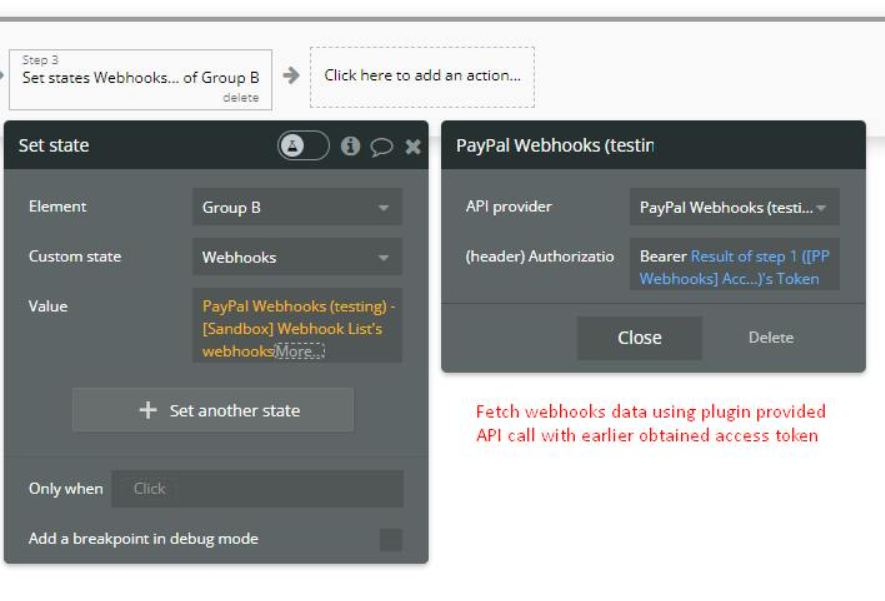
If everything is ok with the previous 2 steps and you obtained an access token, you'll be able now to fetch available webhooks for your application.
For this case we should use one of the API calls "[Live] Webhook List" / "[Sandbox] Webhook List" and because those 2 actions will return a list of things, we can easily display this list in a repeating group for example.
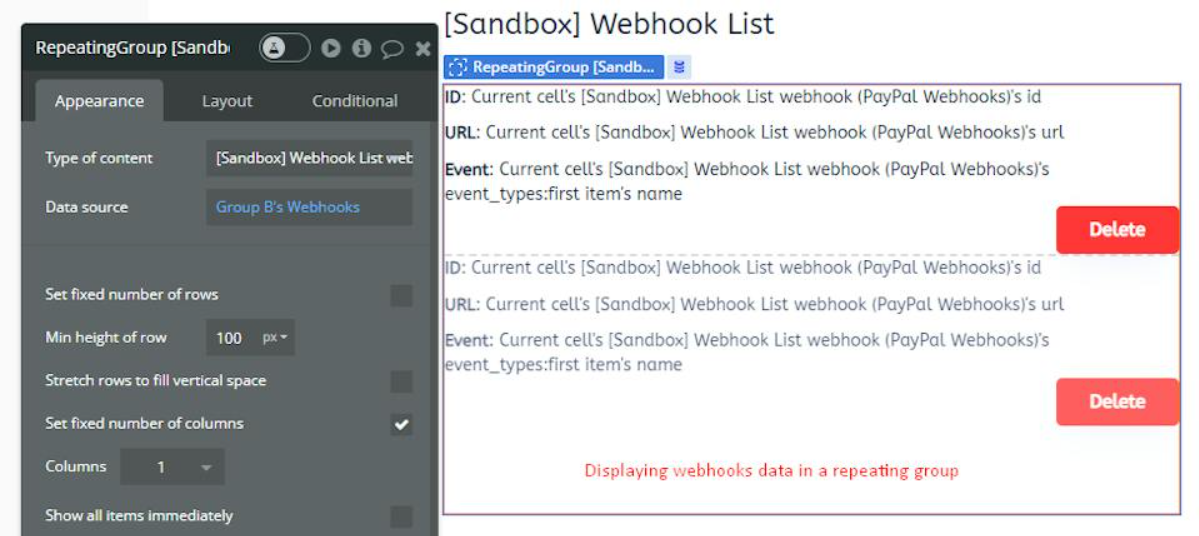
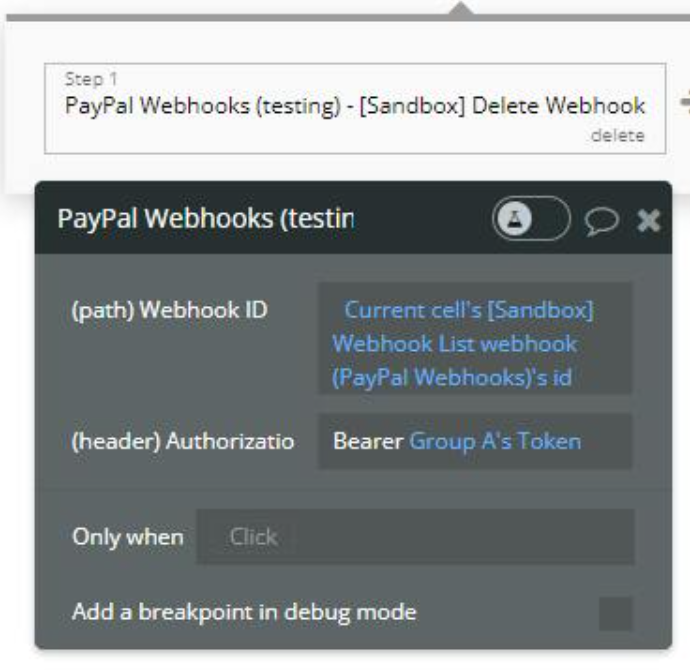
4. Deleting a webhook (optional)
The plugin also provides an API call for deleting unnecessary webhooks. To use it just provide a webhook ID and earlier obtained access token.
5. Create a webhook
Now the interesting part. To create a webhook for your PayPal application use the specific plugin API call "[Live] Create Webhook" / "[Sandbox] Create Webhook".
For this step you'll need to provide an access token obtained earlier, an endpoint URL (we suppose that it will be a bubble server-side workflow endpoint) to handle data from PayPal, and an event name to subscribe to (from PayPal webhook names: https://developer.paypal.com/api/rest/webhooks/event-names)
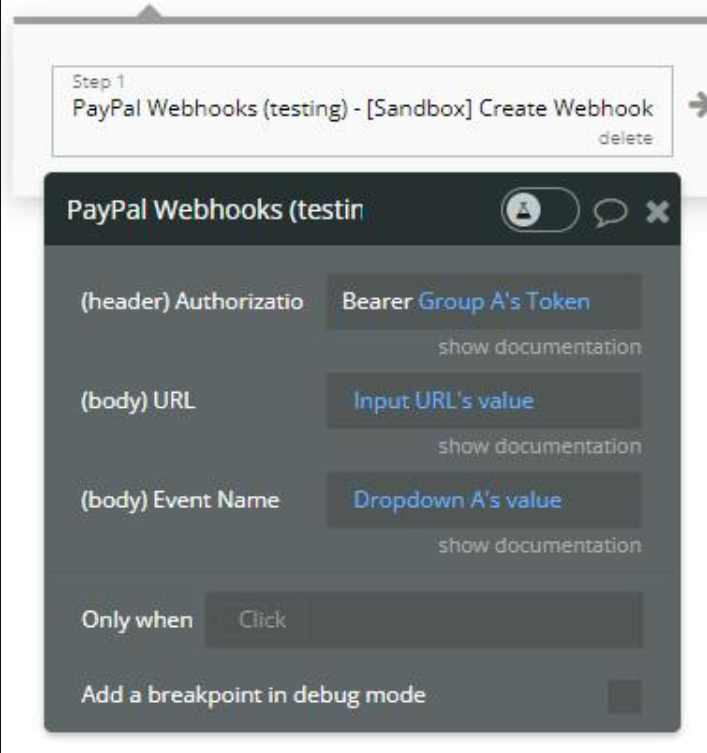
After setting up webhooks for your needs and notifications from PayPal events, you will get messages and notifications on provided webhook URL endpoints.
Recurring Payments & Subscriptions
1. Sign up at https://developer.paypal.com/dashboard and create a new application
2. After installing the plugin, copy your Sandbox or Live Client ID from PayPal and paste it into the plugin field labeled "Client ID".
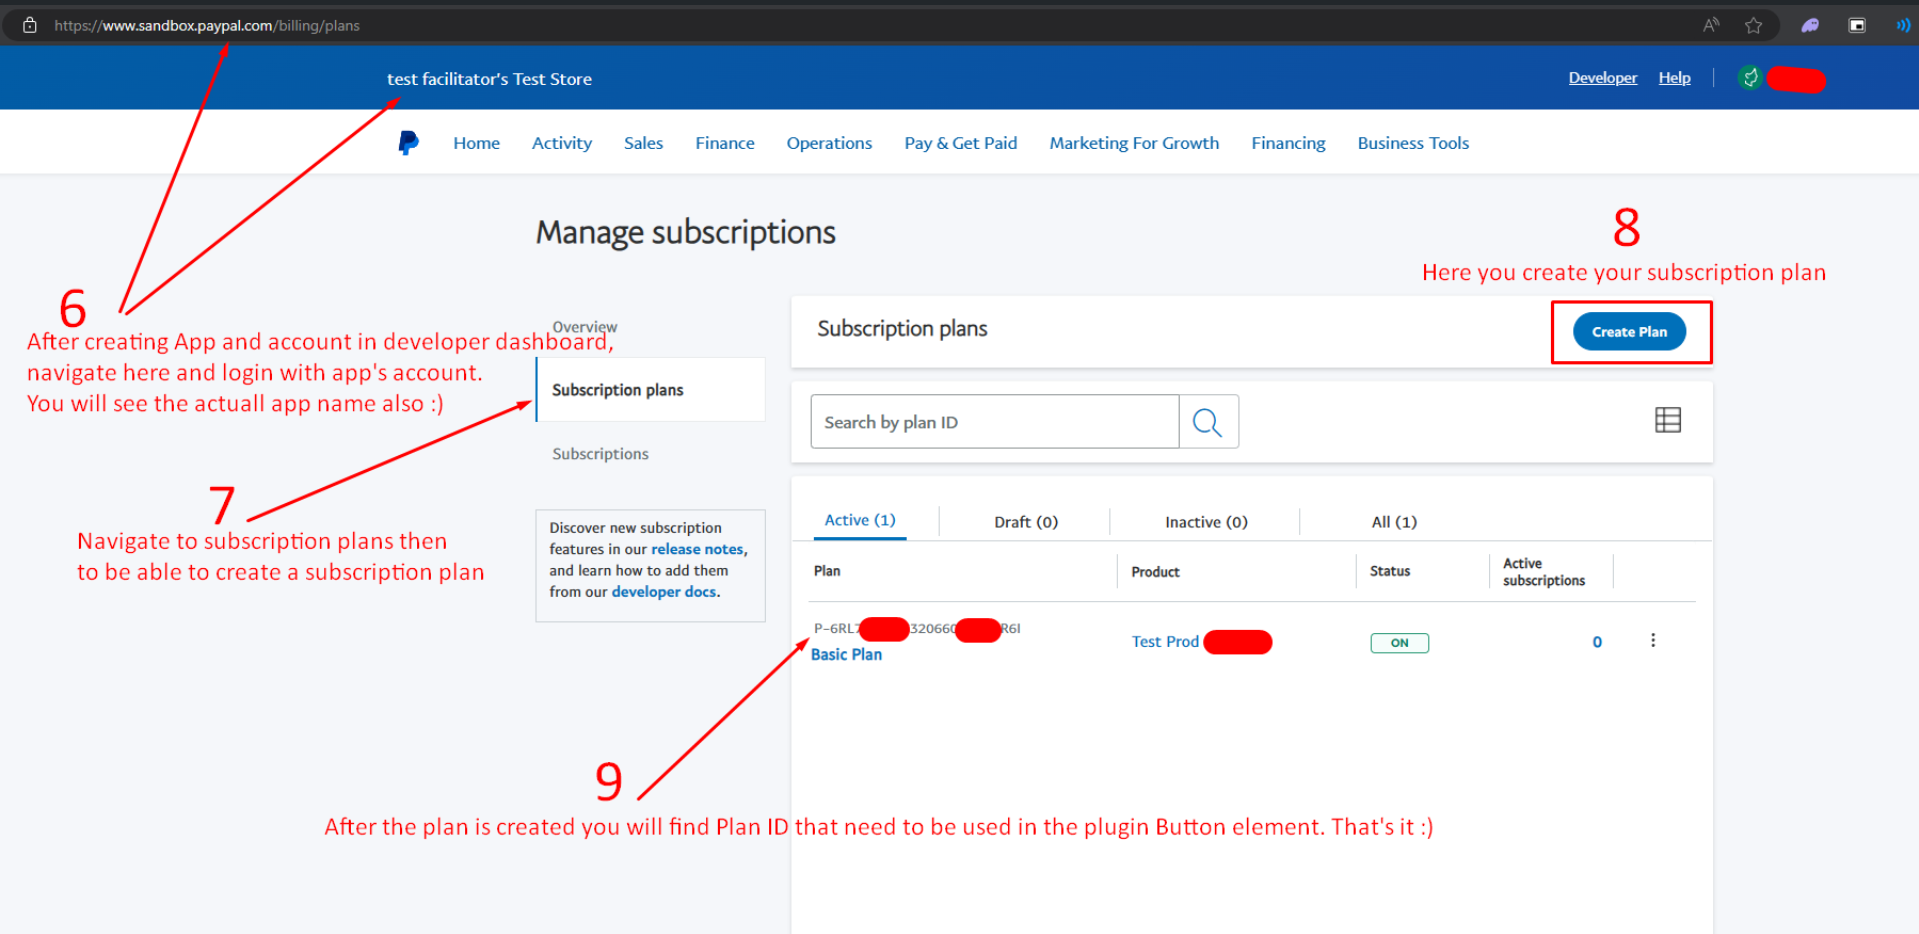
3. Create a new Product and Subscription Plan in your Paypal Dashboard https://www.paypal.com/billing/plans. Copy the Plan ID.
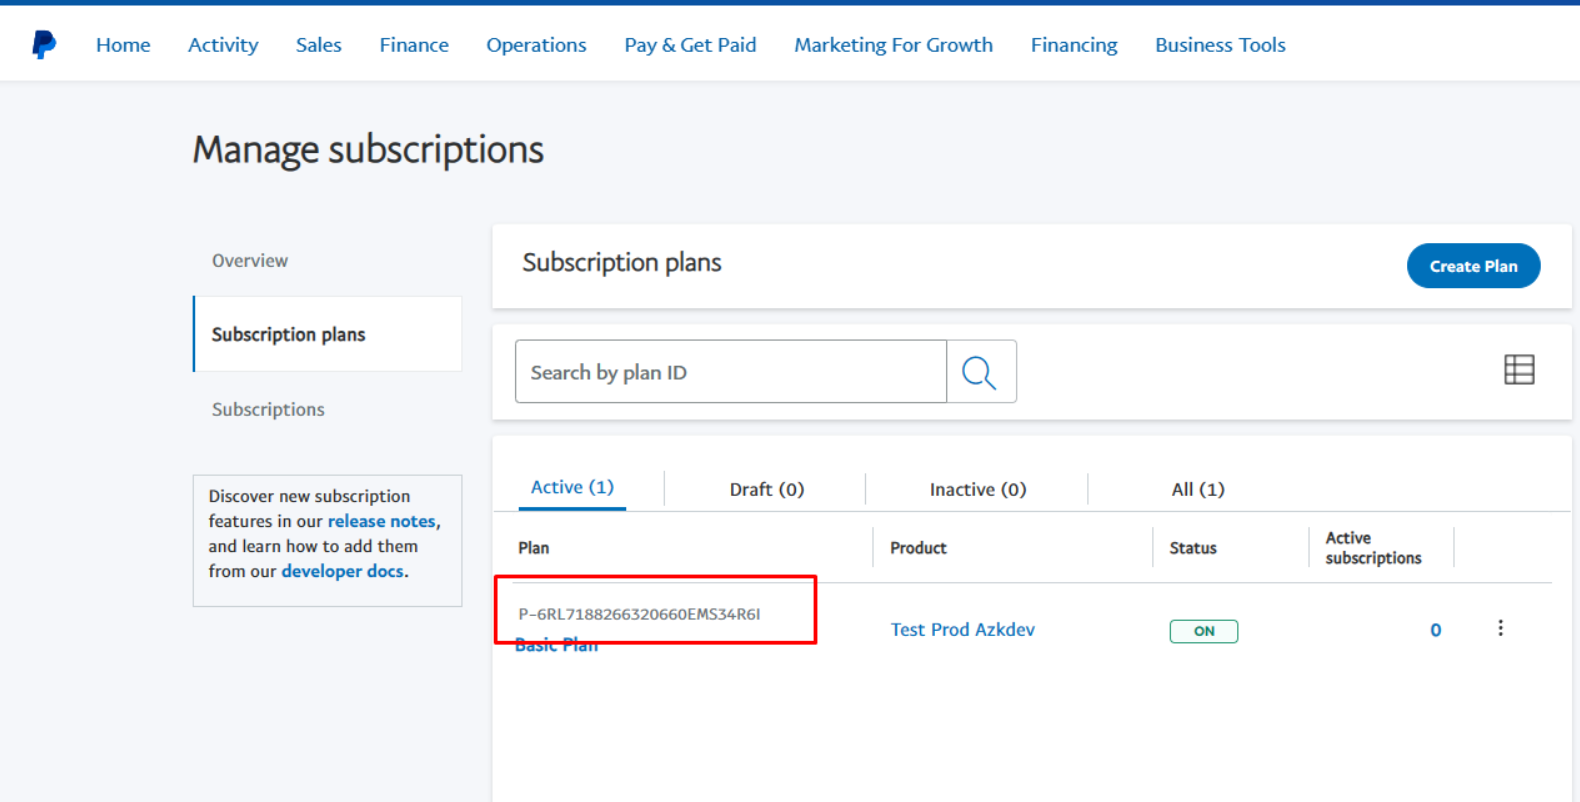
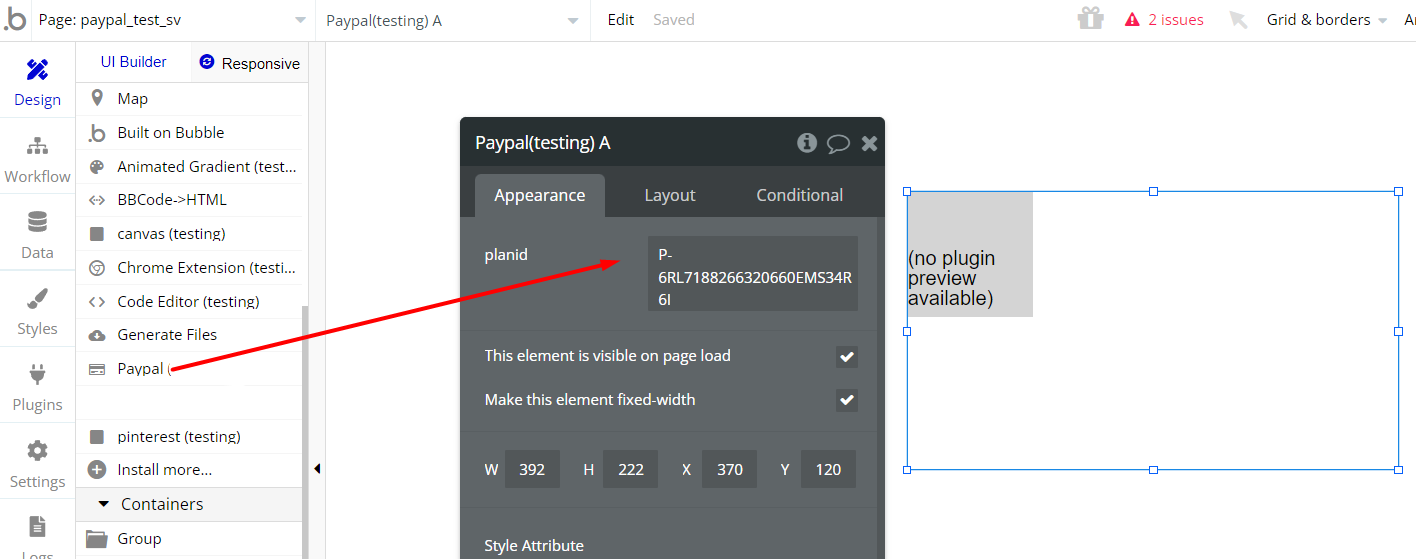
4. Drag the Paypal Element onto your page and paste the Plan ID from step 3 to which the user should be subscribed.
Users can now pay via the smart Checkout buttons.
Video Guide
Plugin Element Proprieties
You have access to 1 state: Subscription ID.
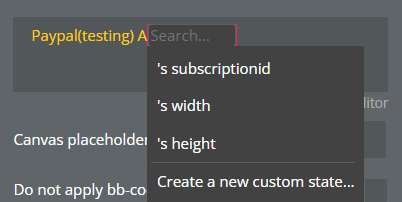
This state is created once a transaction has been successful. You can save this value and use it in subsequent API calls.
You also have access to 3 Events:
- A payment has been successful: This is triggered if a user has successfully completed a payment
- A payment has been canceled: This is triggered if the user cancels the checkout process
- Payment Error: This is triggered when an error occurred during the transaction
You have access to various API Calls. To first make an API call, you will need an access token. You can generate the access token using the Action "Access Token".
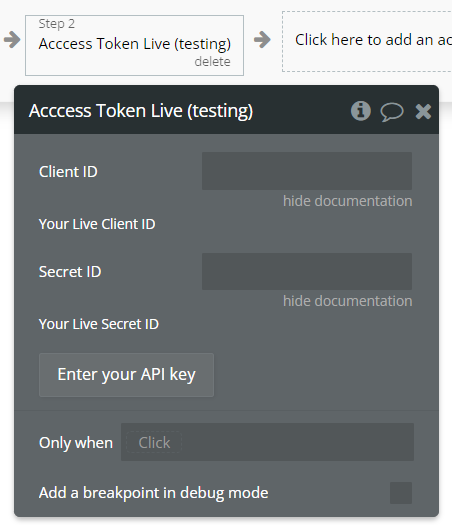
You will have to provide your PayPal Client ID and Secret ID (Sandbox or Live).
Please be aware that Access tokens have an expiration. You can keep track of when an access token expires, by saving the field called "expiration" that is returned after you trigger the "Access Token" action.
The following workflows are included for sandbox and live versions:
1. Cancel Plan (Cancel a subscription)
2. Get Subscription Details (Returns details of a subscription)
For more information please visit: https://developer.paypal.com
Frequently Asked Questions
Updated guidance to find Client ID
Frequently Asked Questions
Have a question, or suggestion, or encountered an issue? 🤷♂️
Don't hesitate to get in touch with us by sending an email to: support@rapidevelopers.com
Want to report a bug? Please follow this guideline!