Dedicated forum thread: https://forum.bubble.io/t/new-plugin-image-filters/69491
Demo page
Introduction
This plugin allows you to add 7 different filters/modifications to your images.
Features
Filters include:
- Sepia
- Brightness
- Contrast
- Color
- Grayscale
- Saturation
- Blur
How to Setup
After installing this plugin you have access to two elements:
- Filter
1. Go to Settings->General of your app and expose the option to add ID attributes to HTML elements. See a short guide here: https://docs.rapidevelopers.com/how-to-assign-an-id-to-the-element
2. Drag the "Filter" element onto your page.
3. Add an image to your page and enter an ID attribute in the element inspector of your image
4. Trigger a filter effect within one of your workflows. You can choose one of the 7 filters and specify the strength of the effect. Enter the same element id that you used for the image you want to target in step 3.
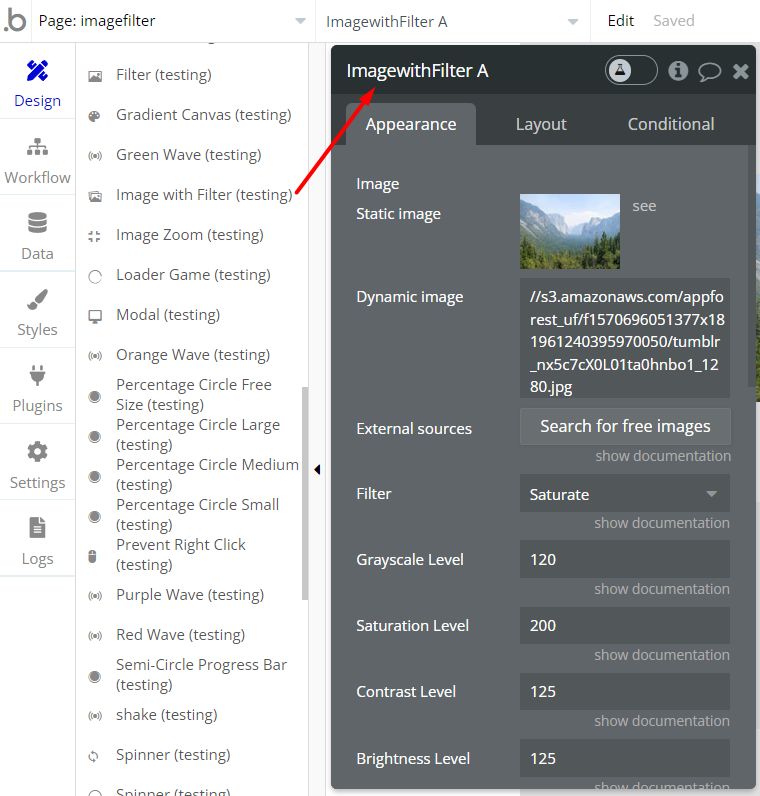
- Image with Filter
1. Drag the "Image with Filter" element onto your page. Upload an image or choose a dynamic image that should be used. Resize your element according to your requirements.
2. Choose which filter should be applied using the dropdown in the element inspector.
3. Specify the strength of the effect for the filter you choose. The values in the other fields will be ignored.
4. Go to workflows-> when page is loaded-> Apply Filter
Frequently Asked Questions
Have a question, or suggestion, or encountered an issue? 🤷♂️
Please contact us by sending an email to: support@rapidevelopers.com
Want to report a bug? Please follow this guideline!