The guide states the things to note, like Admin Access, Custom Code, Notes, APIs, etc.
Admin Rights
The admin page is currently open to all logged in (Demo Login) visitors but with read-only access (they can't perform any actions).
To have full access the user must have their current user's
admin field set to yes. There is also a workflow that redirects users back to the login or dashboard page if they don't have admin access but that workflow is disabled. Be sure to un-check the disable workflow on the purchase of this template.
1. Go to the
admin page -> Workflow tab, locate the following event, and uncheck the Disable workflow checkbox: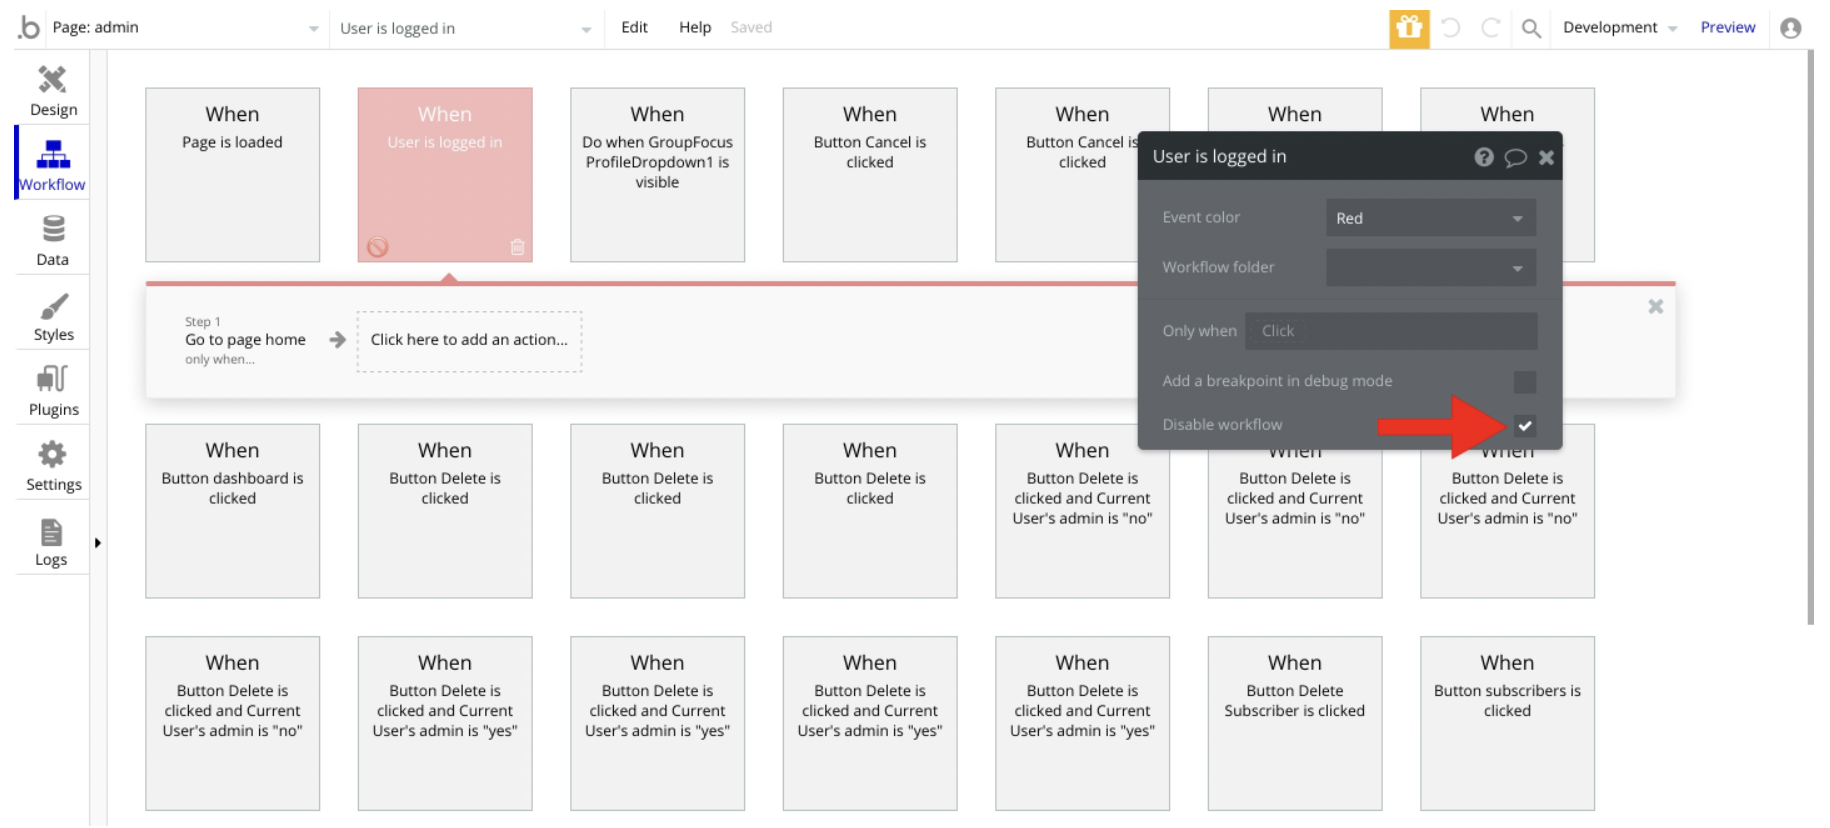
2. Go to Data -> App data -> All Users tab. Locate any user you would like to grant the admin rights to, and click to edit that user record.
Set the
Admin field to yes: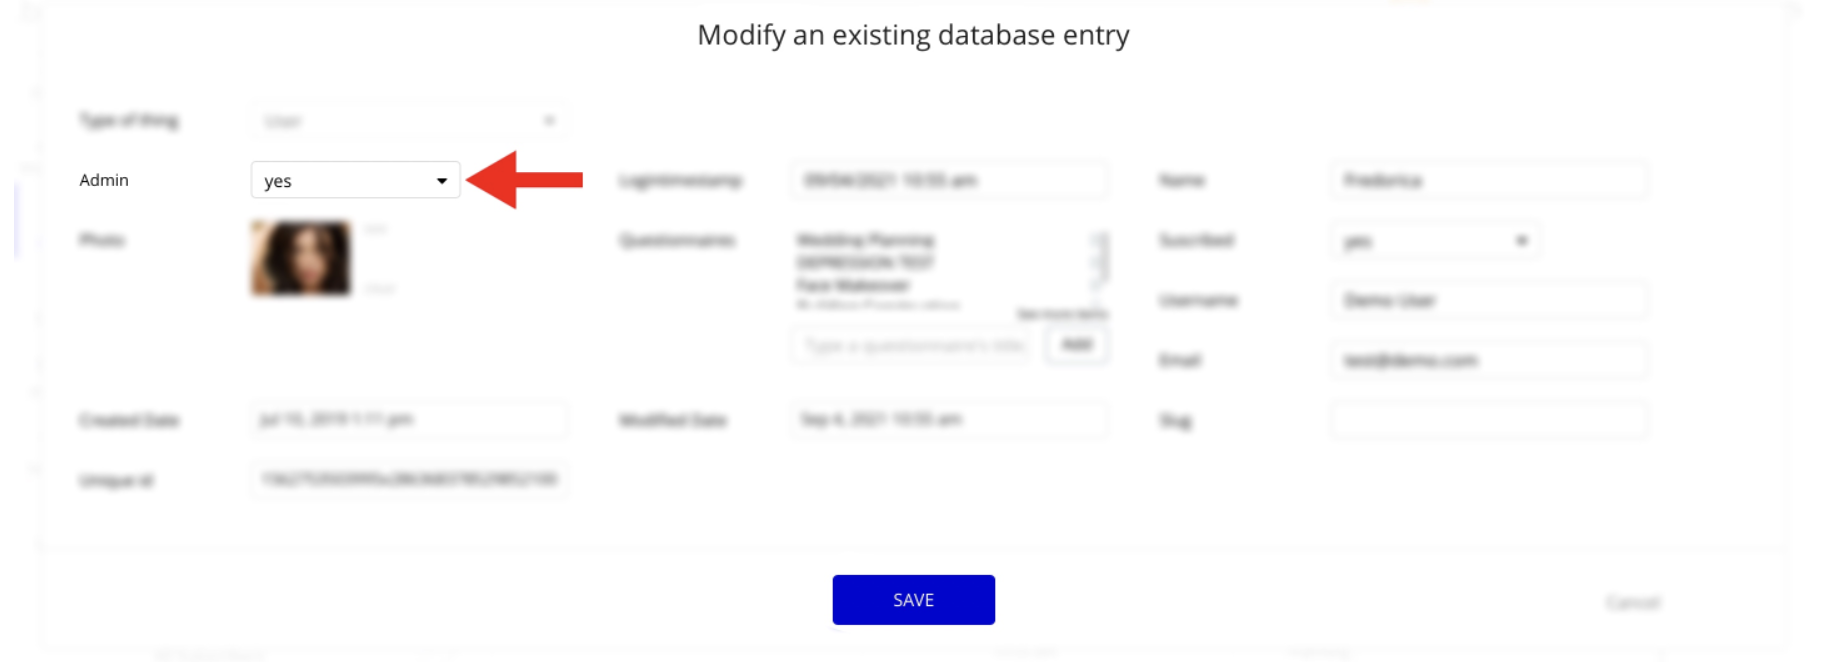
Note: Remember to hit the SAVE button.
Congrats! You have successfully granted the admin rights. Now you can use all the admin page and its features as an admin user.
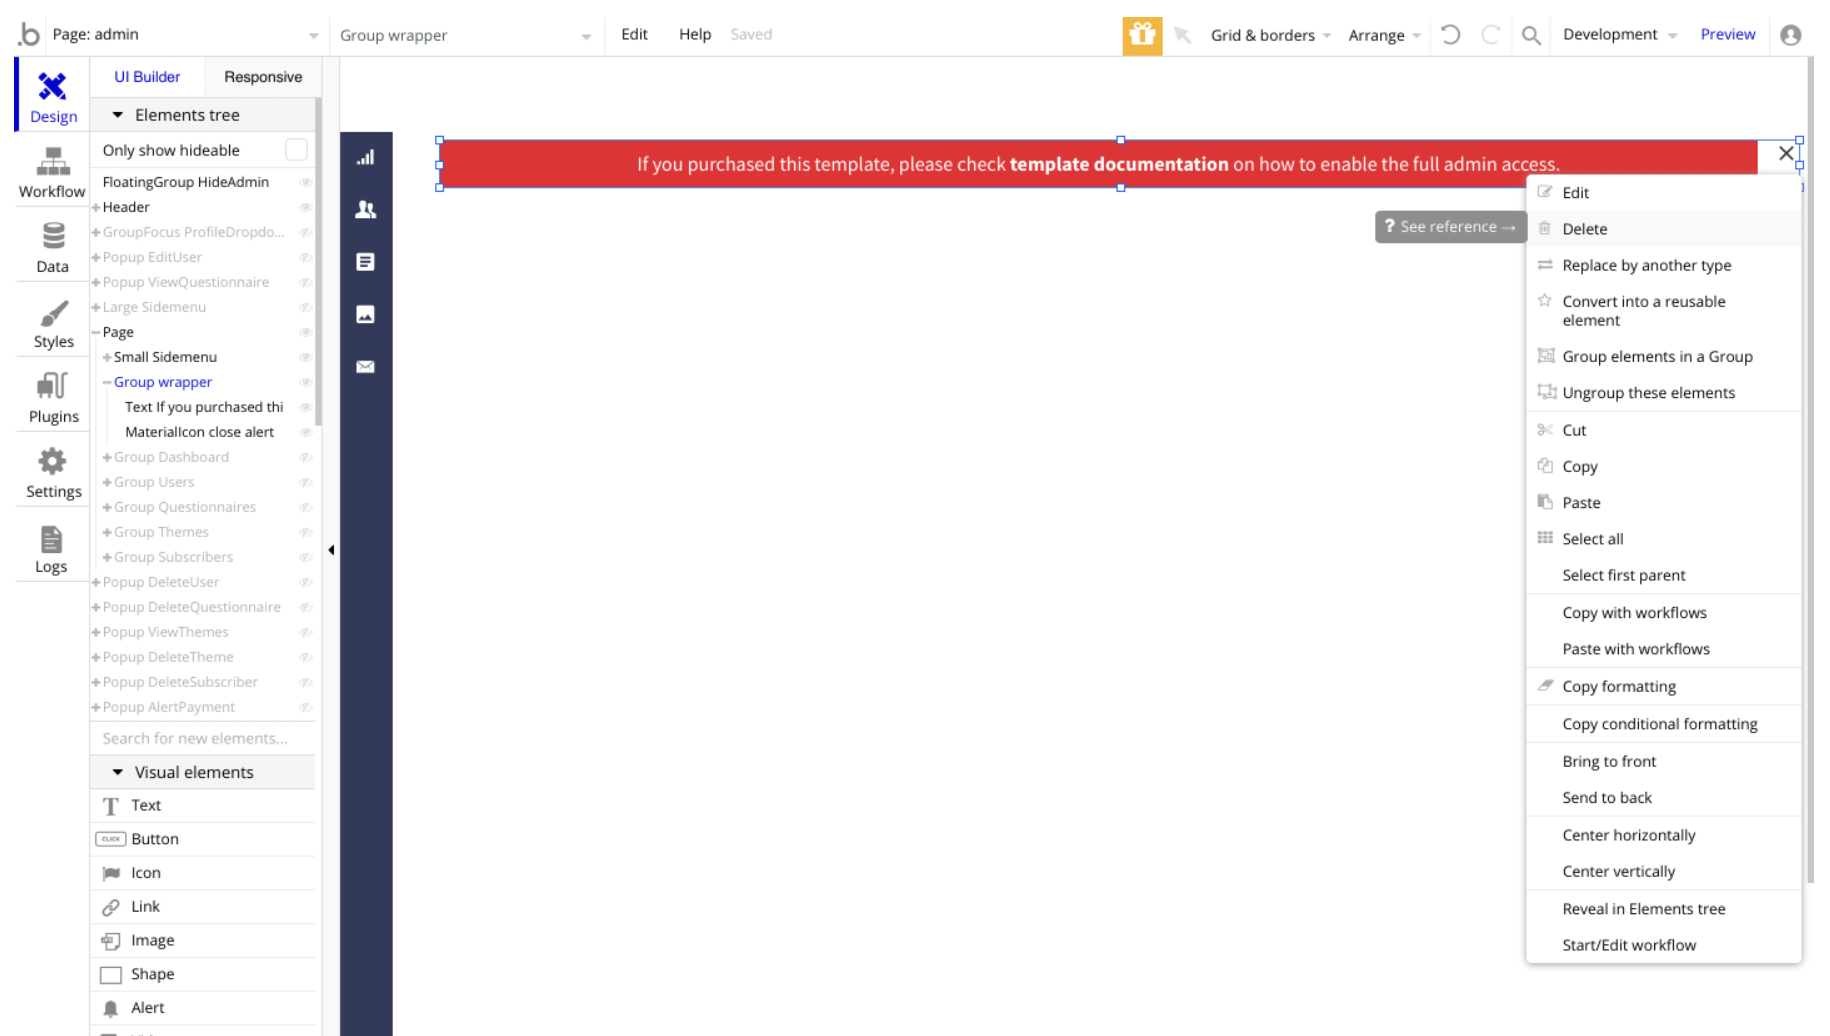
Also, go to the Design tab to locate the "Group wrapper" element, and simply delete it:
Restriction on deleting questionnaires
On the demo user profile, the first three questionnaires are restricted from deletion or editing (they are used as examples for demo purposes).
To change that, on the
home page find the following workflow, and change the state from “yes” to “no”. 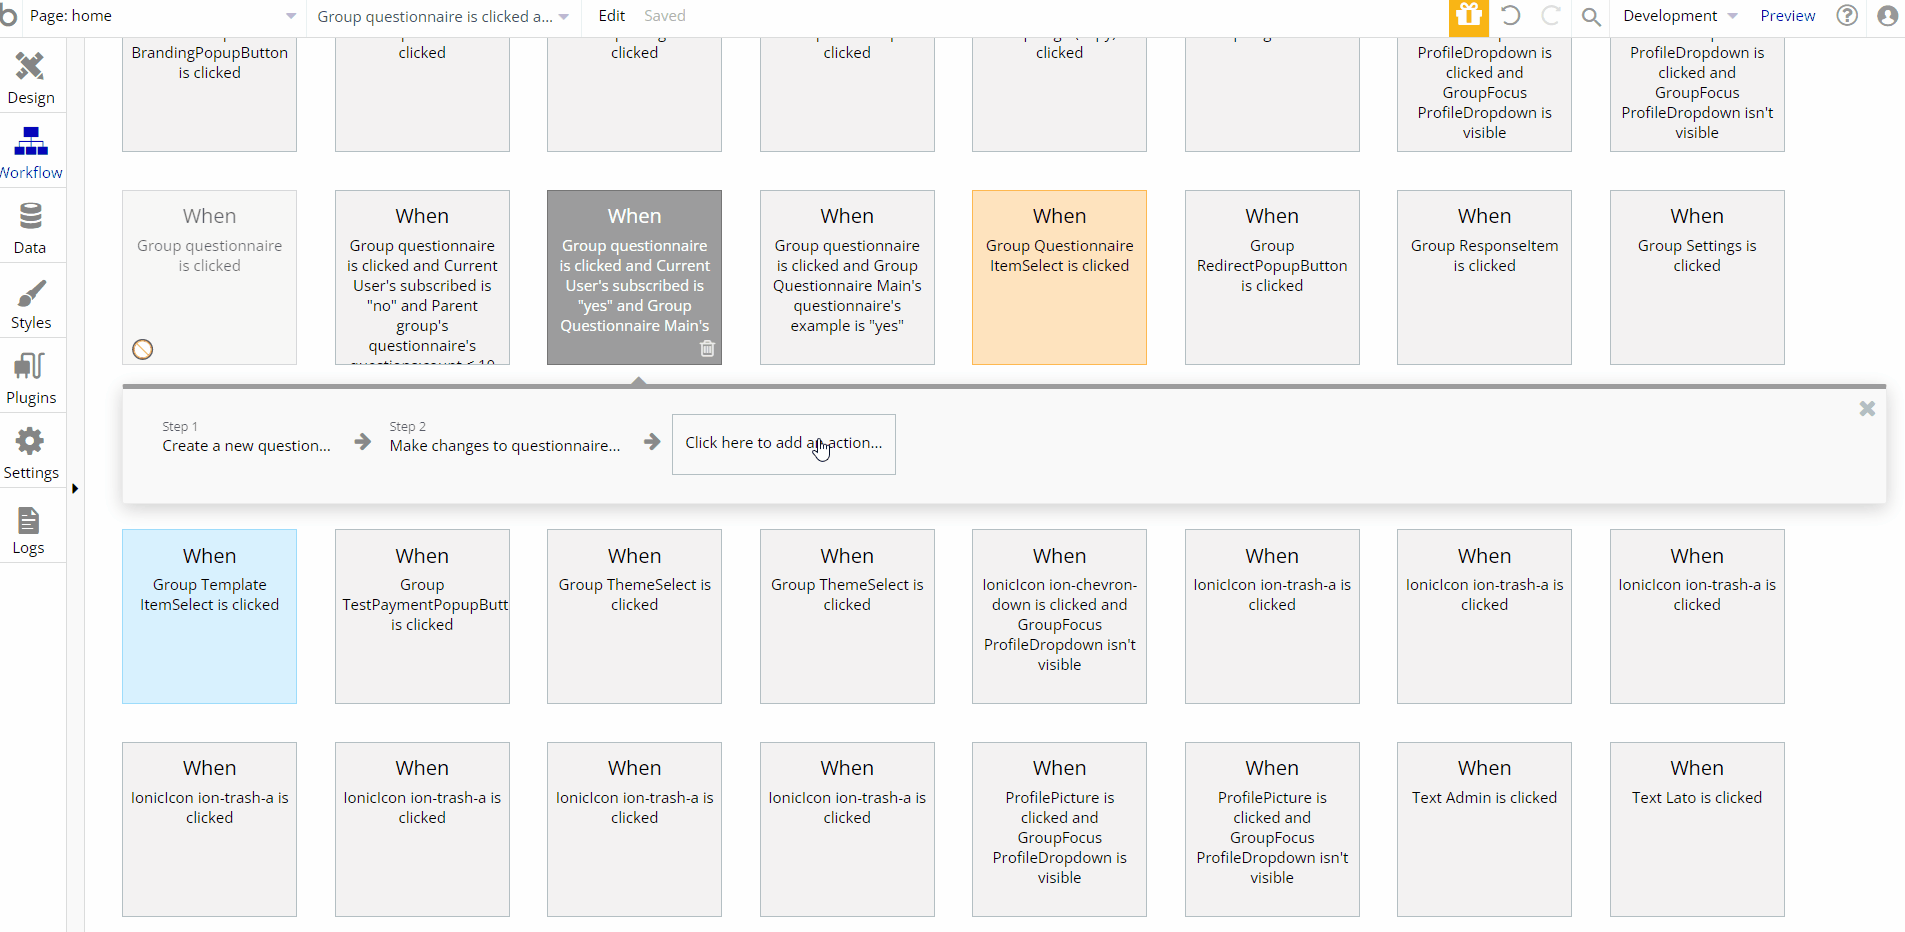
Custom Code
On certain pages, there are some HTML elements used for some solutions that are not available by default. You can find these codes on the following pages:
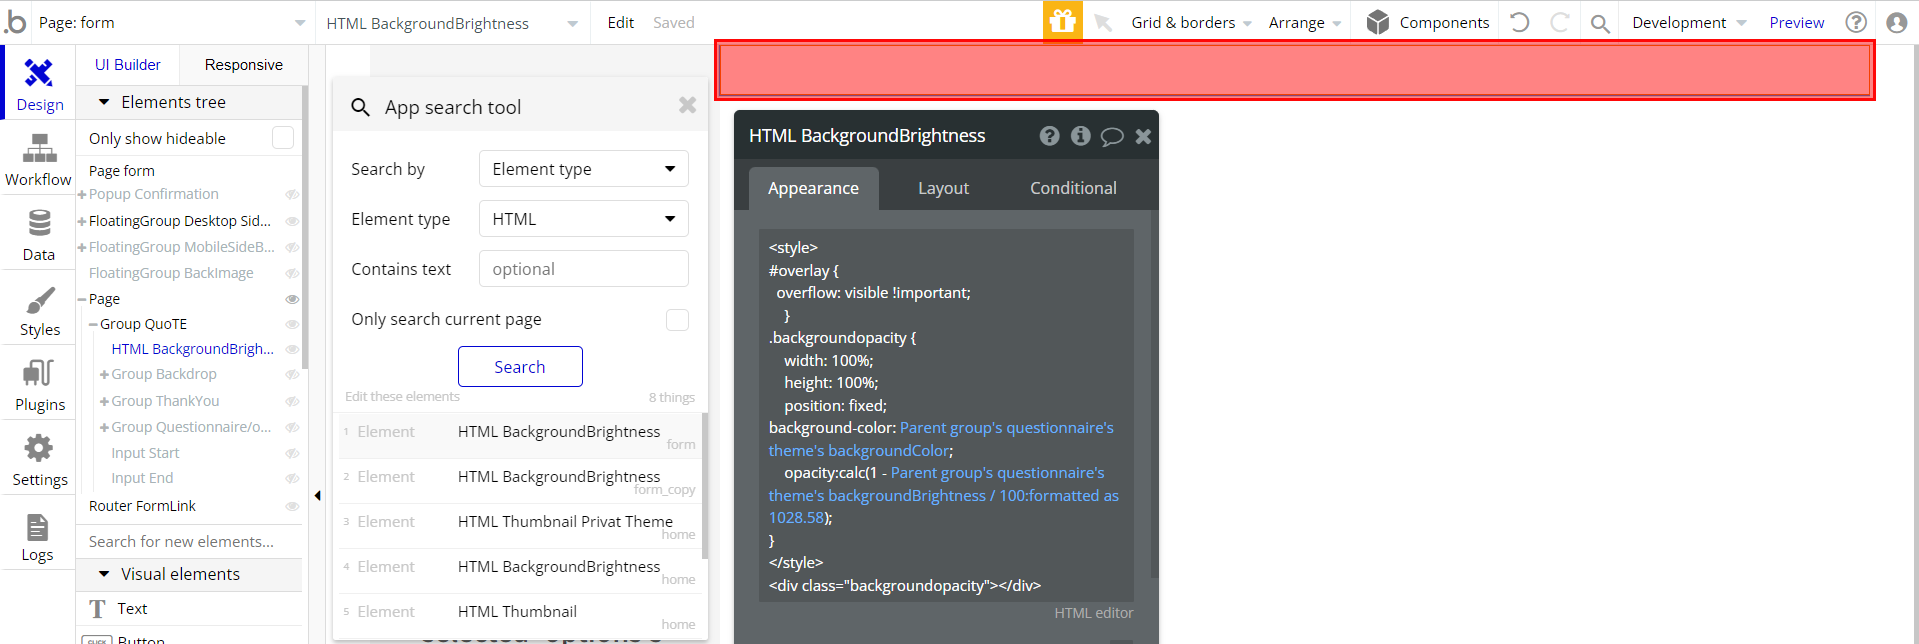
formpage - HTML BackgroundBrightness - this element creates a container at the full width&height of the page, and assigns the value of the current questionnaire theme background & opacity.
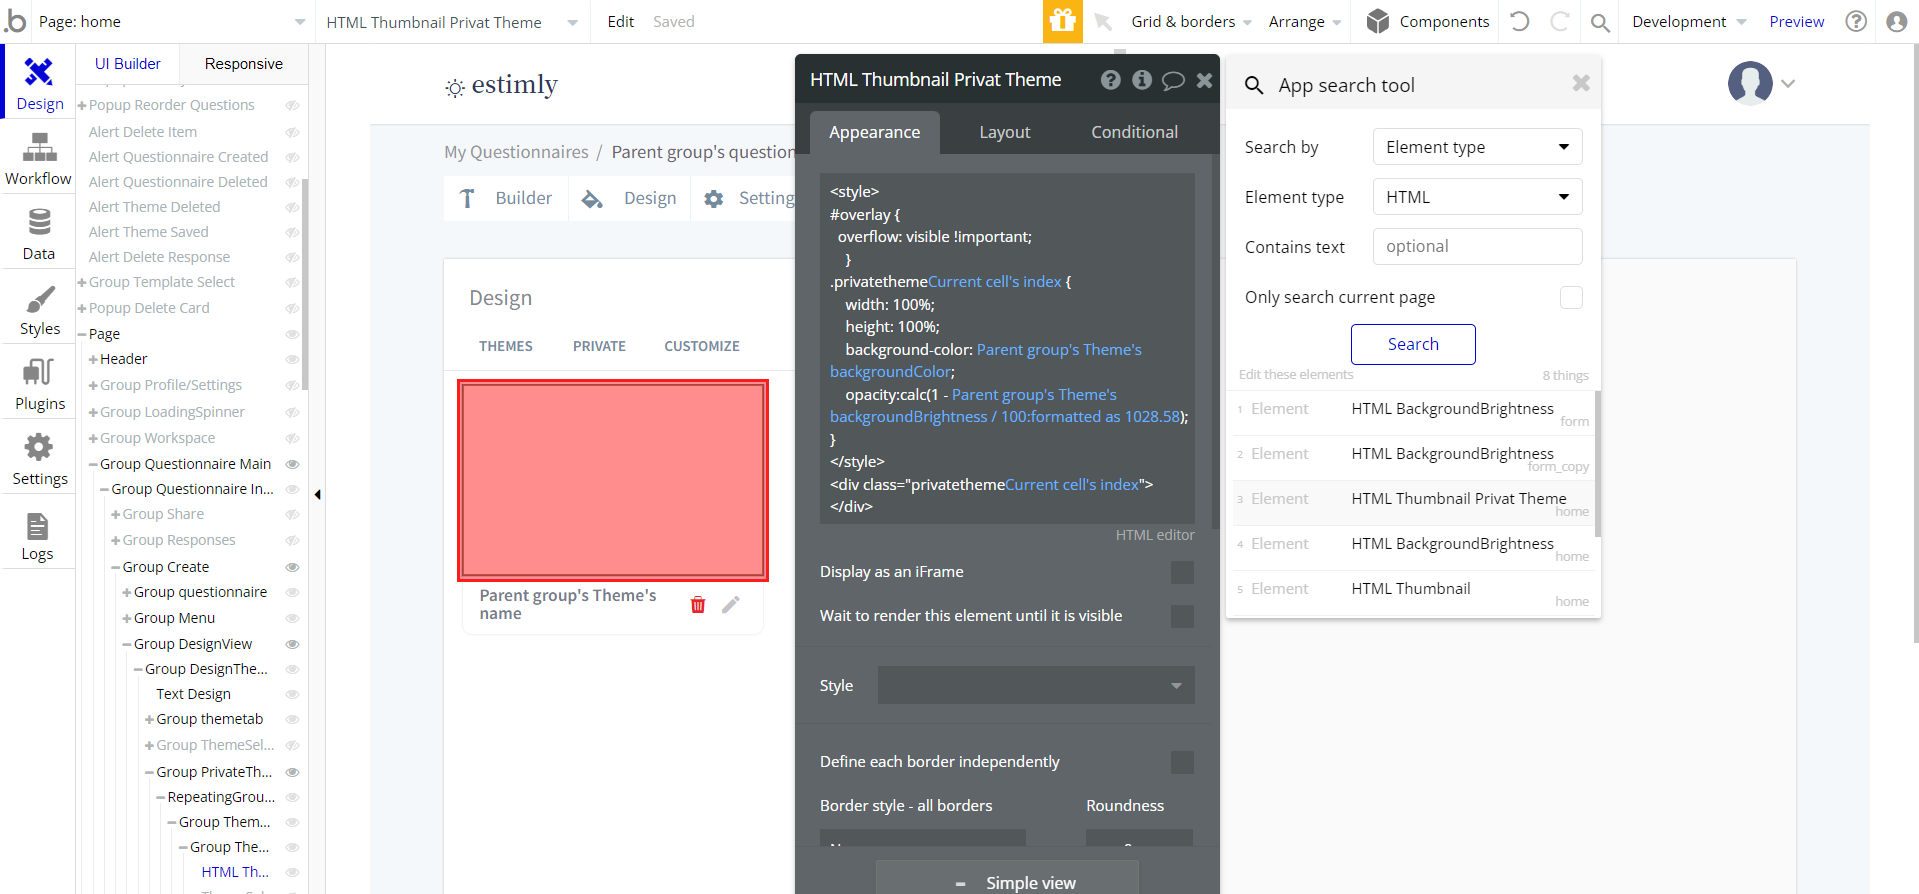
homepage:- HTML Thumbnail Privat Theme - this element creates a container and assigns the value of the current theme used on the “Themes” tab, namely background & opacity values.
- HTML BackgroundBrightness - this element creates a container on top of the theme image and determines its opacity with help of the SliderInput Opacity slider.
- HTML Thumbnail - this element creates a container and assigns the value of the current theme used on the “My Questionnaires” tab, namely background & opacity values.

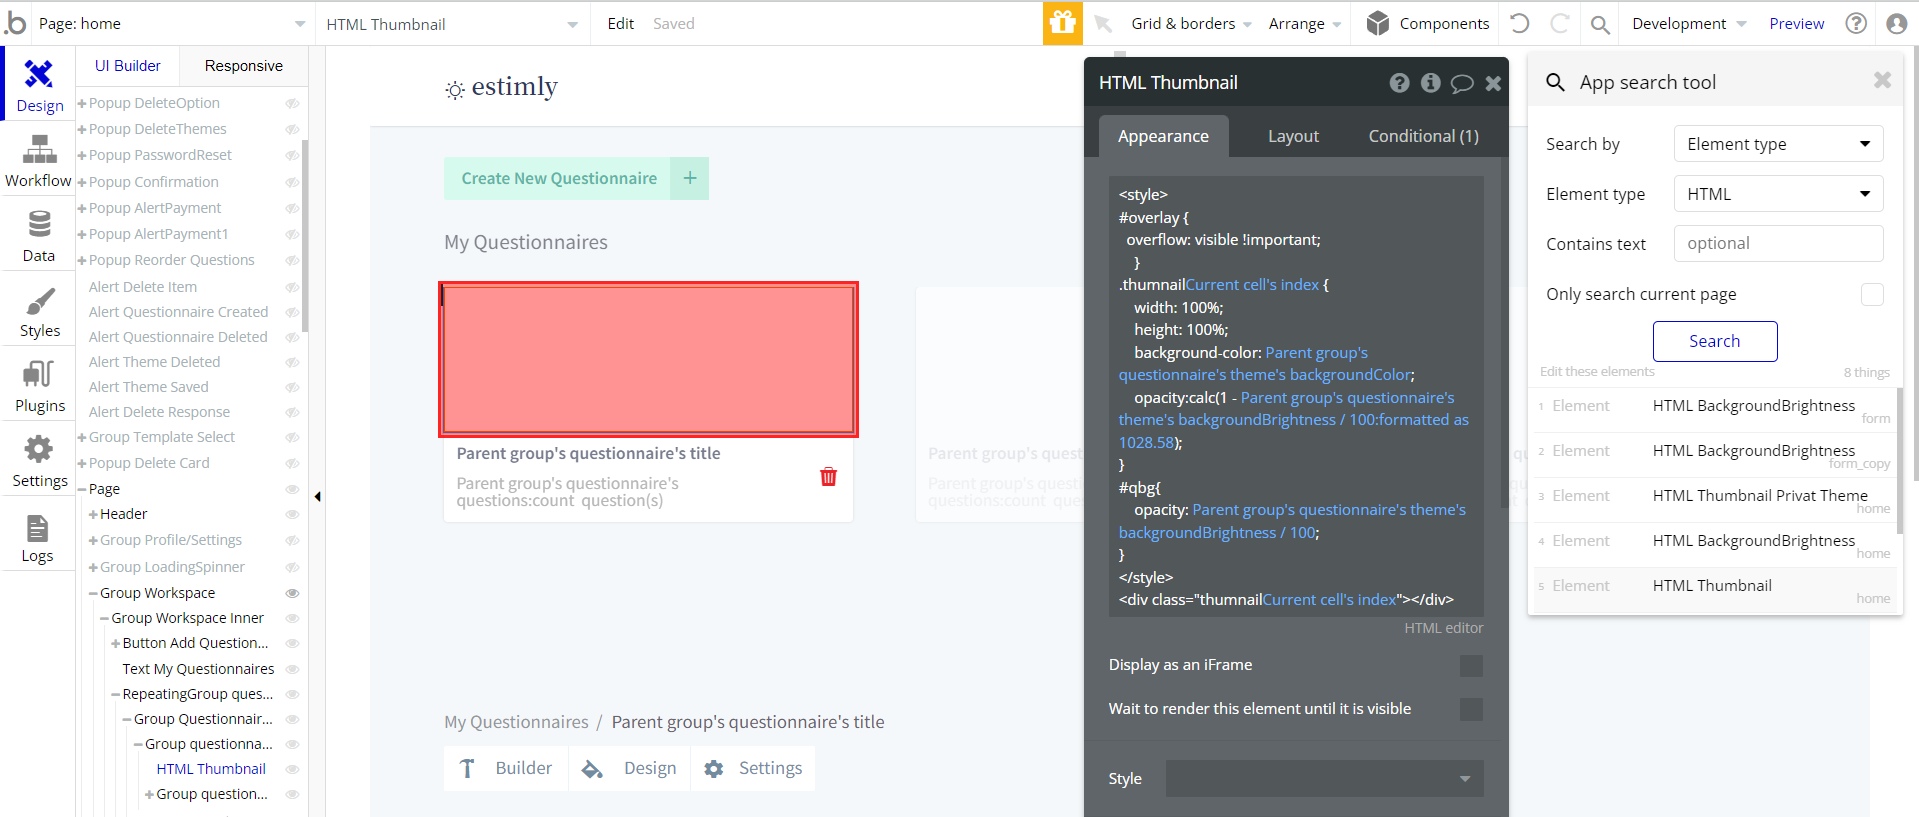
Important: Feel free to customize the styles, but please note that changing the code may break the described functionality. Strong CSS/Javascript and Bubble skills are recommended.
❕For all things Bubble check: https://manual.bubble.io/.
❕For CSS/Javascript check: https://www.w3schools.com/.
API Webhooks
Estimly is using Backend workflows for some important features: copy questions and options, as well as delete answers.
They can be located in the Backend workflows tab in your editor:

The responsible endpoints for updating and canceling a subscription are the following ones:
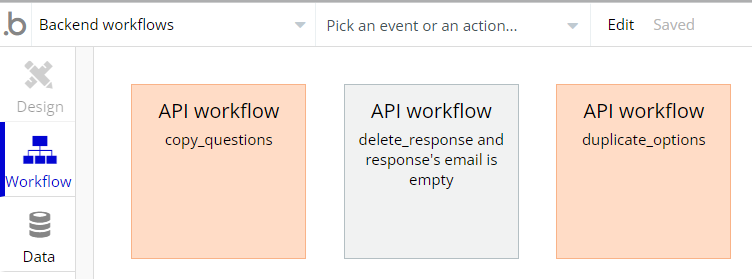
- copy_questions - this workflow copy questions from the template to a new questionnaire that is created when the template is clicked.
- delete_response - this workflow deletes the answer one day later after it is created.
- duplicate_options - this workflow copies options from the template to a new questionnaire that is created when the template is clicked. It is used within the same workflow with the
copy_questions.
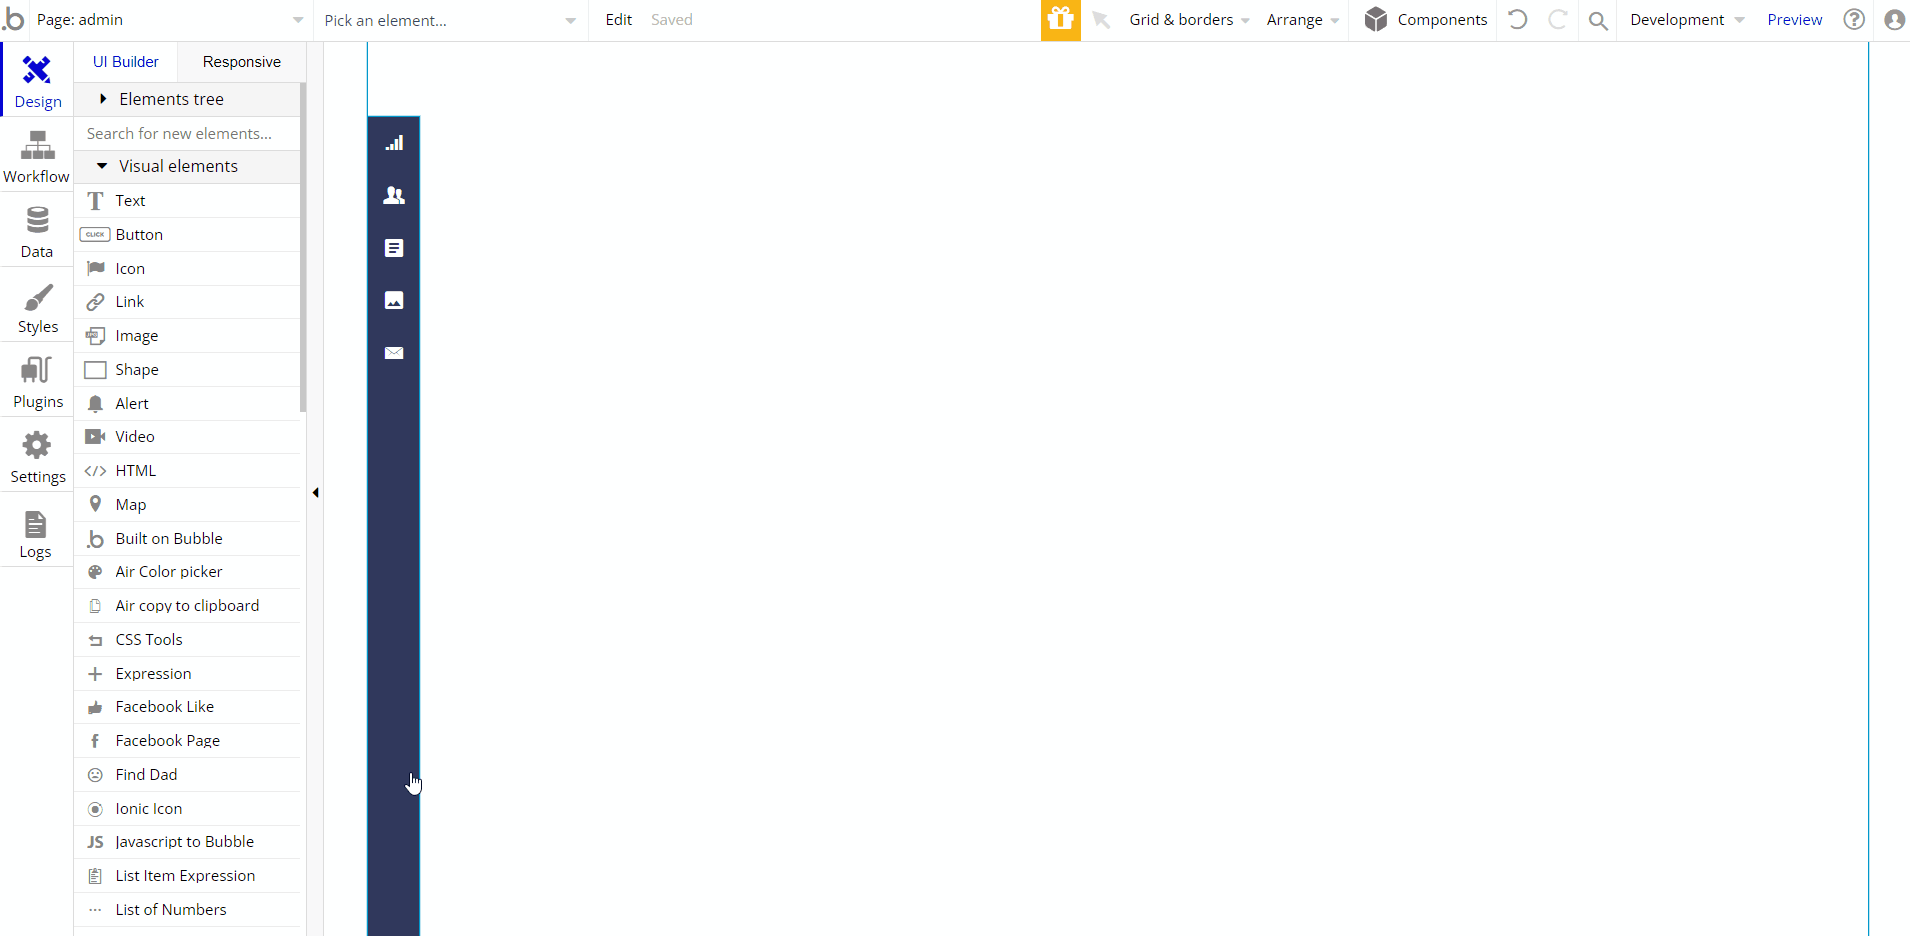
Hidden Design Elements
Tip: Initially, on some pages, design elements in Bubble Editor might be hidden.
Here is an example of how to unhide 👀 them:
Plugins
In this section, we describe additional plugins used on templates pages for different purposes.
Random String Generator Plugin
This plugin is used for generating random strings. This is a free plugin that requires API key configurations.
Random String Generator: See the instructions on how to set the Random String Generator Plugin in Bubble.
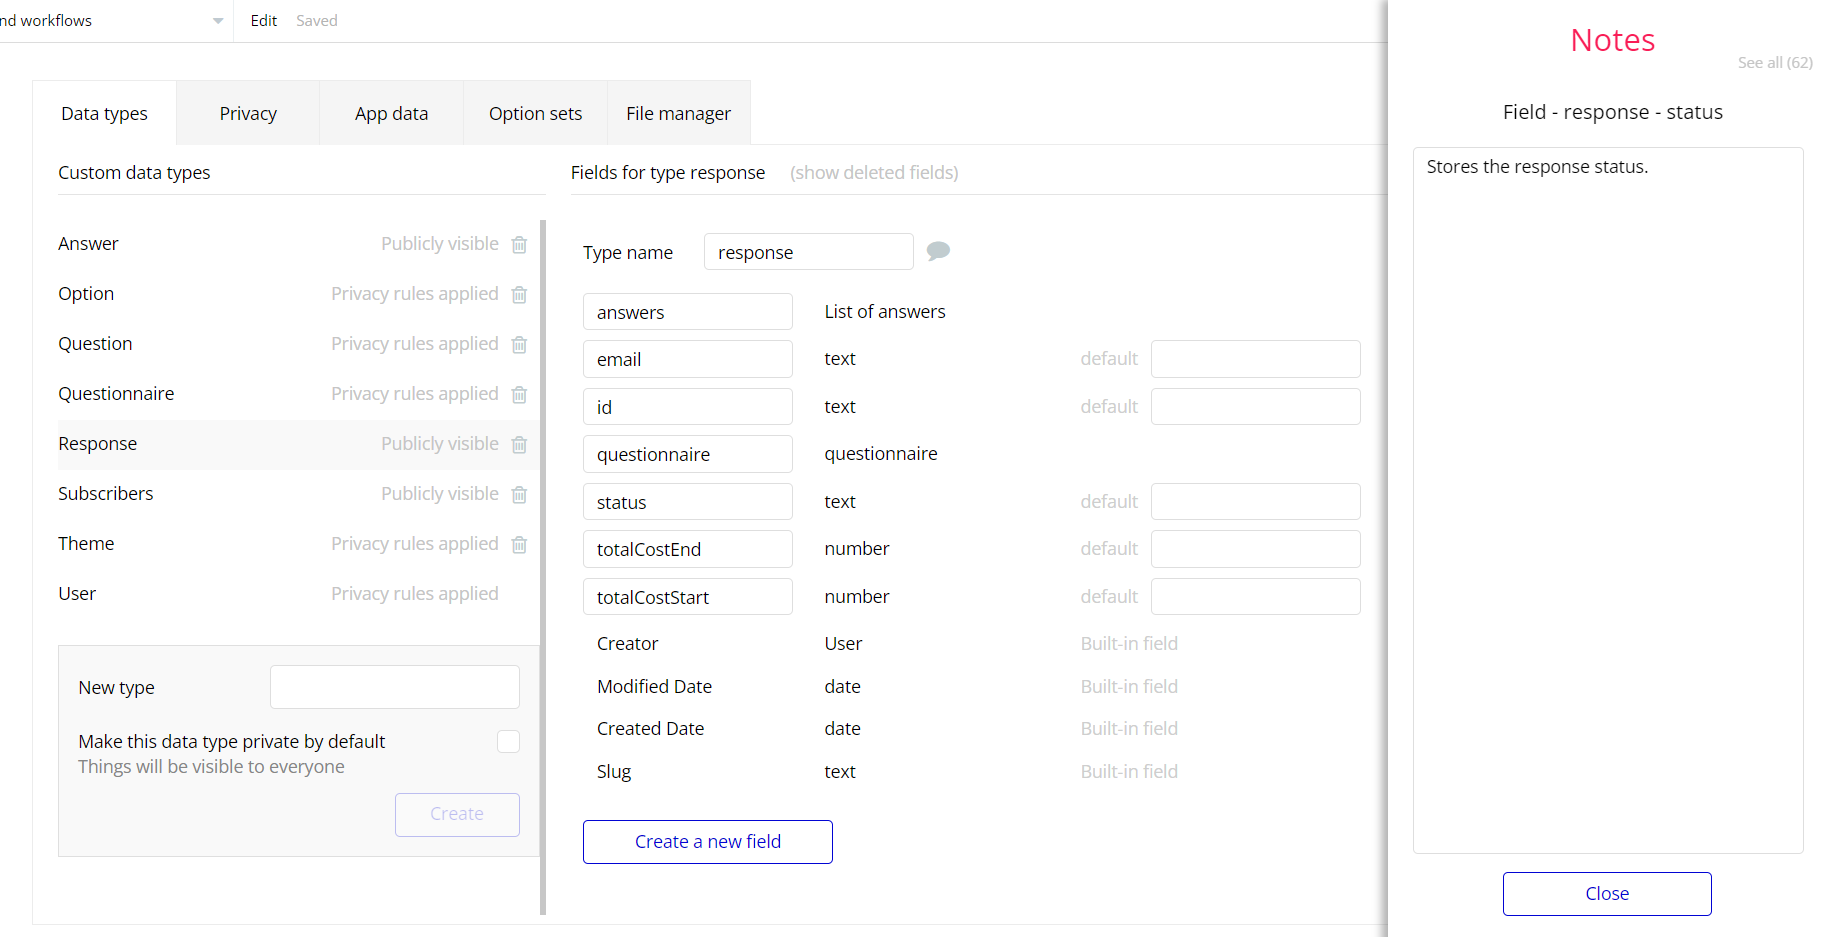
Embedded Notes in Bubble Editor
This template comes with explicit Notes for Database fields, Option sets and their fields, and Privacy rules, which will guide you with the modification process.
In order to preview a Note of any data type or field, click on the 💬 icon.