Here we will describe all steps of Users from creating sign up to finish order.
There are 3 roles we need here:
Requestor - user who create an order and want to print something on 3D printer
Maker - user who are ready to create 3D model
Admin - user who will resolve conflicts between Requestor and Maker
IMPORTANT! According current implementation, all orders should be separated by countries. All Maker in Australia will see only Requestors' orders in Australia. For each new country you need to create main Stripe account in this country and attach Makers' connected accounts to it.
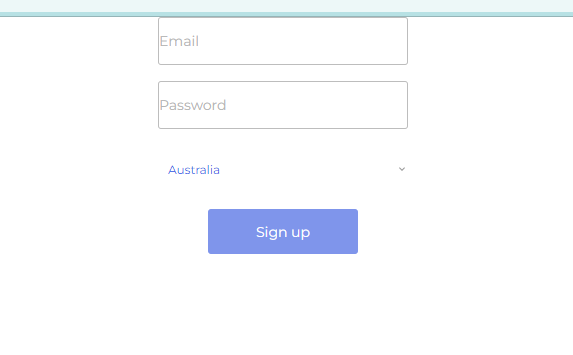
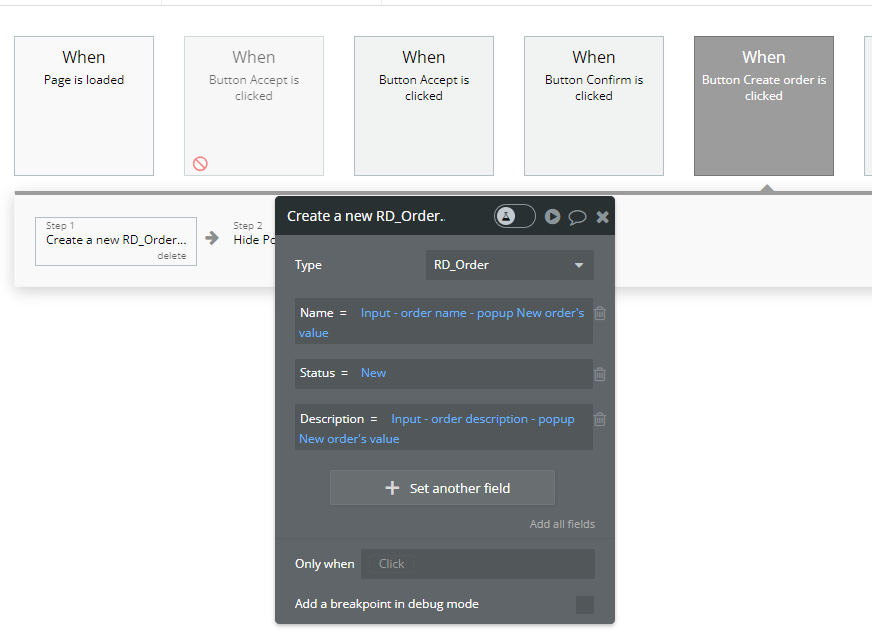
1. Requestor sign up
Requestor enter email, password and select his country
Because Express accounts are working in 42 countries now - our suggested list the same as the list of allowed countries (but where you create Stripe accounts before adding these country in allowed for registration)
After sign up action add "Stripe - Add Customer"
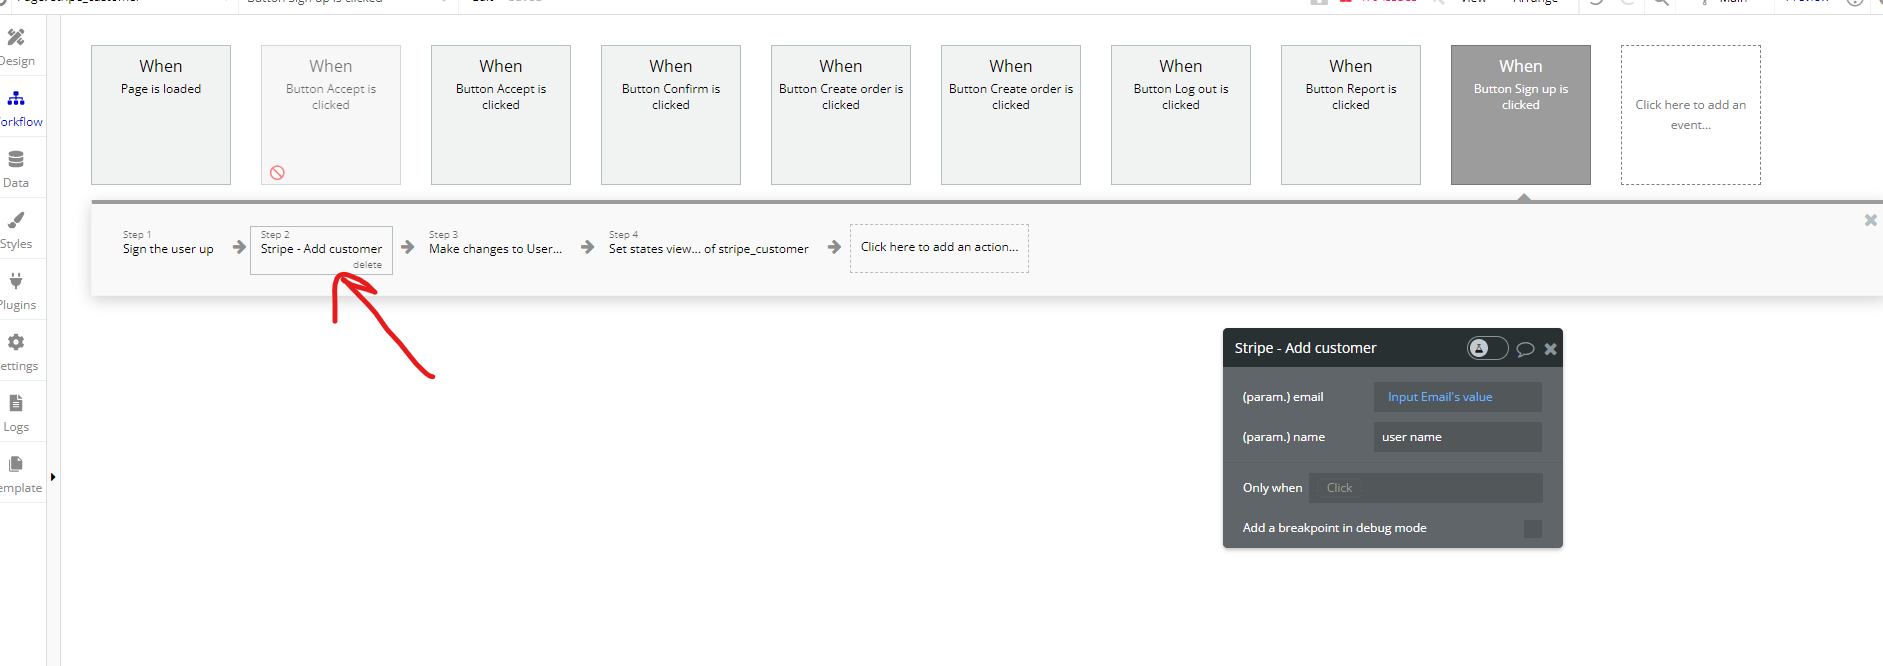
API Call: https://api.stripe.com/v1/customers
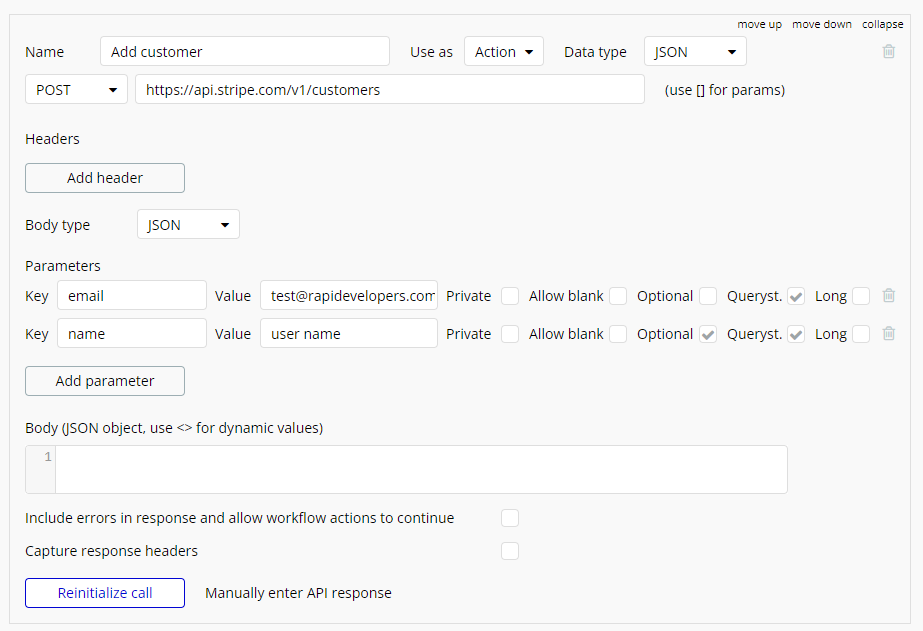
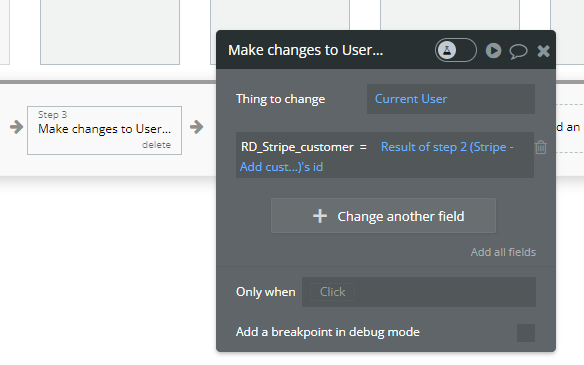
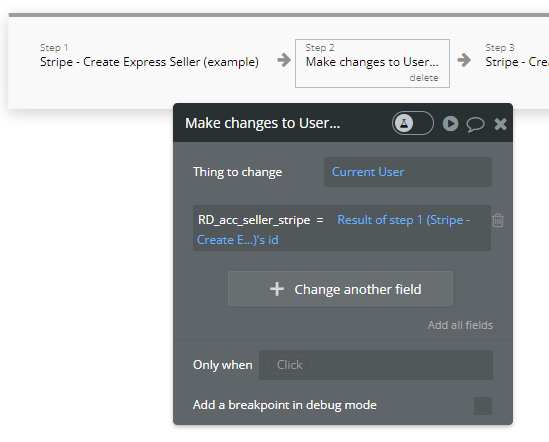
And make changes to User - add customer id
User create new order
2. Maker sign up the same as for Requestor
After sign up Maker create express account
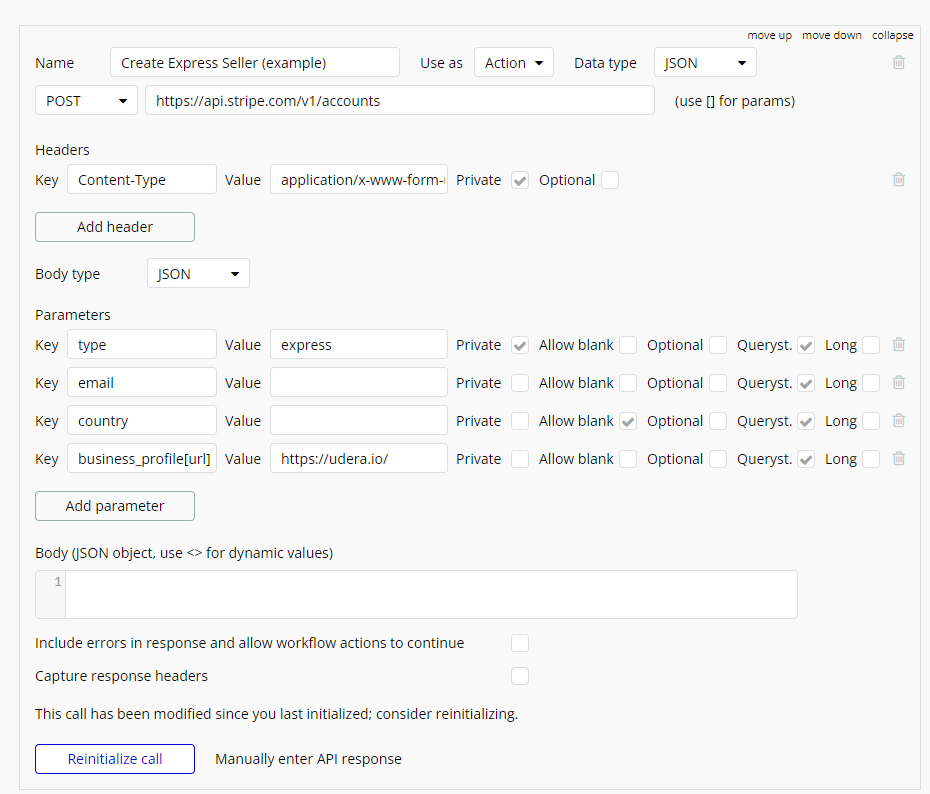
In Bubble you need to use "Stripe - Create Express Seller (example)" action. And you the same dynamic parameters (Country - Alpha-2 country code: https://www.iban.com/country-codes)
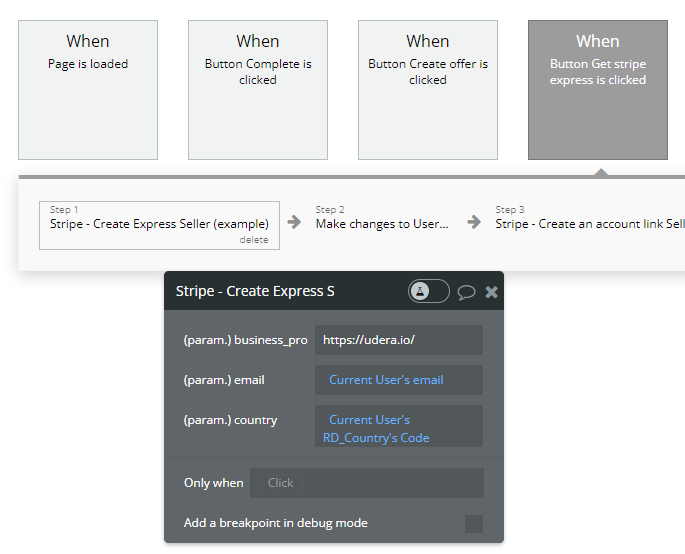
API Call: https://api.stripe.com/v1/accounts
Attach create express account to Maker
Create link to go through sign up process in Stripe for Maker

API Call: https://api.stripe.com/v1/account_links
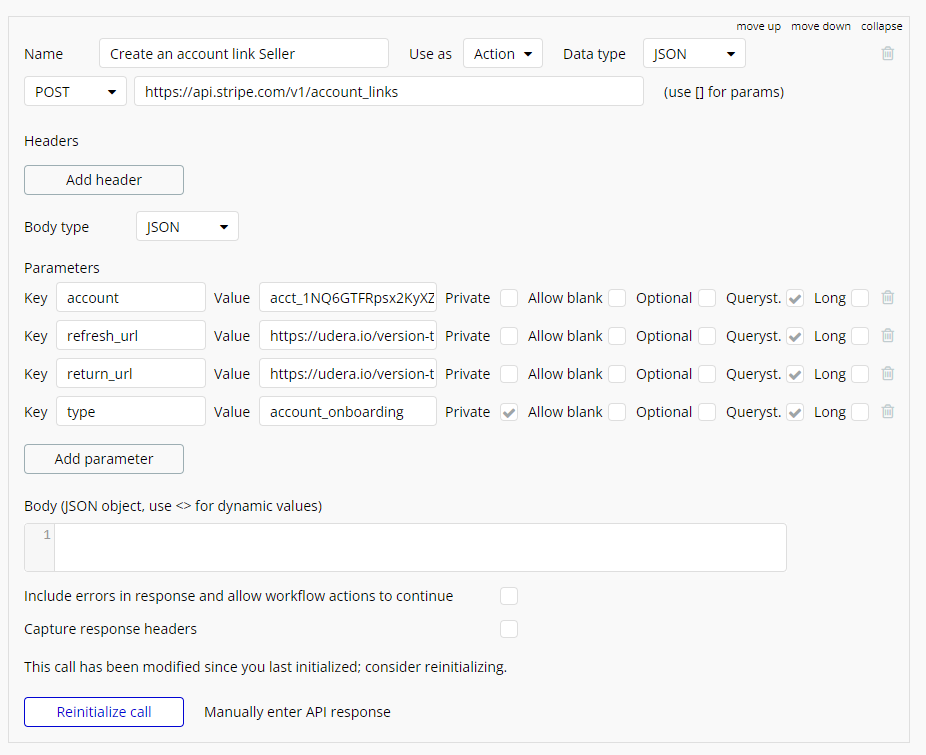
And redirect maker

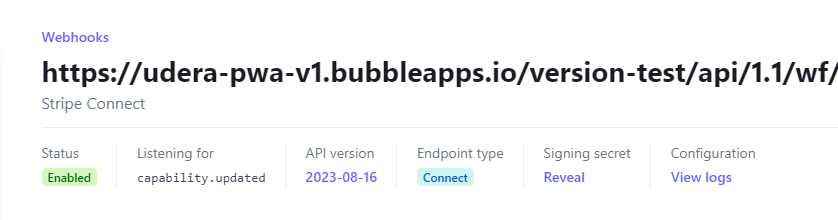
In Backend workflows when we receive the info that sign up process is finished, we change status of account
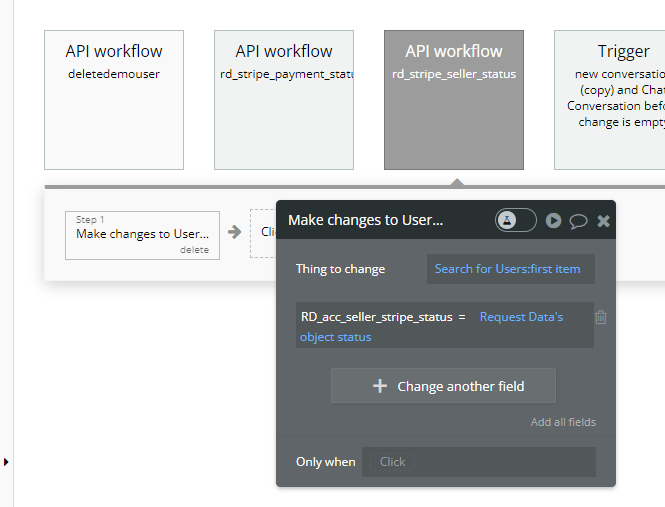
Webhook event: capability.updated
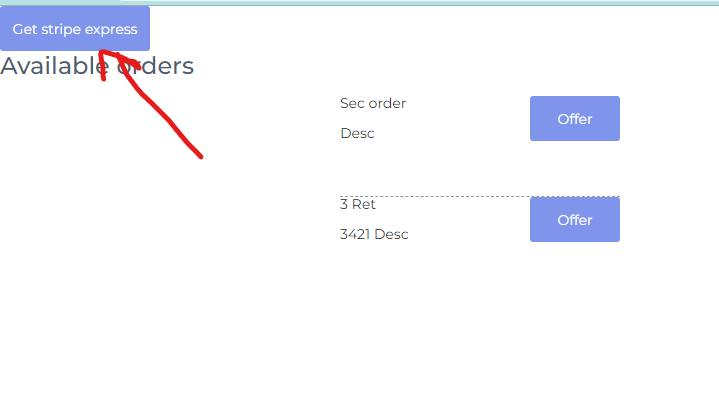
After that Maker can create offers for orders
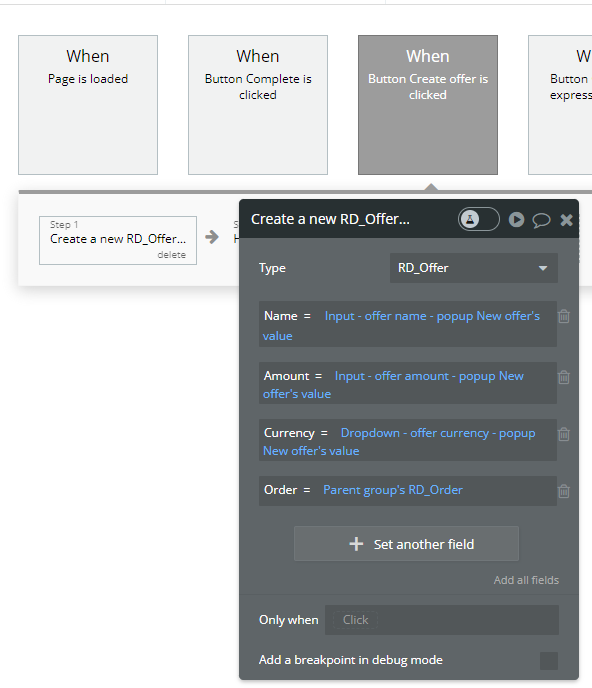
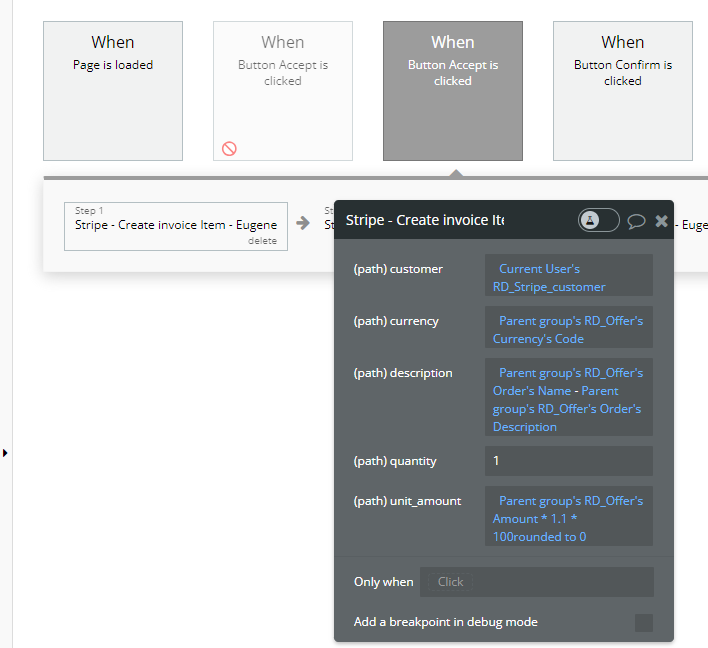
3. Requestor invoicing
Requestor see all offers for his order and accept one of them
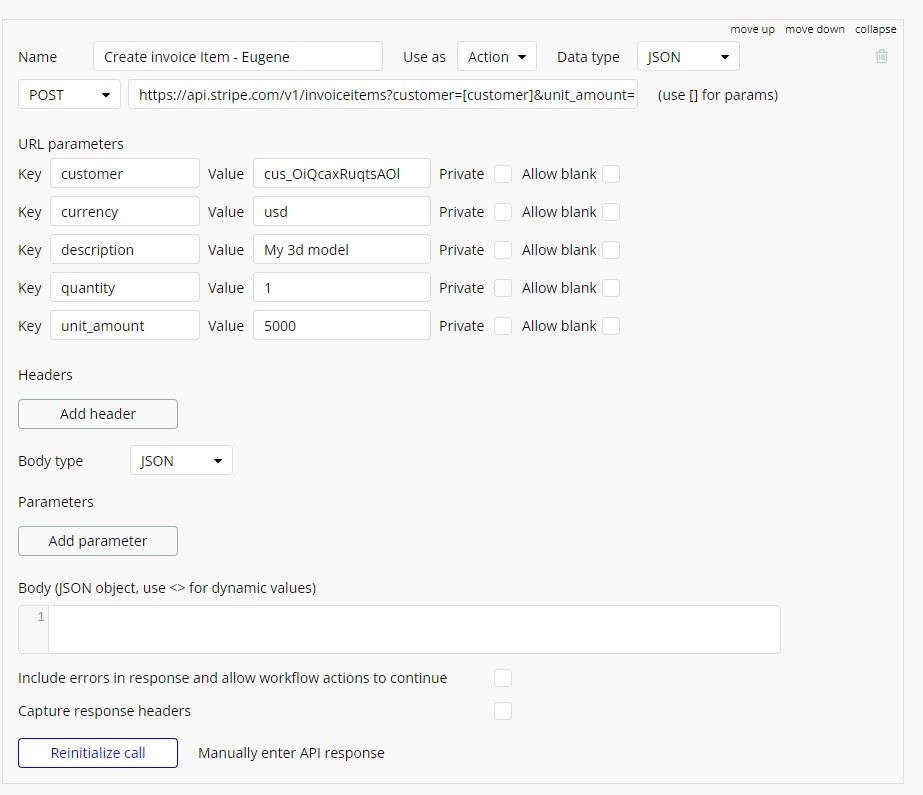
Use action "Stripe - Create invoice item" to create item that will be attached to invoice
In the field "unit_amount" change 1.1 to percent of your commission (1.1 - 10% commission)
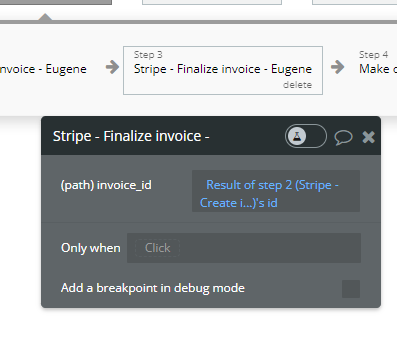
Use action "Create invoice". Previously created invoiced item will be attached automatically to this invoice


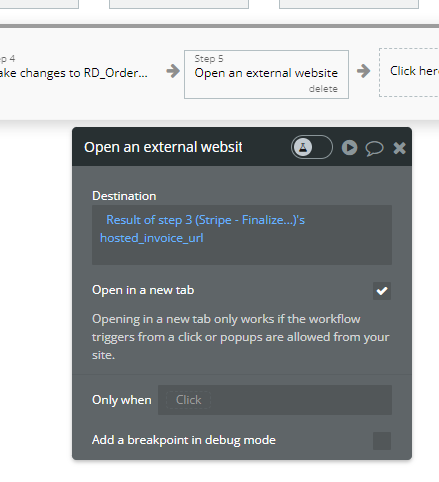
Use action "Finalize invoice" to change the status of invoice from Draft to Open
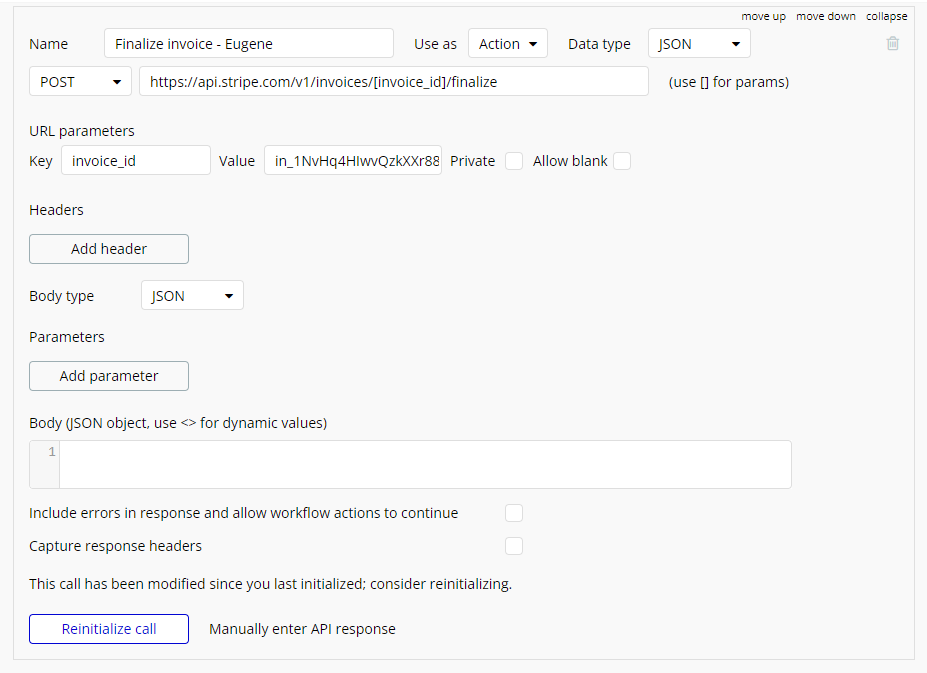
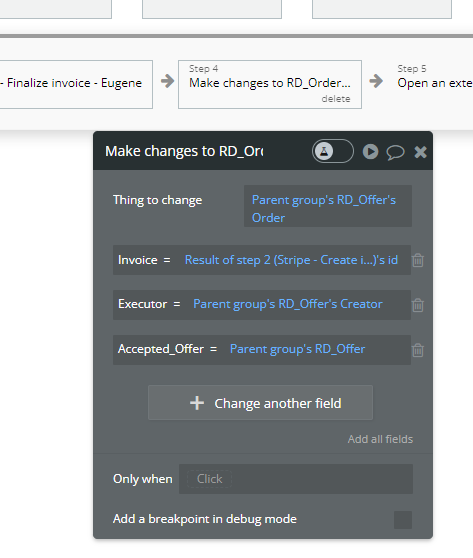
Make changes in order and attached accepted offer to order
Redirect Requestor to pay for invoice
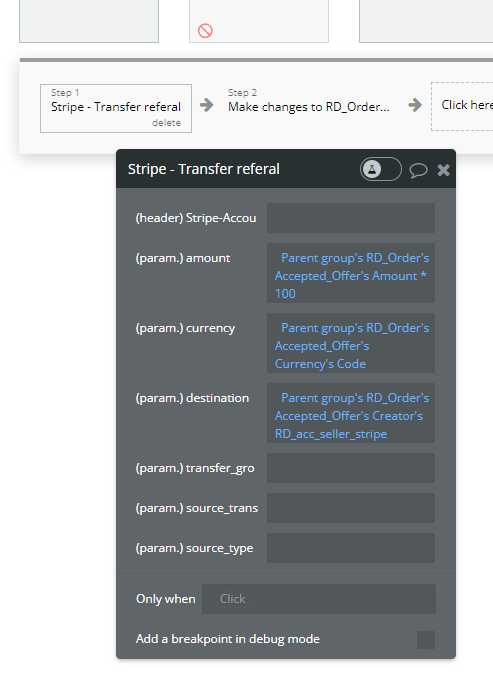
In Backend workflows when we receive the info that invoice is paid, we send money to Udera revenue account (change "destination" to needed express account you want to use)

API Call: https://api.stripe.com/v1/transfers
Webhook event: Invoice.paid

And change status of Order
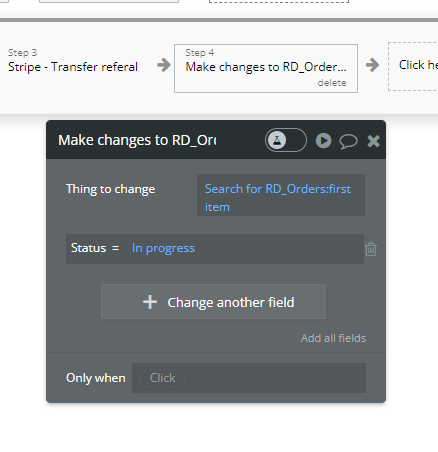
If everything is good and Requestor confirm that don't have any problems with the order and click "Confirm"
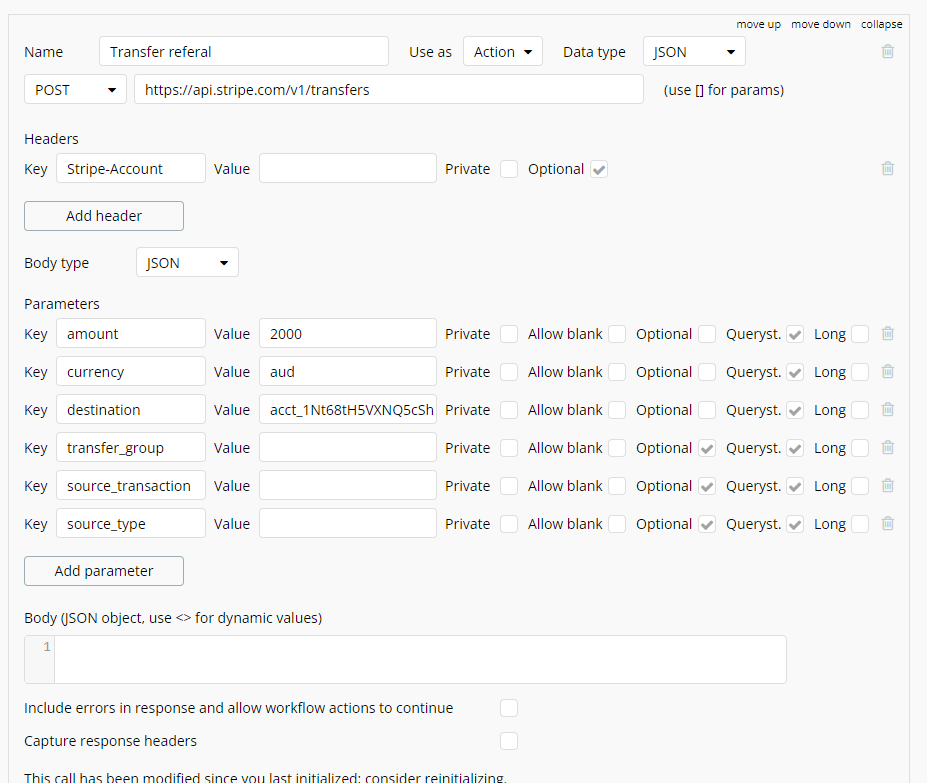
Use action "Stripe - Transfer referal" to send offer amount to Maker
And change status of order
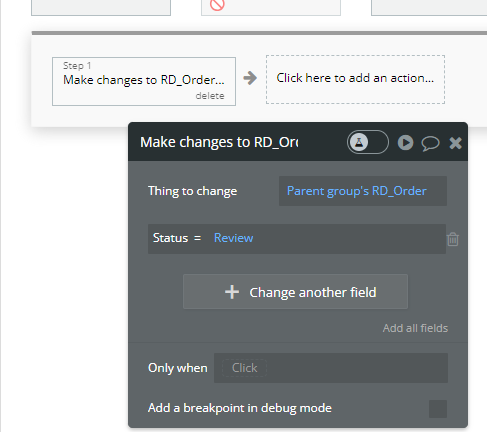
If Requestor report about problems and click "Report"
Change status of order to "Review". After that Admin will see this order
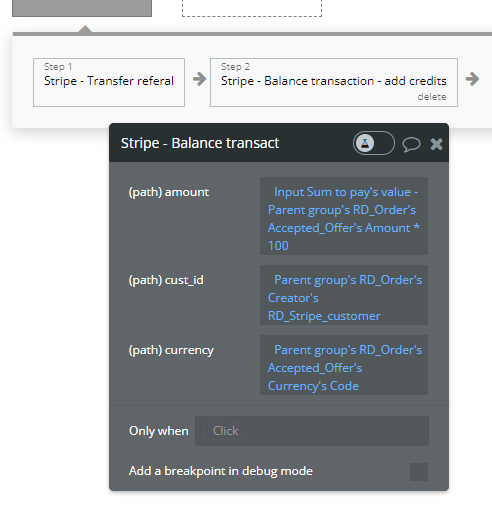
Admin enter the sum he suppose he need to send to Maker and click "Confirm"
Maker receive needed sum
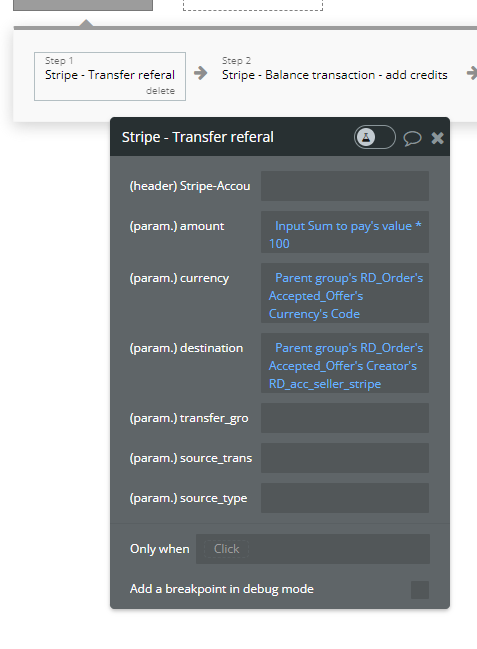
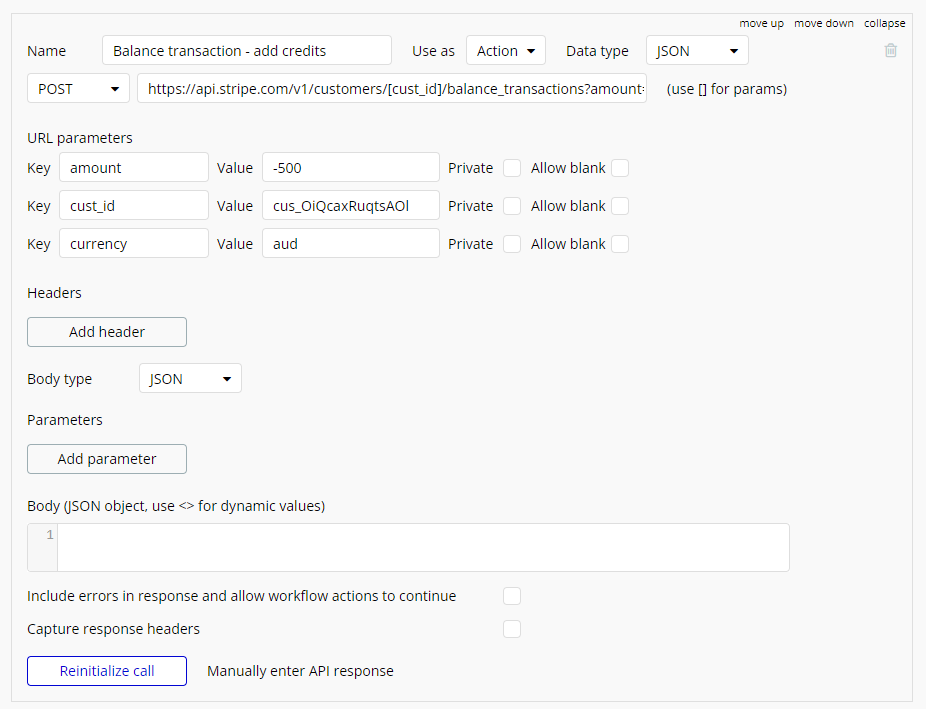
Use action "Stripe - Balance transaction - add credits" to send needed amount to Requestor as credits for future orders.
Important! Credits will be automatically used in next invoice.
Change status of order.
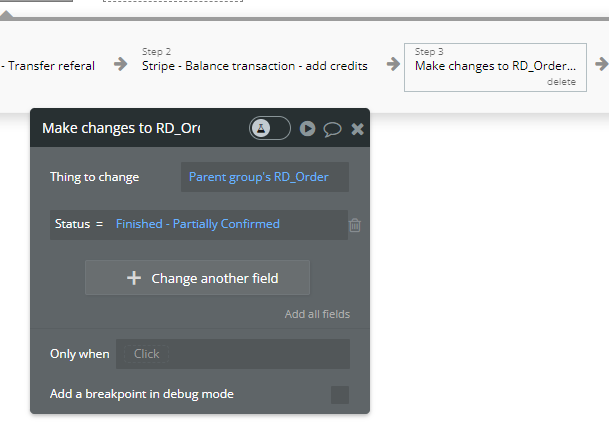
Order process is finished.