The guide states the things to note, like Admin Access, Custom Code, Notes, APIs, etc.
Admin Rights
For security purposes, this template has limited rights for potential customers. This means that you will not be able to use the admin features to their fullest until you purchase the template and enable admin rights.
Note: Users will not be able to access the admin page unless granted admin rights.
Tip: It is possible to access the admin panel via Demo Admin user. But, for security purposes, the features are not enabled unless purchasing the template and turn this feature on. In order to grant the admin rights, please follow the instruction below.
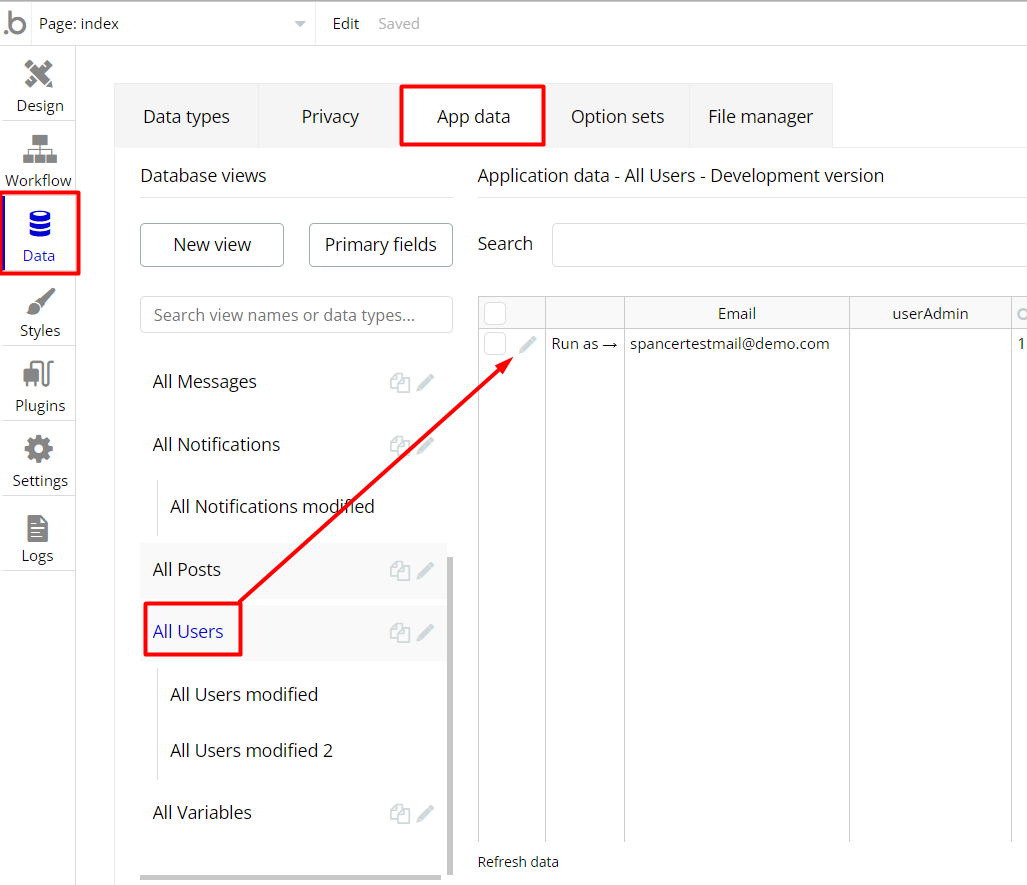
- Go to the admin page -> Data -> App data -> All Users tab. Select any user record and edit it. Set the Admin field to yes:
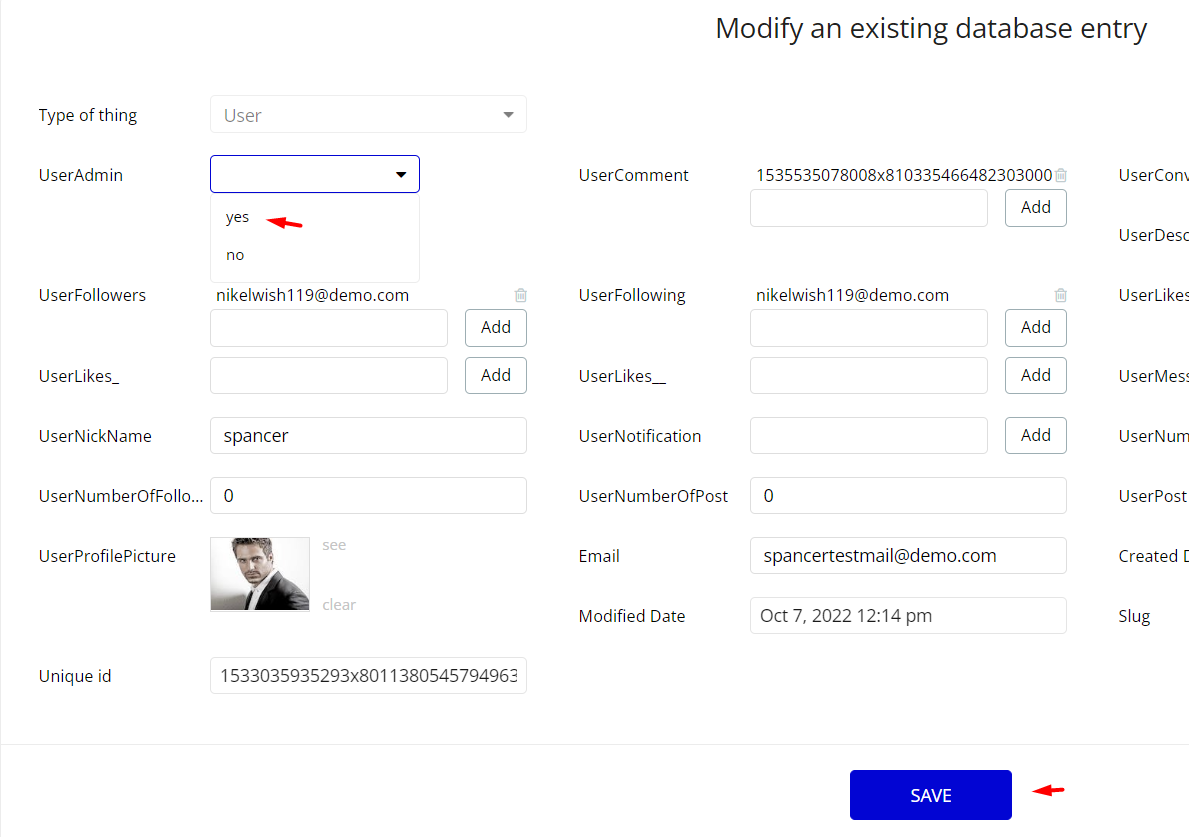
Note: Remember to hit the SAVE button.
An additional limitation is set on the
dashboard page via the Variables datatype, adminRights field. If a demo user with admin rights gets to this page, he will not be able to access the page or do any manipulations because of the conditions on edit/delete actions.
Under the Data tab click the icon in the Editor, go to the Data Type
Variables and look for theadminRights field with the Yes/No boolean type. 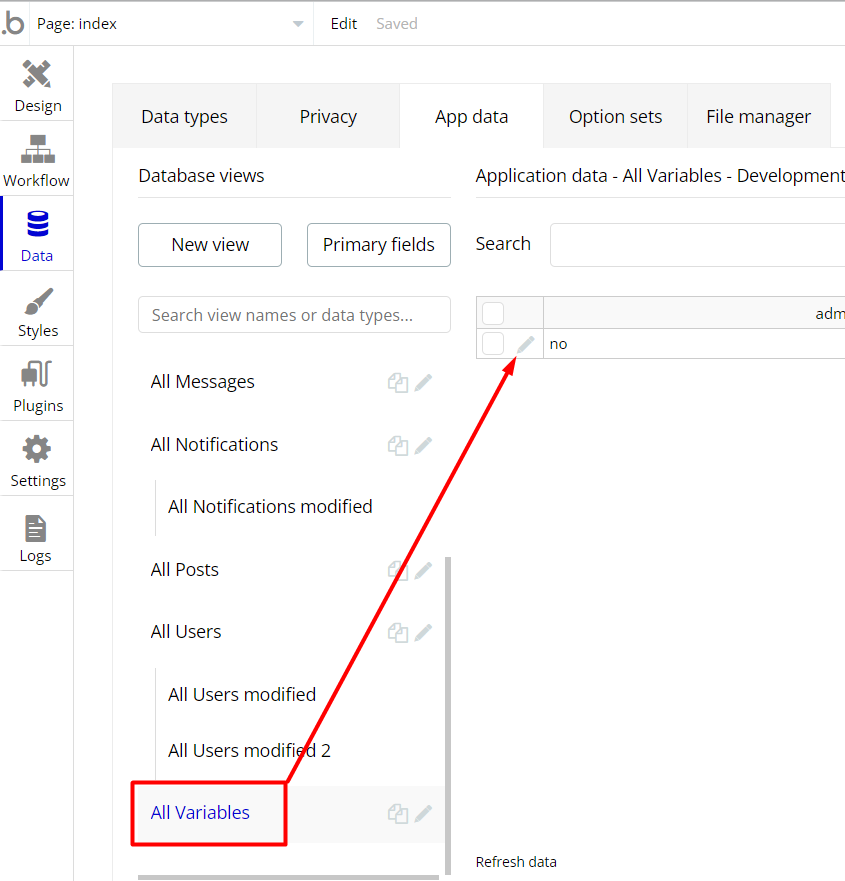
To enable the editing rights set the value to
yes, so the admin user will be able to manage the platform, deleting users and posts on the dashboard page.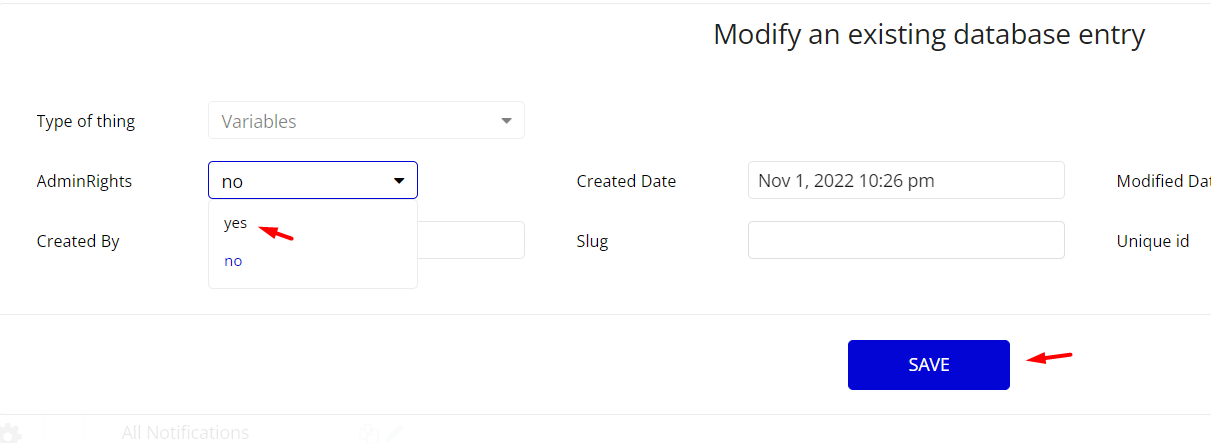
Note: Remember to hit the SAVE button.
The
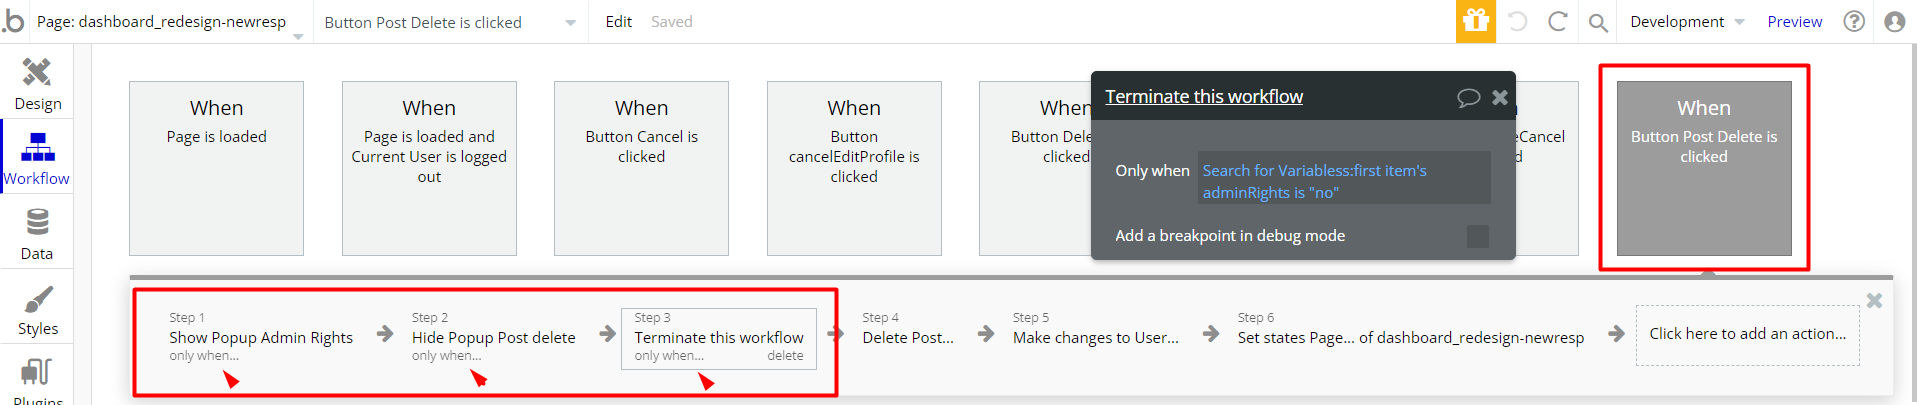
dashboard page has buttons with admin restriction conditions in the workflow which are locked when adminRights is no.If you have already purchased the template, you can simply delete the workflow steps with the following Conditional of these elements, in order to gain full access to dashboard features:
- Find the Delete buttons workflows to remove the steps with the condition "Search for Variables: first item's
adminRightsis "no".
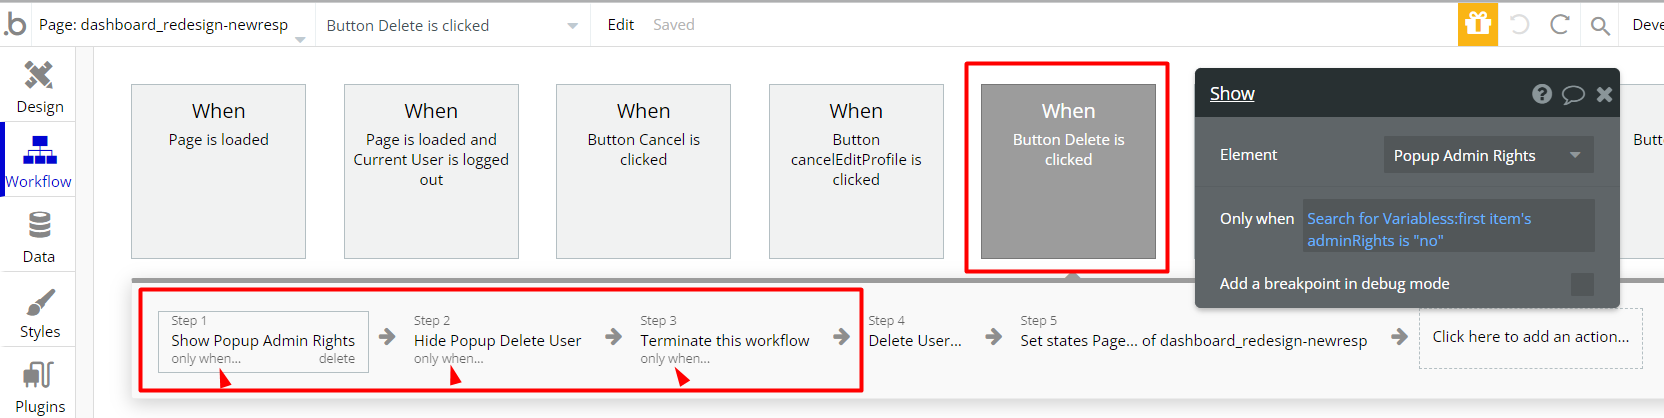
- Complete. After these changes, you can check the respective actions on the page.
Congrats: You have successfully granted admin rights. Now you can use all the dashboard page features as an admin user.
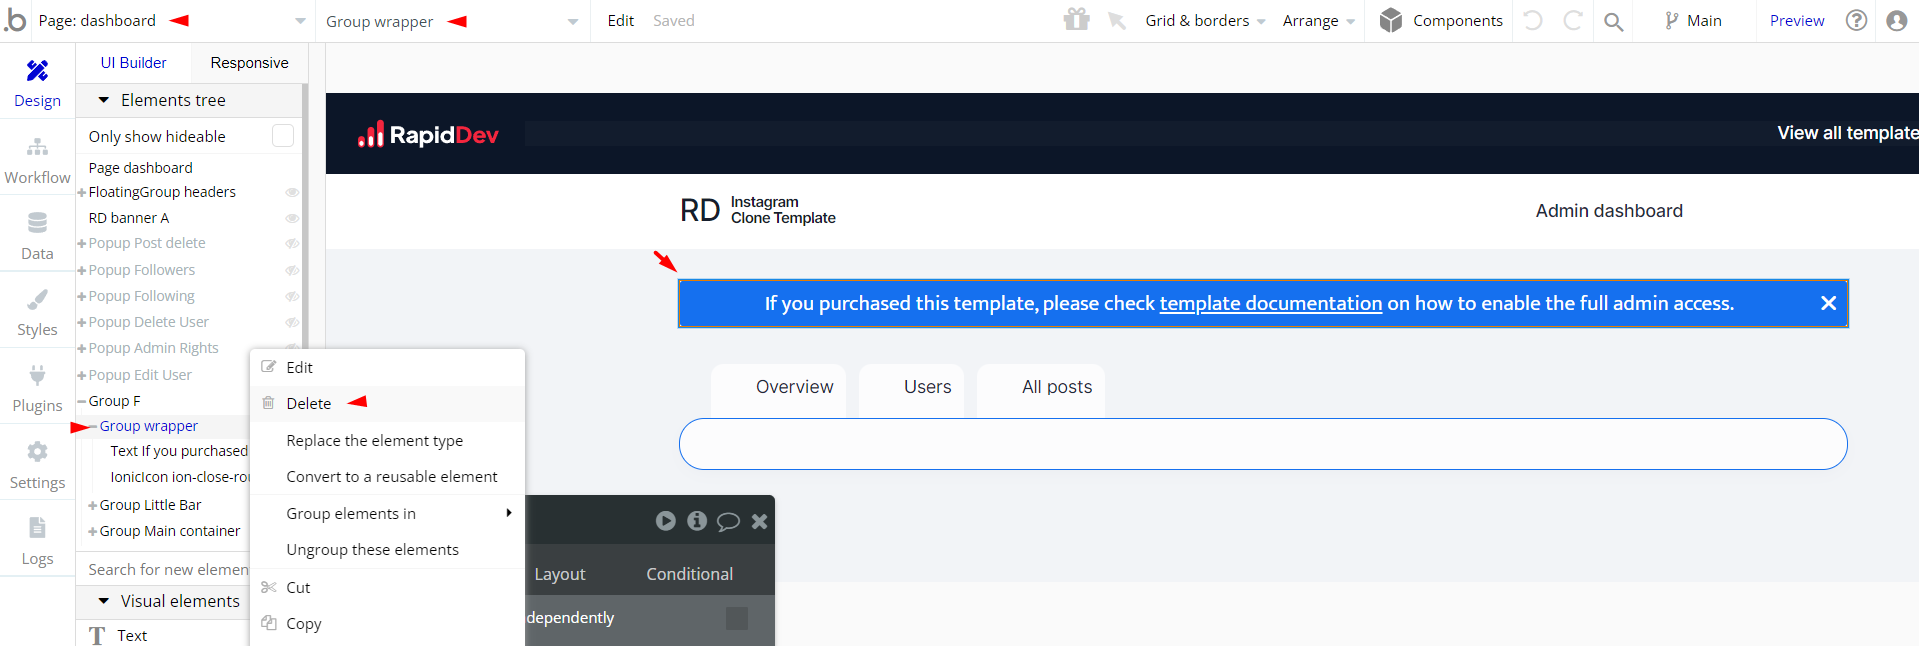
Also, delete the warning group that says to check the template's documentation:
- Locate the container Group "wrapper and delete it:
API Webhooks
Clonegram is using Backend workflows for some important features: create comments, display and create new posts.
They can be located in the Backend workflows tab in your editor:

- create_comment - add comments to posts.
- post - do a search for posts to be displayed on
indexpage.
Hidden Design Elements
Tip: Initially, on some pages, design elements in Bubble Editor might be hidden.
Here is an example of how to unhide 👀 them:
Embedded Notes in Bubble Editor
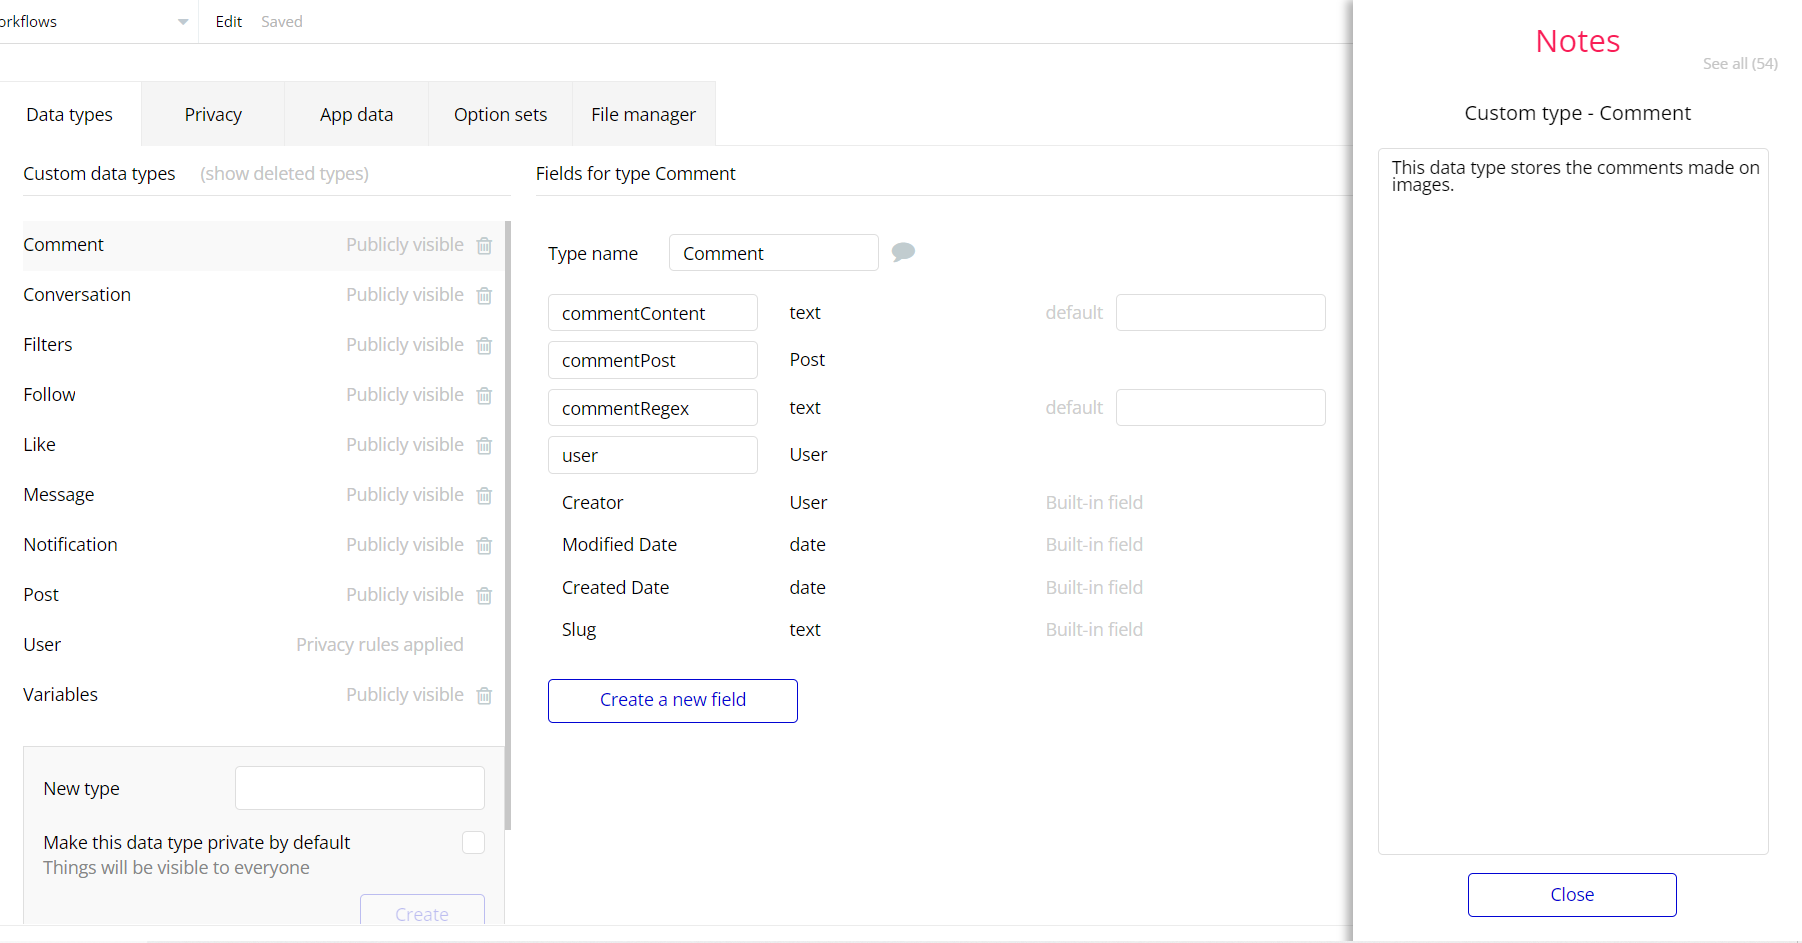
This template comes with explicit Notes for Database fields, Option sets and their fields, and Privacy rules, which will guide you with the modification process.
In order to preview a Note of any data type or field, click on the 💬 icon.