This section states the purpose of each page.
Introduction
In this summary, we will describe each page and its content. The Page Element is the fundamental one that contains all the other elements.
Tip: See Bubble Reference for more information about Pages element https://bubble.io/reference#Elements.Page 🙂
Pages
index
This is the main page typically encountered first on the web app that usually contains links to the other pages of the site.
A homepage includes a variety of menus that make it easy for users to find the information they need.
It is the main navigation page. From there, users can go to signup/login, and view categories and sections containing information that gives a better understanding of how the platform works.
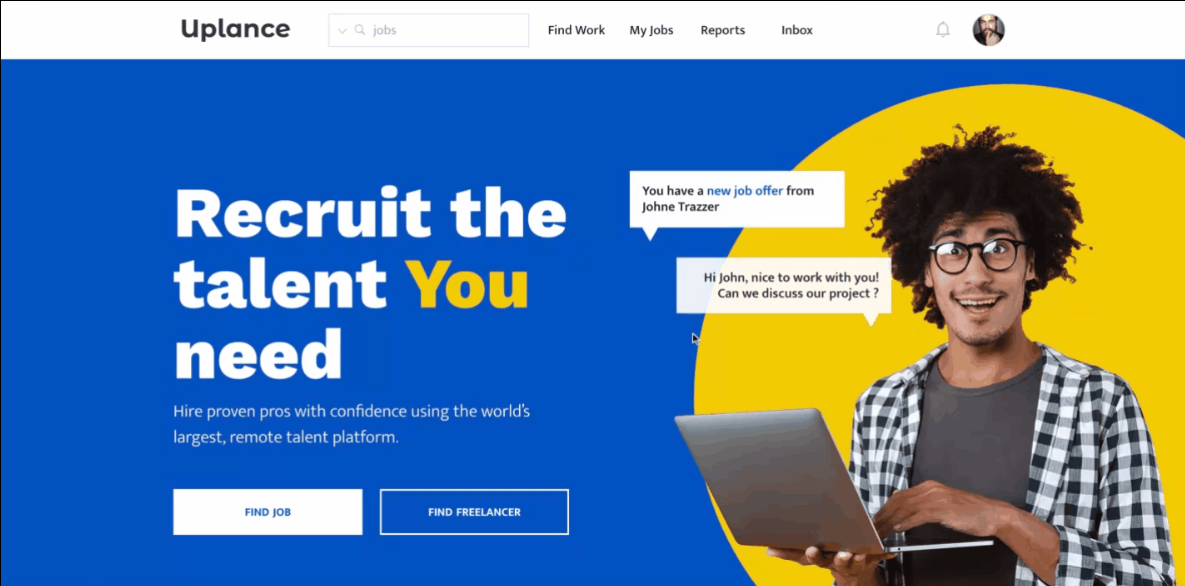
It comes with a cool animation feature, here:

The group elements can be found in the group element called "Group right":
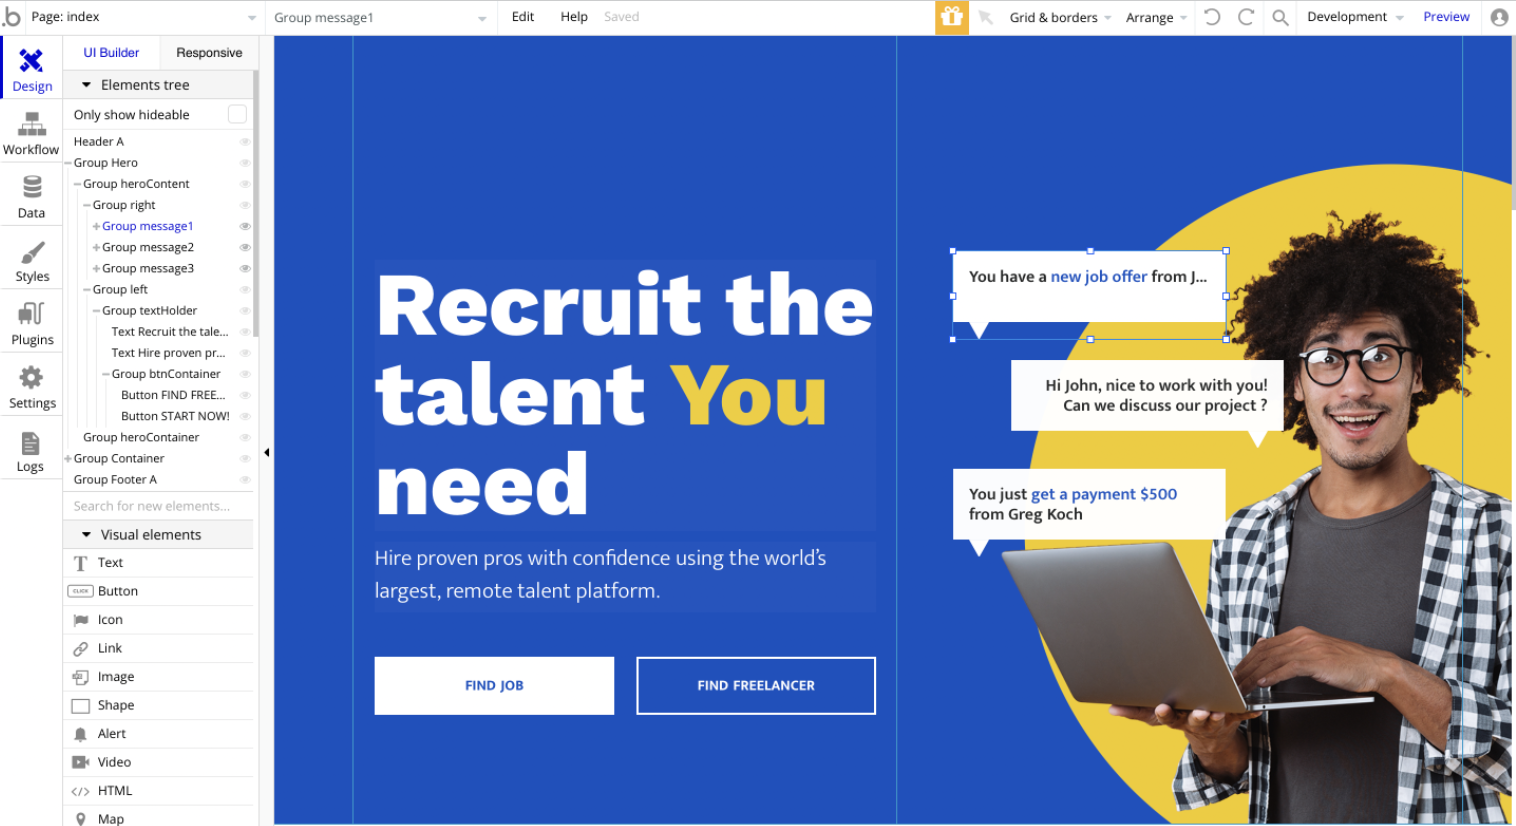
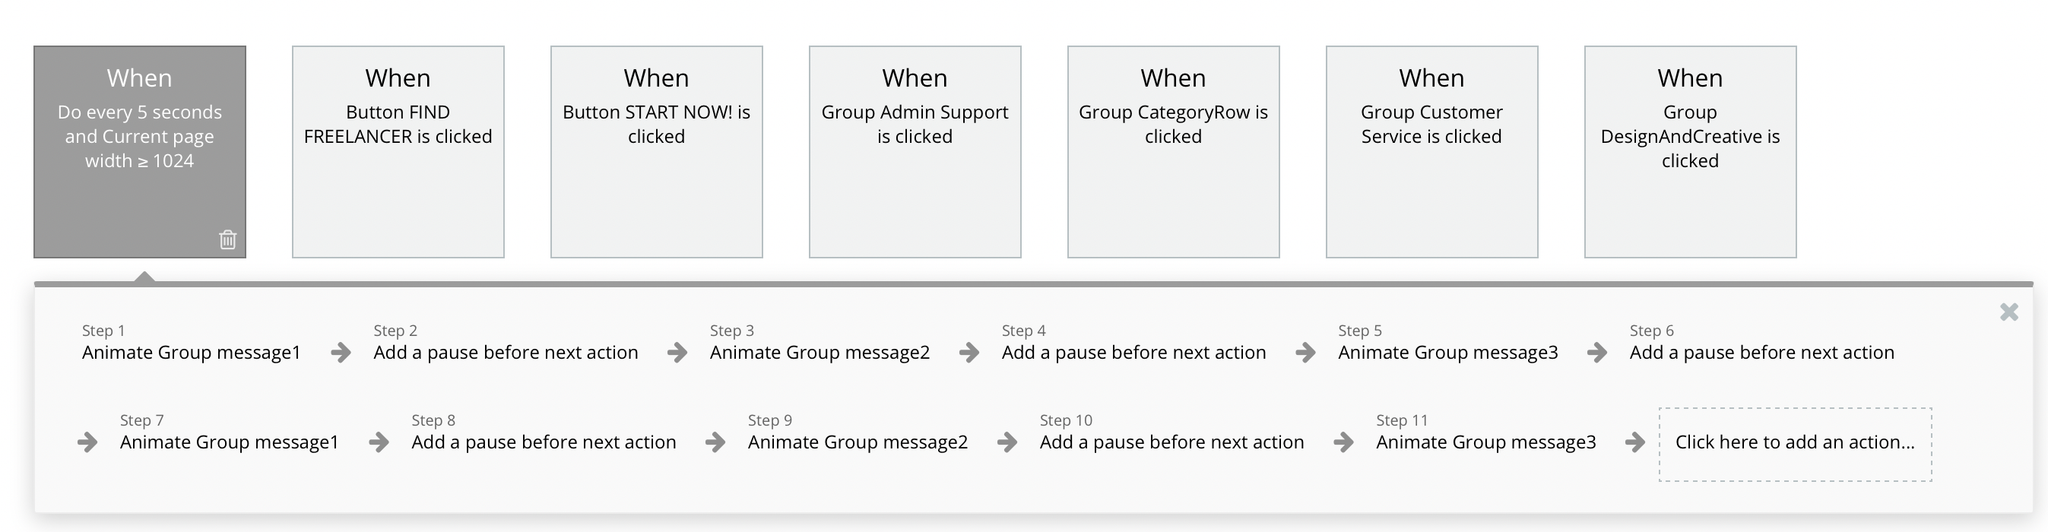
In case you'd like to modify the animation, you can find the responsible workflow actions here:
admin
This page is designed to manage platform data, e.g. Users, Items, Payments… and others. Only users with admin rights are able to access this page (in read-only mode), and those users who have access rights can edit or delete anything here.
The admin dashboard is a one-page component of the template designed to display useful information about jobs, users, transactions, and categories.
Here you can also view the platform's Stripe account's balance, ban users, add new categories and issue refunds.
Tip: Initially, your Design tab may be lacking elements but no worries! They are simply hidden in the Bubble editor.
And this is how you can unhide👀them:
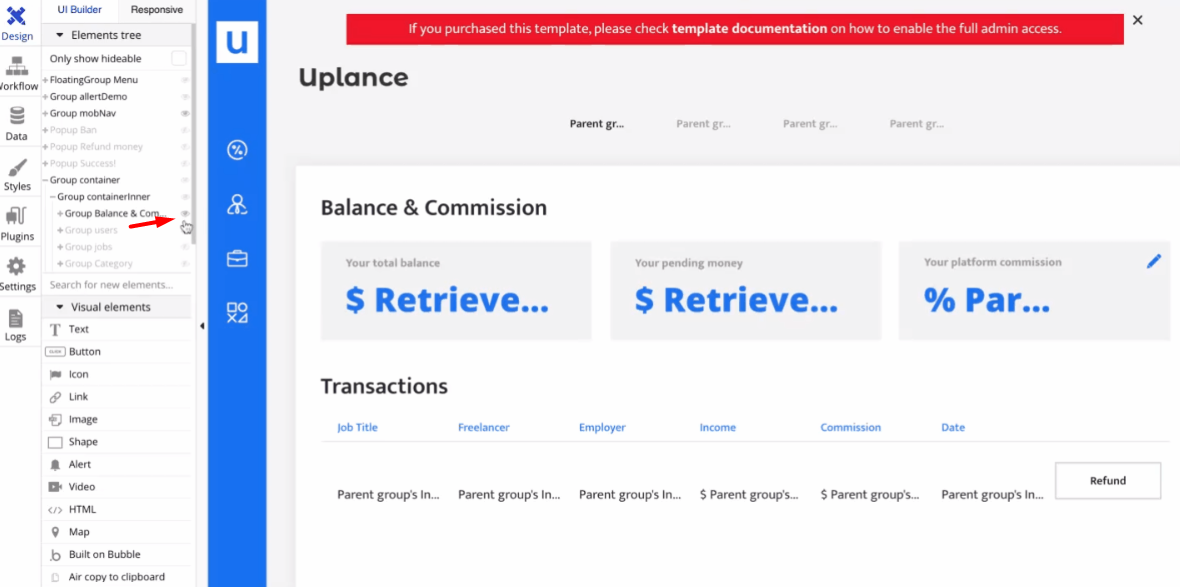
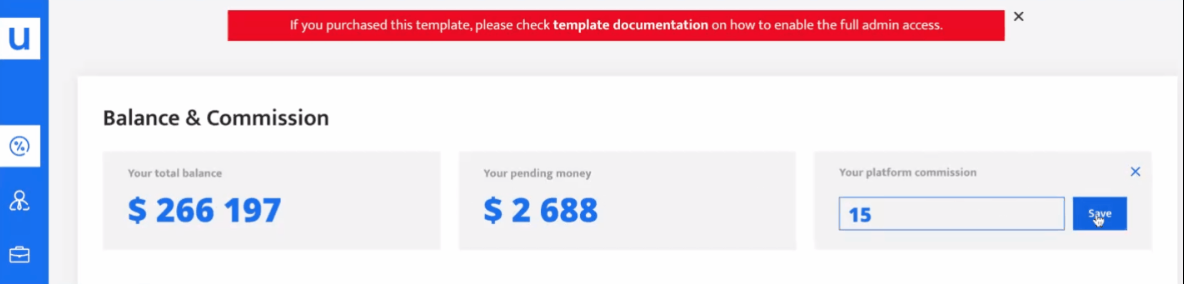
The first section displays Balance & Commission data, where you can change the platform commission (App Fee). It also displays the list of all Transactions, where you can refund the paid amount to the freelancers.
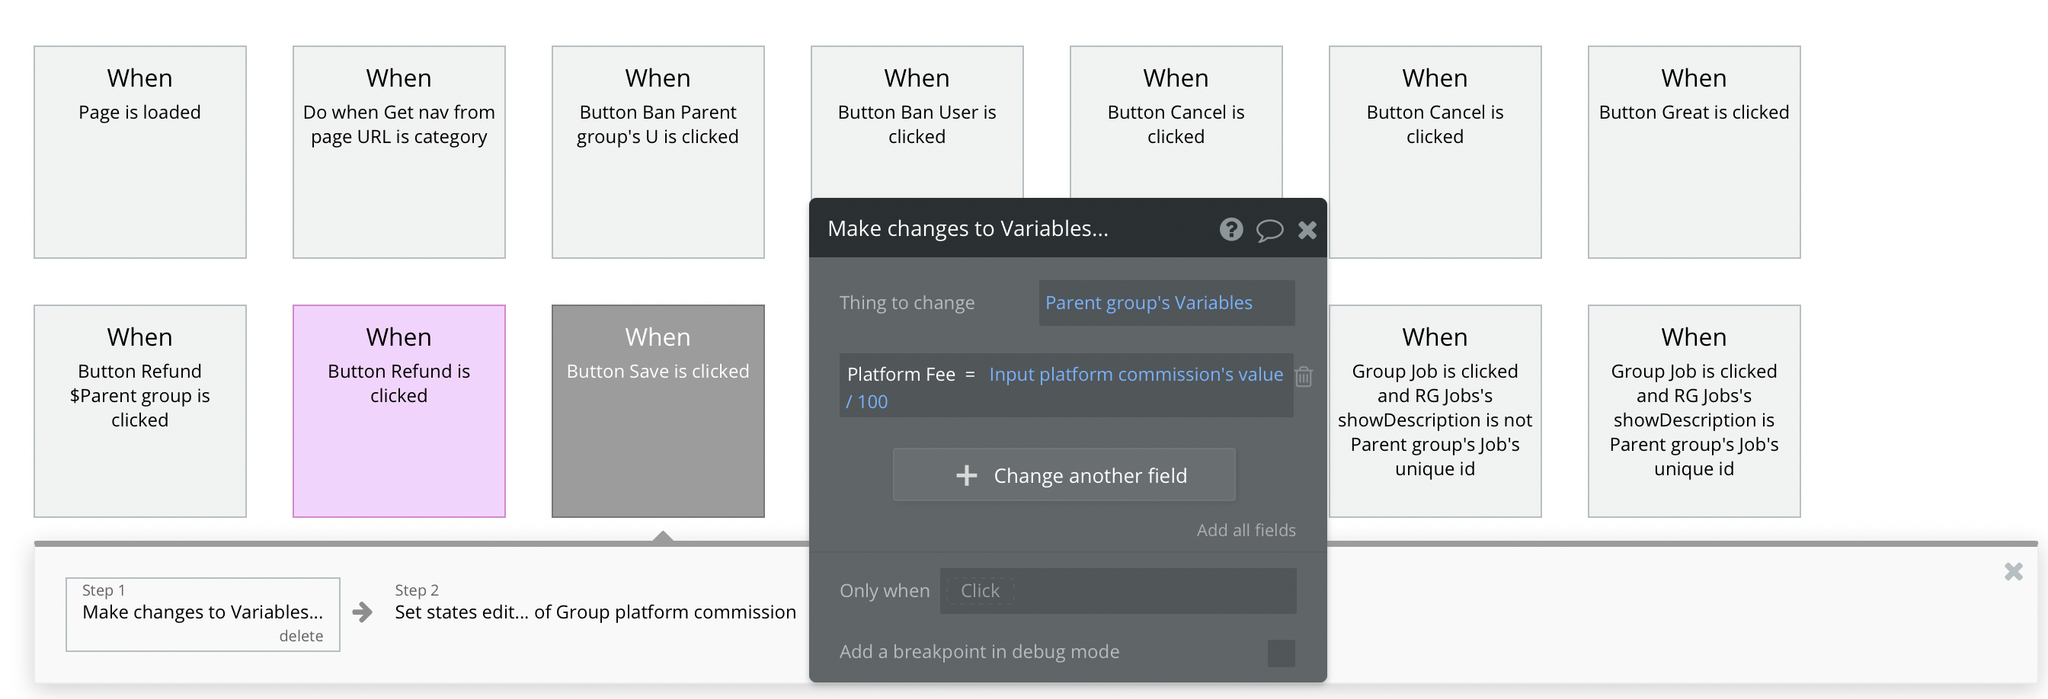
Platform commission feature can be found here:
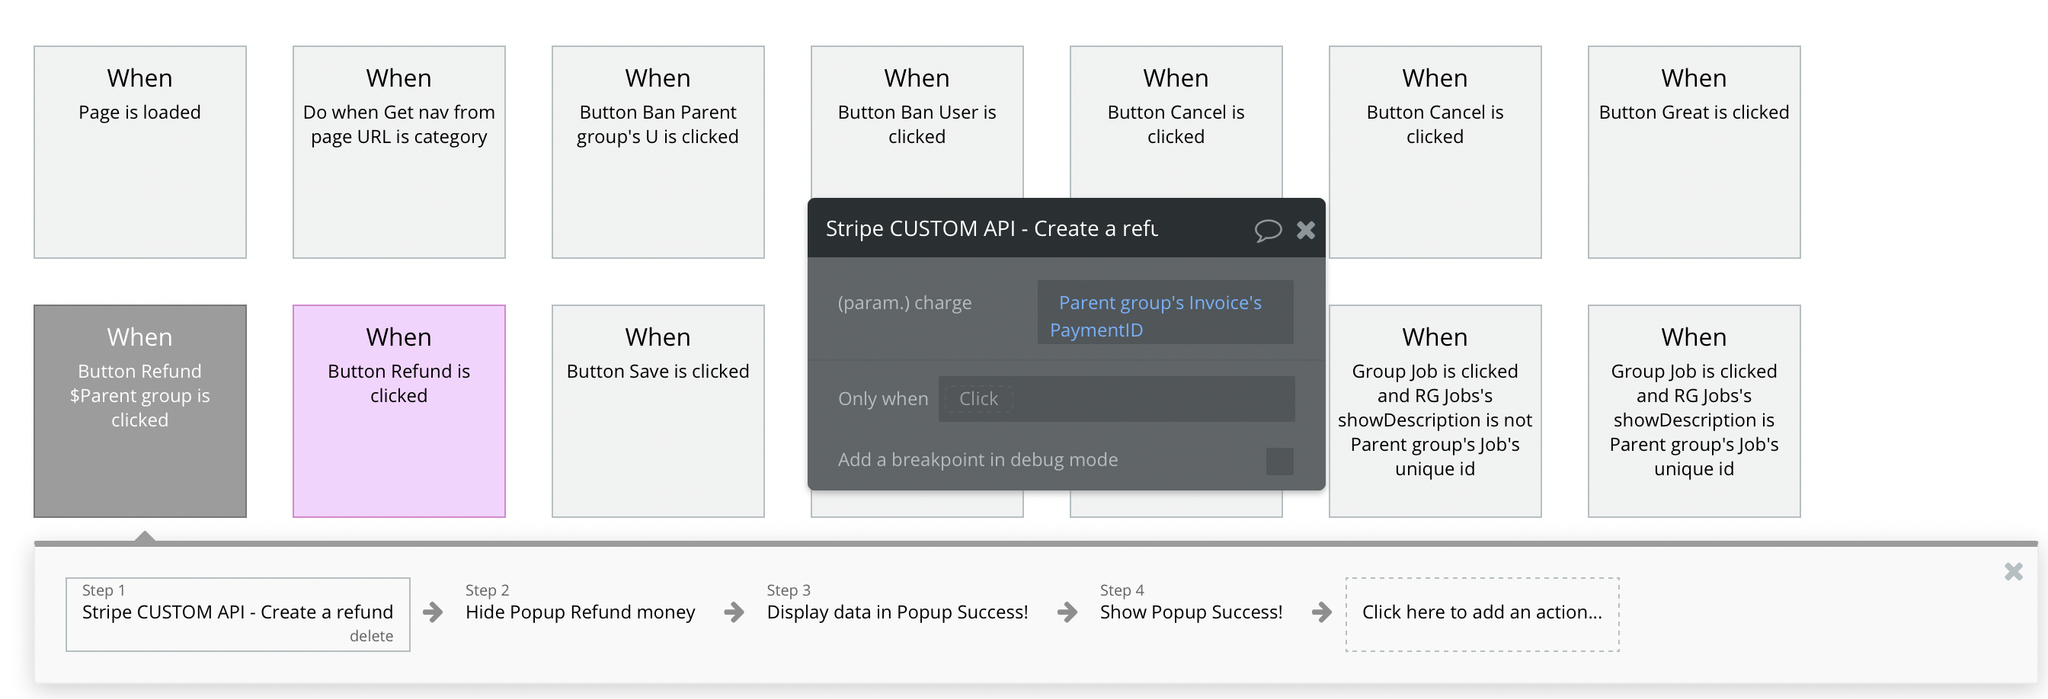
Refund feature can be found here:
The next two sections are simply listing data about
Users and Jobs, where you can search for data, ban users, reorder data by ascending or descending order: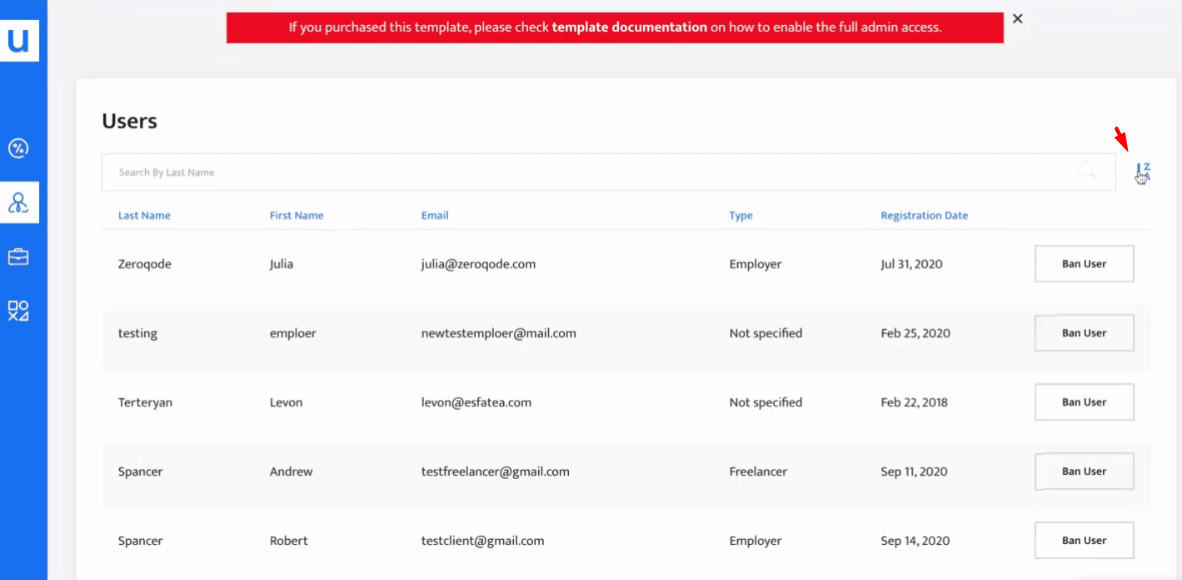
Ban User feature can be found here:

It changes the Banned status to "yes", as well as adding the reason description.
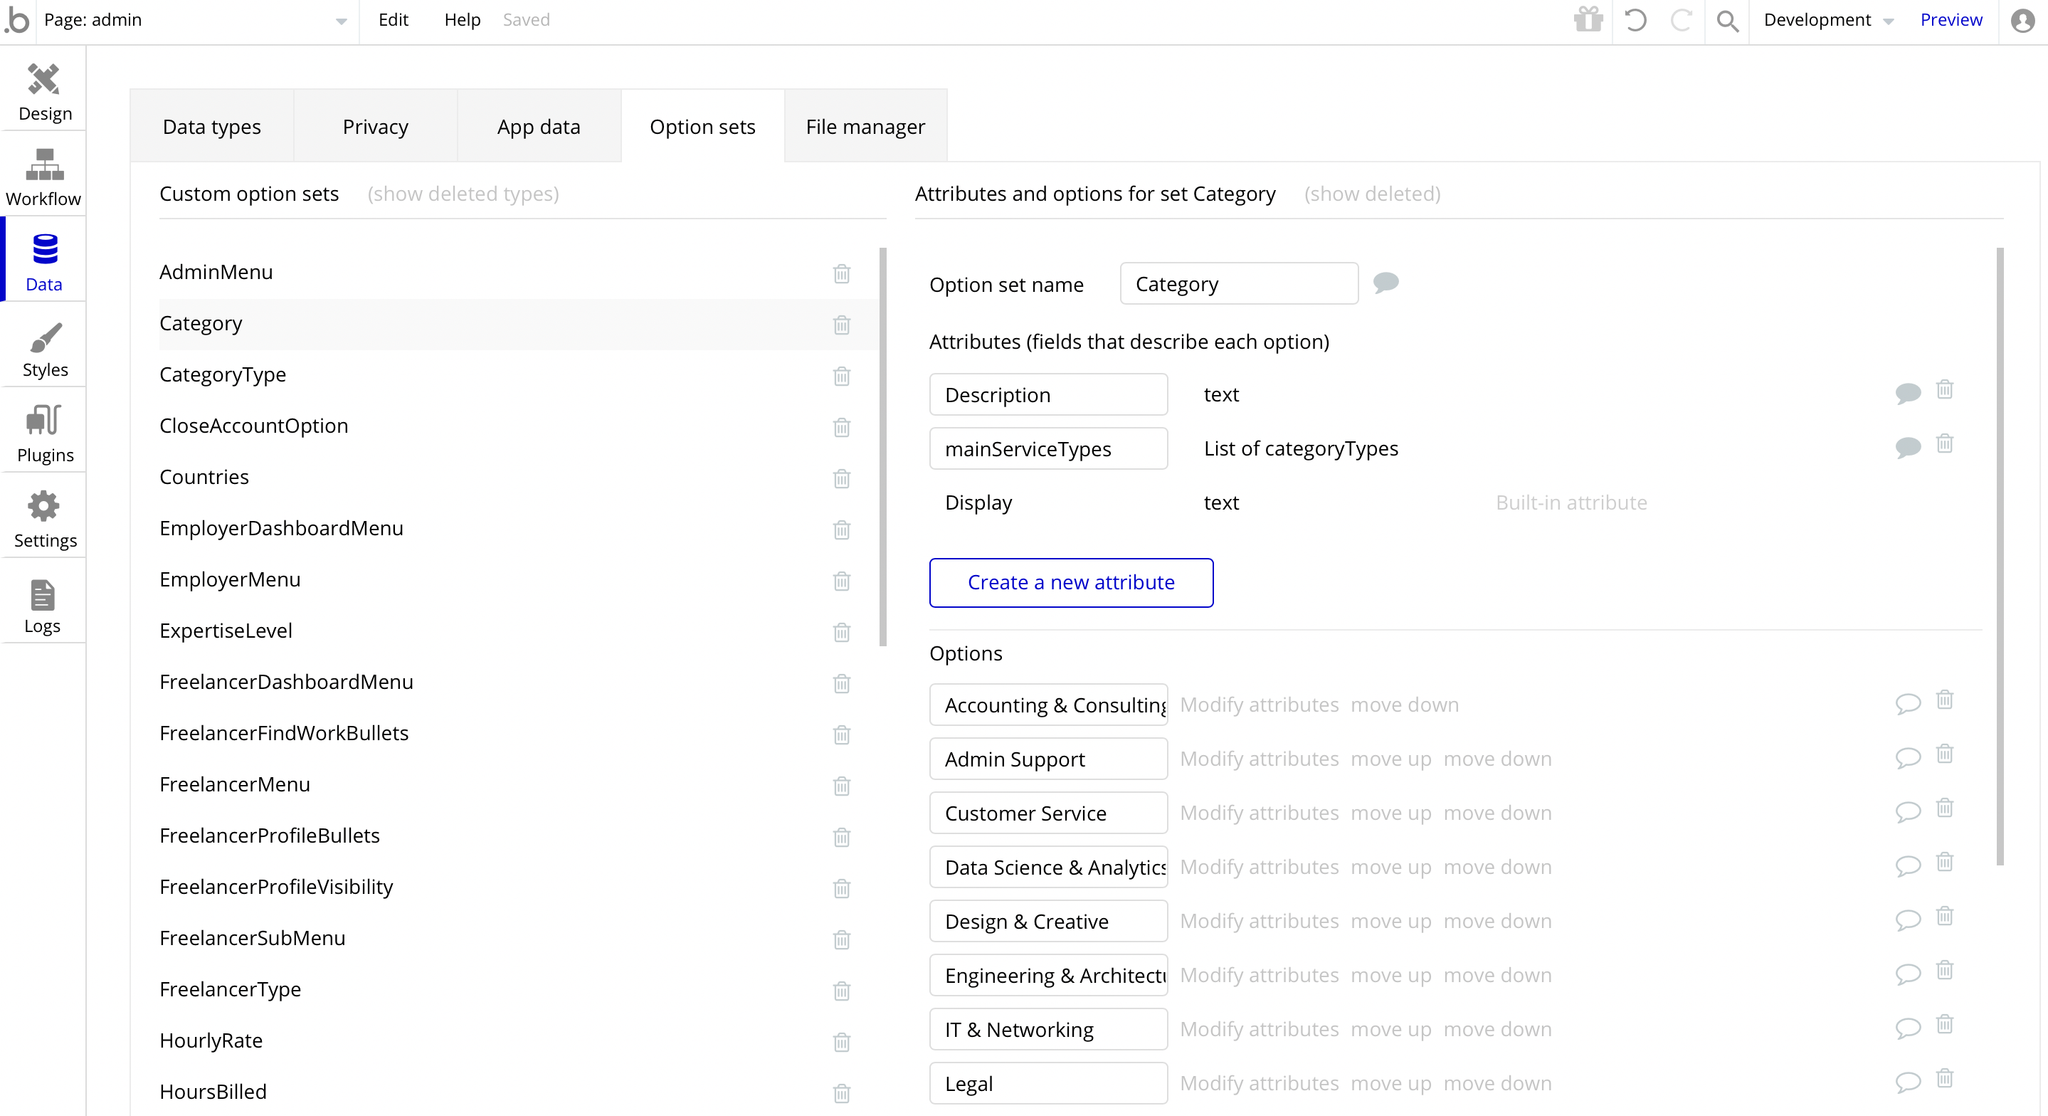
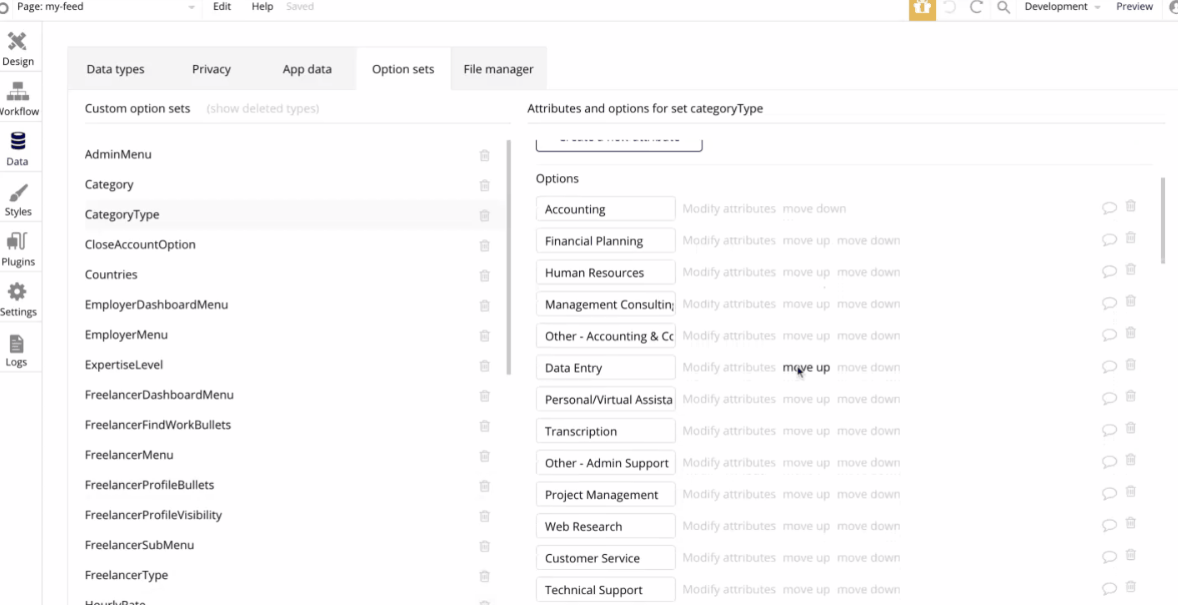
Finally, the 4th section is where you can find Category & Skills:
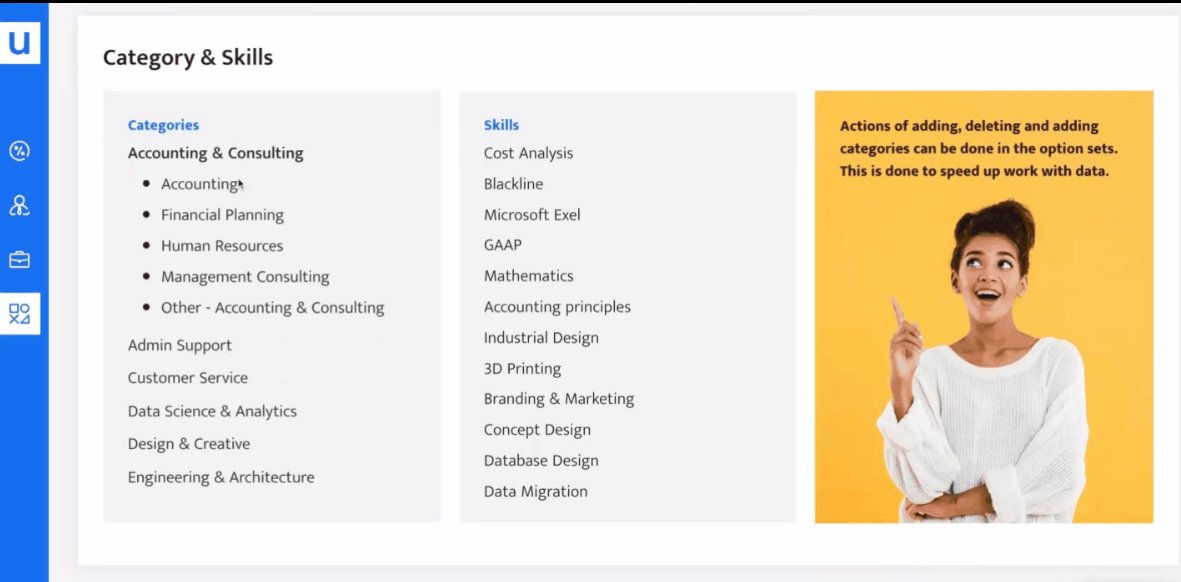
Which can be found in your Data -> Option sets -> Category, here:
employer
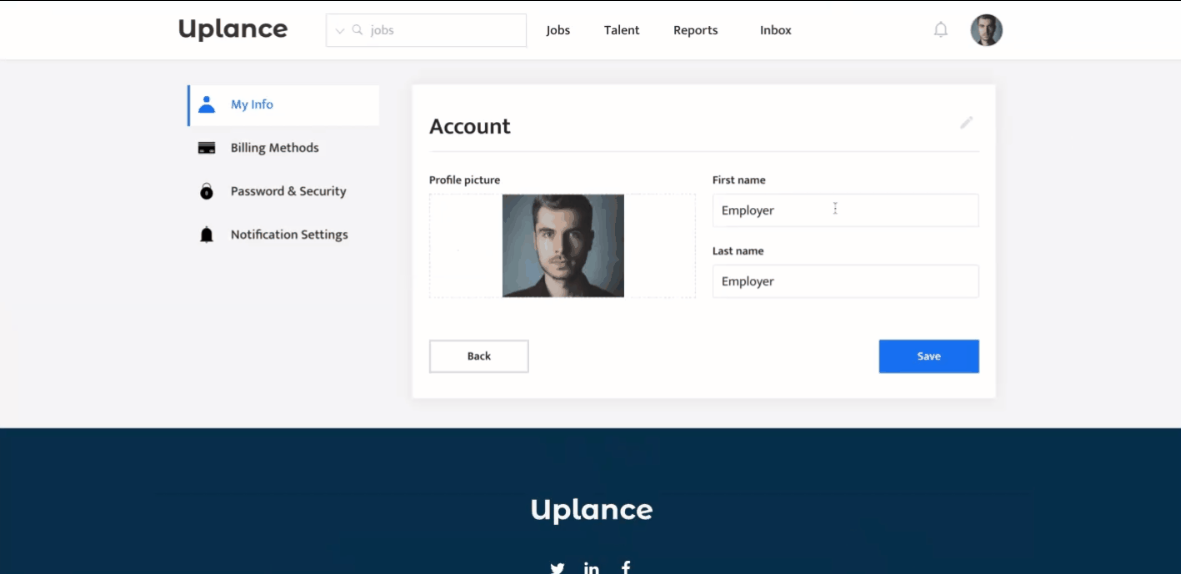
This page is for those who joined the website as an employer. It shows information such as profile photos, payment methods, profile information, and notification settings.
Here, an employer can update profile information, payment method, password, and email and set new notification settings.
Here is how to unhide👀the groups:
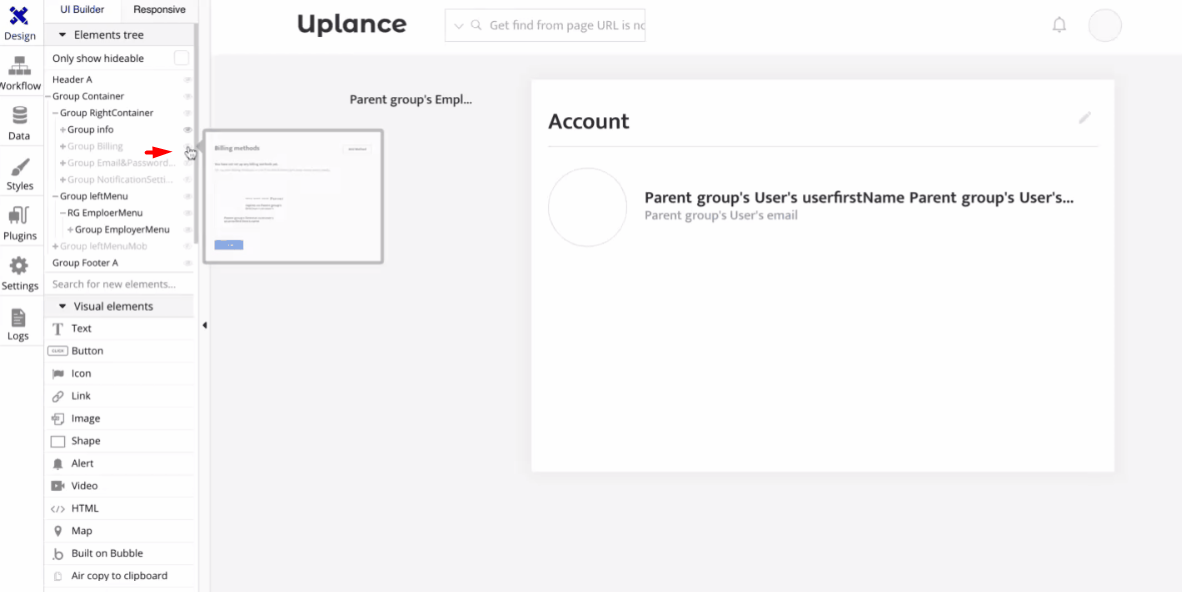
In case you landed on the platform for the first time, you'll need to provide a Billing Method, and its responsible workflow can be found here:
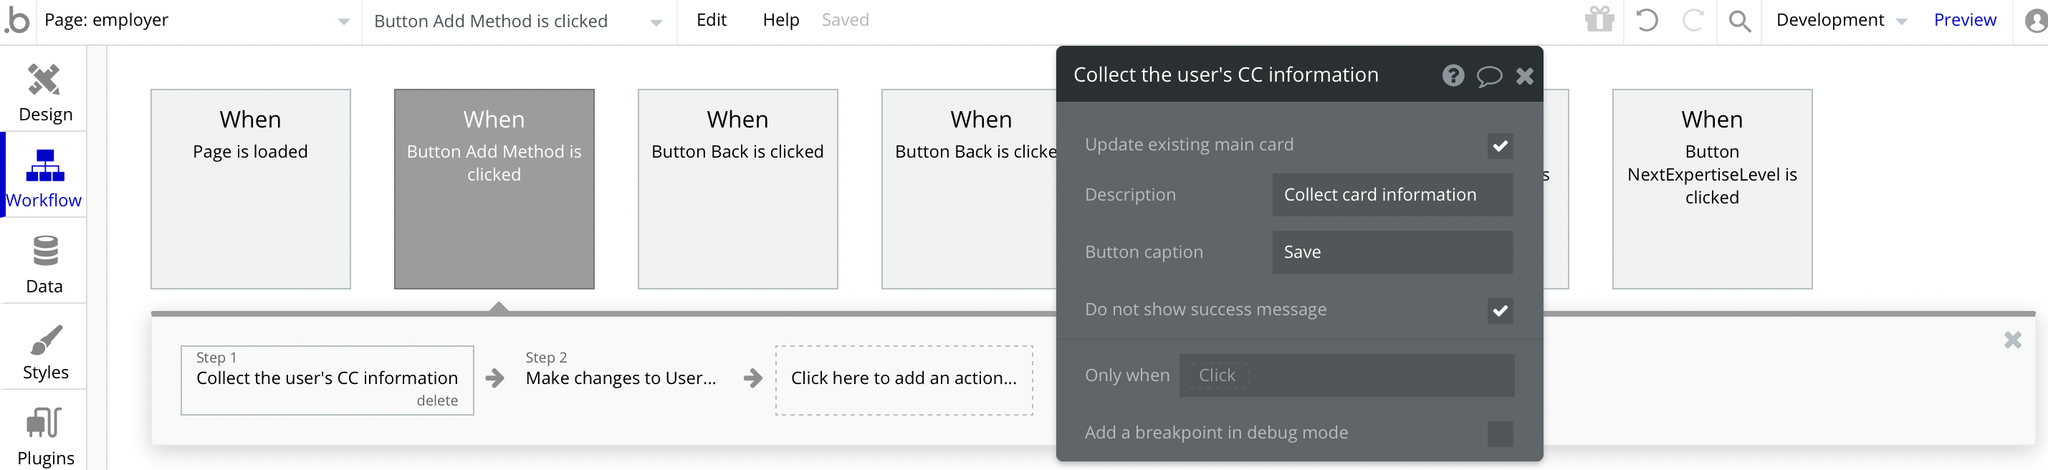
Then updating the employer's Stripe verification to "yes":
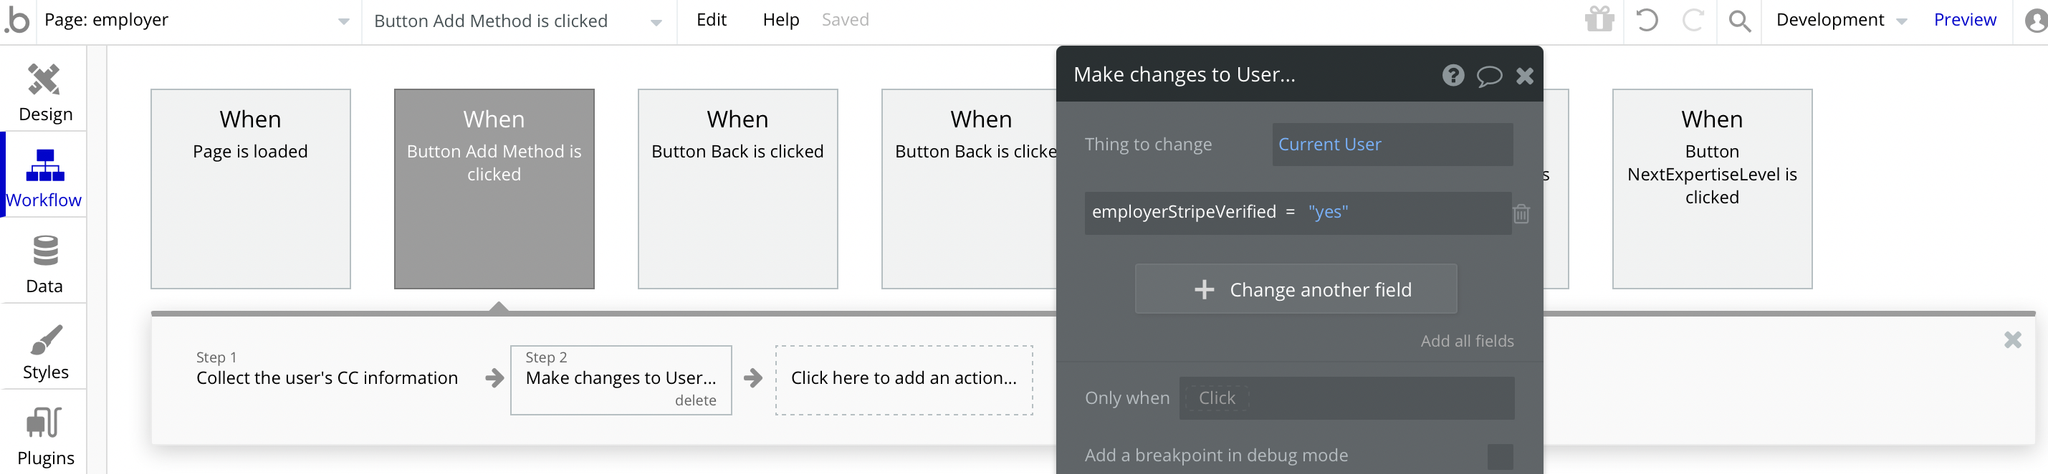
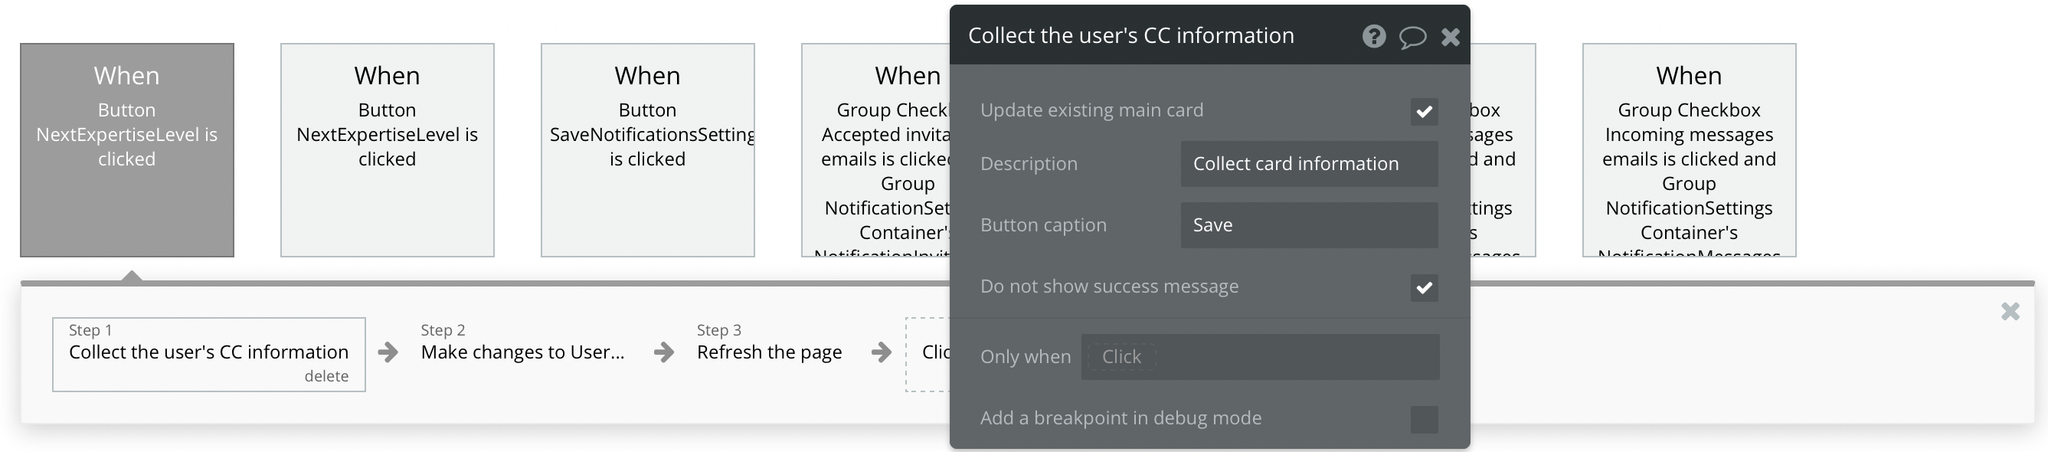
And in case you want to change the existing billing method, it can be done here:
employer-dashboard
This page was designed for employers only, with the purpose of managing projects.
Here, an employer can start creating a new project or edit an existing one, accept/decline a job offer, and pay for the project as well as complete a project or delete one.
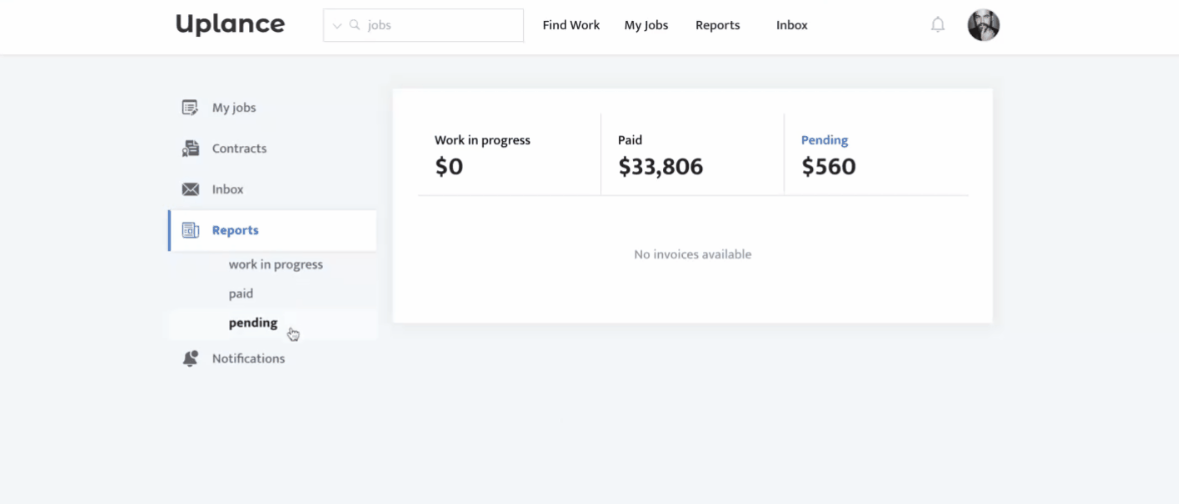
It features an Inbox 📩 for messages and chats with freelancers, a reports tab for viewing invoices, and a notifications tab.

Here is how to unhide👀the groups:
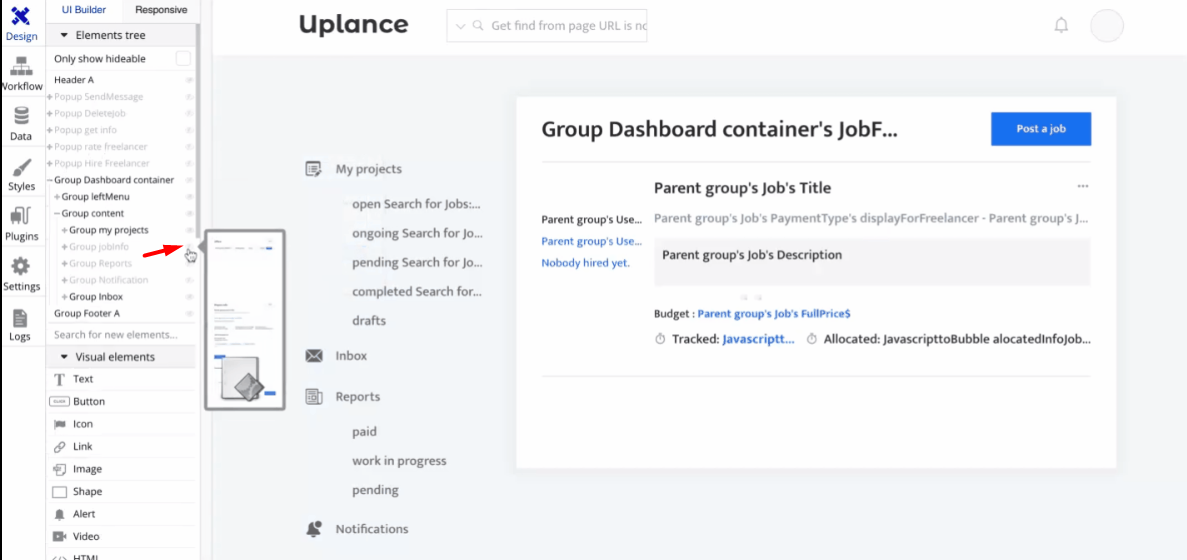
Let's say you'd like to check the workflow responsible for each section from the left menu, e.g. My Projects:
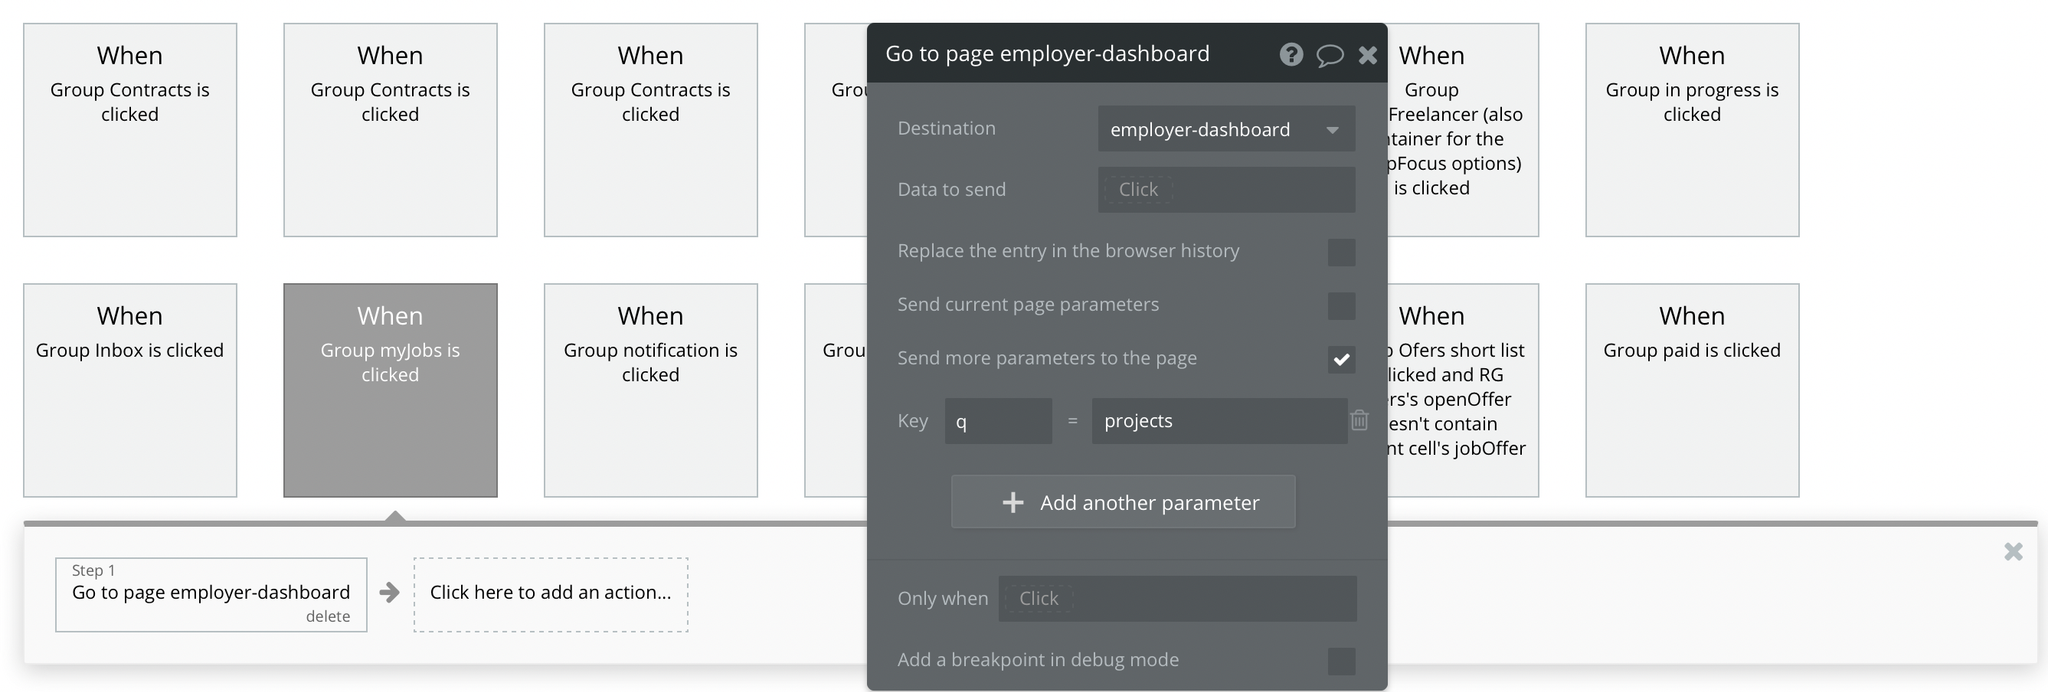
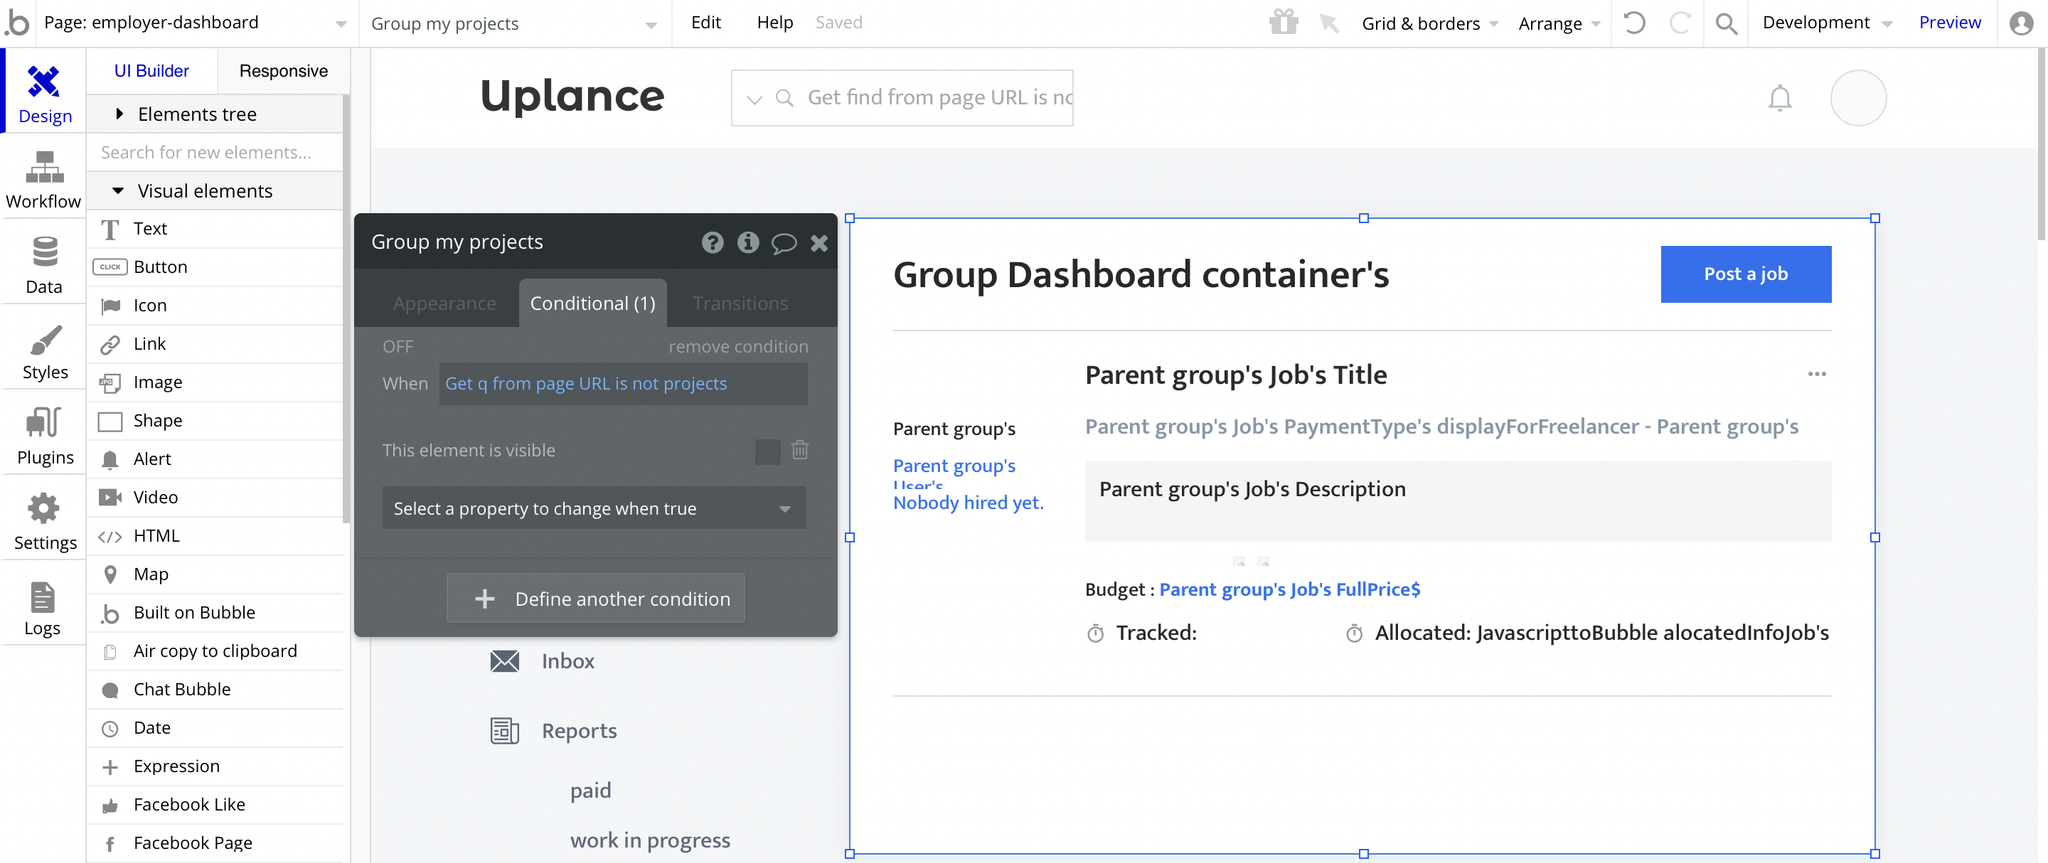
It is passing a key q with the value "projects", so it actually checks for this key in order to display the appropriate group:
find-freelancer
This page was designed mainly for employers to search for freelancers however freelancers can also visit it to check their competition.
Here, an employer can search by name or tags or use filters to find the right candidate.
An employer can send messages as well as job invitations to freelancers or just add them to a liked list. The freelancers on the other hand can do pretty much the same without the option of sending messages, invitations, and adding other freelancers to their liked list.
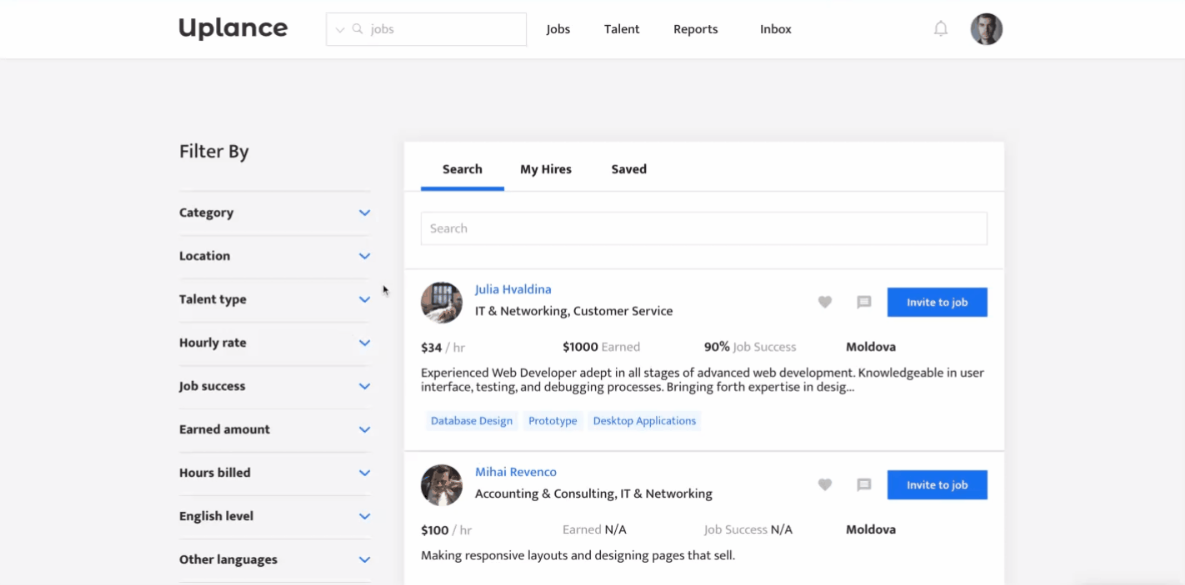
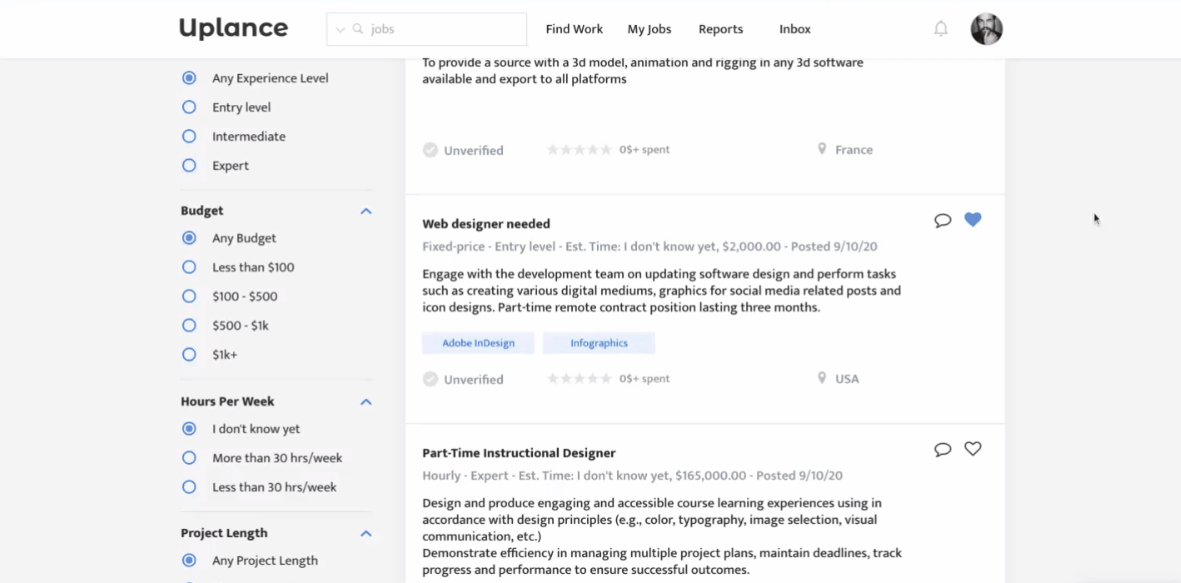
The marketplace may become so overpopulated with job candidates, that it becomes overwhelming🤯to search for.
But no worries - the Like❤feature comes to the rescue:
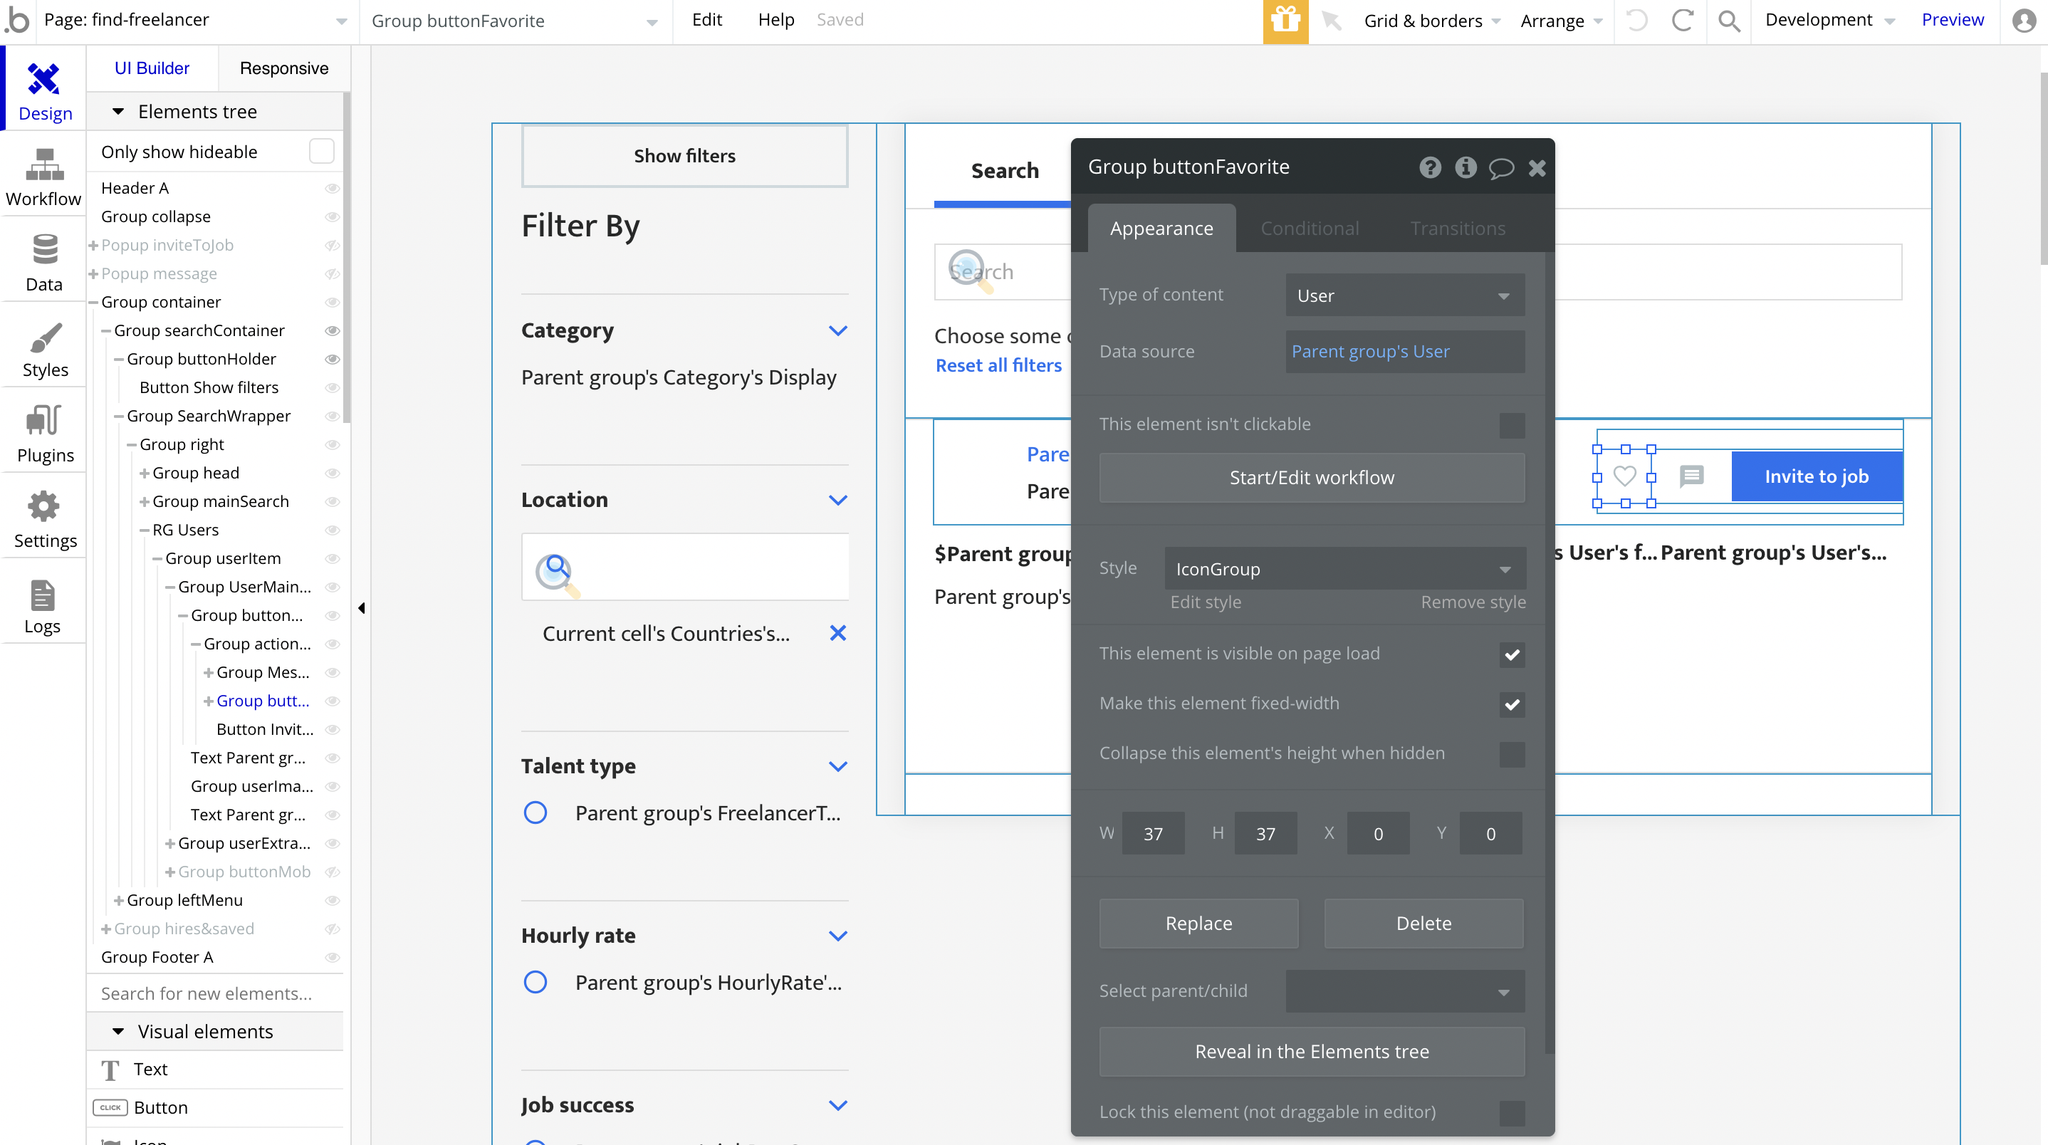
When you click on the heart-icon, and the current candidate will be added to your Saved tab. The responsible workflow can be found here:
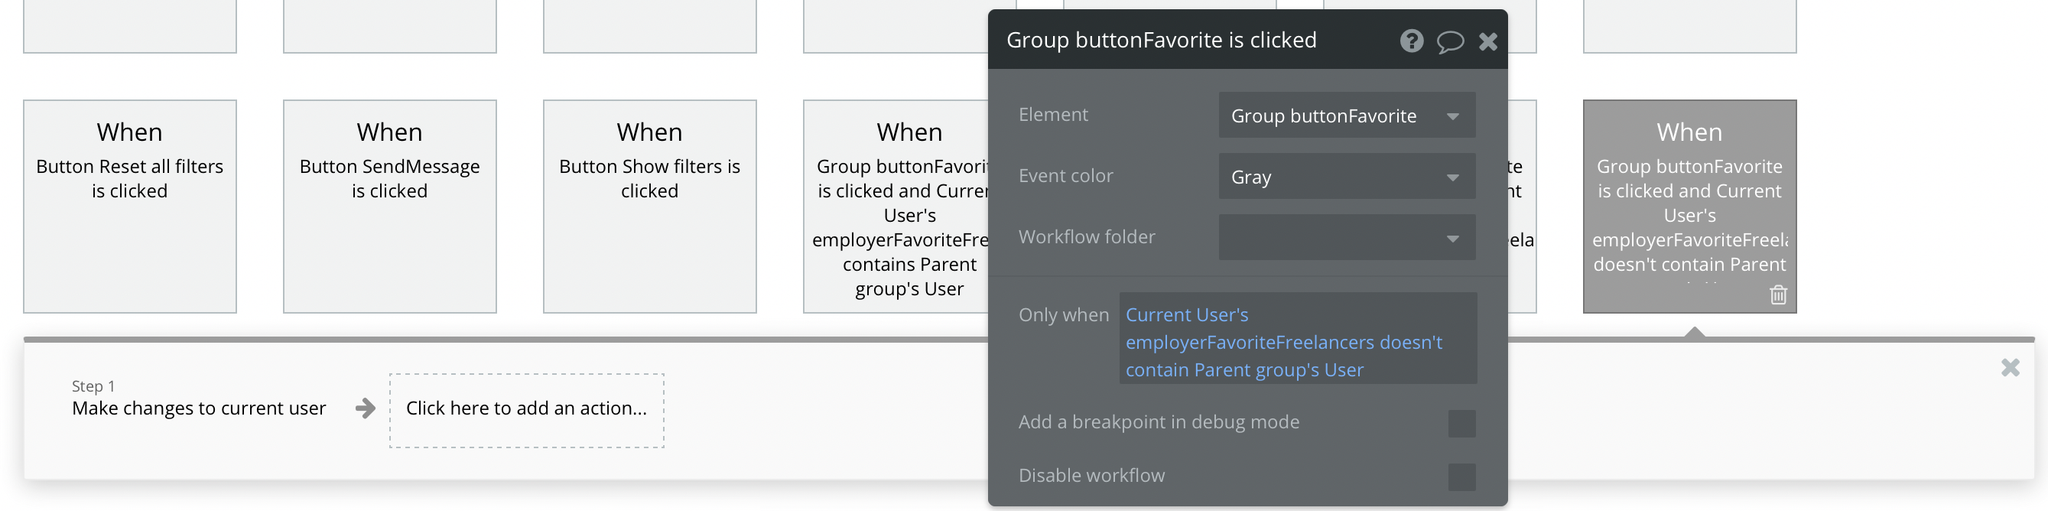
First, it checks whether or not the
employerFavoriteFreelancers list contains that User, and if it doesn't, the liked candidate will be added to the list: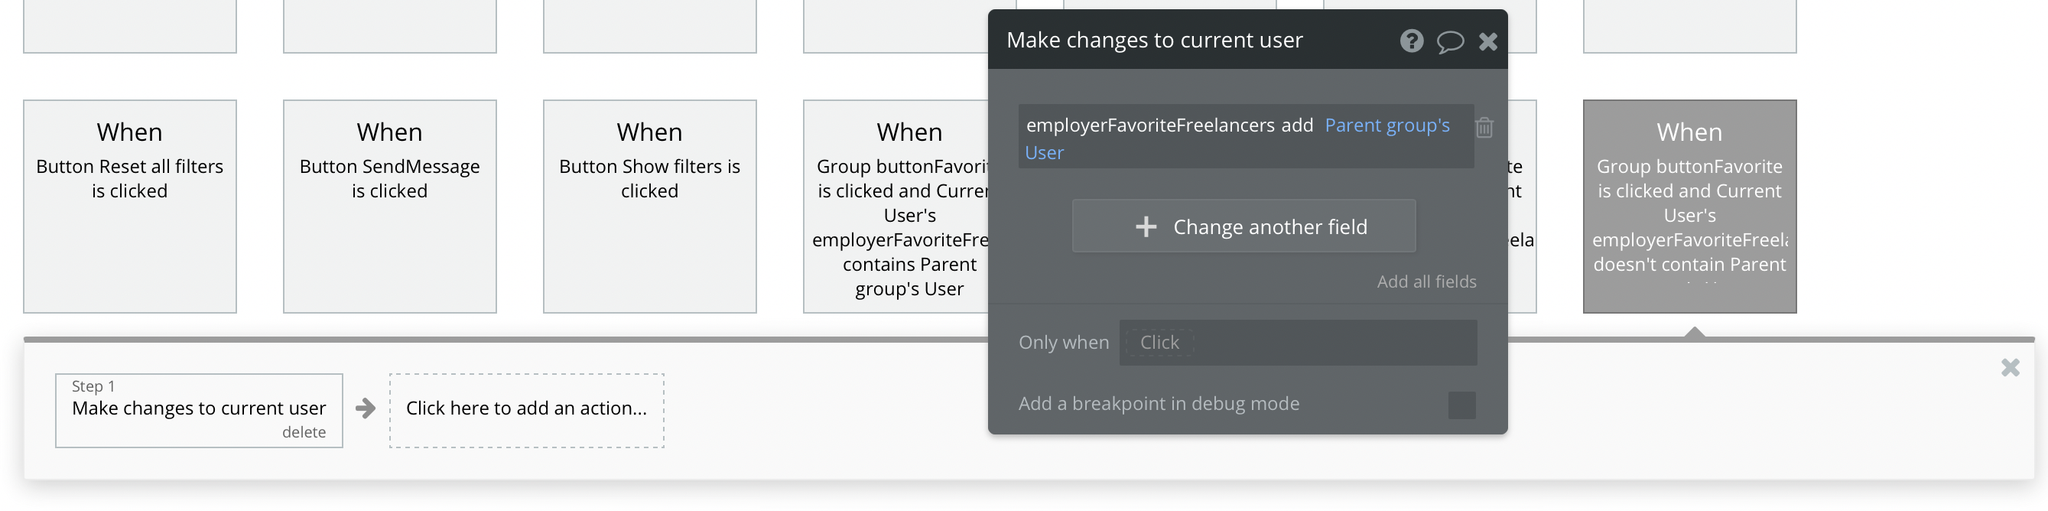
find-job
This page was designed mainly for freelancers to search for jobs. A freelancer can use filters or search by title or tags to find desired jobs.
Also, there is the option to send 💬messages to employers and add jobs to a liked list.
One of the most important features when searching for jobs by filters - reset all filters, so you don't have to remove each section manually.
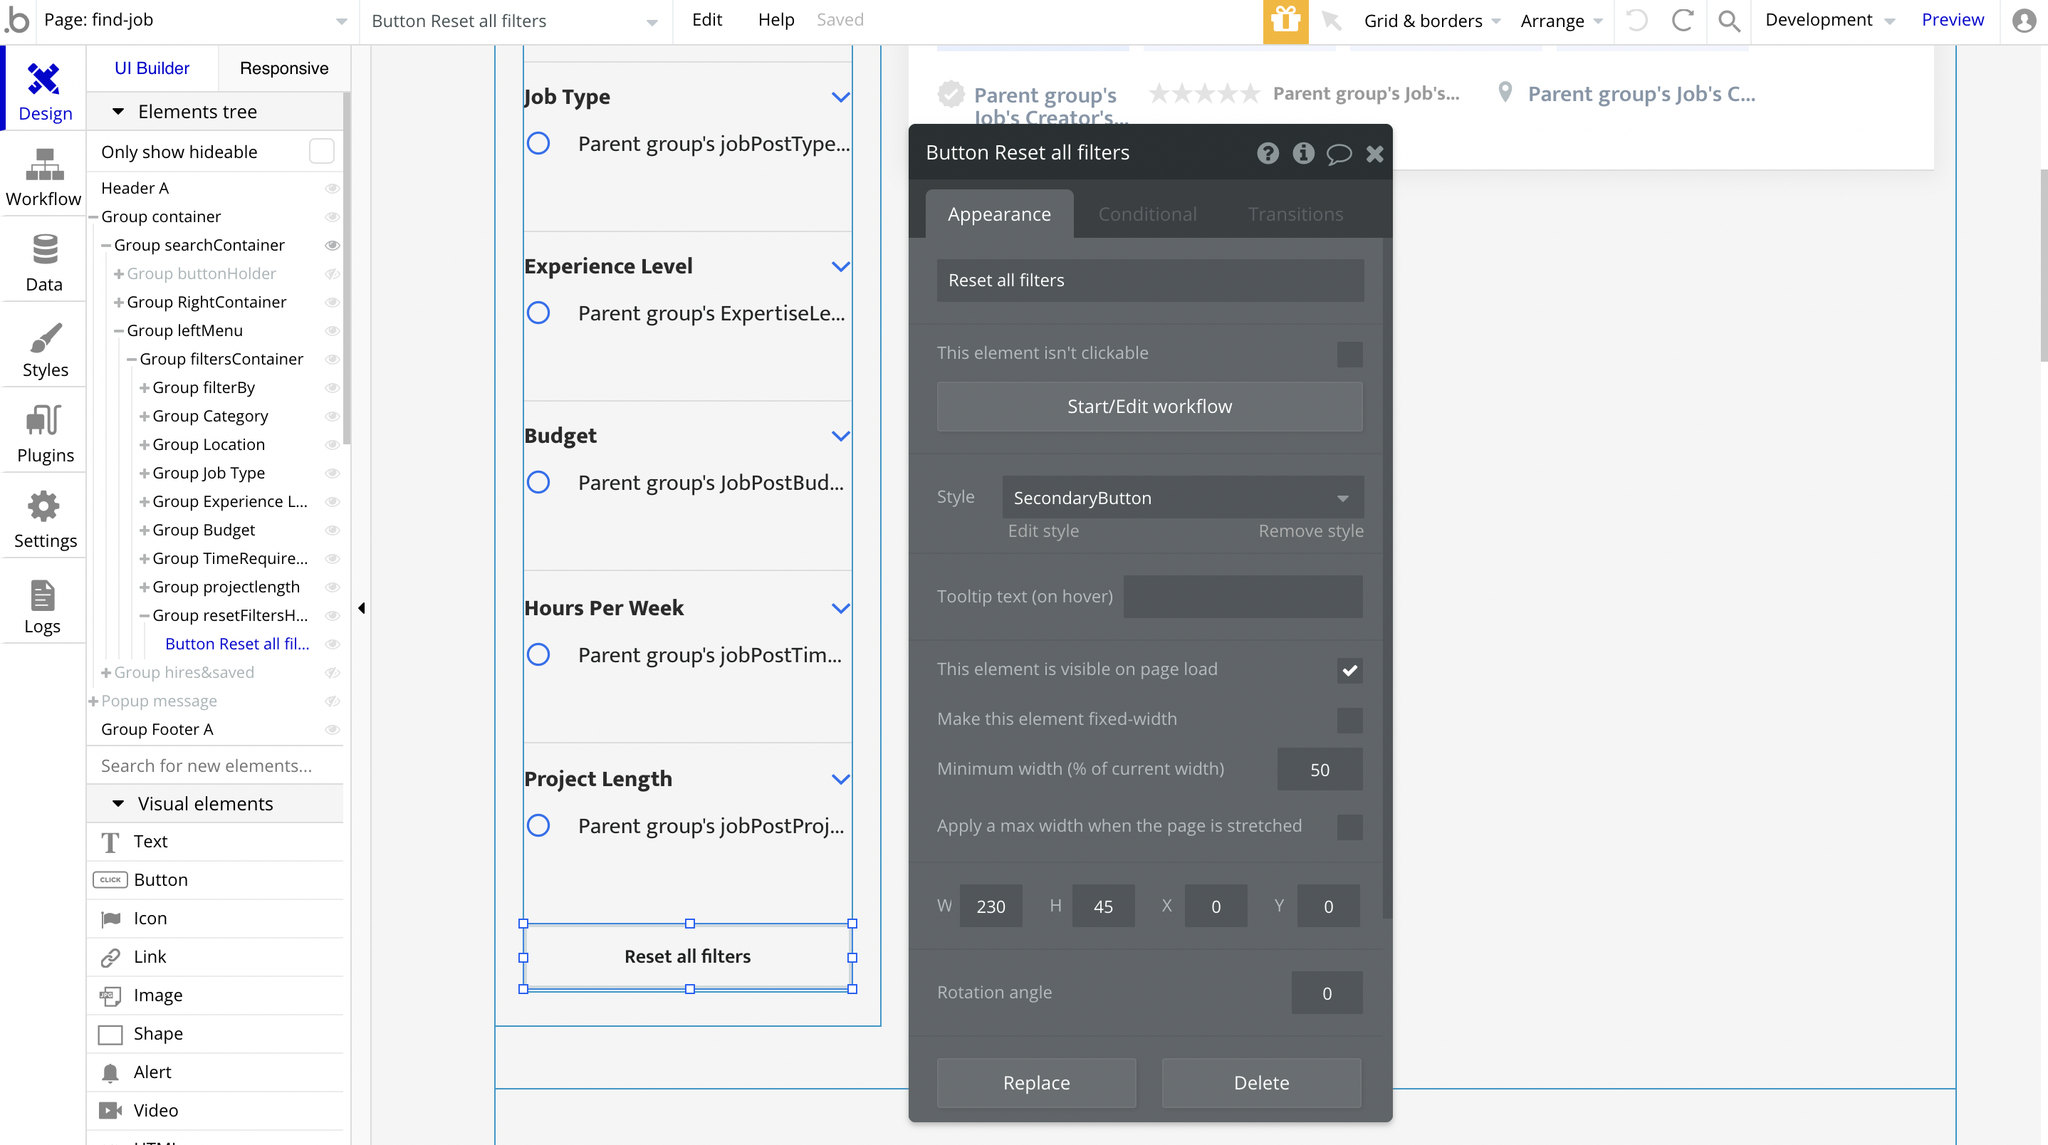
The workflow can be found here:
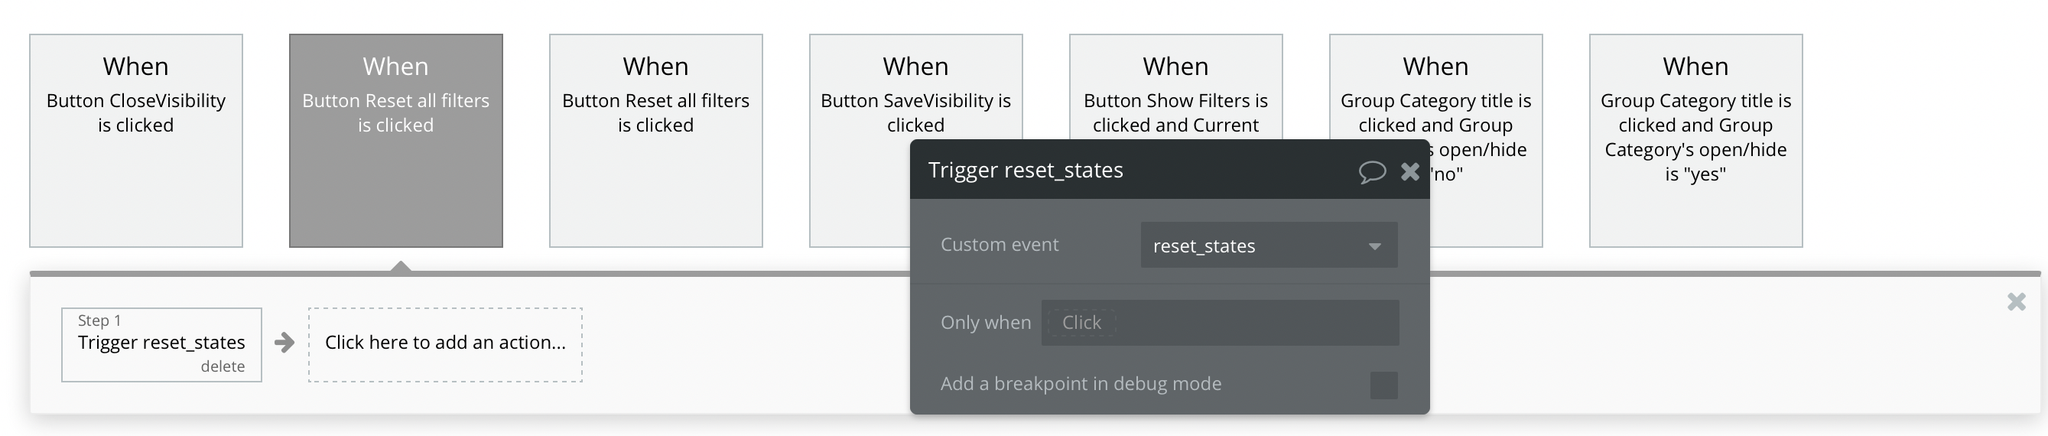
Which is triggering a custom event called reset_states:
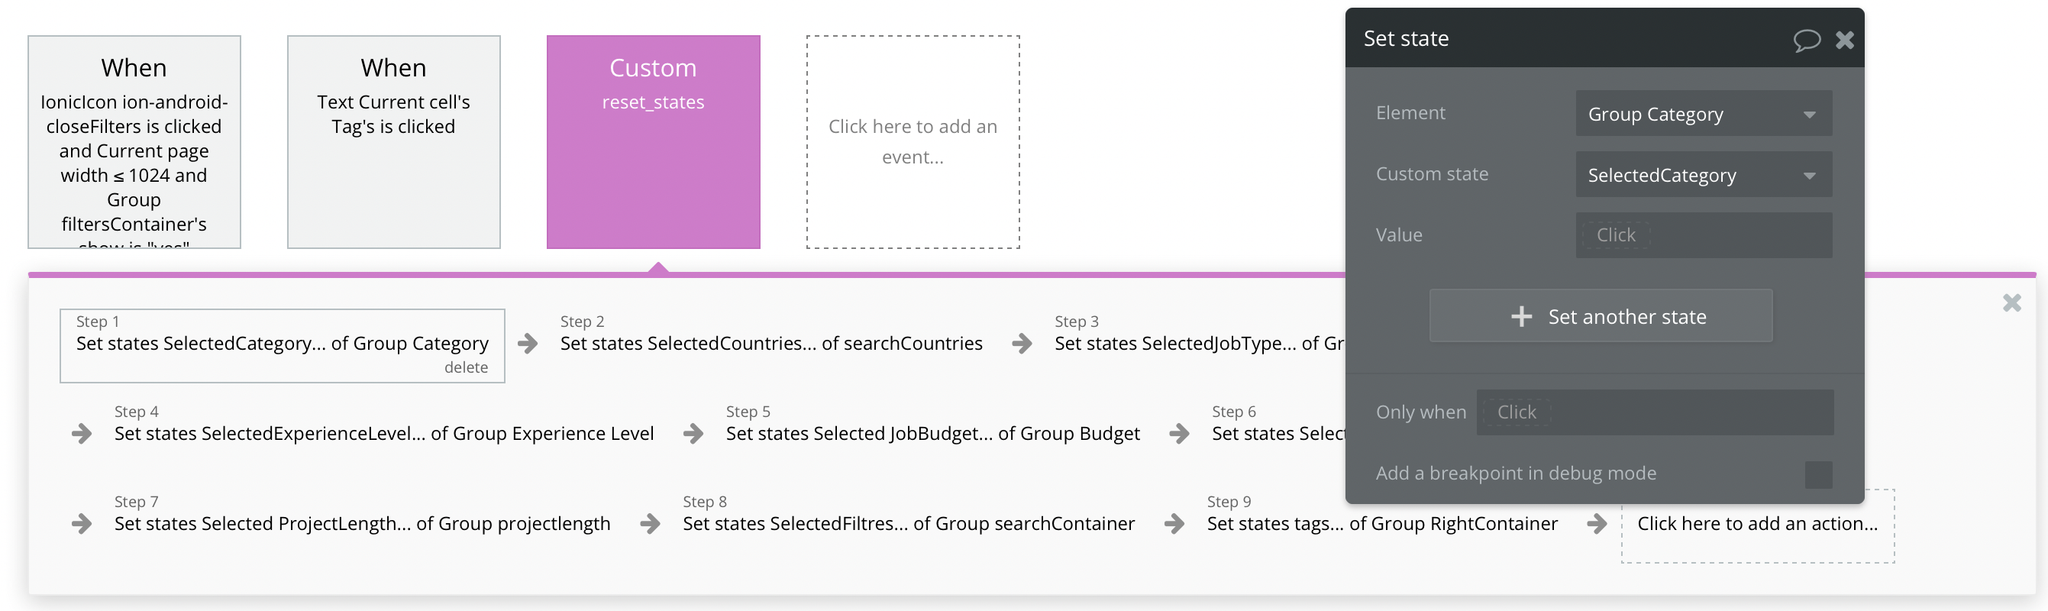
This event is running multiple actions to simply reset all the group states from each filtering section.
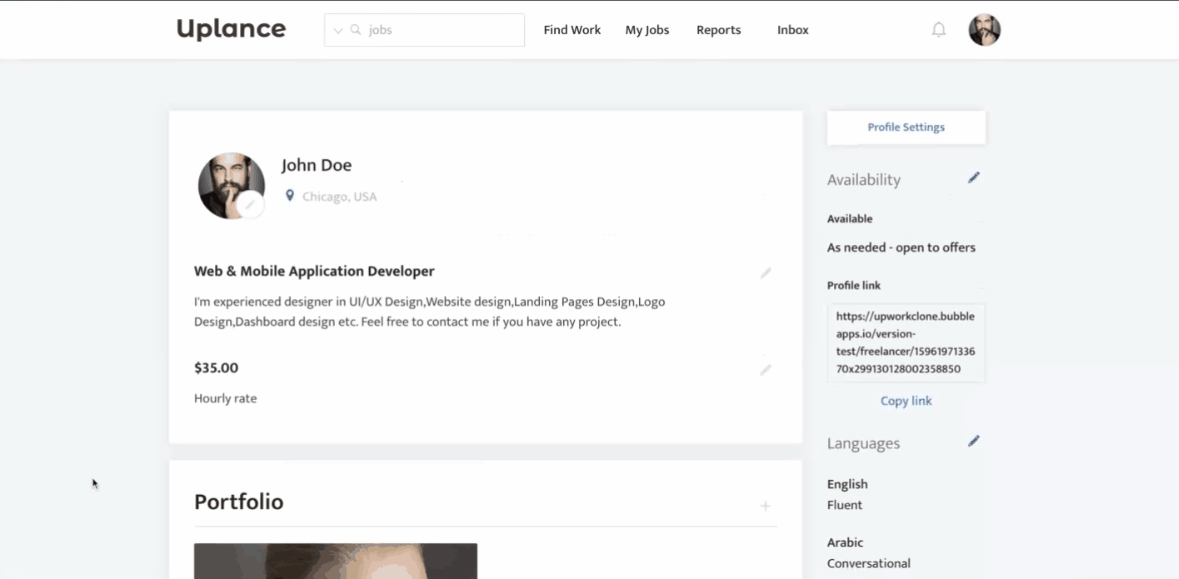
freelancer
This page was designed to display a freelancer's profile. Freelancers can also edit✏their own profiles on this page.
You can find👀the groups here:
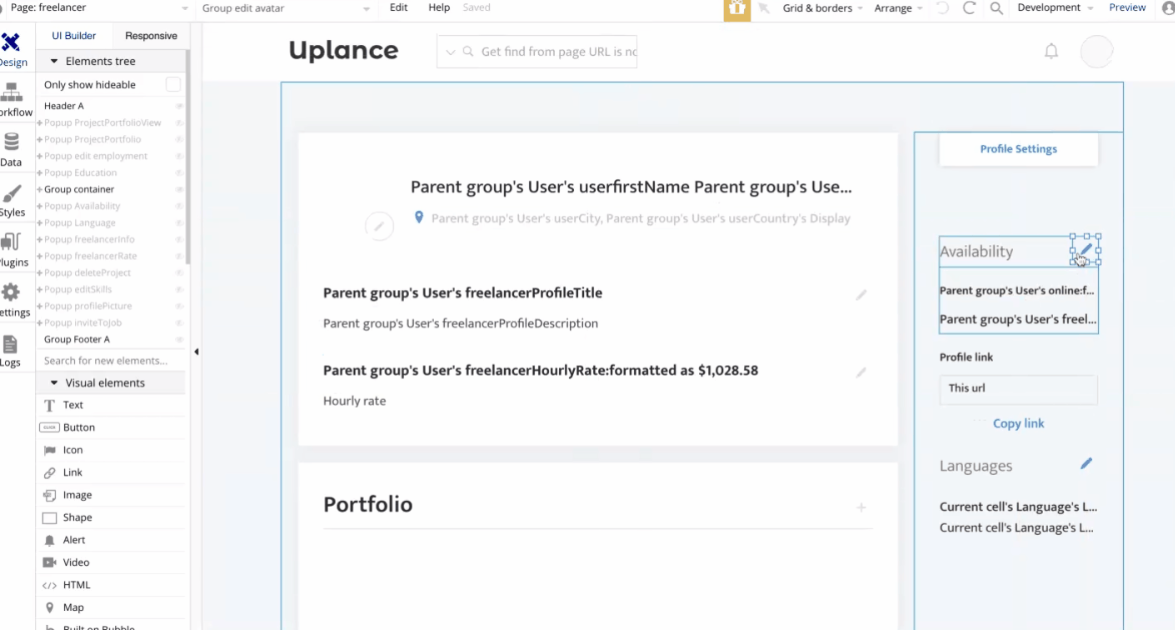
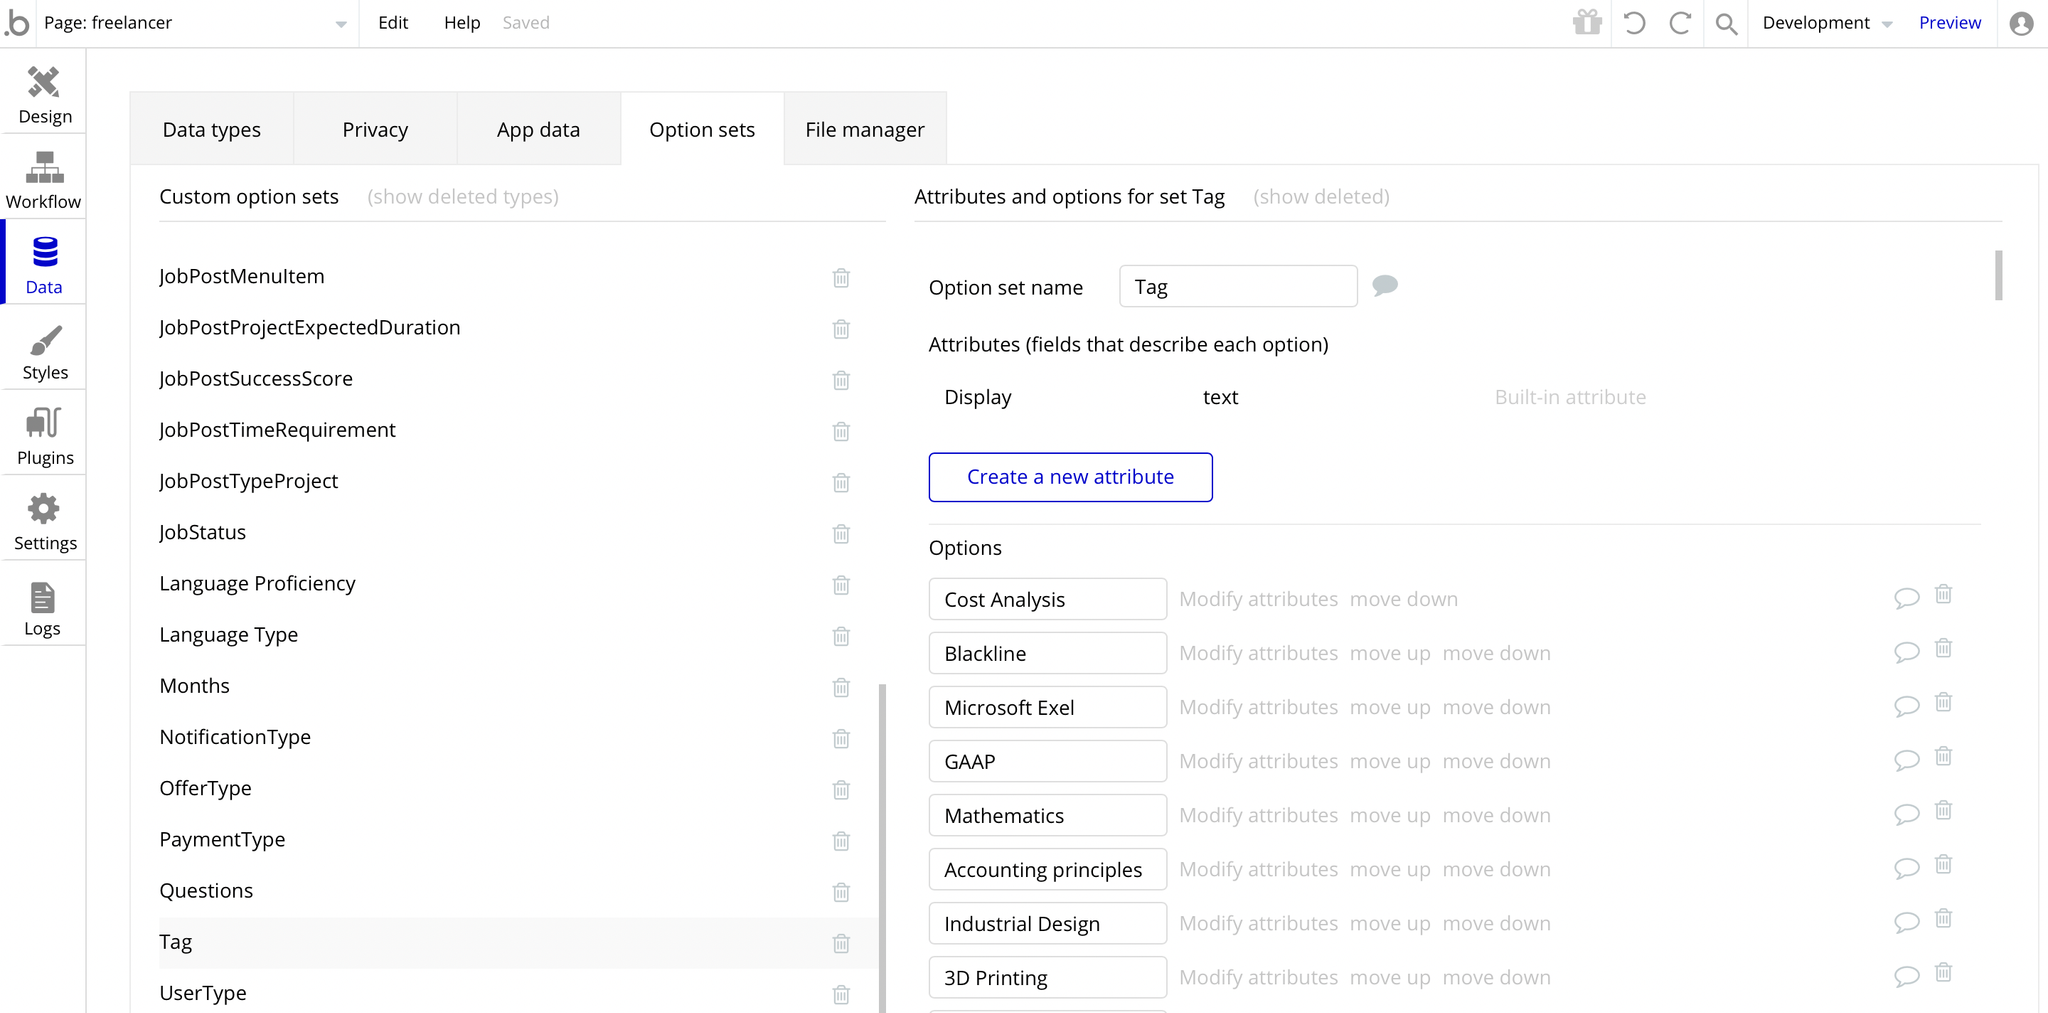
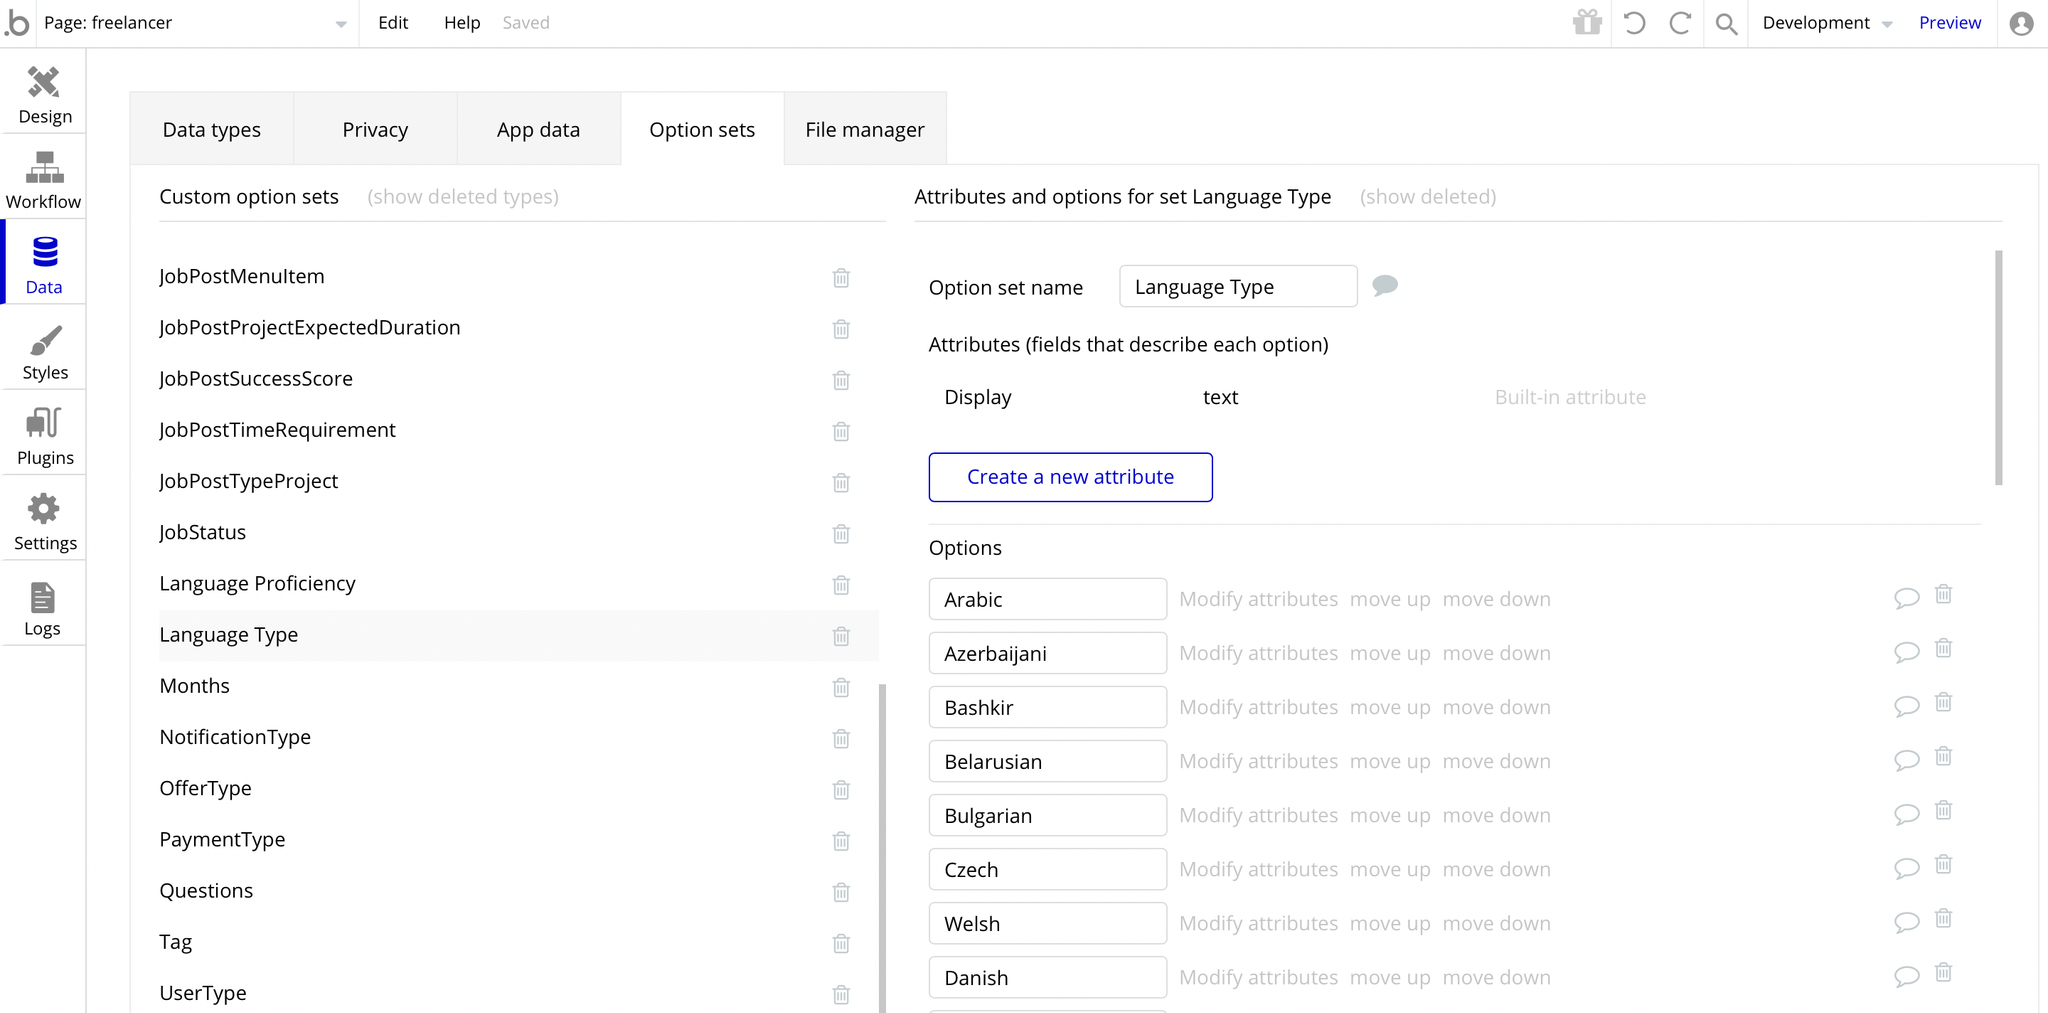
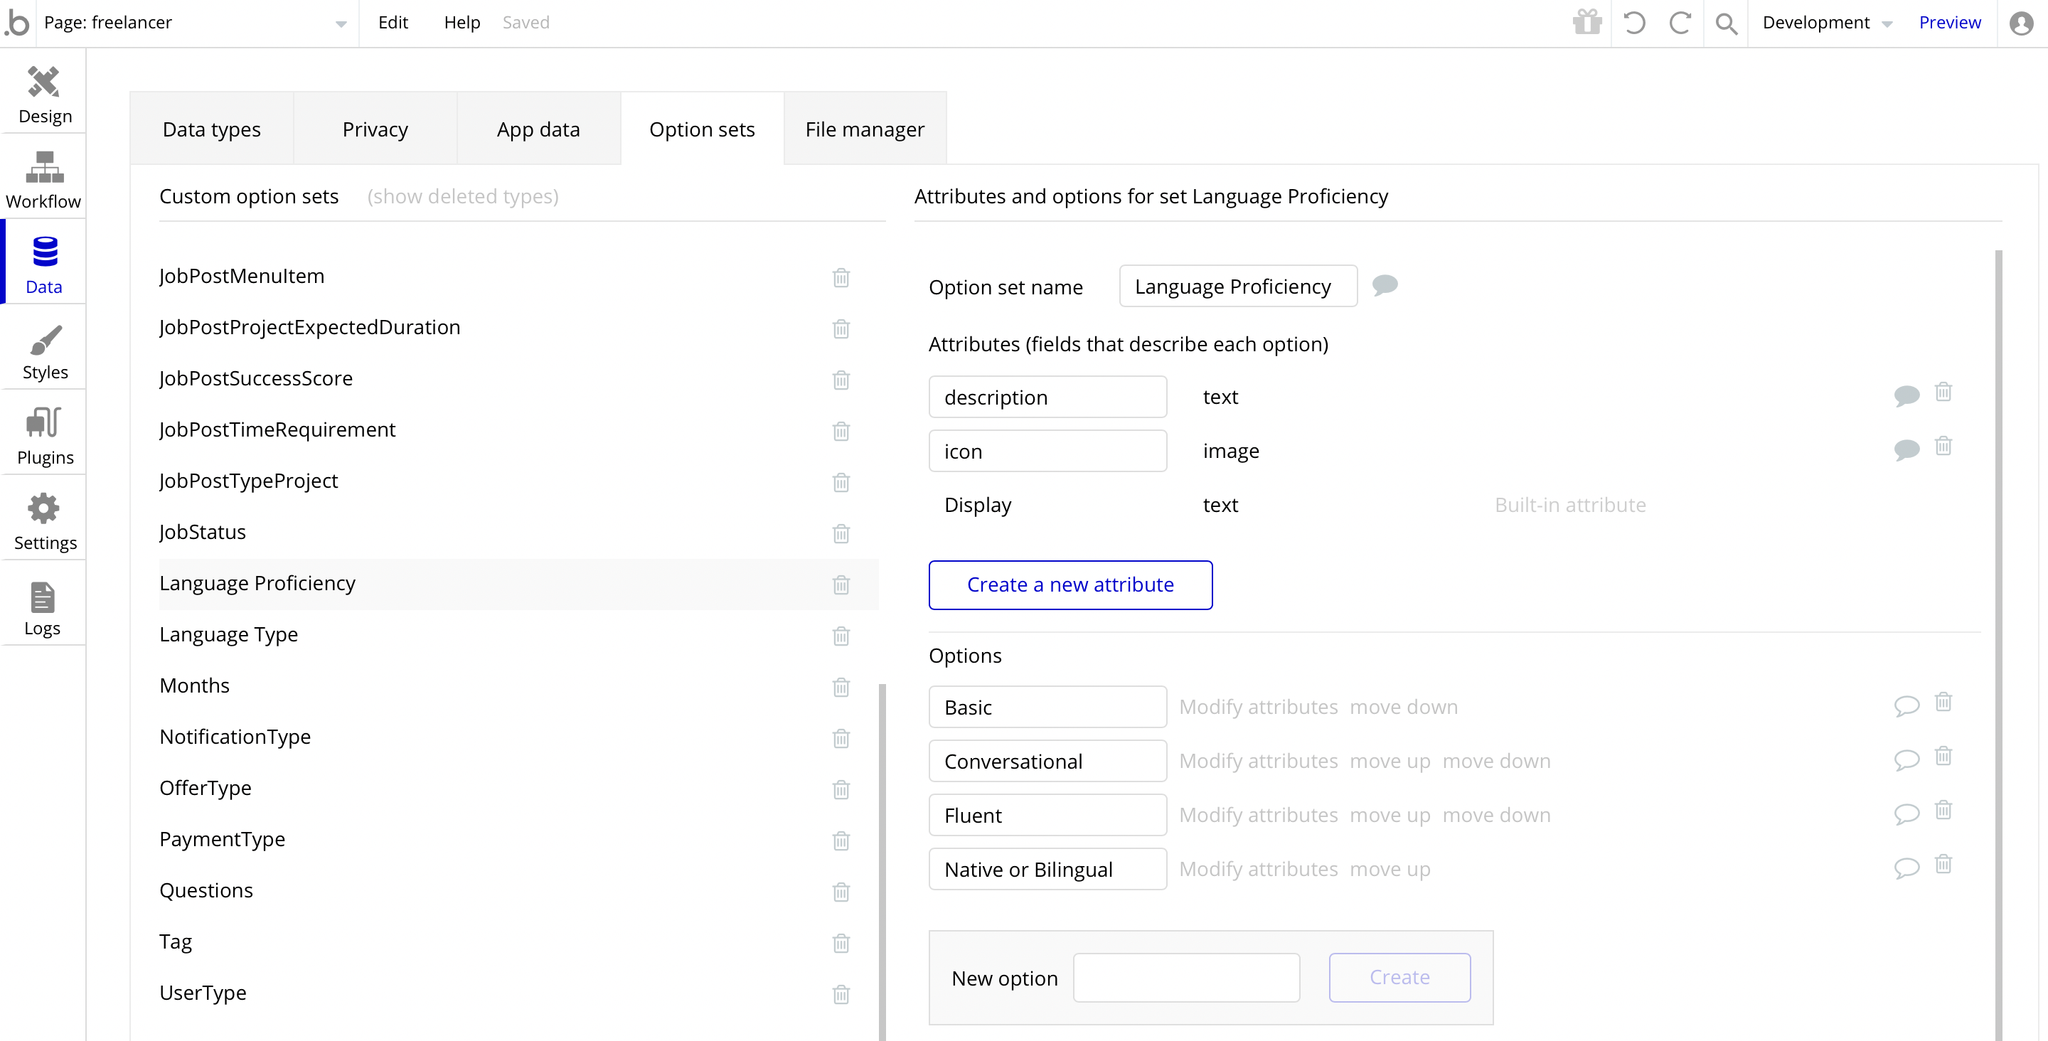
And for Languages and their proficiency, the Option sets are Language Type and Language Proficiency:
freelancer-dashboard
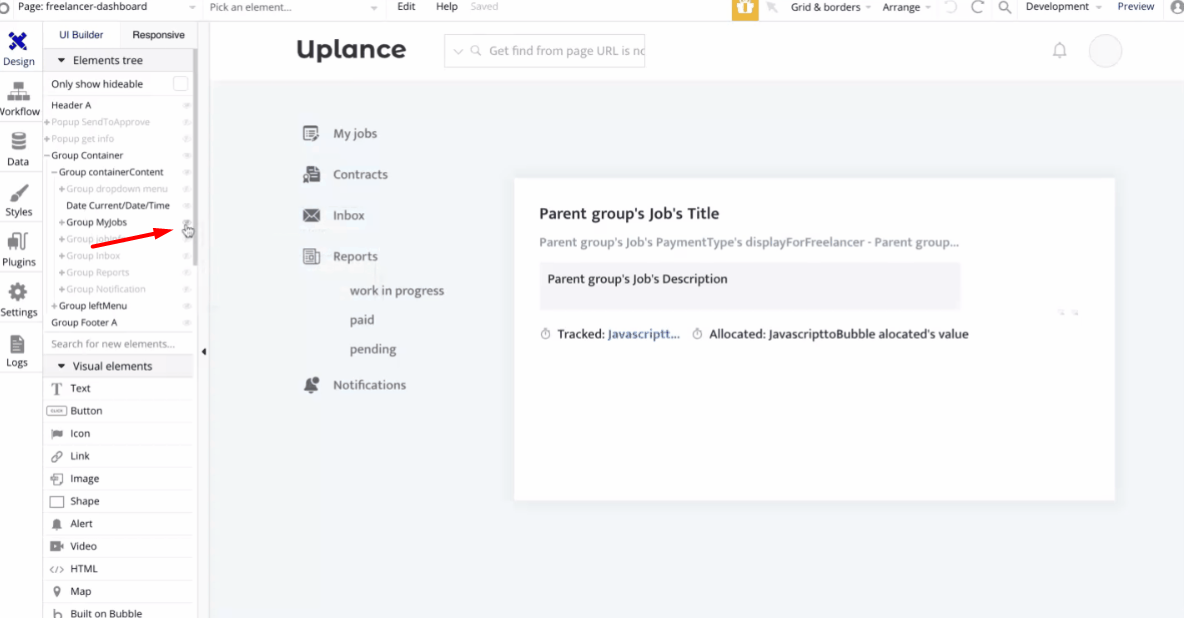
This page was designed for freelancers with the purpose of managing their jobs. The freelancer can track time while working on "by hour" payment type projects, send a project for approval when he finished the job, and view paid jobs.
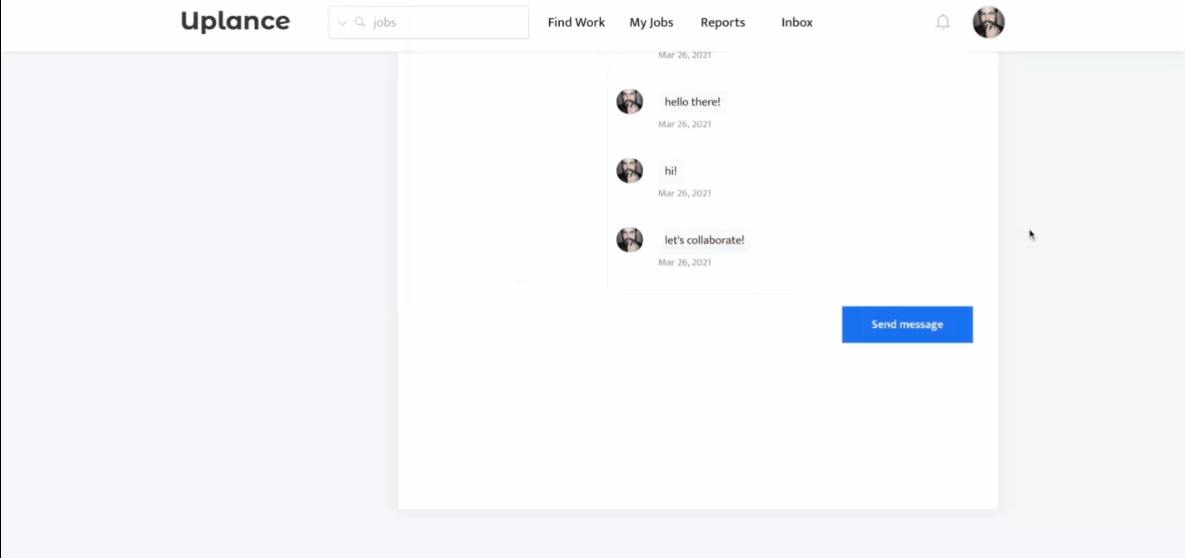
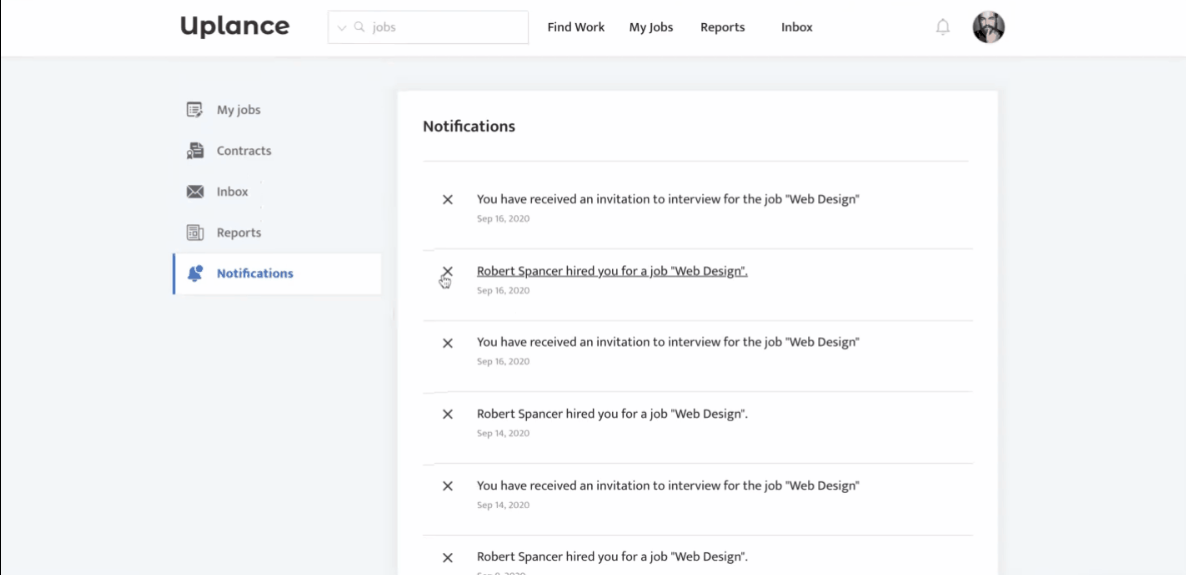
He can chat with employers via inbox or view his a = ba=b notifications.
My jobs

Contracts
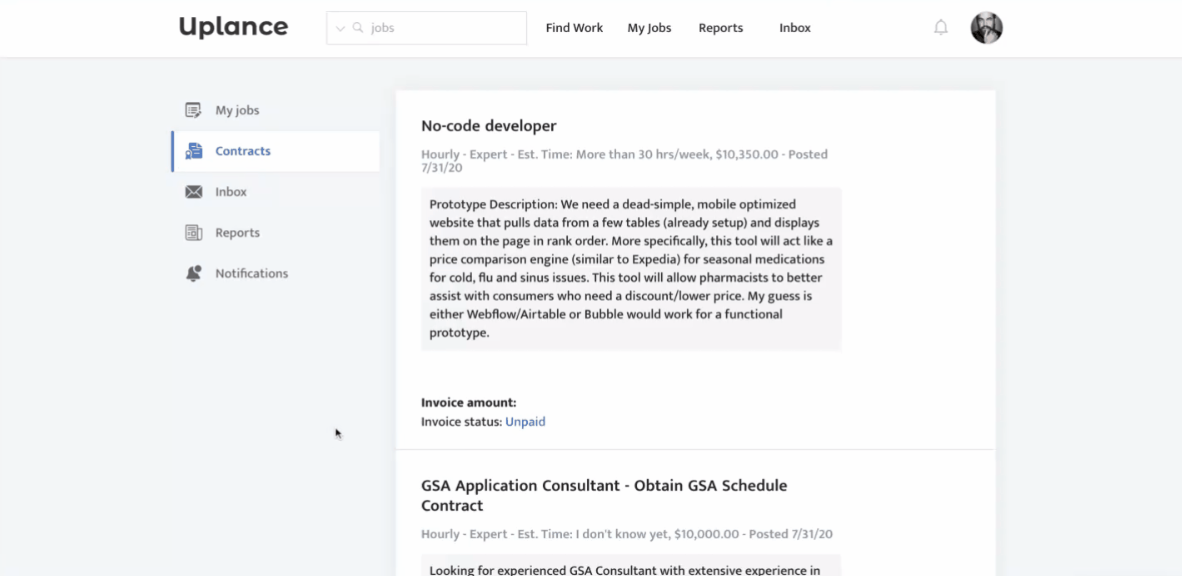
Inbox
Reports
Notifications
Here is how to unhide👀the groups:
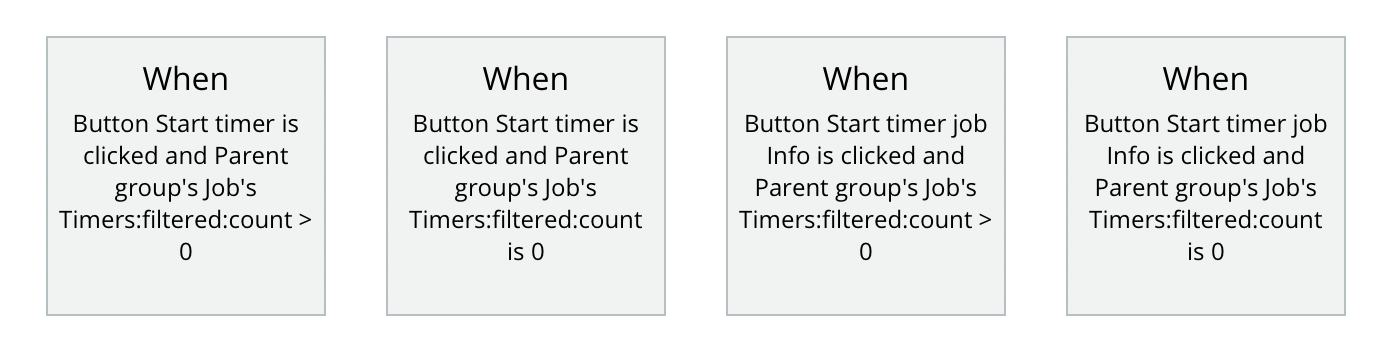
Uplance is using the Timer⏲functionality which updates in real-time even if you close the browser tab. It's workflow events and respective formulas can be found here:
freelancer-settings
This page is mainly used by freelancers to edit their personal information as well as a bridge to their freelancer-dashboard and freelancer pages.
More specifically freelancers can change there their name and location, password and email, add new working categories and tags, set their account's visibility and expertise level.
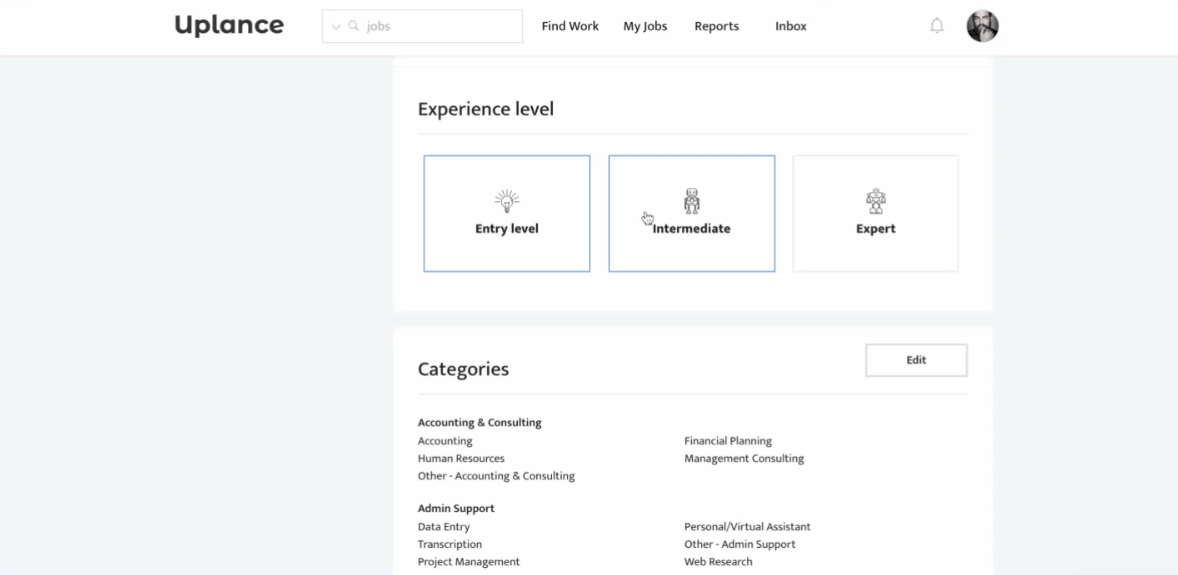
The experience level💪is a RepeatingGroup pulling data from Option set ExpertiseLevel:
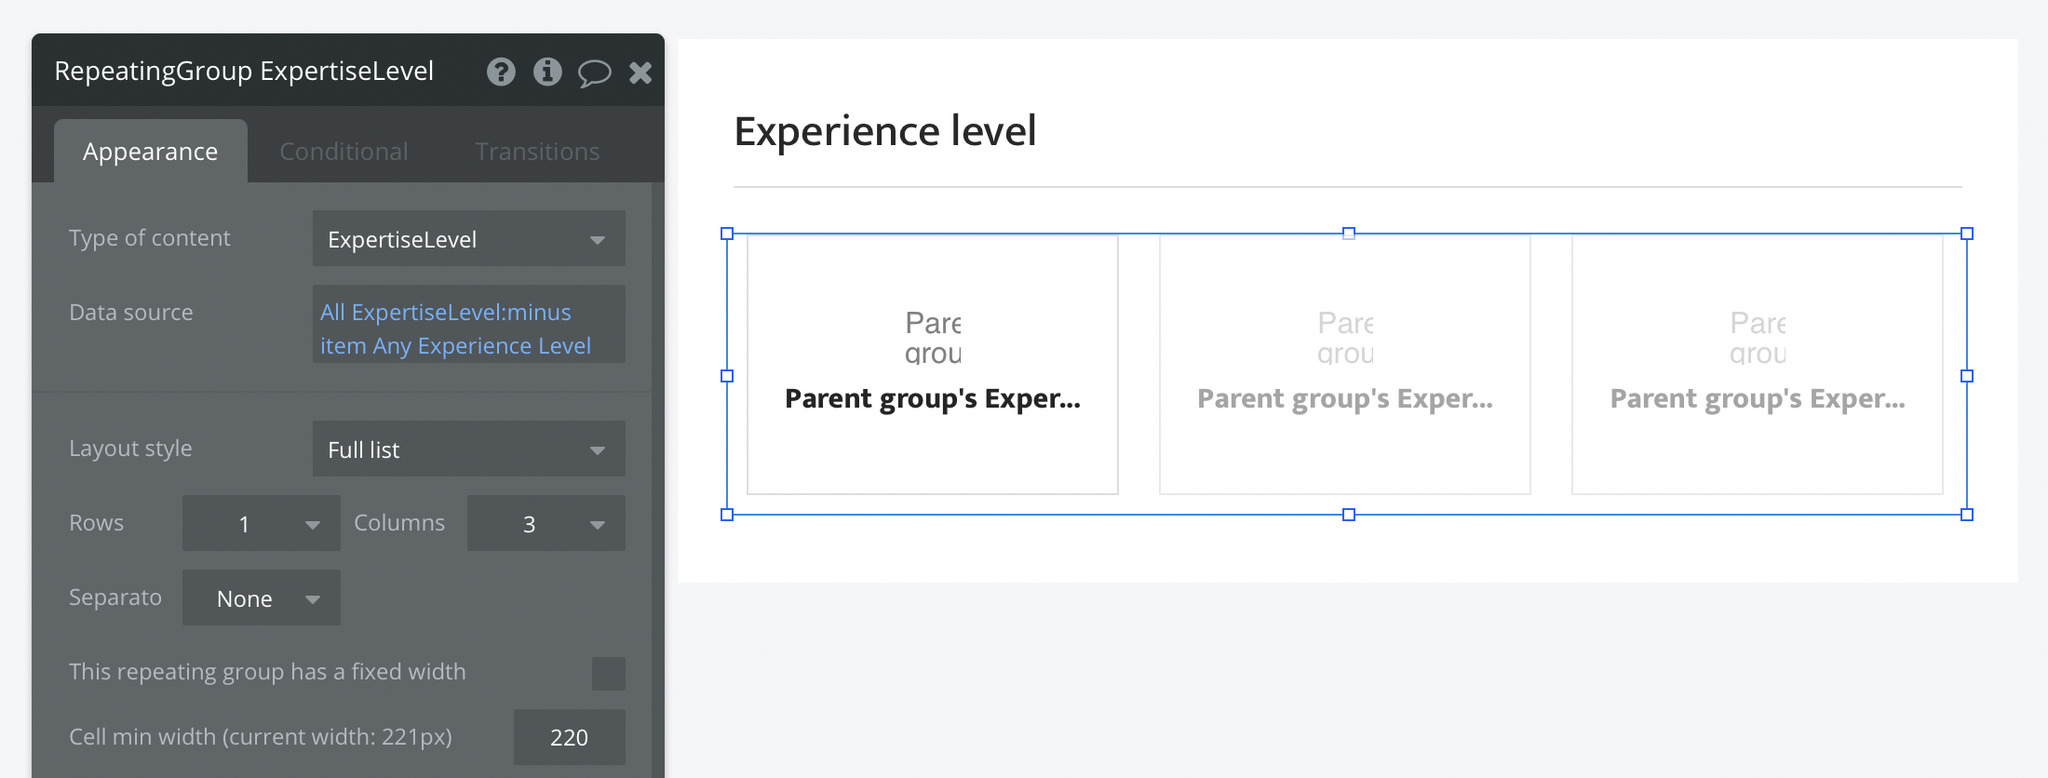
And when you click on any of the 3 items, it is making changes to your
freelancerExpertiseLevel field, with the current item that has been selected: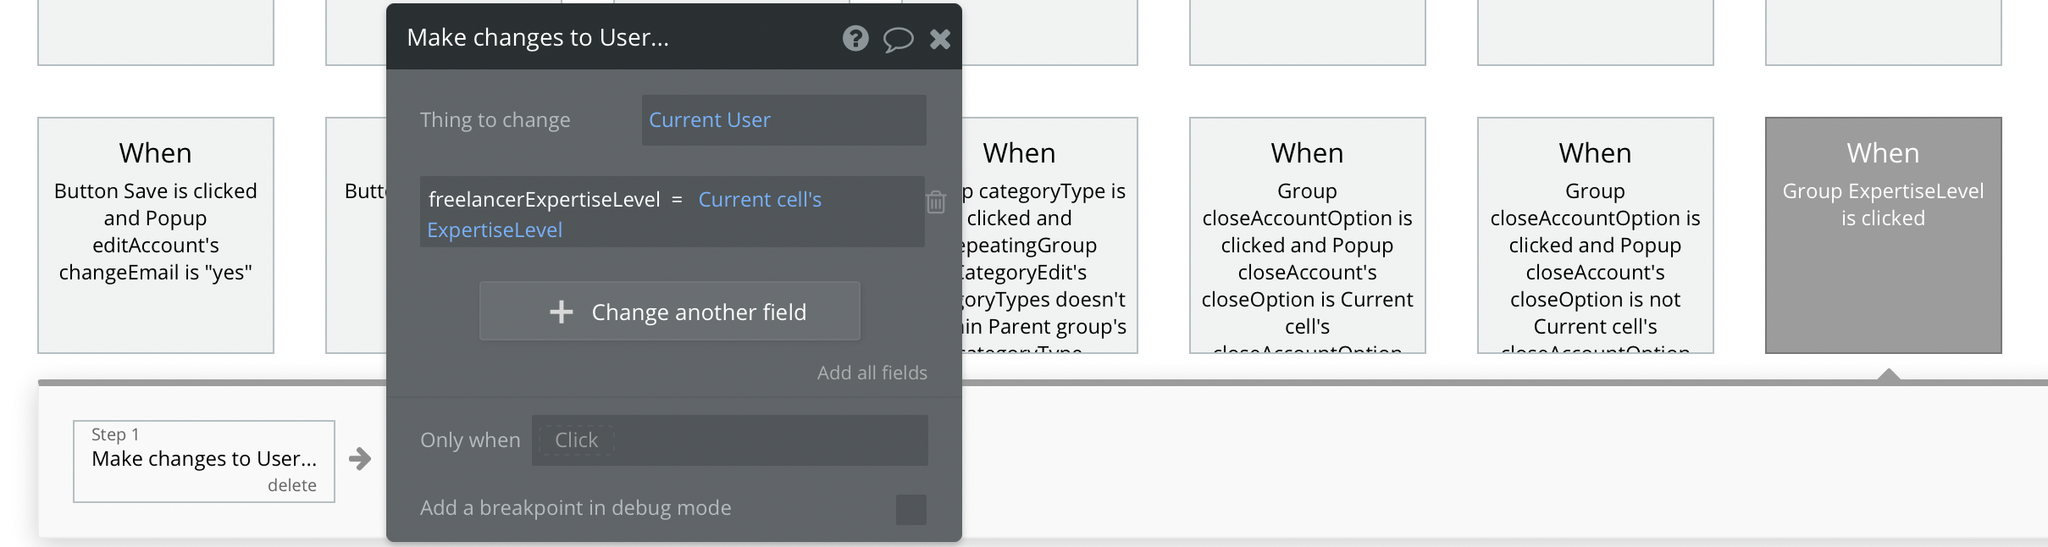
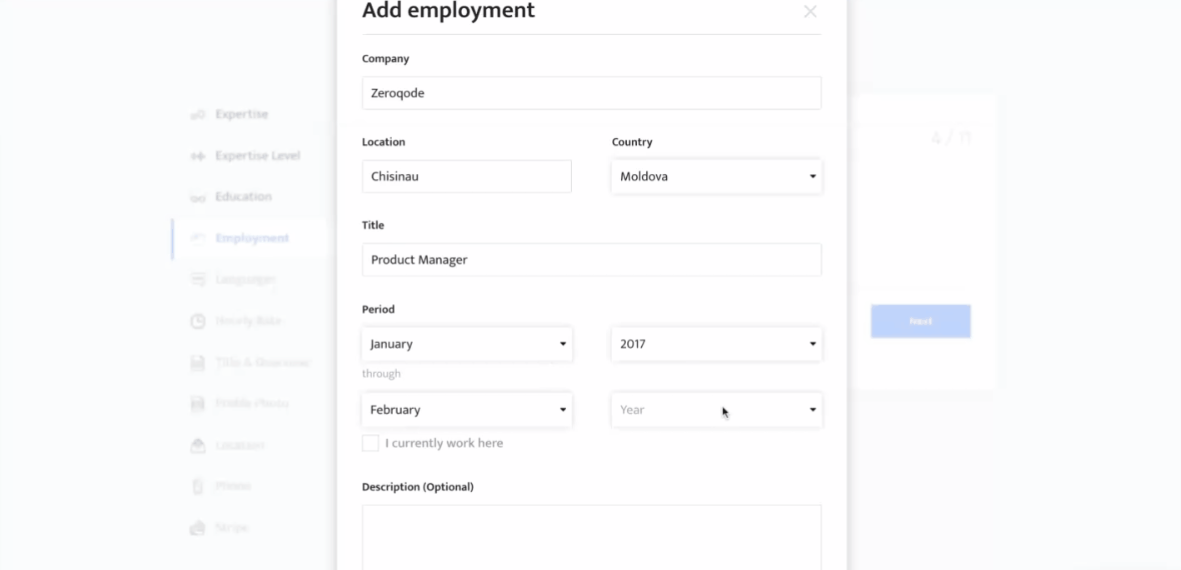
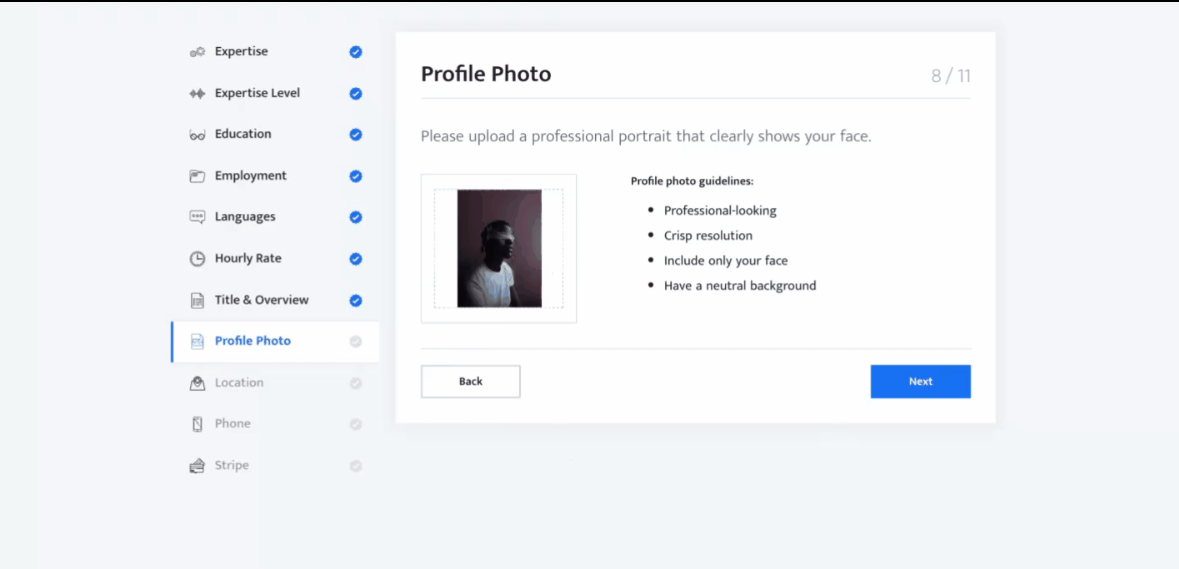
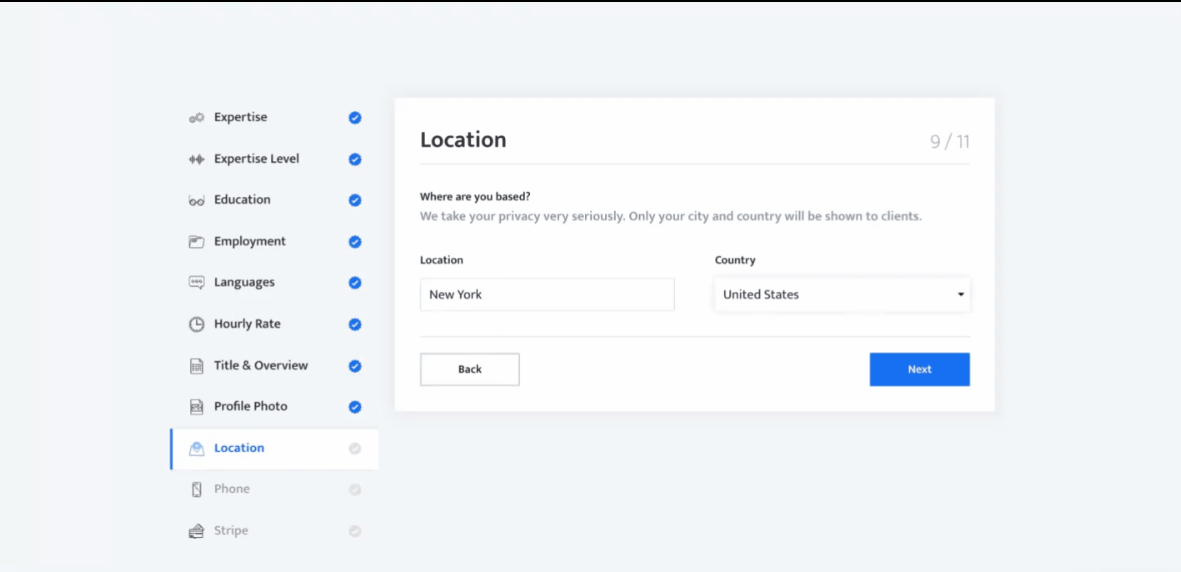
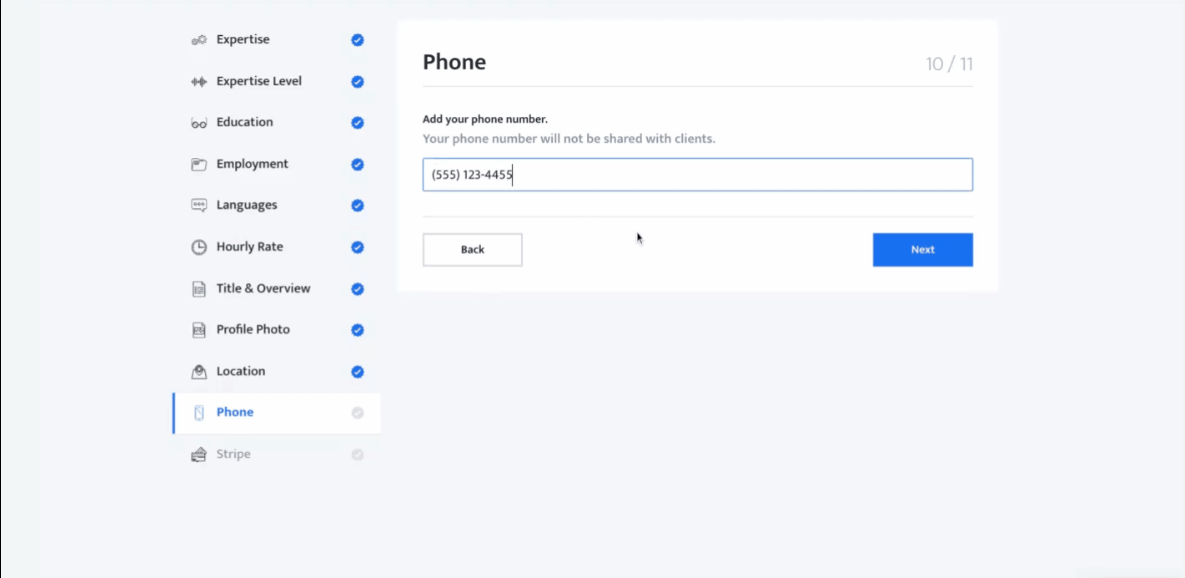
freelancer_onboarding
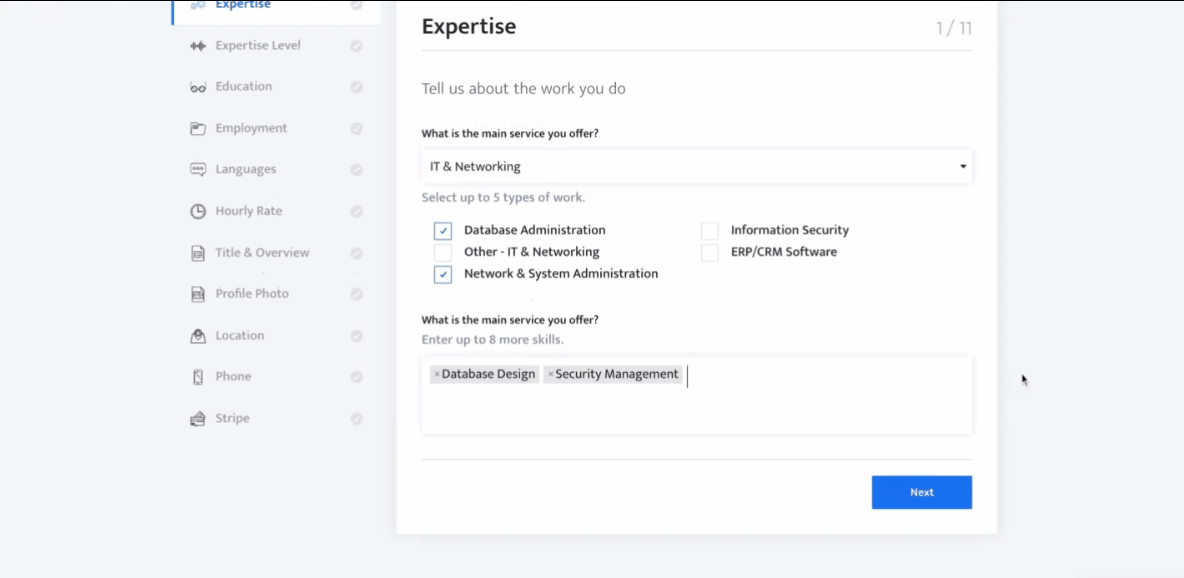
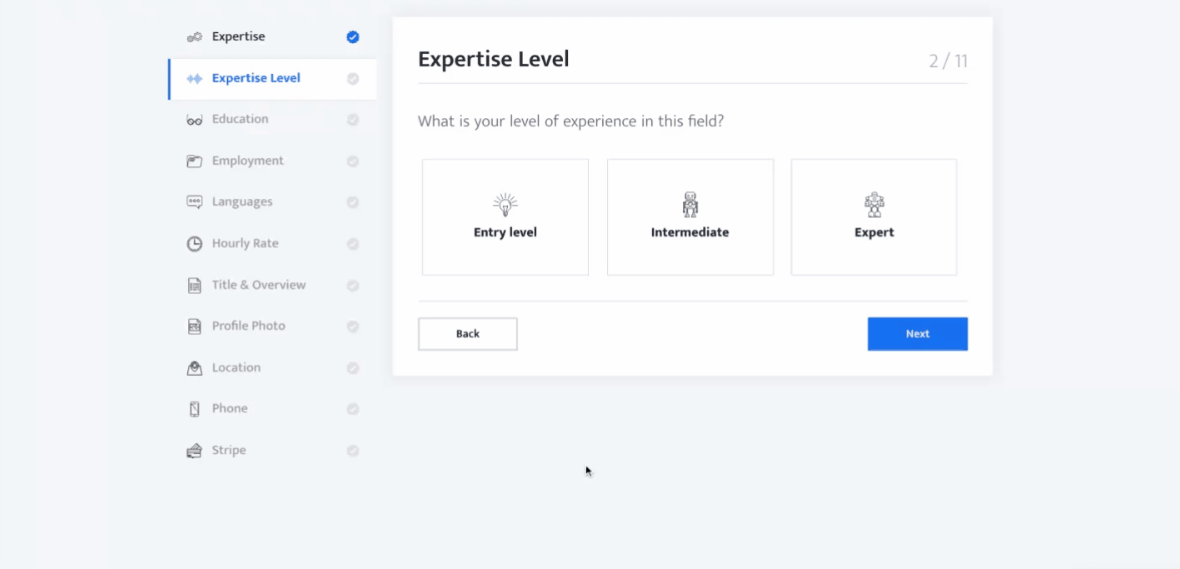
This was designed for onboarding freelancers. Here, a freelancer is asked to provide all the information that might be needed for an employer to make a decision to hire him.
Only after all the details have been submitted, the freelancer can start working on the platform.
Tip: If the freelancer didn't complete all the steps he will be prompted to resume where he has left until all the details are submitted.
⚙ Expertise
Expertise Level
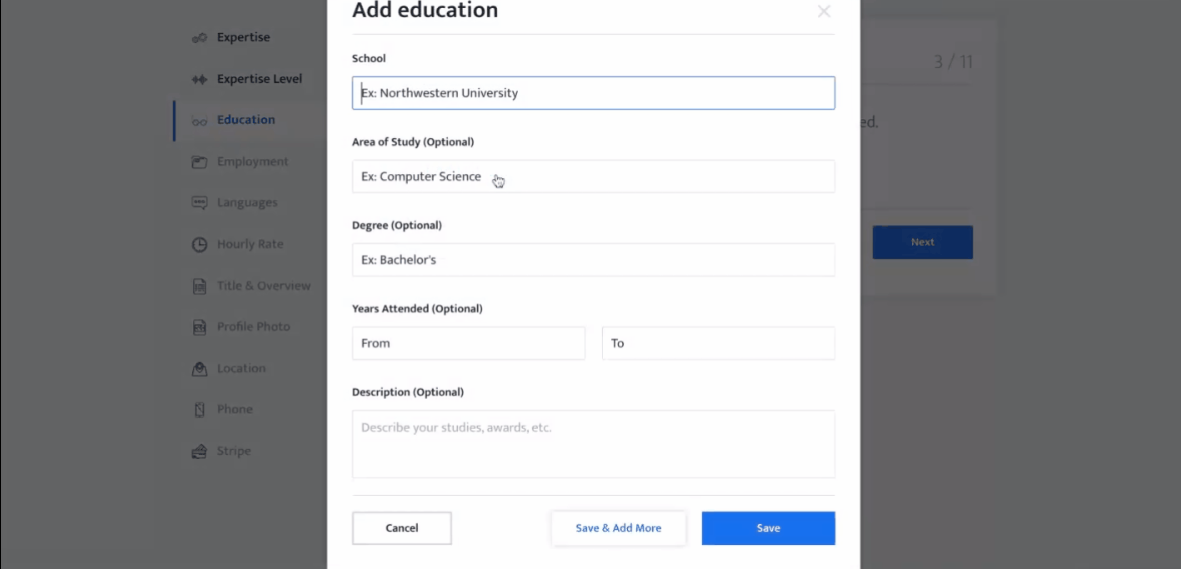
🎓 Education
Employment
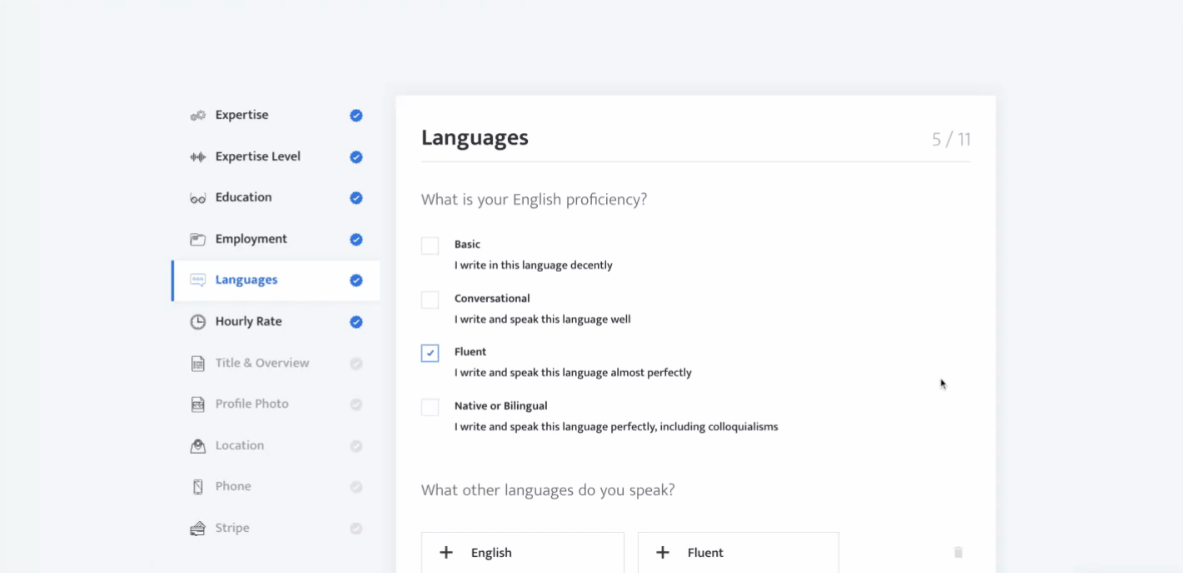
Languages
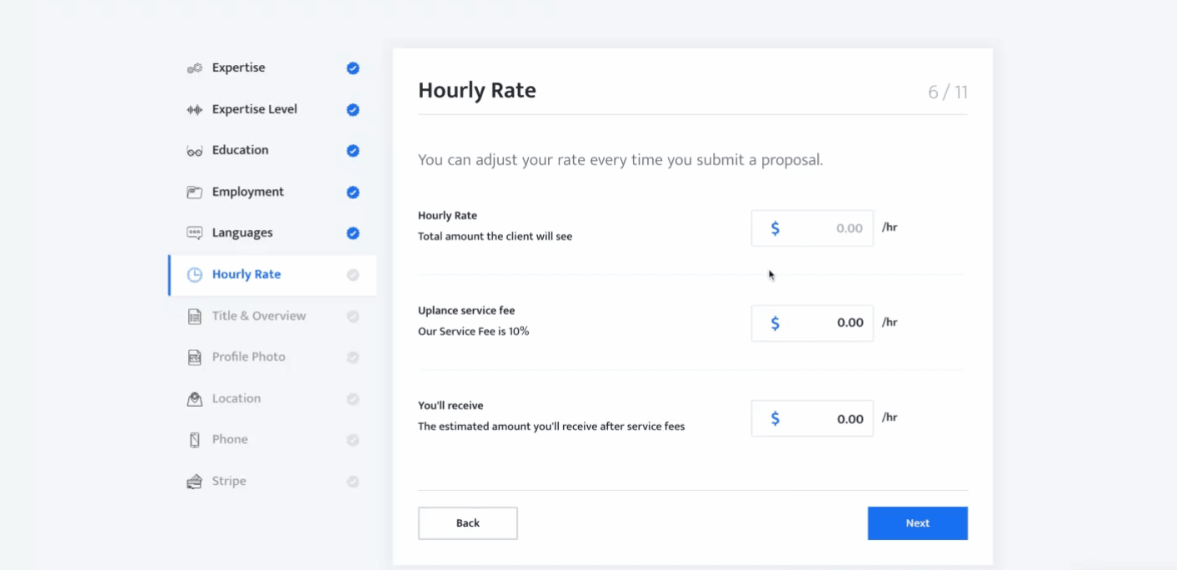
Hourly Rate
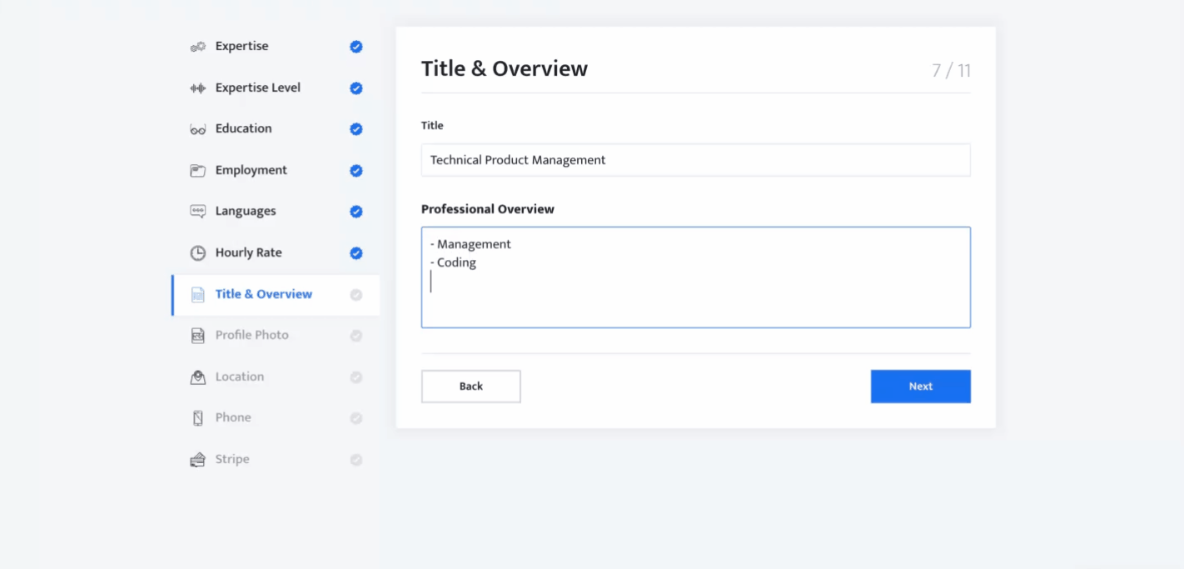
Title & Overview
Profile Photo
Location
Phone
Stripe
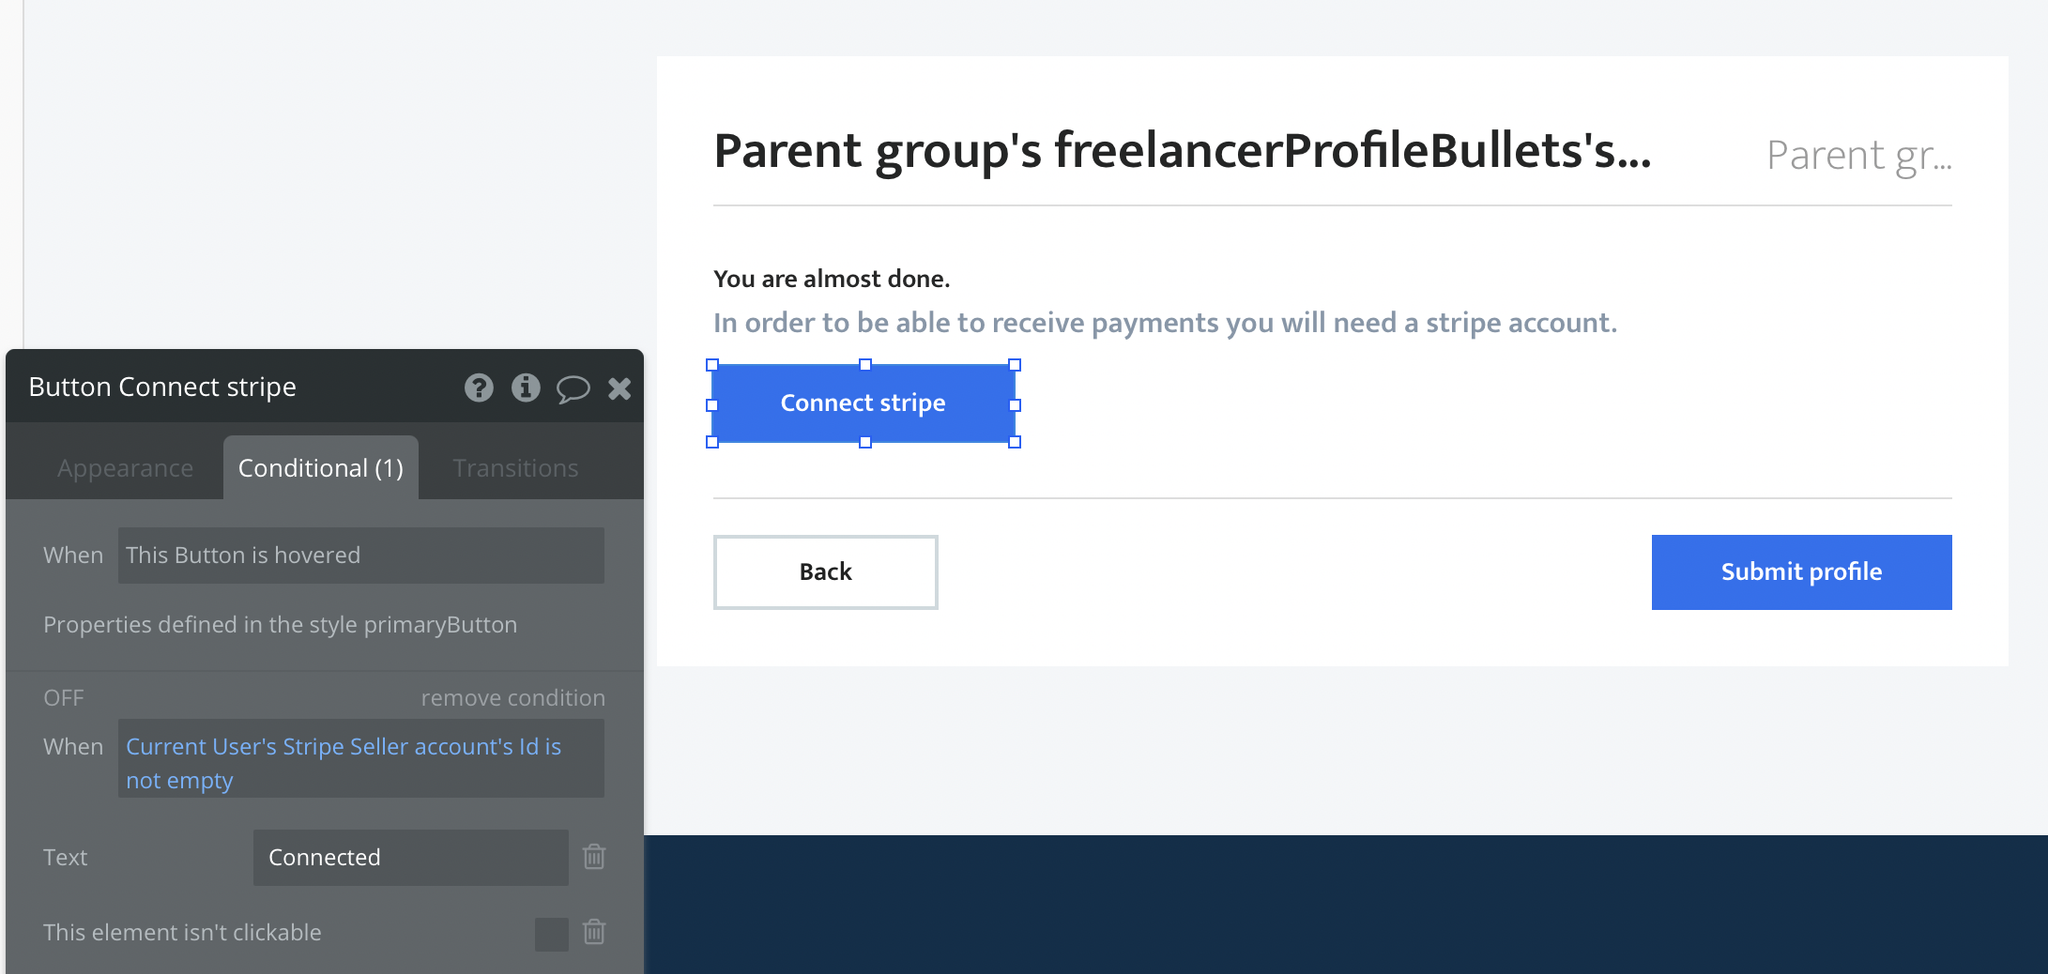
This is the "Connect stripe" button, if you'd like to check the Stripe workflows for registering a seller account:
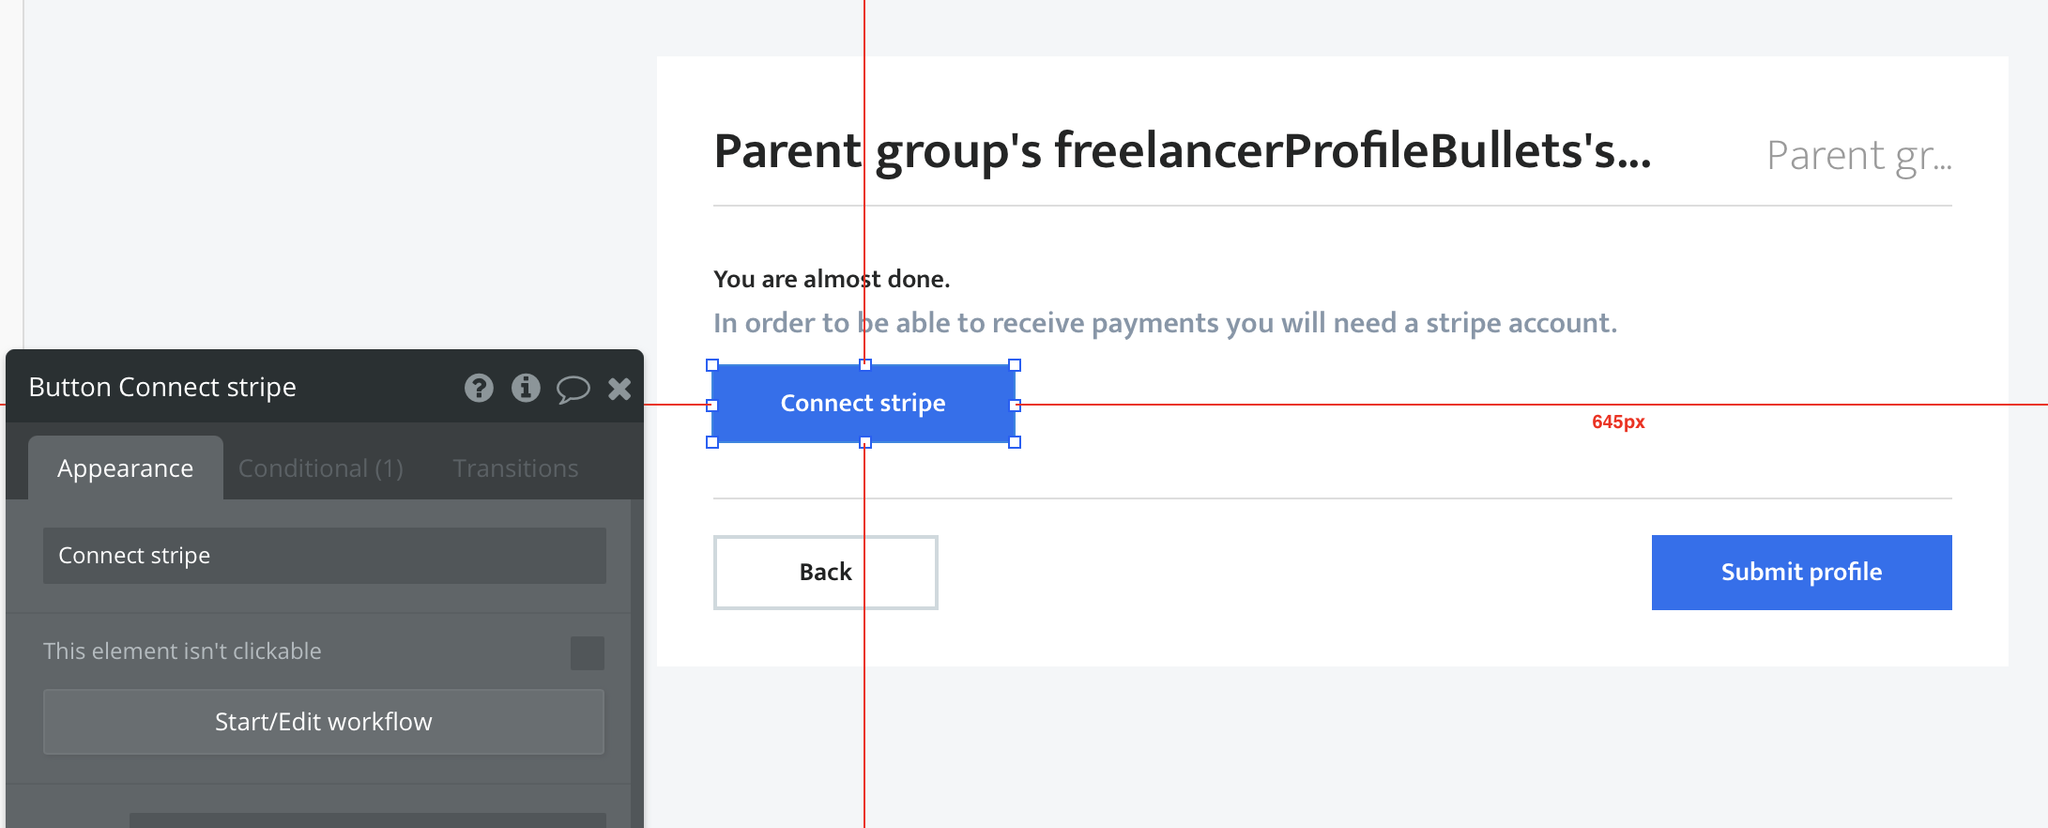
It has a Conditional that checks whether or not the Current User's
Stripe Seller account's Id is empty. If not empty, meaning the seller ID has been saved into the database after successful registration, the button's text is changed to "Connected" and it becomes non-clickable:
The workflow is simply registering the seller by using the Current User's email:
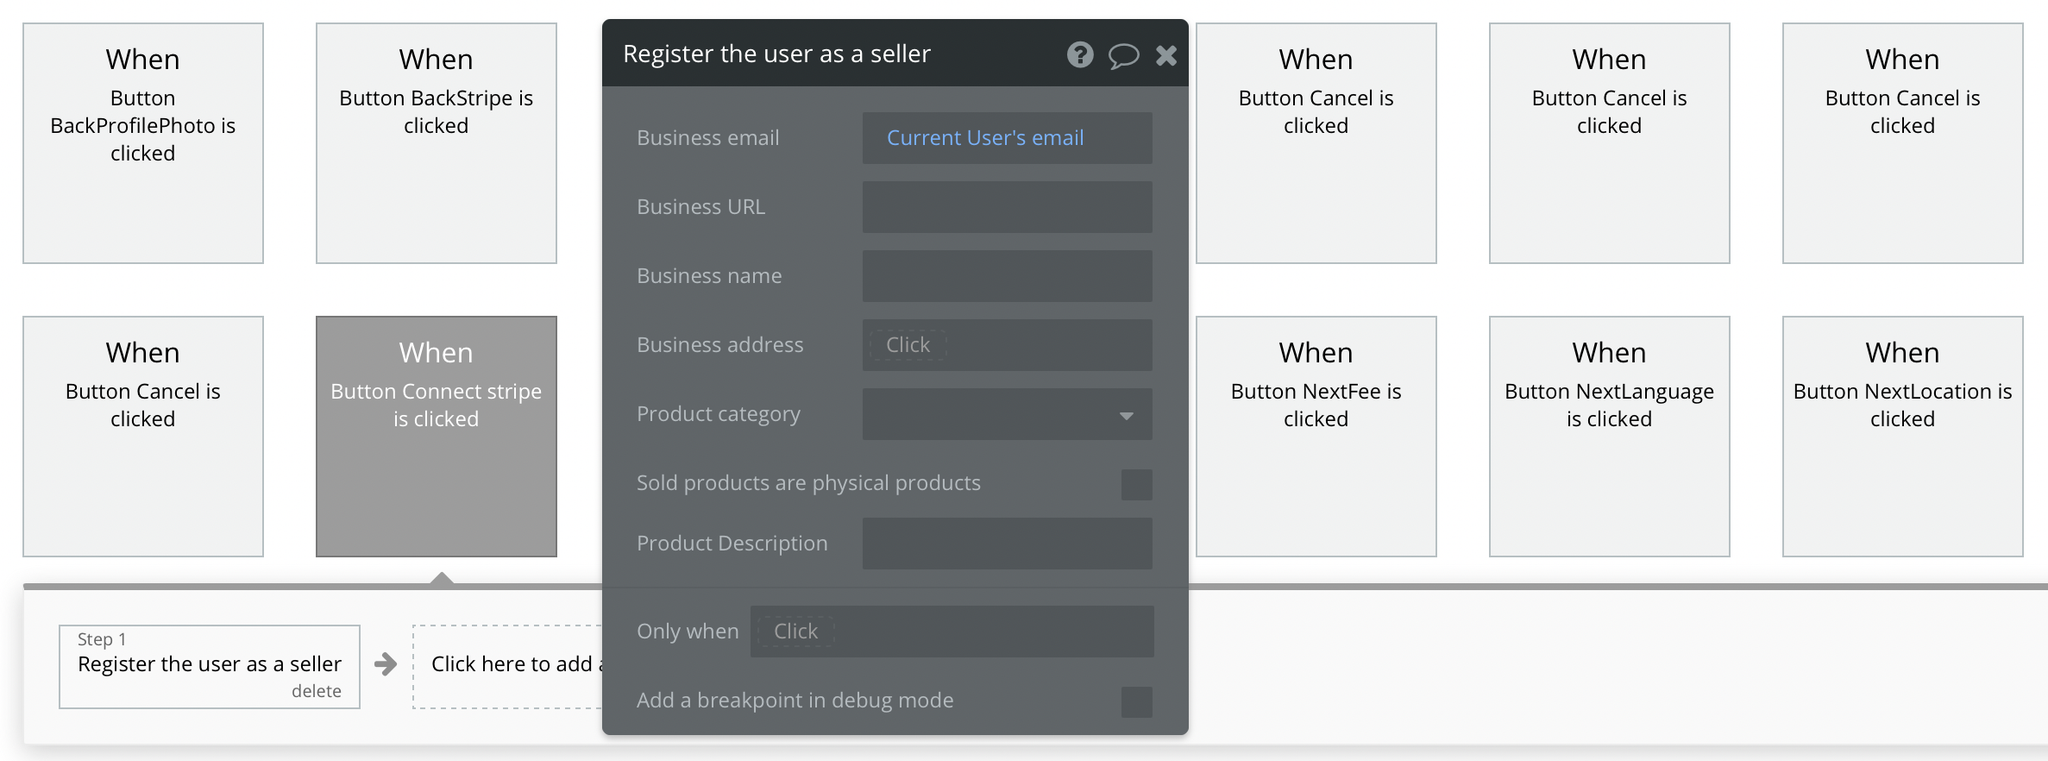
Due to Bubble's Stripe plugin, the Seller ID registration is a hidden process in your Bubble database, which happens in the background. It is not possible to find it in your workflows as it happens on a hidden page as well.
This page has already been specified in your Stripe dashboard: https://bubble.io/poststripeauth.
job-detail
This page was designed to display a Job. It contains all the details that were submitted by the employer upon its creation.
The freelancers will submit their proposals on this page while also having the option to save the job in their liked list.
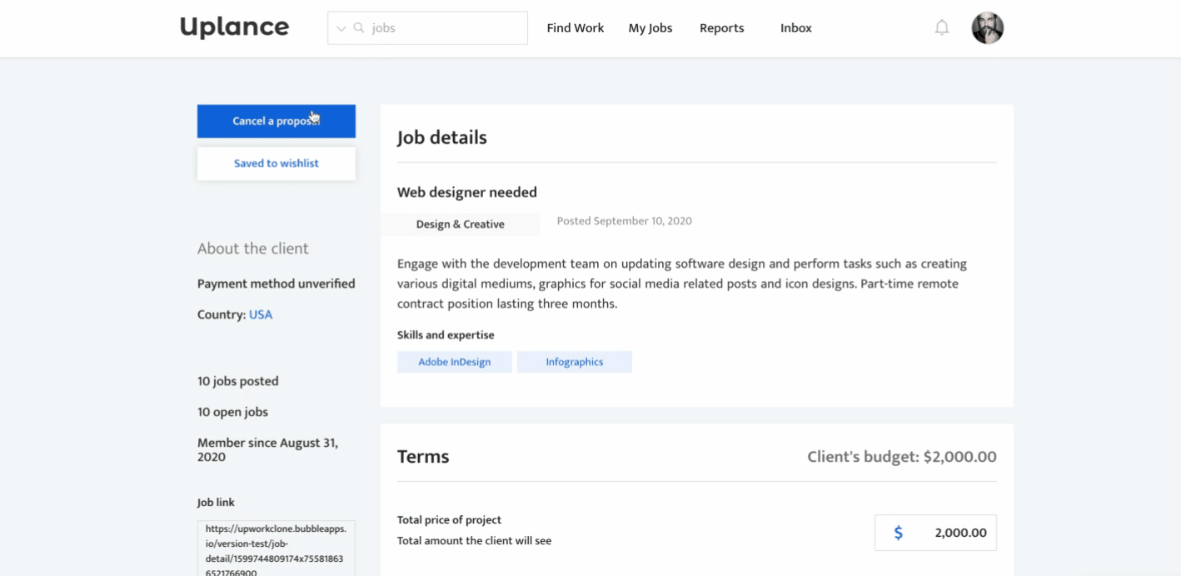
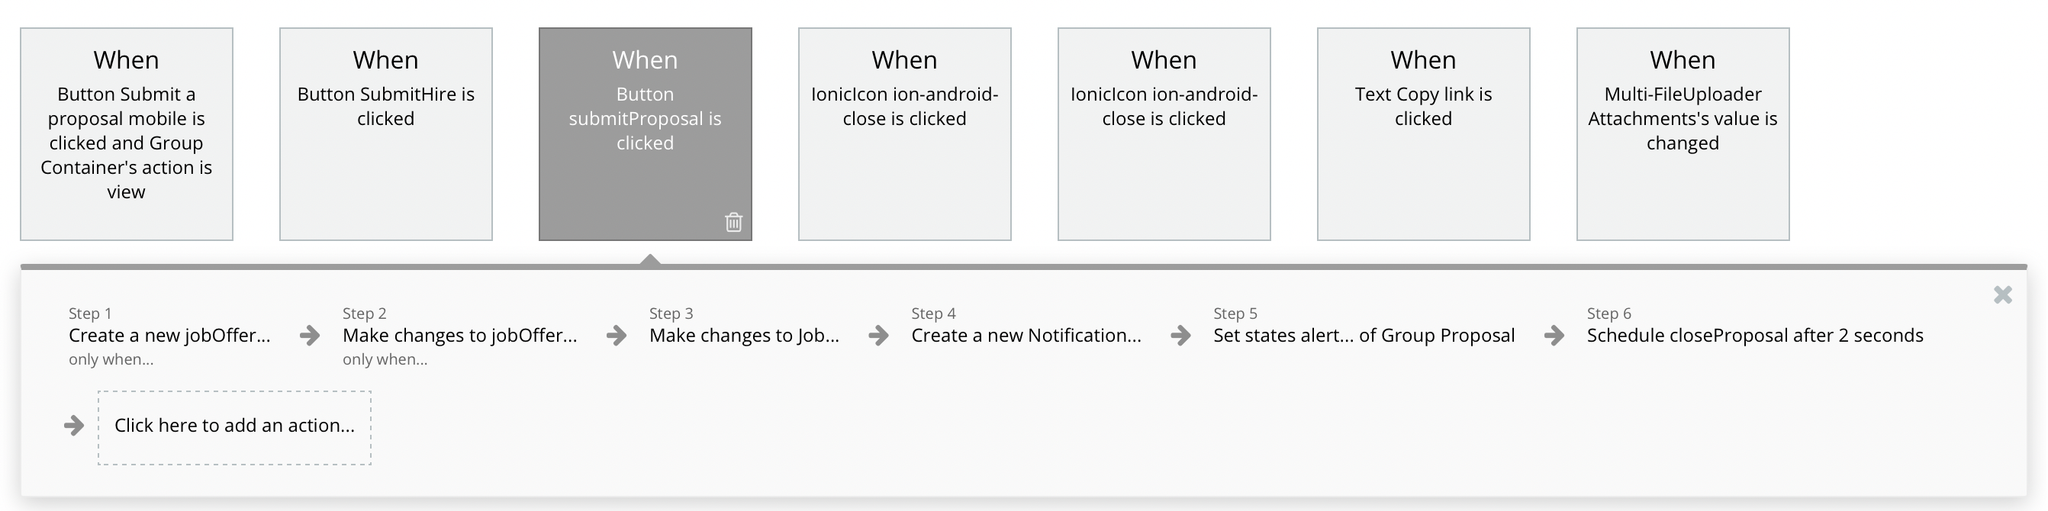
The main purpose of this page is submitting a job proposal. The button can be located here:
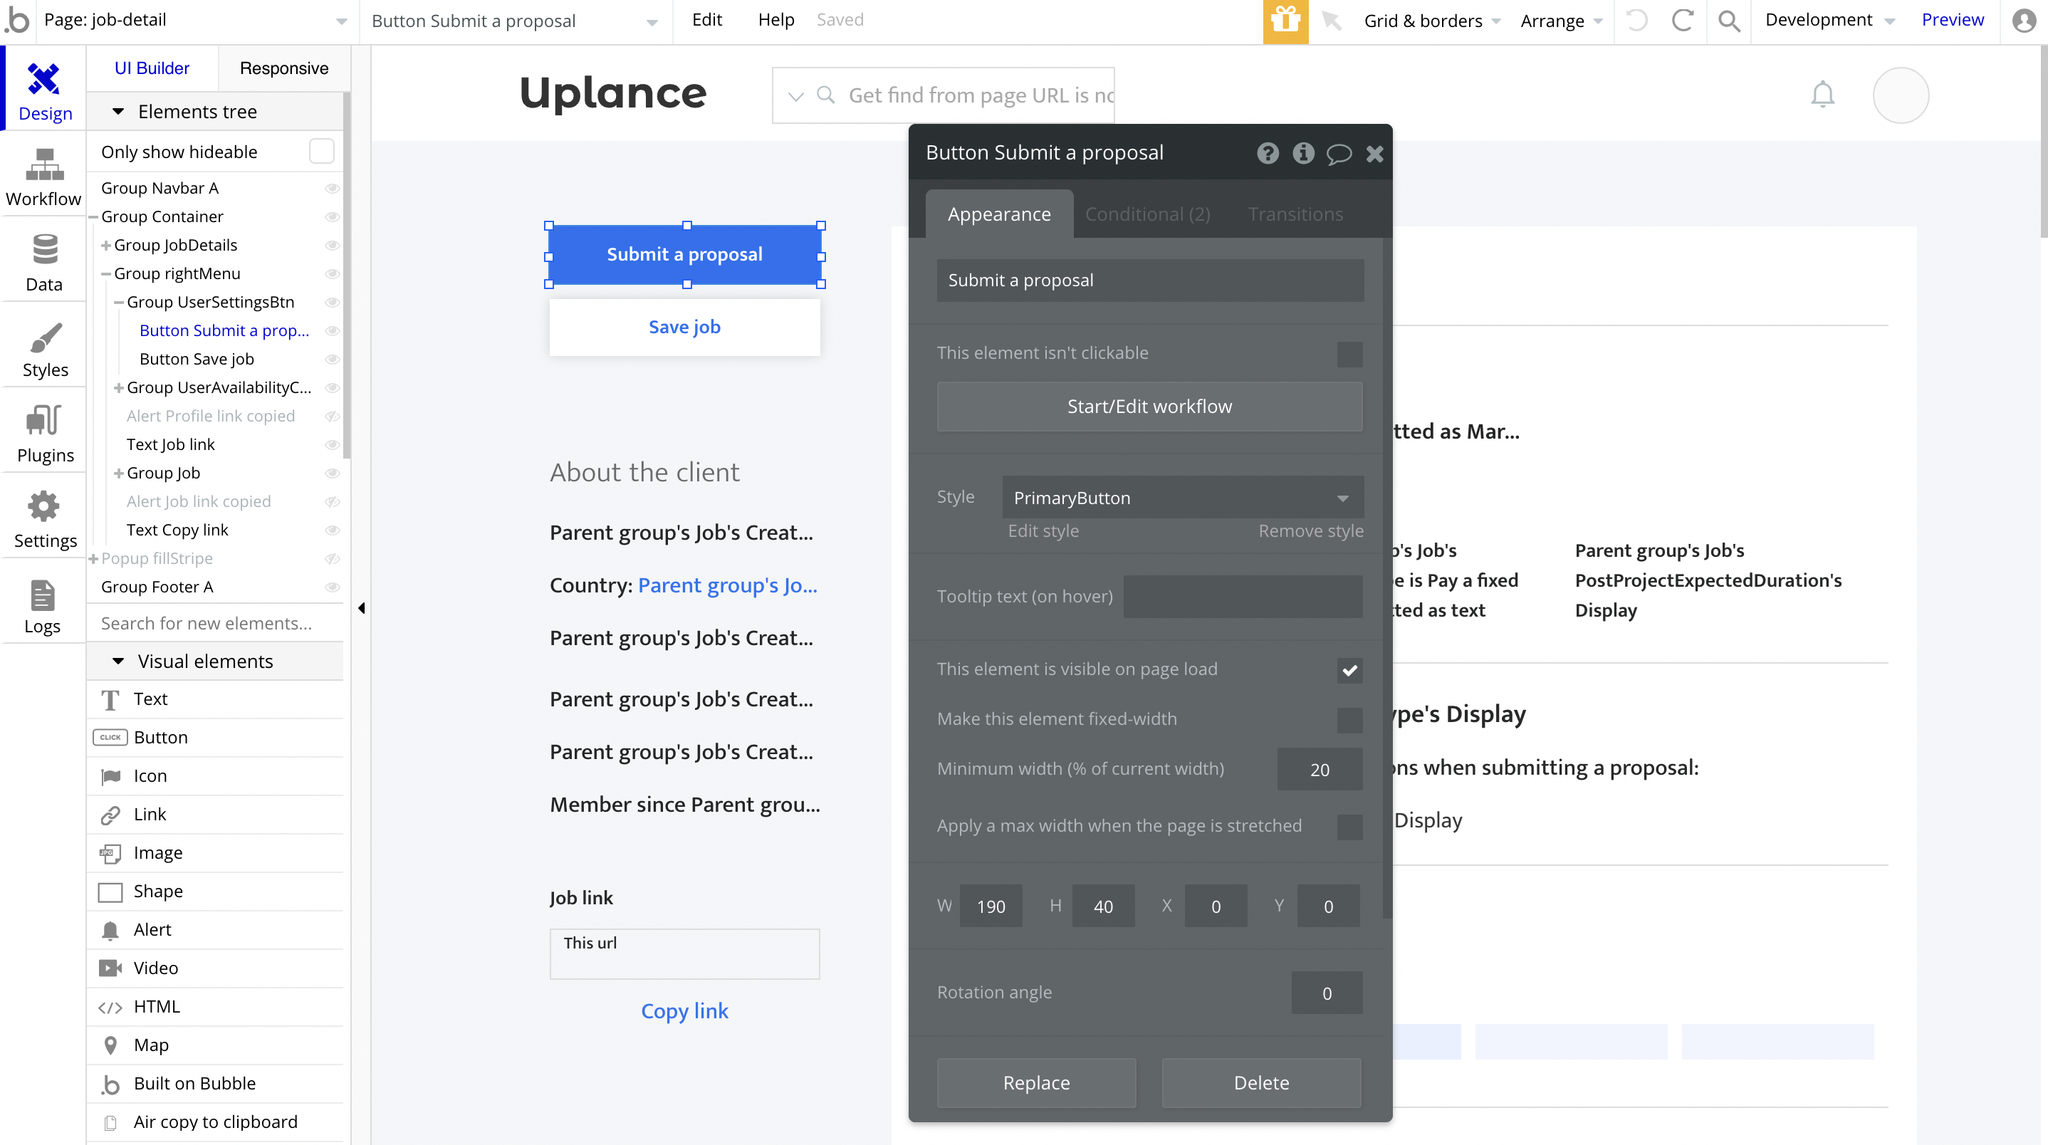
When submitting a proposal, the Terms group appears and contains the information about employer's pricing. If you, as a freelancer, agree to work on this project - just submit the proposal. The submission workflow can be found here:
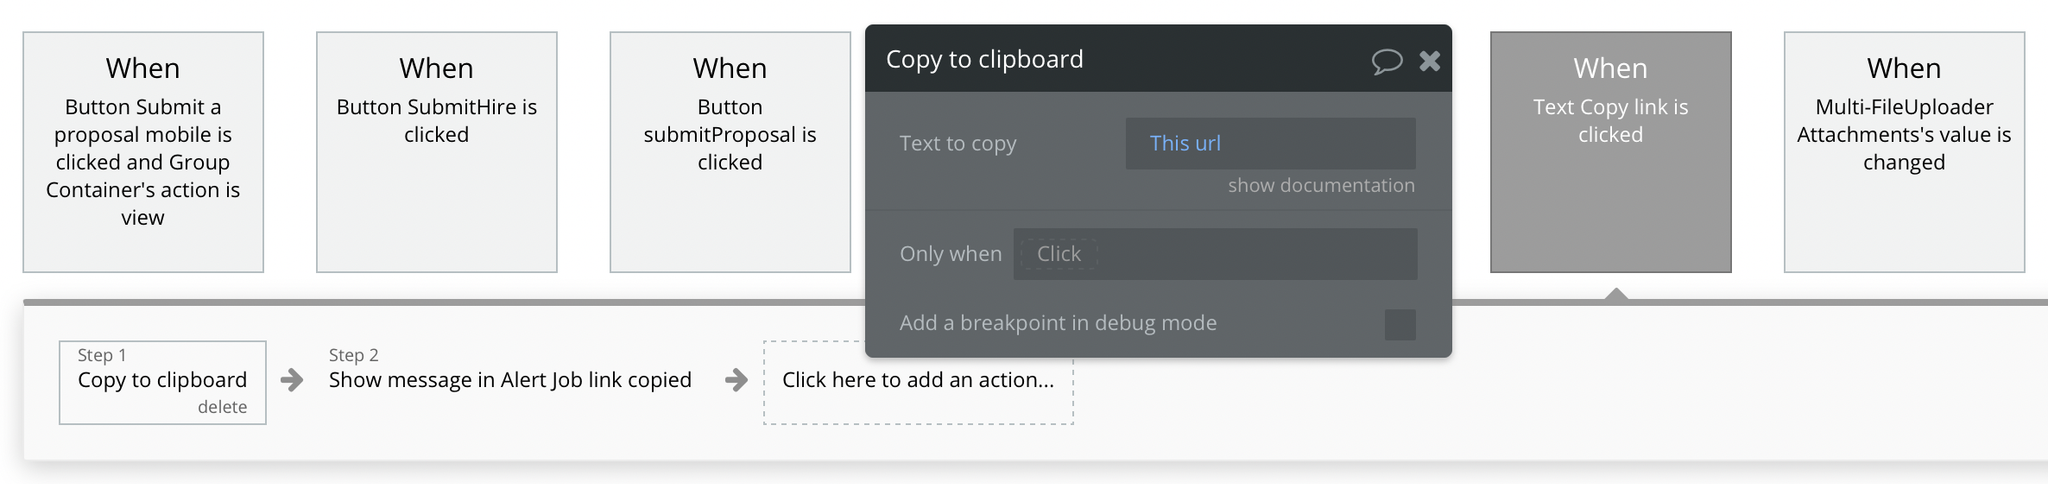
Also, this template comes with a cool free🔌plugin called Air Copy To Clipboard, which allows you to copy the link to your clipboard:
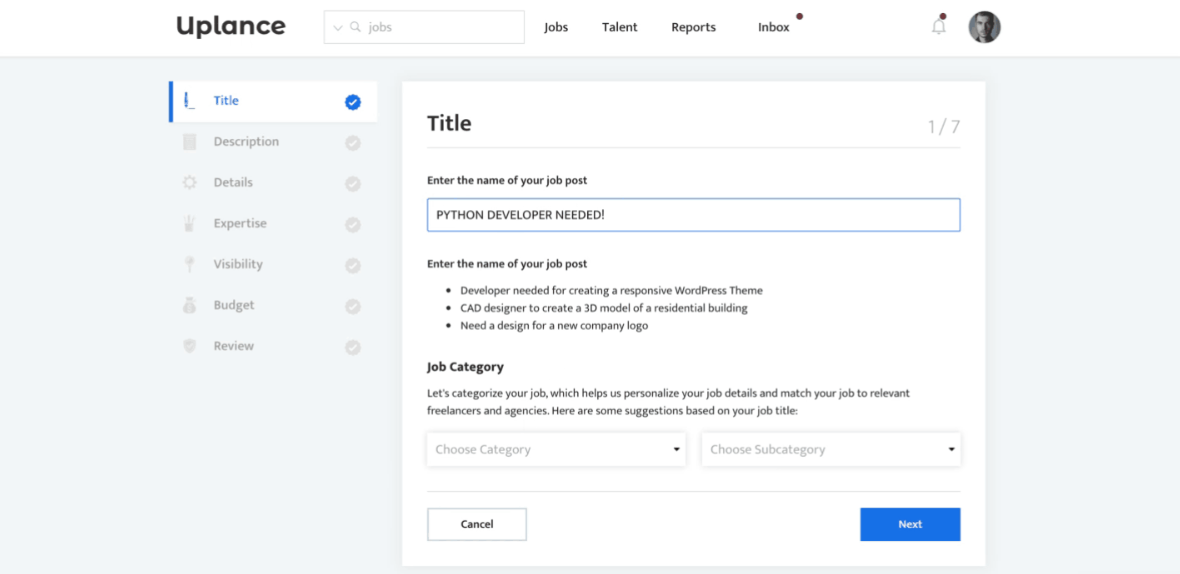
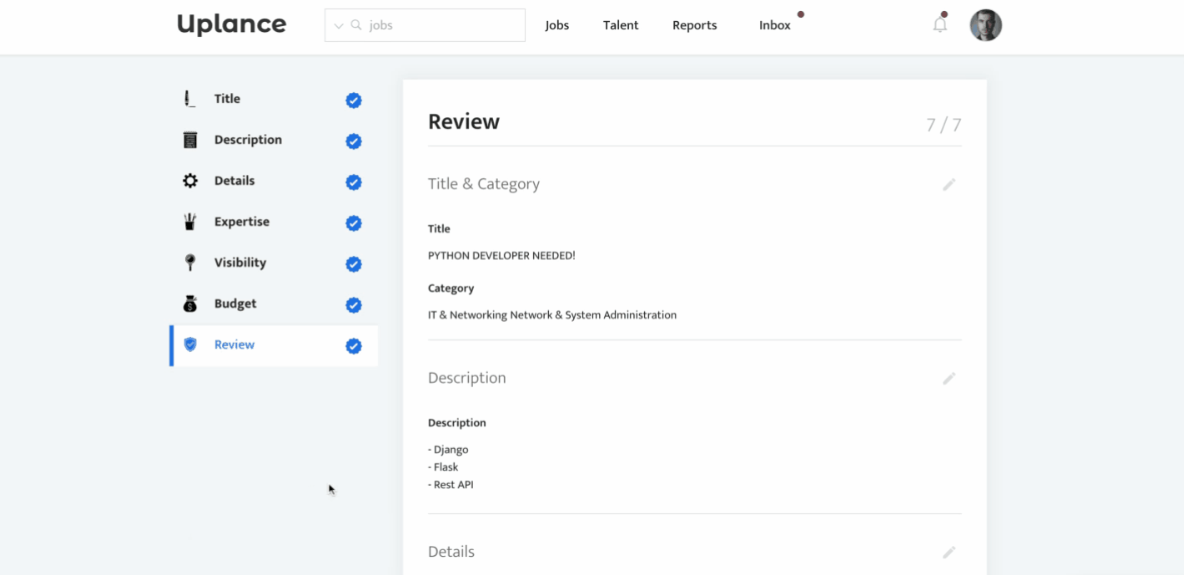
job-post
This page was designed for employers to post their projects. It has a list of steps that have to be completed for the job to be published.
Tip: While submitting all the job-related information, the status of the job being created will be Draft and will change to Open as soon as all the details are provided and it will be visible for freelancers.
There is also the option to leave and come back later and continue submitting job details at the step you left at.
Title
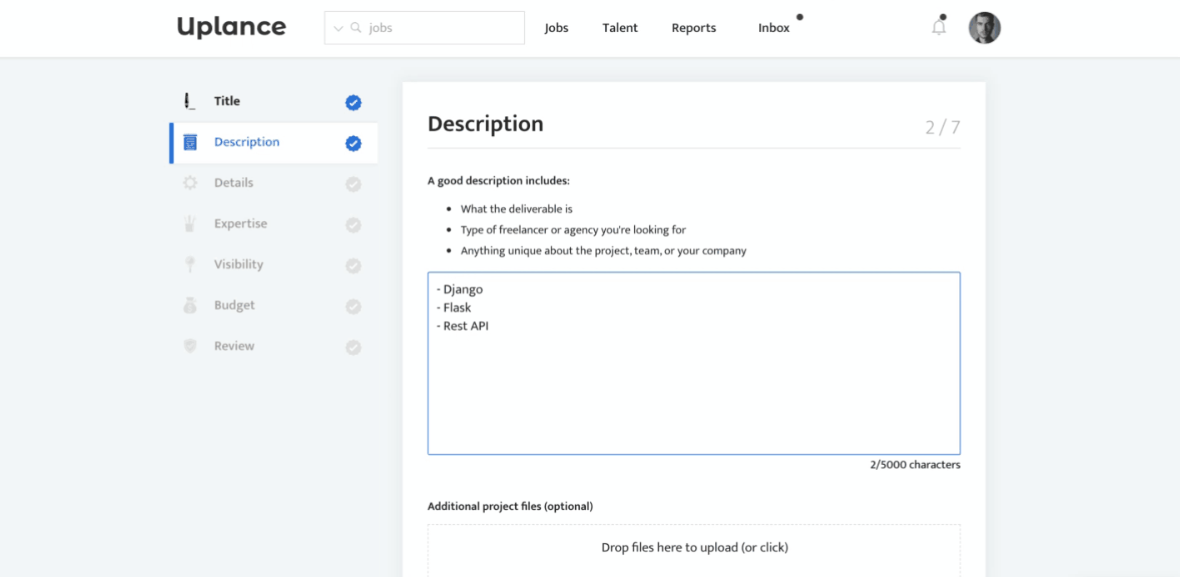
Description
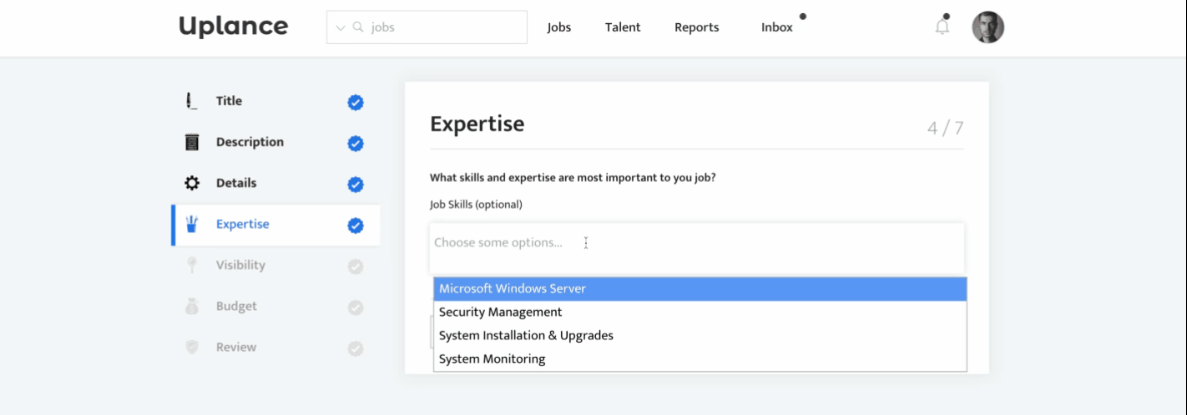
Details
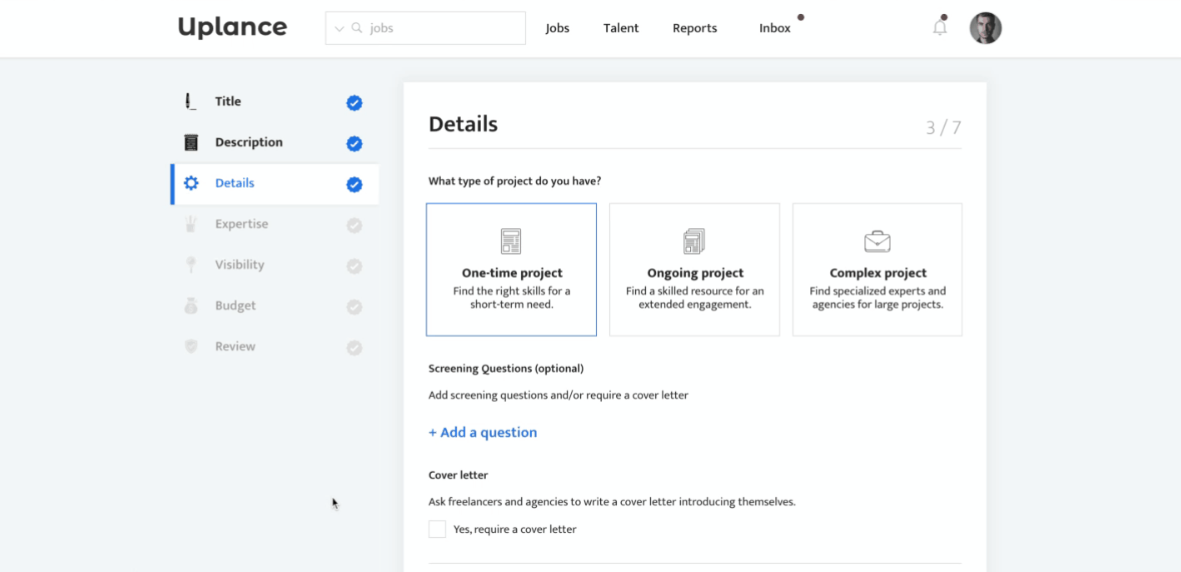
Expertise
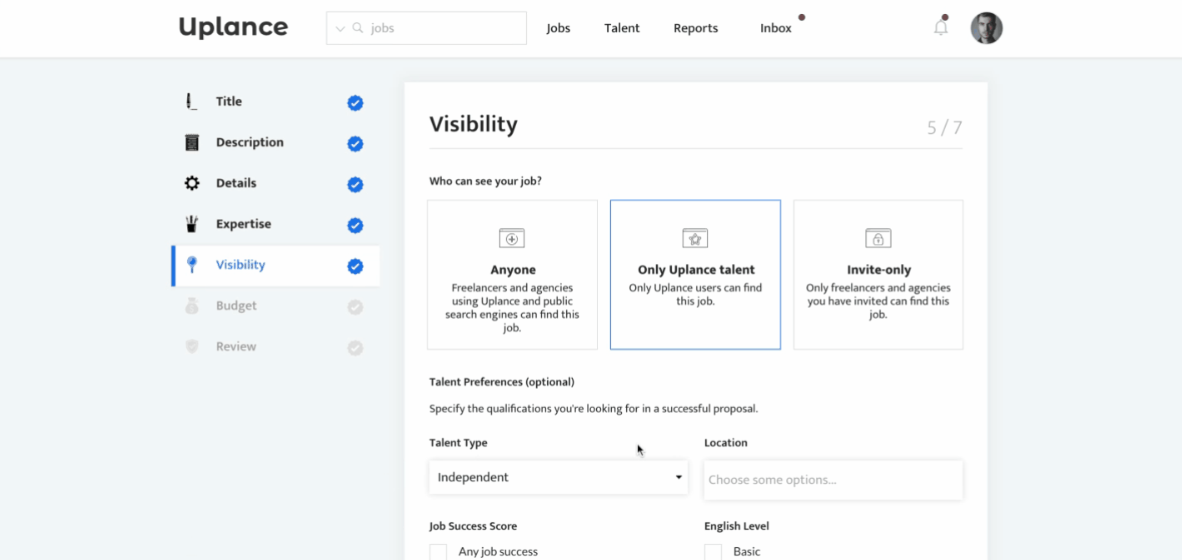
Visibility
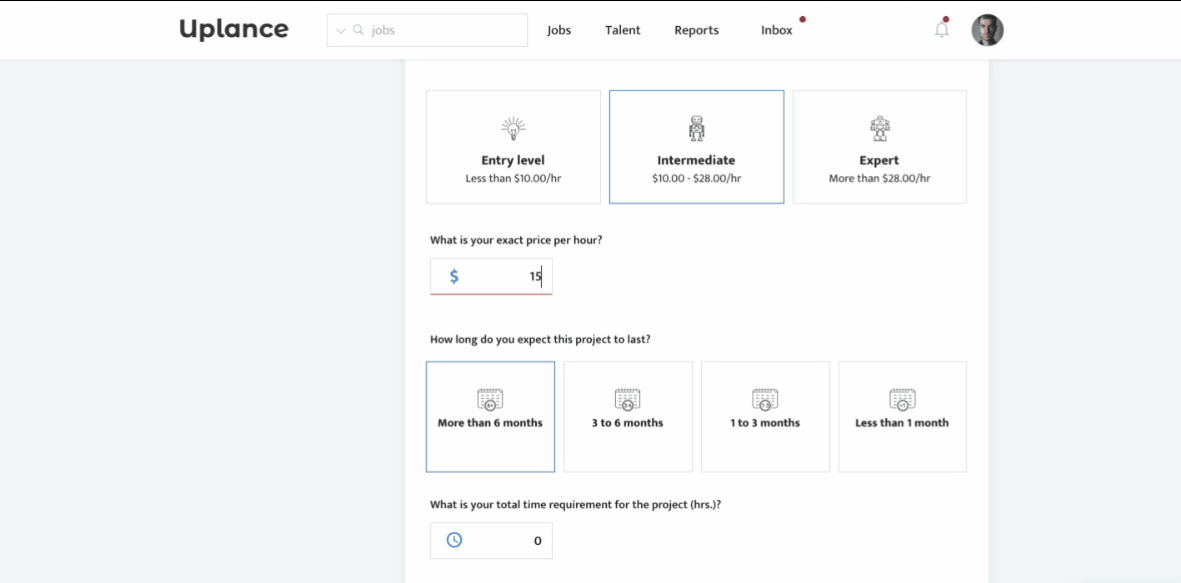
Budget
Review
Here is how to unhide👀the groups:

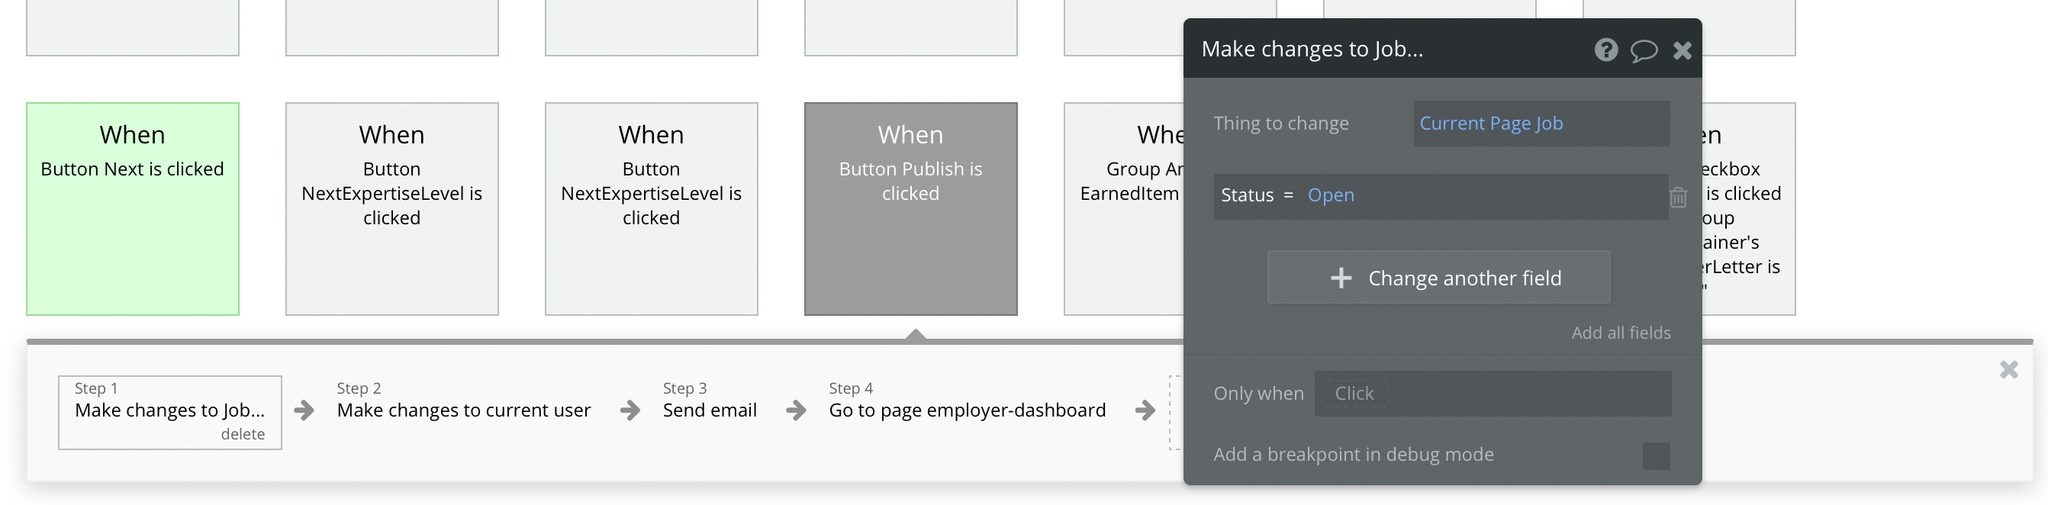
When the "Publish" button is clicked, it changes the Current Job's status to Open:
Also, this button comes with a couple of Conditionals that influence its functionality.
If the
filledJobPostMenuItems already contains this job, the text changes to "Update", meaning this job exists and you are able to edit it: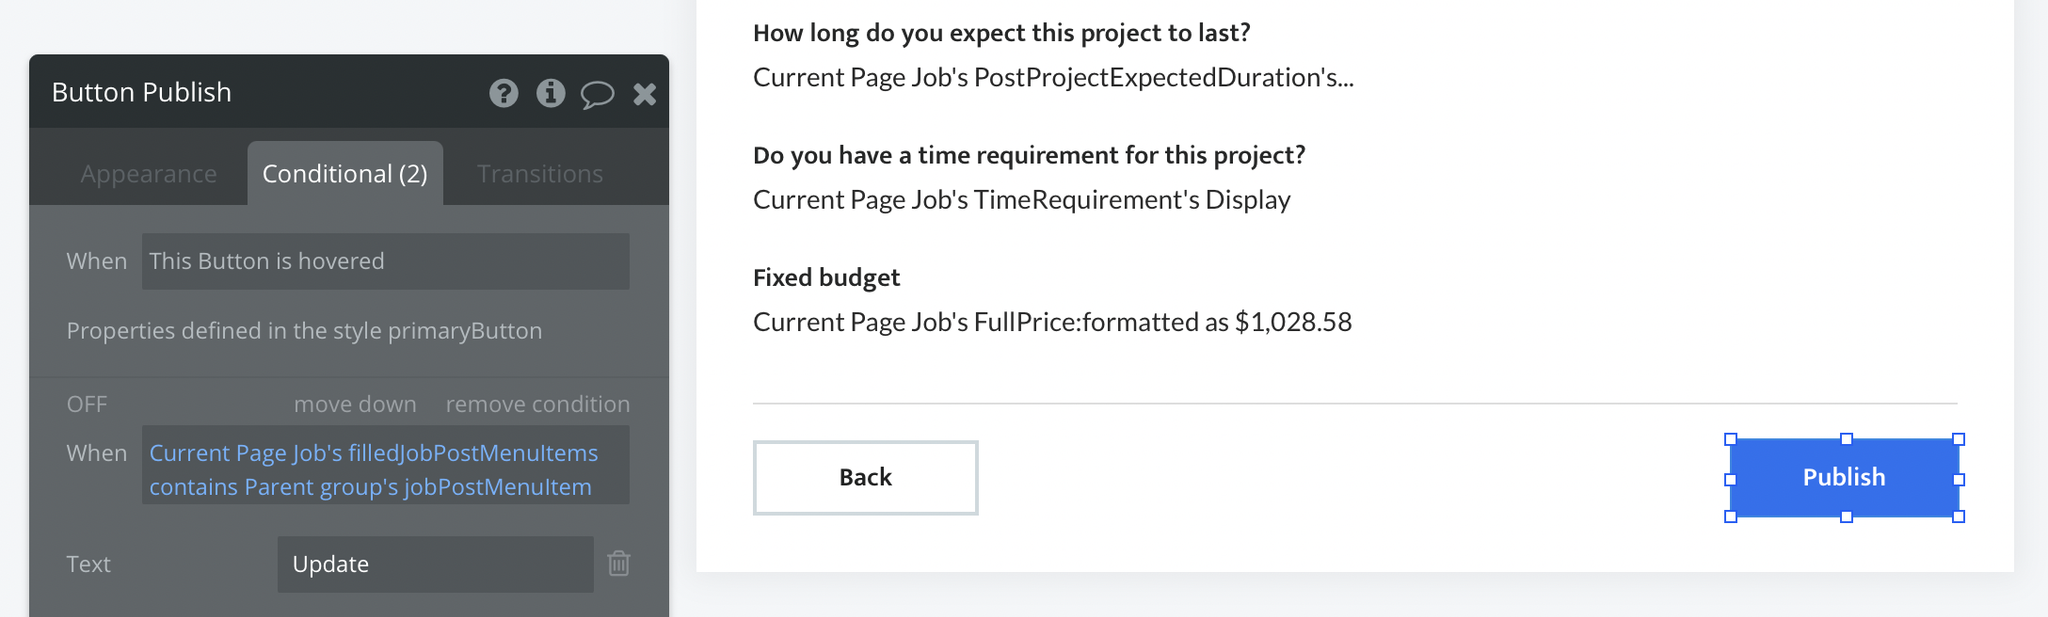
If Current User's status of Banned is "yes", the text changes to "Unavailable" and this button becomes non-clickable, since the user is banned from using the platform feature.
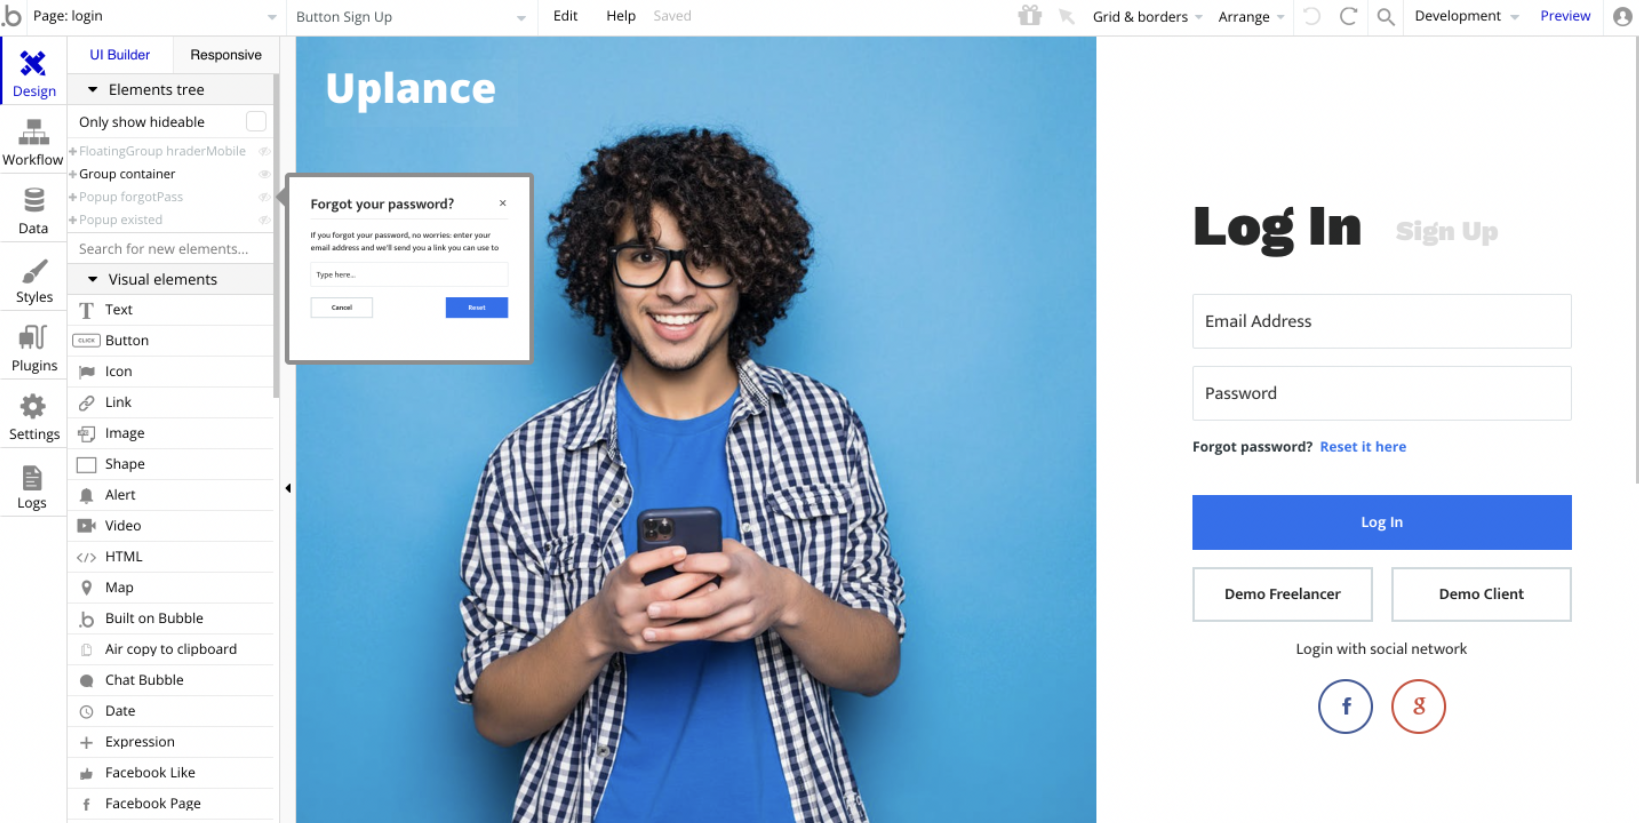
login
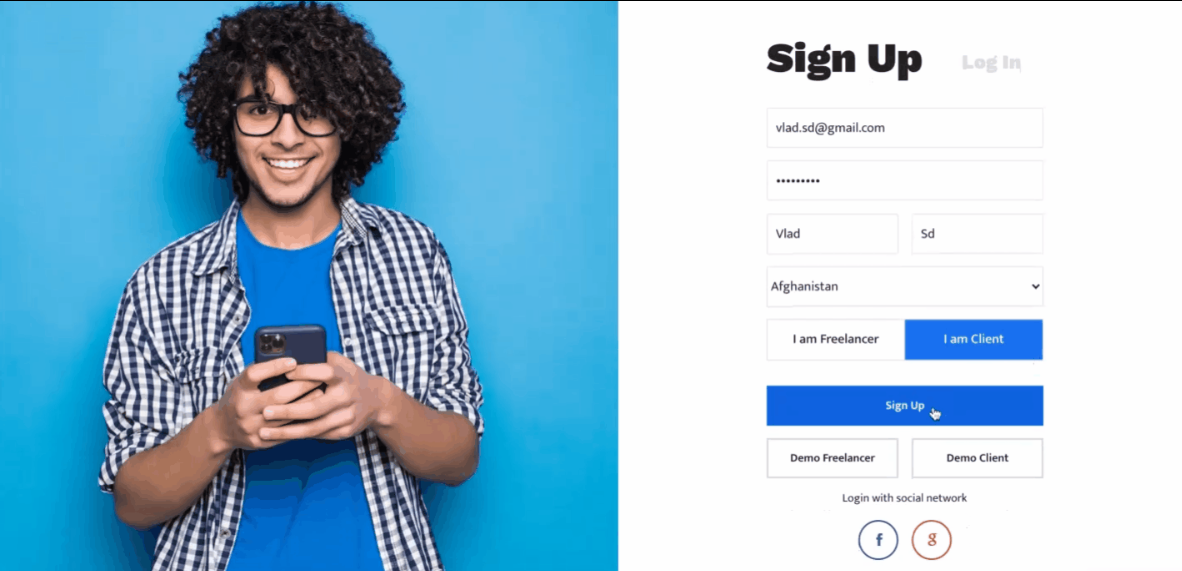
This page is used for creating an account or logging in to an existing one. To access it, users will click on “Signin” button in the header. Besides standard registration, users can also use their social media accounts (e.g. Google or Facebook) to register or log in.
On this page, users are offered a demo user to log in and test all the template features. For detailed information on how to remove this button, see the Remove Demo Login section.
This page is used for users to log in or to sign up. Users can as well log in or sign up to the platform via social media: Facebook or Google.
You can unhide👀the elements here:
The "Sign Up" button can be found here:
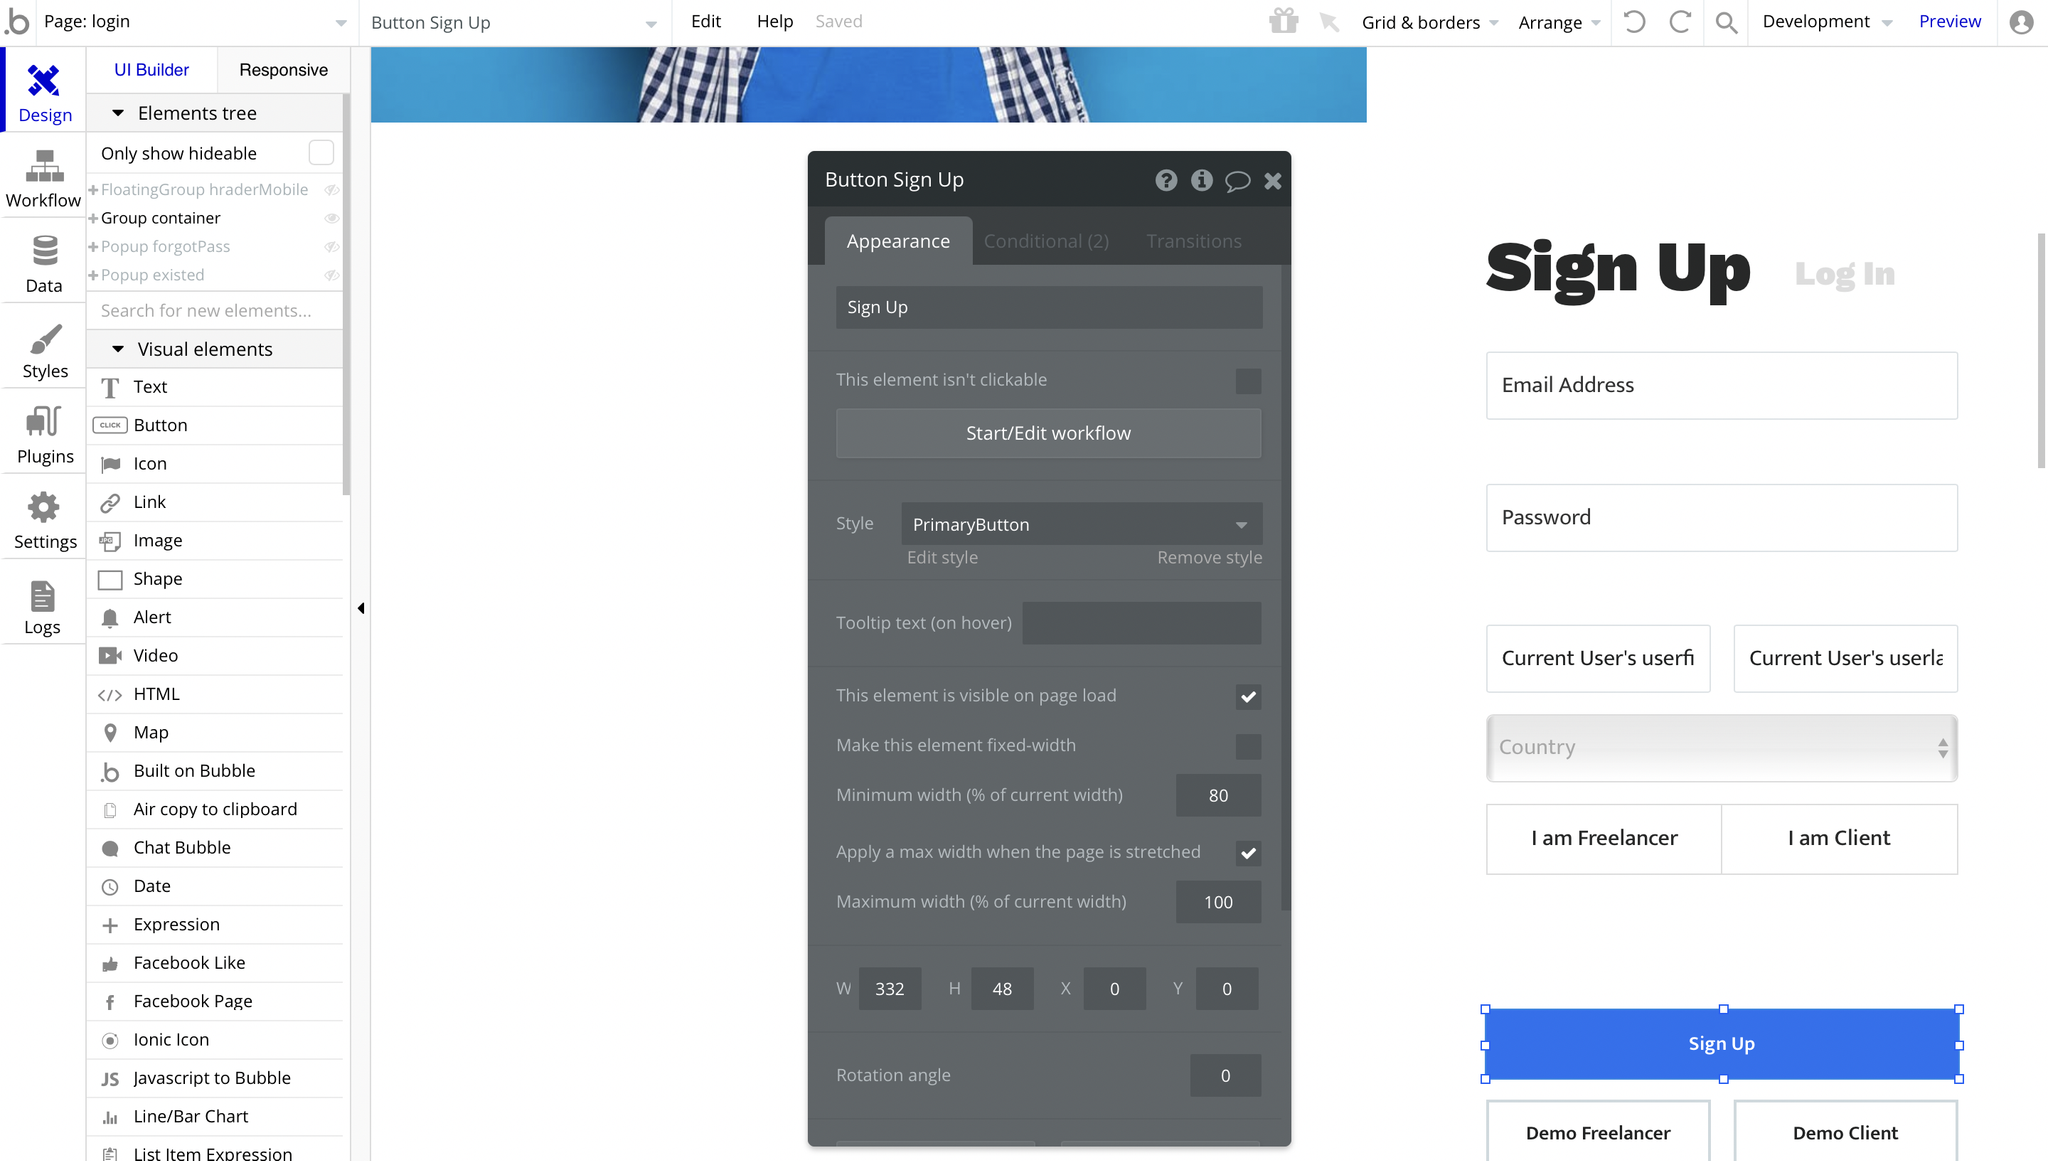
Uplance is using 2 different userType values: Freelancer and Client (Employer). At the login or signup stage, it is required to select one of the user types that reflects your account.
Tip: This page comes with demo logins that have been placed for testing purposes. They may be removed from your app.
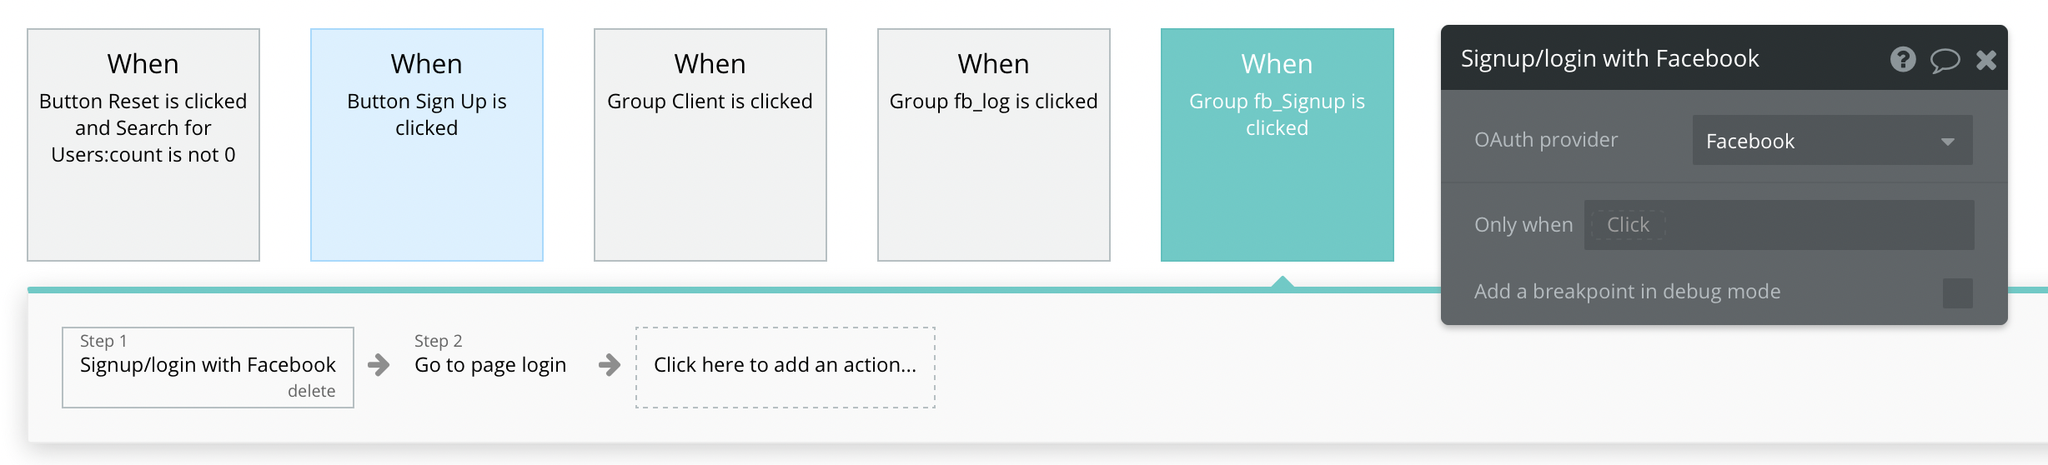
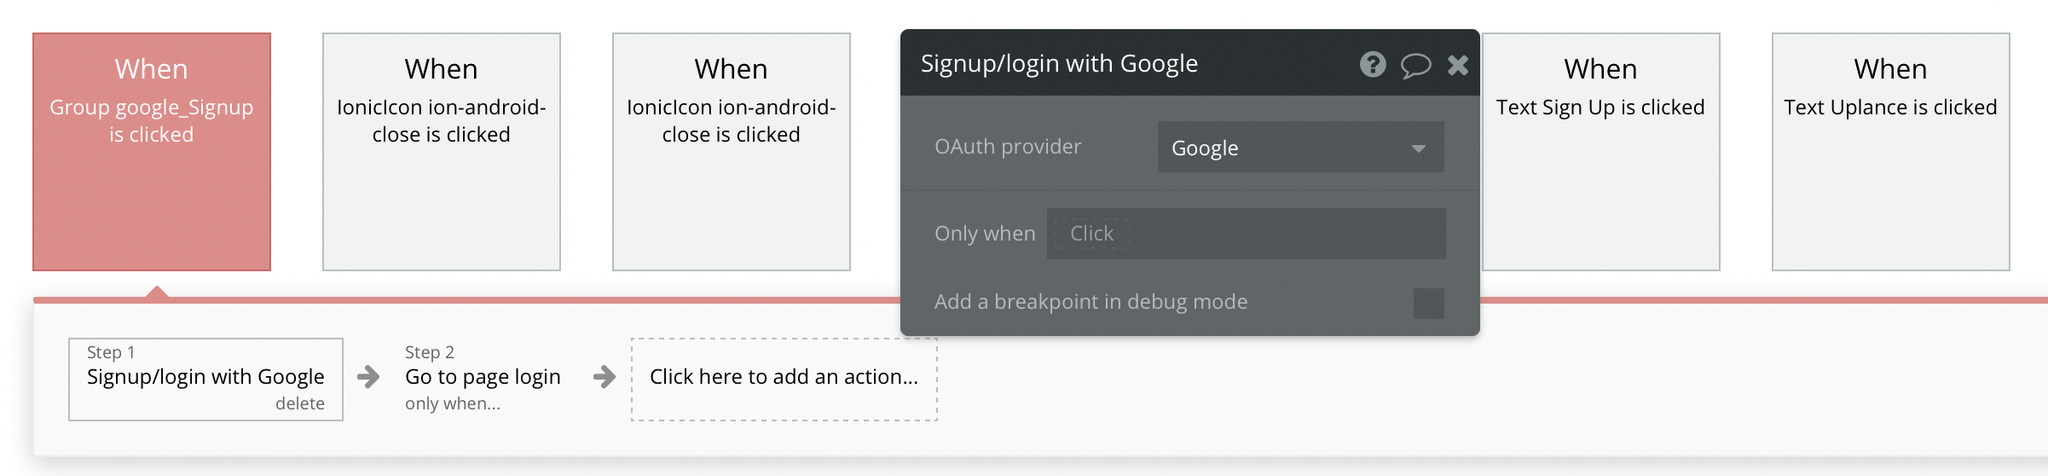
To signup via a social network, Uplance is using the Facebook and Google plugins that require configuration. Their workflows can be found here:
my-feed
This page is mainly used for freelancers to search for jobs or just to check job recommendations. It is also used to edit freelancer information like skills and categories, profile visibility and availability.

The left menu with My Feed, Recommended and Saved tabs can be found here:
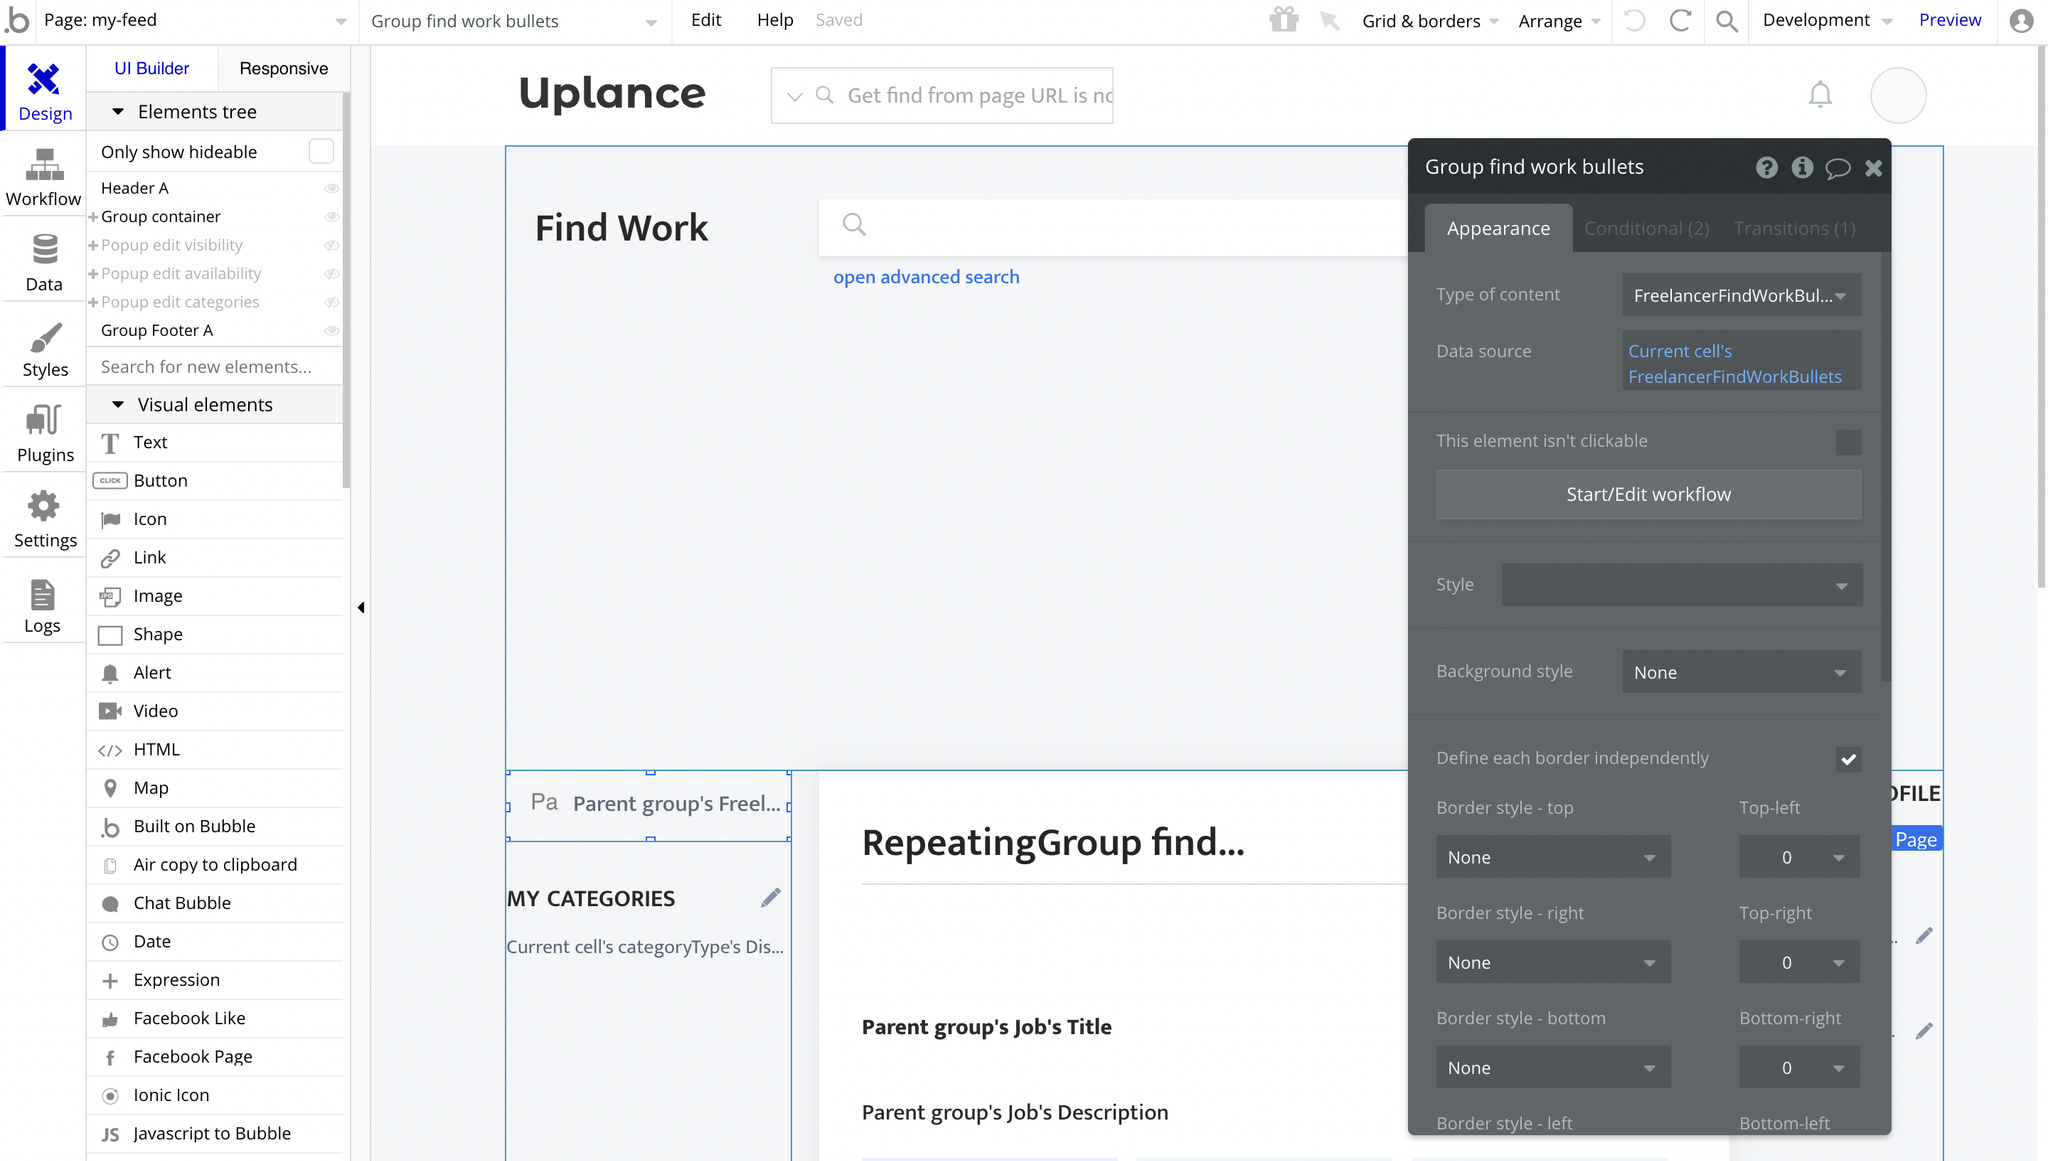
If you'd like to find the category options, go to Data -> Option sets -> CategoryType:
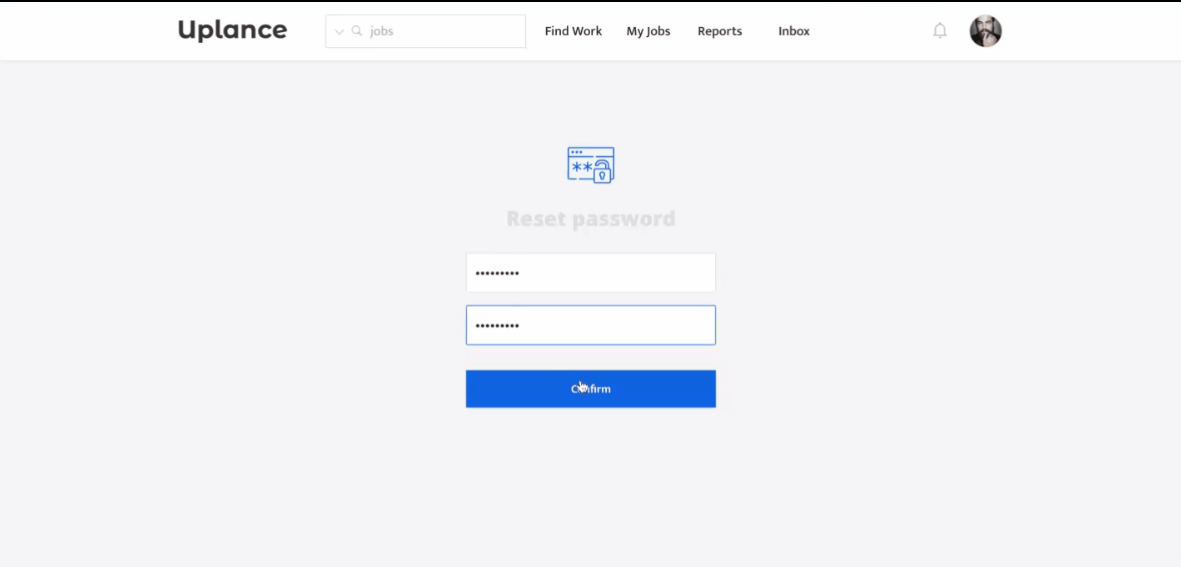
reset_pw
This page is used for resetting the password.
The "Confirm" button is placed in this group here:
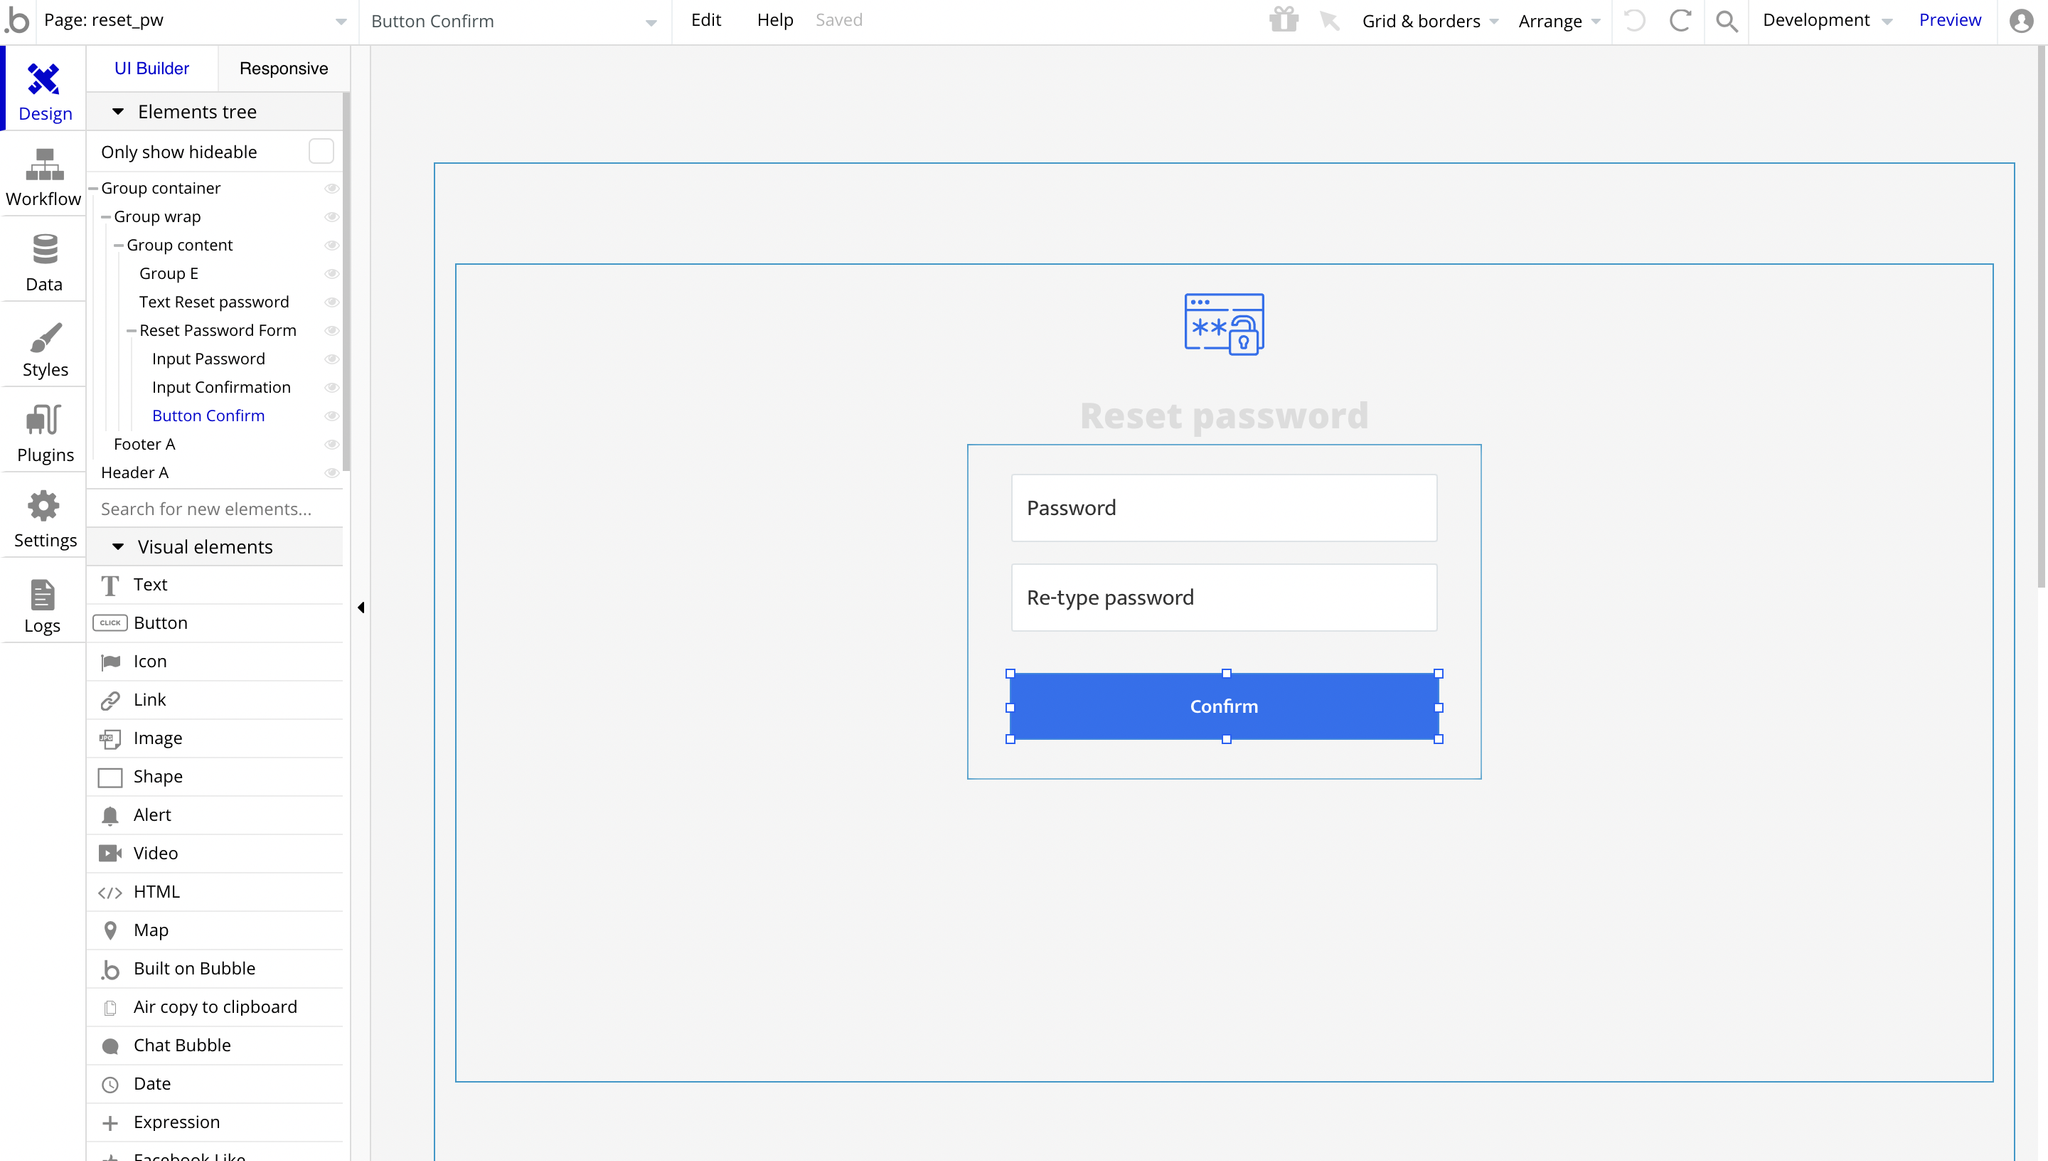
When confirming the new password, it is resetting based on the input values:
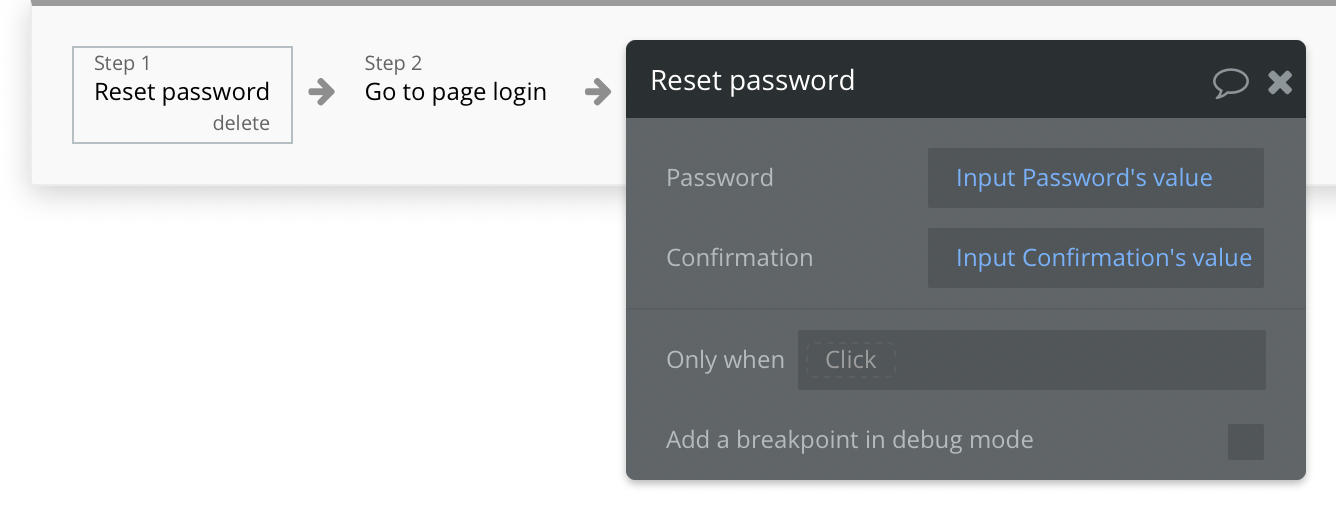
And then simply redirect back to the login page.
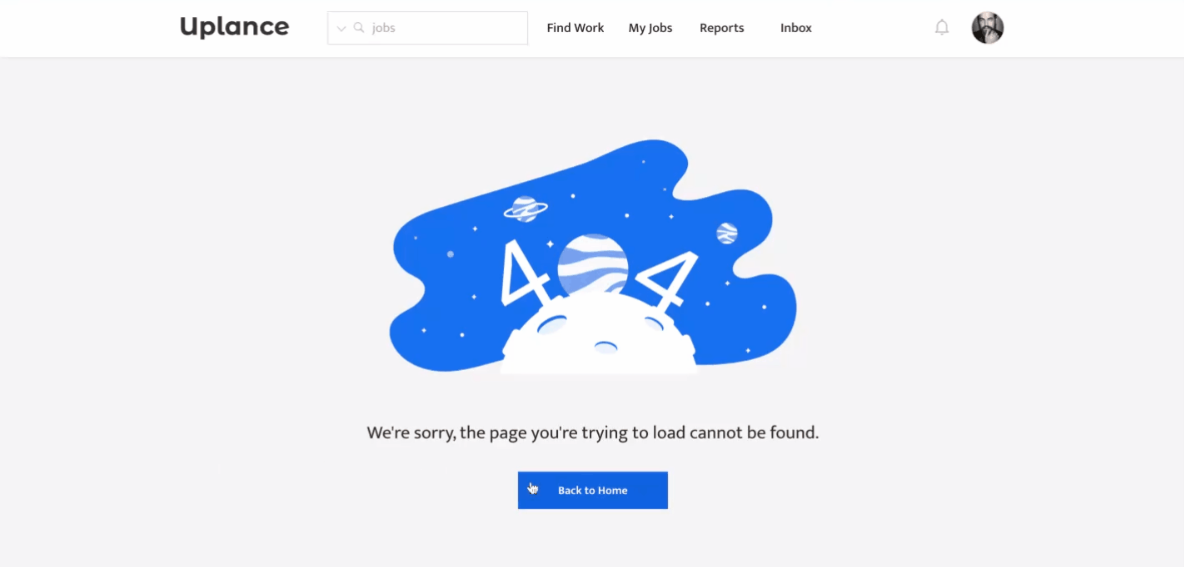
404
This is a custom-designed page for 404 redirect errors, informing a user that the requested web page cannot be found, or it doesn't exist.
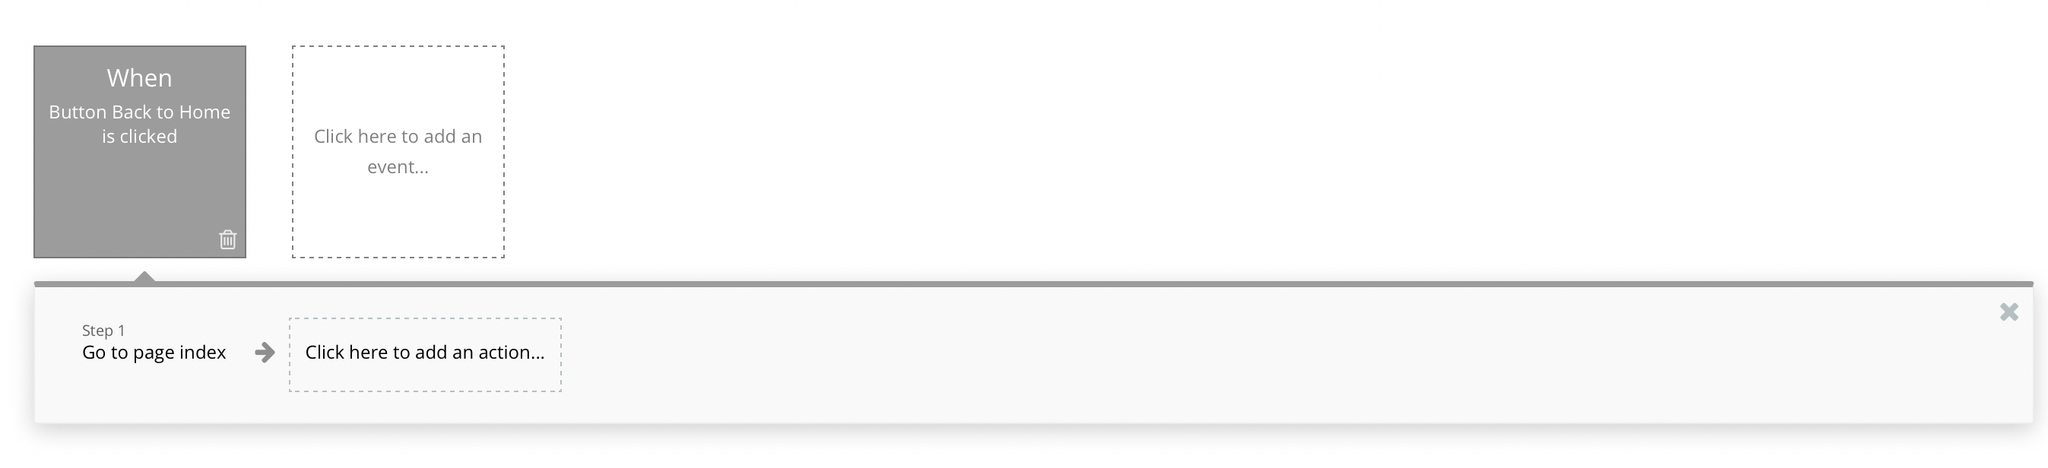
The "Back to Home" button can be found here:
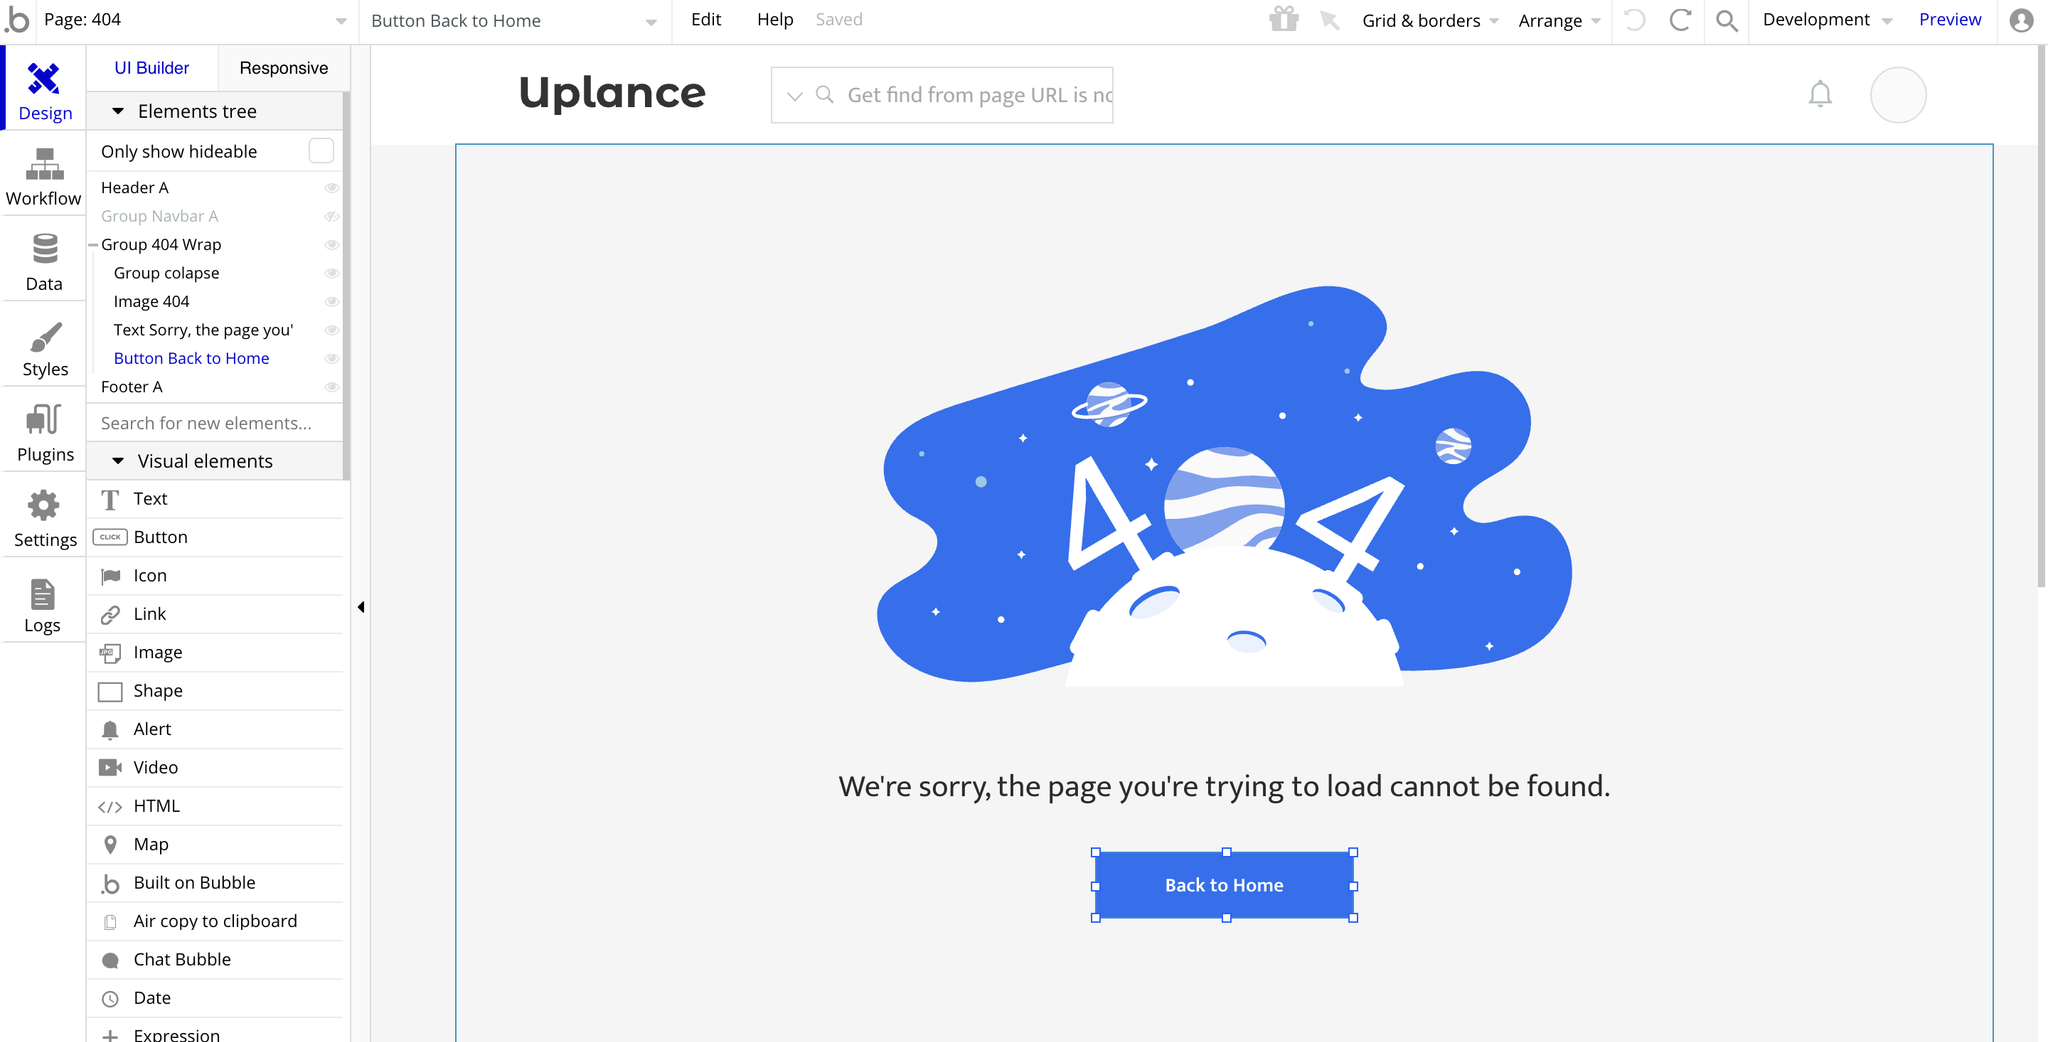
This page has a single-button workflow, to redirect users back to the index page, since the entered page does not exist: