About this Template
Link to the template page: https://bubble.io/template/whatsapp-bot-1566910177549x290913205550055400
Introduction
The WhatsApp Messaging Bot template is a no-code product that uses the Twilio Whatsapp API Integration.
The solution developed in the template targets businesses and users who want to optimize their communication through WhatsApp.
By using this template, the users will have access to a variety of features such as a customizable chatbot, templates of answers, a dashboard for managing users, etc. developed to reduce the time for processing the requests and overall communication.
Features
- Integrated customizable chatbot
- Fully responsive pages and user dashboard
- Management of the users from one place
- Messaging between WhatsApp and Bubble app
- Customizable chat templates
- Dashboard with statistics of user’s activity
Note: This template requires to create an account to interact with API: https://www.twilio.com/console
The template comes with a paid plugin - Twilio Whatsapp API Integration - you would need to subscribe to it (or buy it) if you want to continue using it.
Video Overview
Demo
Ready to move further?
Tip: Find out more on how to work with a template on Bubble here:
Setup Guide
Once you have bought or added a template to your account, you will see a dropdown in the New Application popup that lets you pick a template as the basis for the new application.
Note: This can only be done when you create a new app.
After you've selected a block you bought, complete the ”Name your app” field and press Create app.
Tip: A template isn't a theme for your app, but a pre-built set of elements and workflows. You can modify the template as you would modify another app.
Wait for Bubble to load the application with all the data.
After the application has loaded, you'll see the Component library on the right side for New Application. You can close it or follow the assistant steps to adjust different settings.
Congrats: You have successfully created a Bubble app based on your template. Now you're ready to go and dive into the Bubble no-code development toolset.
Twilio Whatsapp API Integration Plugin
In order to make the WhatsApp sending message option work properly, it is required to configure the Twilio Whatsapp API Integration within your Bubble editor.
Note: The template comes with a paid plugin - Twilio Whatsapp API Integration Plugin - you would need to subscribe to it (or buy it) if you want to continue using it.
1. To find a detailed description of the steps needed for setting up the chatbot please check the Twilio Whatsapp API Integration Plugin’s Documentation, How to Setup section (except the 3rd and 4th steps).
2. For security purposes the template has limited rights for potential customers.
To unlock all the template’s functionalities, please follow the two steps described further.
- Go to Page “Dashboard” and delete this Workflow:
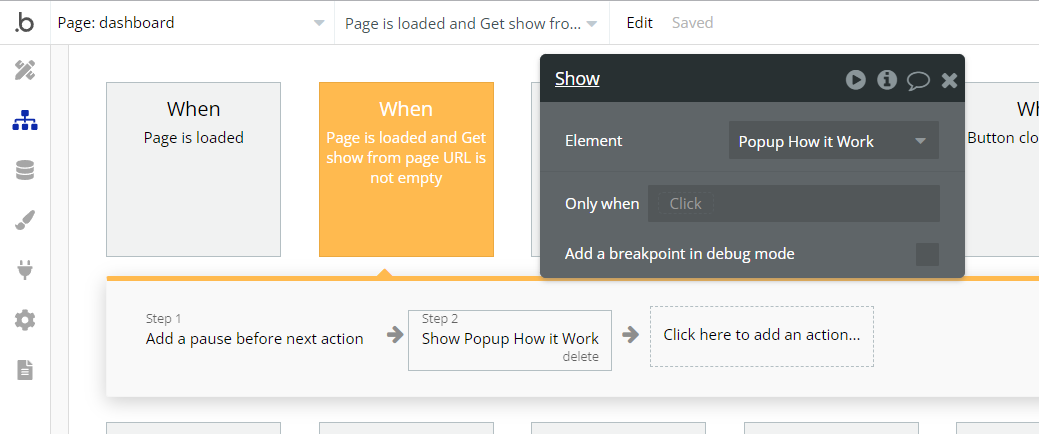
- To clean the Application of the left elements:
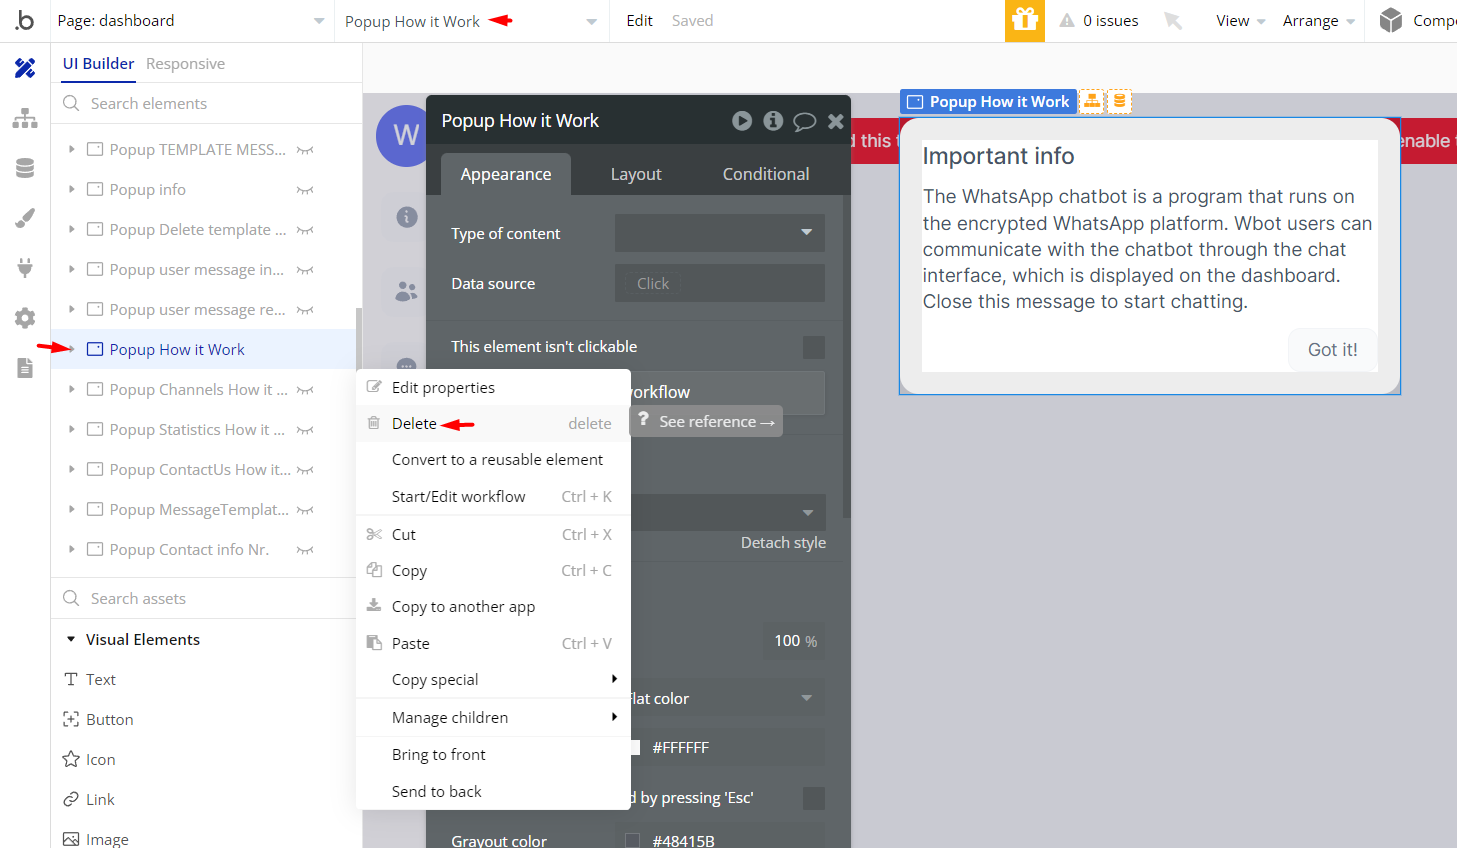
a. Go to Page “Dashboard” in the editor look for the Popup “Popup How it Work” and delete it.
b. Open the Workflows tab, find the workflows that have the condition “Search for Variables:first item’s access rights is no” and delete it.
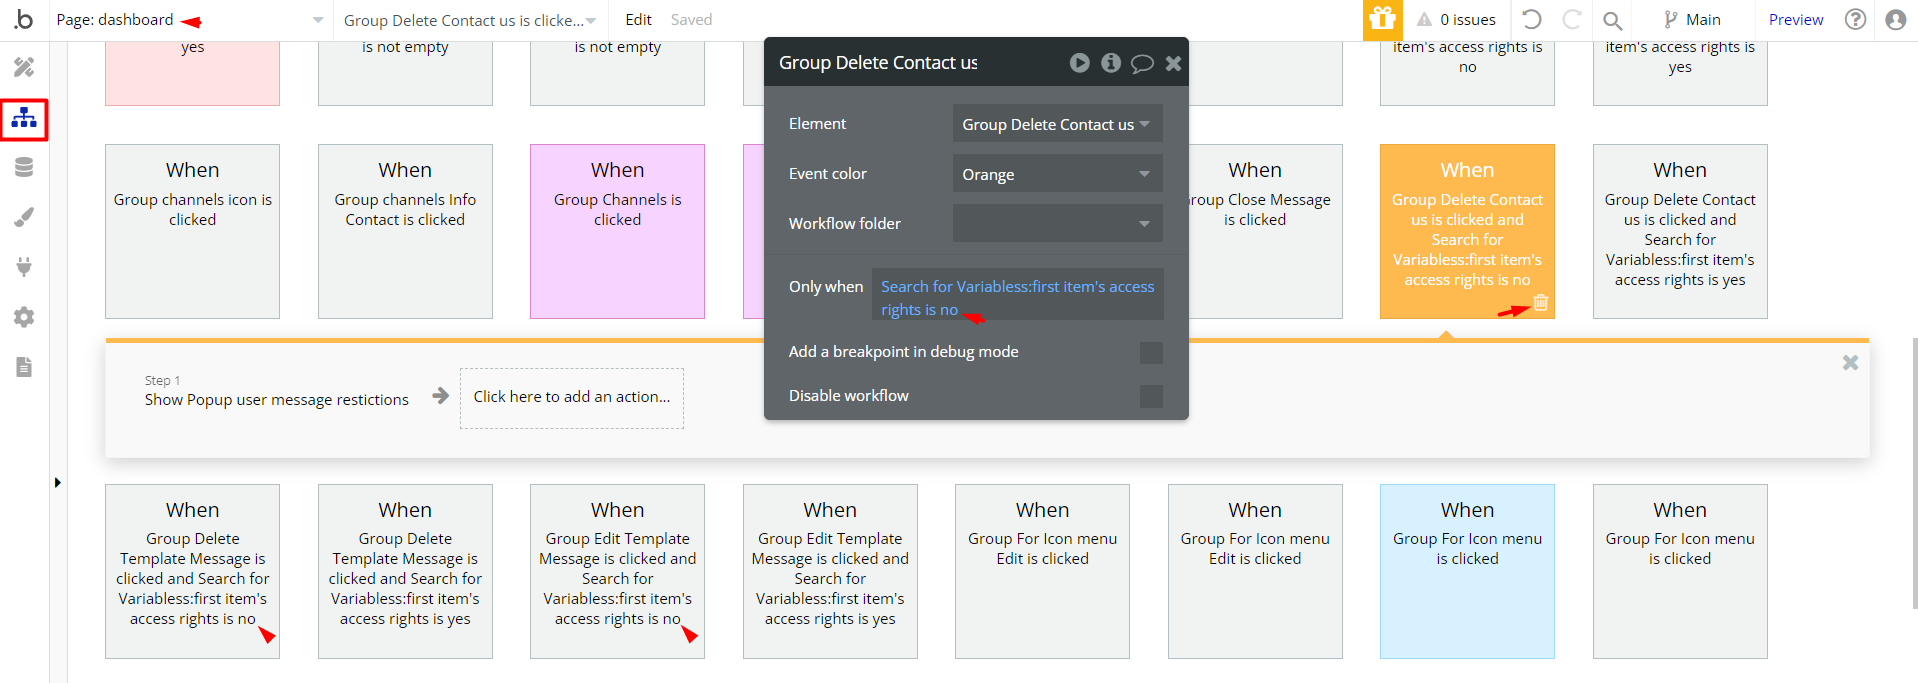
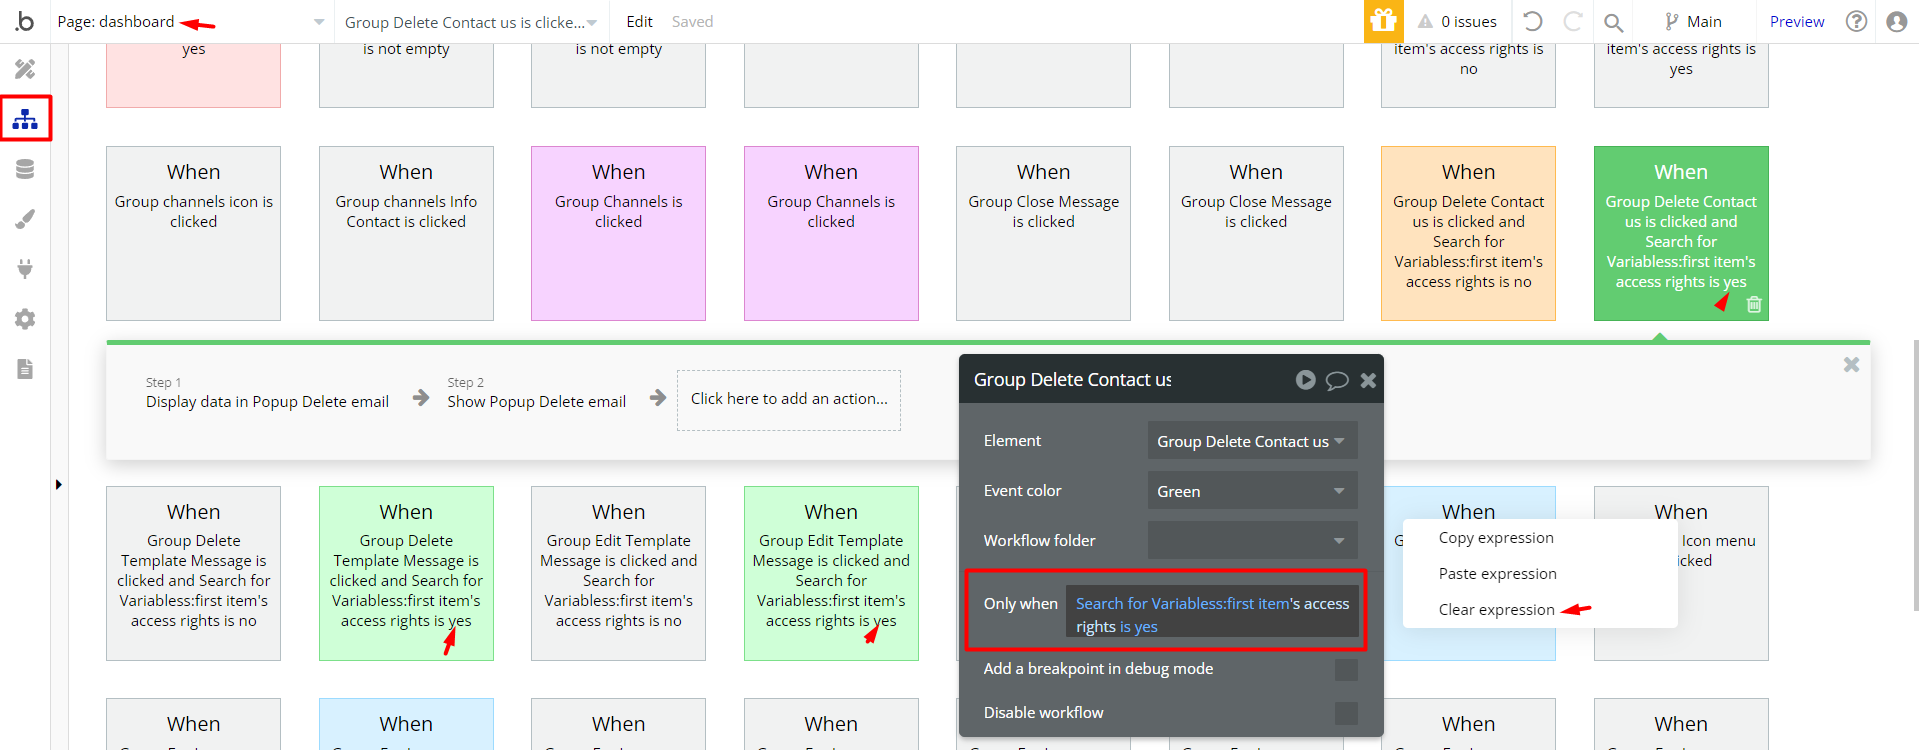
3. Then find the workflows with the condition “Search for Variables:first item’s access rights is yes” and delete just the condition.
Autopilot setup (Bot setup) - ⚠️Outdated!
Please note that this part of the guide is outdated as the Autopilot service was discontinued in August 2023. We are preparing to publish a new guide about Twilio Studio setup.
In the meantime, please see the Twilio guide available here: https://www.twilio.com/docs/studio/tutorials/how-to-build-a-chatbot
- Go to Twilio Console (https://www.twilio.com/console)
- In the left menu, find All Products and Services
- Select Autopilot from Products and Services option

4. Select either Start from Scratch or Build from Scratch, and in the new pop-up that appears give it a Name and Description, click Create Bot.


5. After you've created the bot, you'll get into the menu where you will start training the bot according to your requirements

6. By clicking Add a task you'll be able to create new tasks for users.
More about tasks read here: https://www.twilio.com/docs/autopilot/guides/how-to-build-a-chatbot#tasks

7. Once you add a new task, you'll have 3 actions: "Program", "Train", and the last one is "Delete"

8. Clicking on the "Program" button, will open an editor with a JSON object which will require a modification of a value for the field Say for the current task. After modifications are done click "Save" to save the changes.

9. The next part is to switch to a training task. Click on "Switch to train task"

10. Here you can add in the variants of the answers that the users will get. For that, press the button "Add Sample" and in the bottom right click the button "Simulate".
A window will open that will simulate a chat, there you enter the text that you gave the variants that your users might have and the bot will respond with the text you trained.

11. Once you're done with the setup of your bot, click "Build model" to approve the changes.
You're all set!
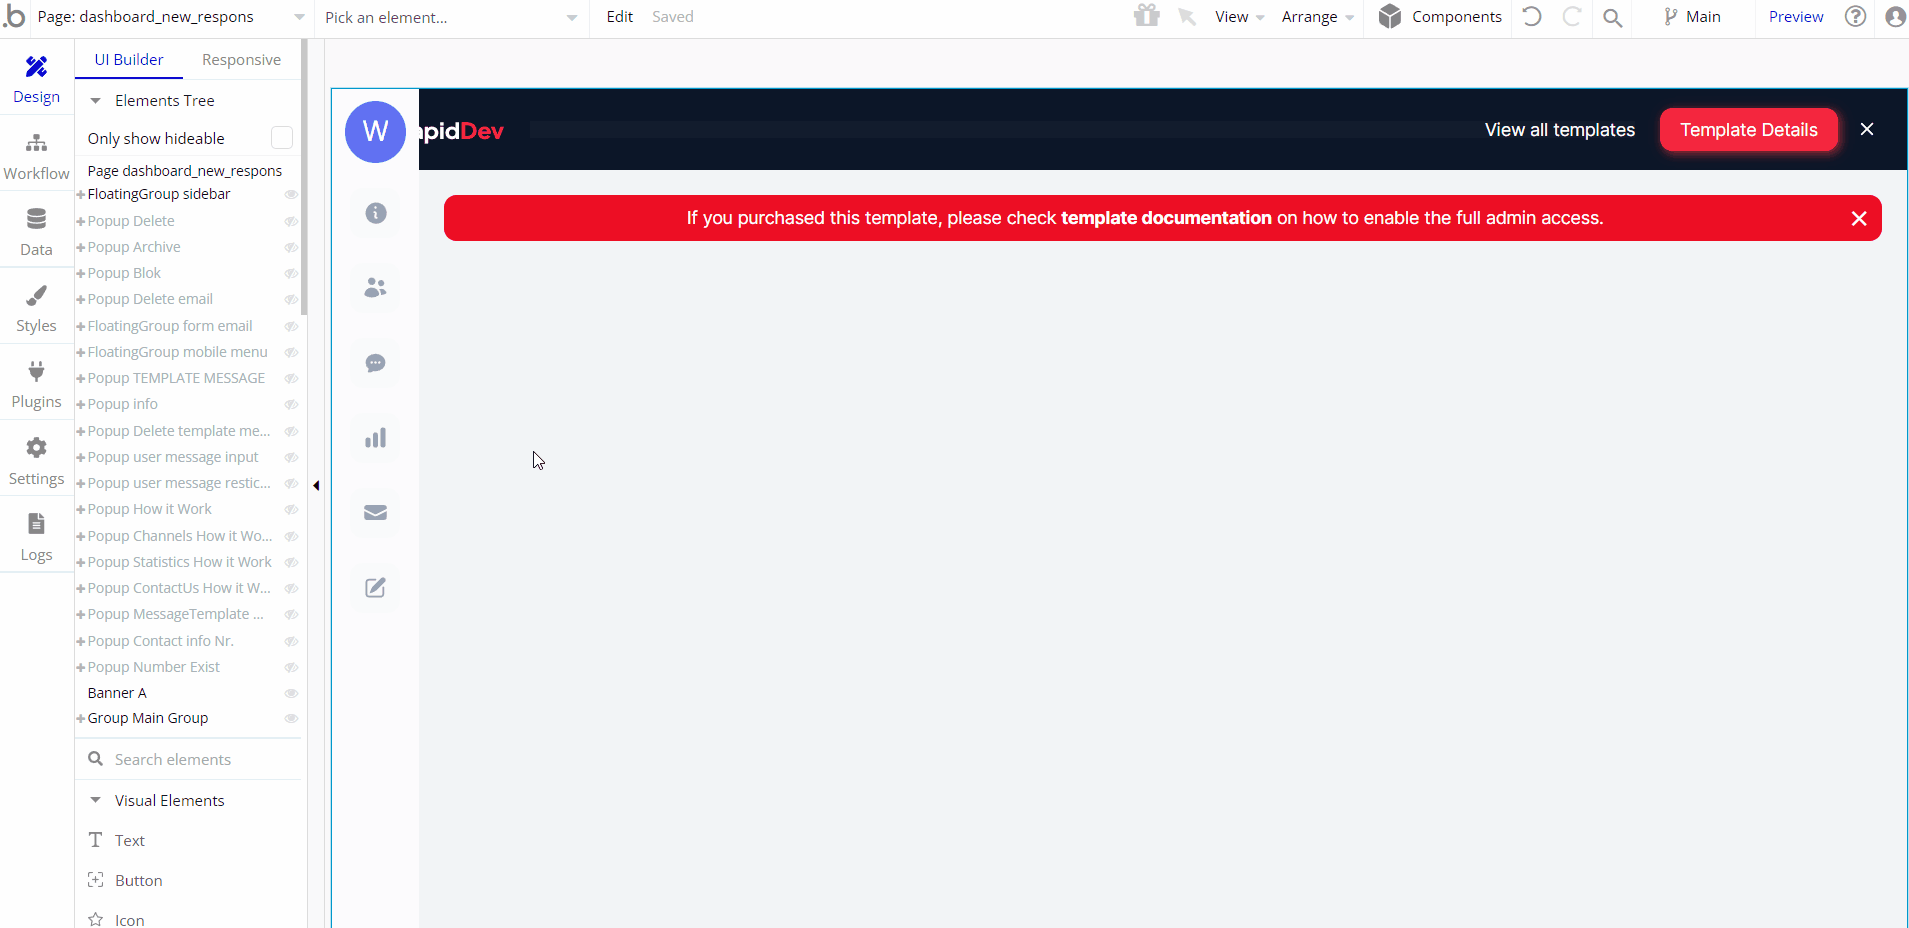
Remove Banner
This template comes with a promotional banner above the Header element. Feel free to remove it from your app.
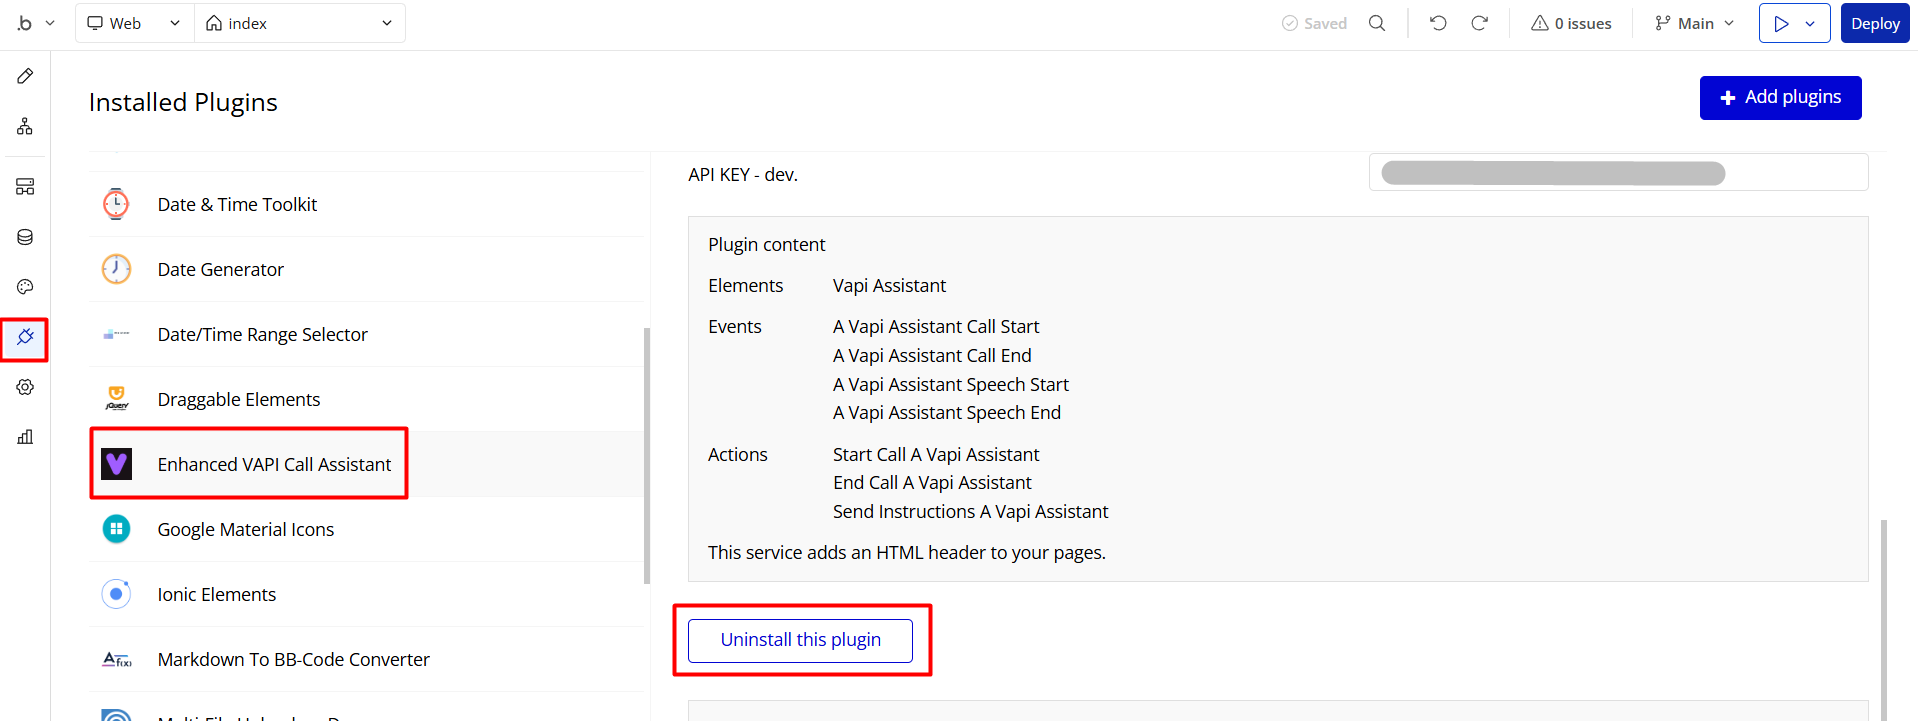
VAPI AI Call Assistant Integration
Check out a new feature that is powered by the VAPI AI Platform.
It allows your application to have a completely customizable voice assistant that will answer any customer’s questions within the framework of the set prompt.
Please note that this is a paid plugin, so to use it, you need to subscribe or buy it.
As for the traffic, you only pay for the minutes you use. Check the pricing details here: https://docs.vapi.ai/pricing
Call Assistant Setup: See the documentation on how to set up the Enhanced VAPI AI Call Assistant in the Bubble App.
If you don't need this feature within your app, feel free to remove it.
In this case, remove the:
- reusable element “AI Assistant” from the index page and reusable elements
- remove the following step in the workflow:
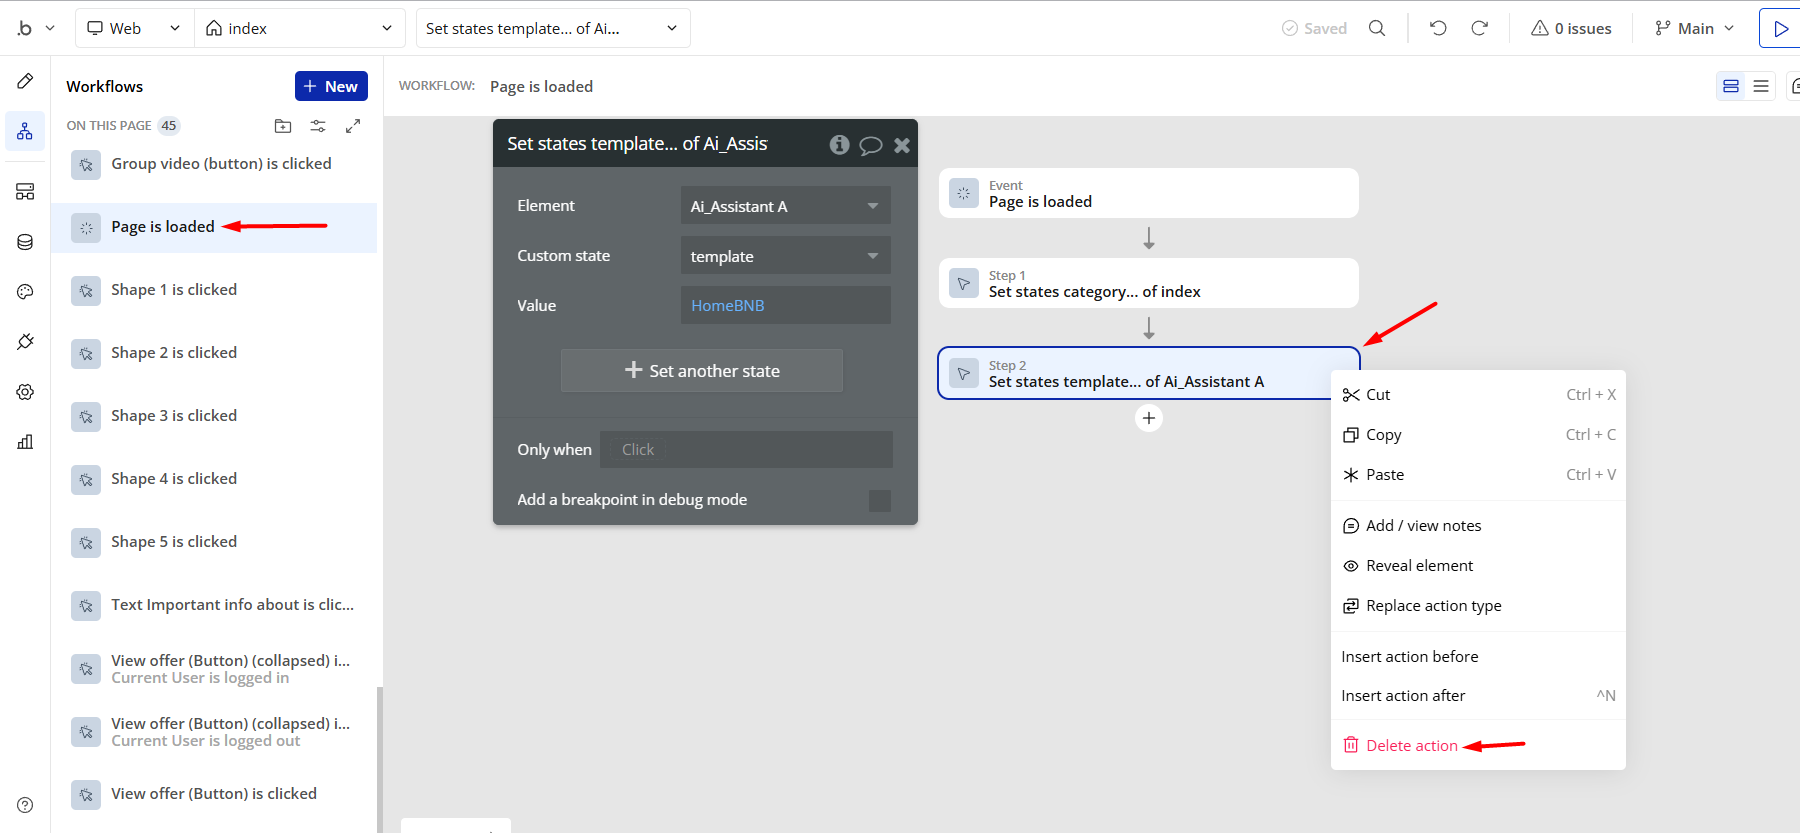
- Remove the Enhanced VAPI Call Assistant plugin from the plugin tab.
Things to Note
Note: In case you would like to use it as part of a more complex app, for proper functioning, please be sure to create all relevant data types within your application database before copying the template, and adding the required plugins.
For reference, use the Data Types and Setup Guide sections as well as the Plugin tab of the template editor.
General FAQs
If you haven't found the answer yet, contact us by sending an email to: support@rapidevelopers.com
Want to report a bug? Please follow this guideline!
Hidden Design Elements
Tip: Initially, on some pages, design elements in Bubble Editor might be hidden.
Here is an example of how to unhide 👀 them:
Pages Overview
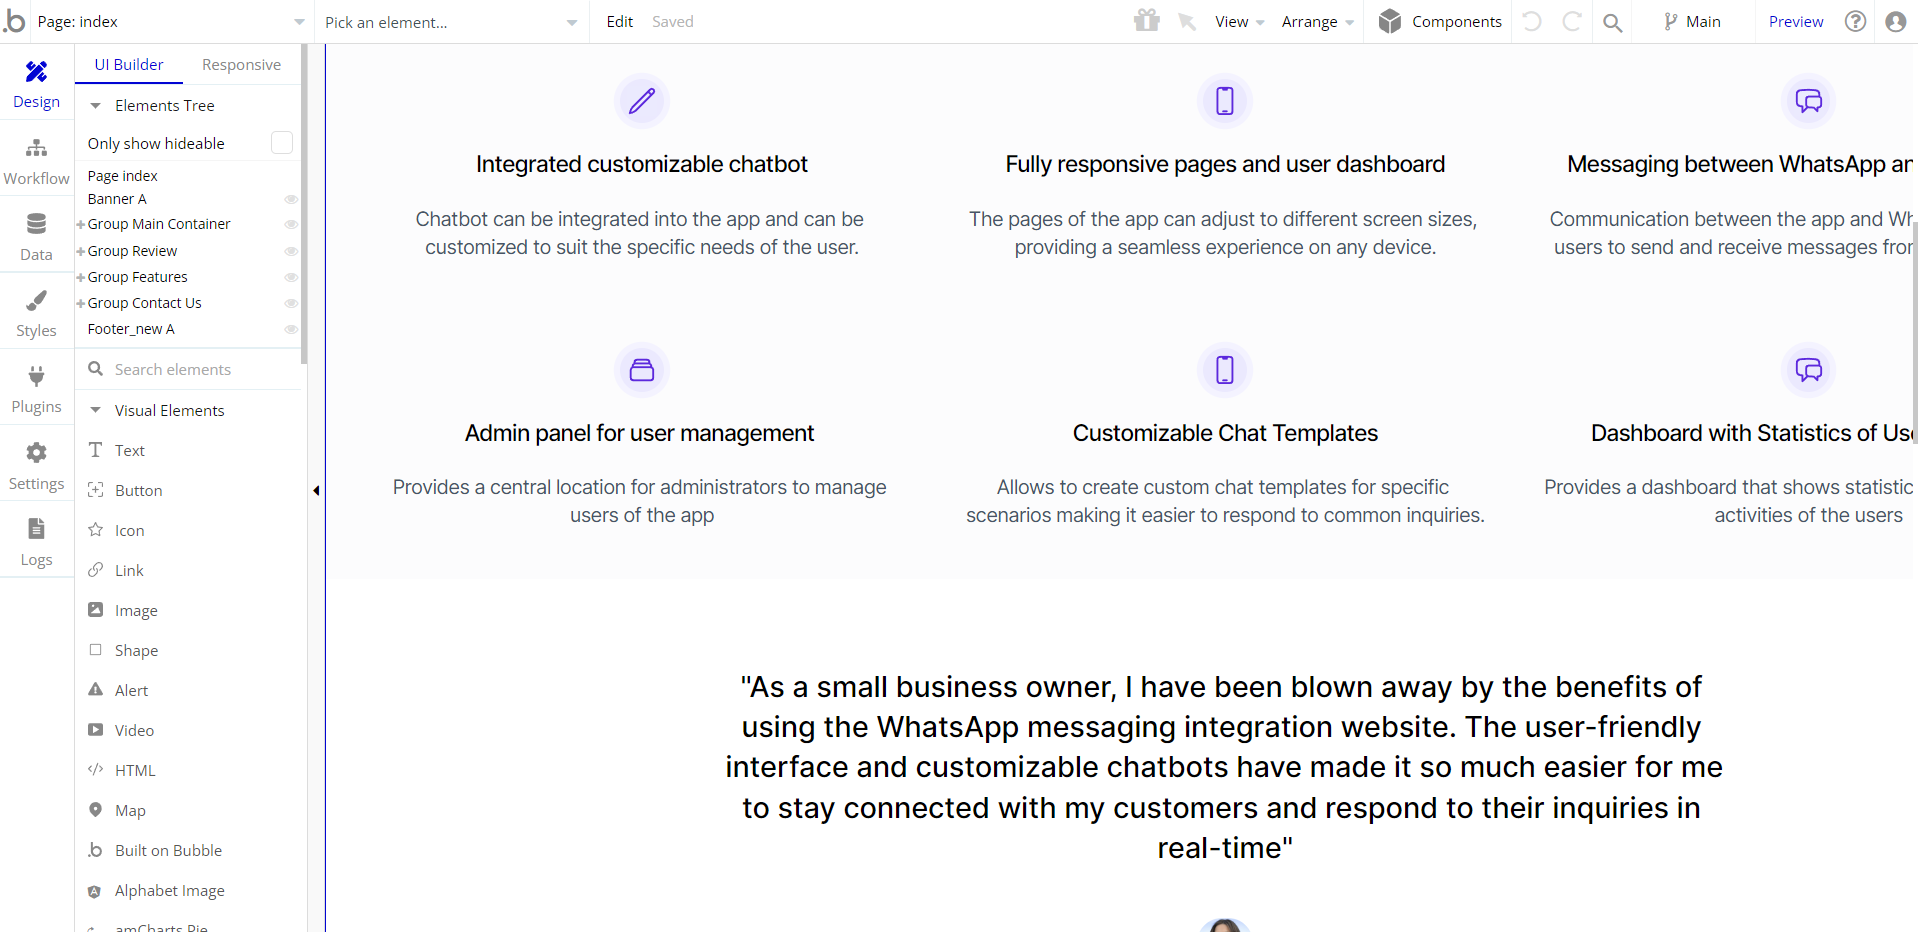
index
This is the main landing page of the template and contains basic information for new customers to learn more about the application.
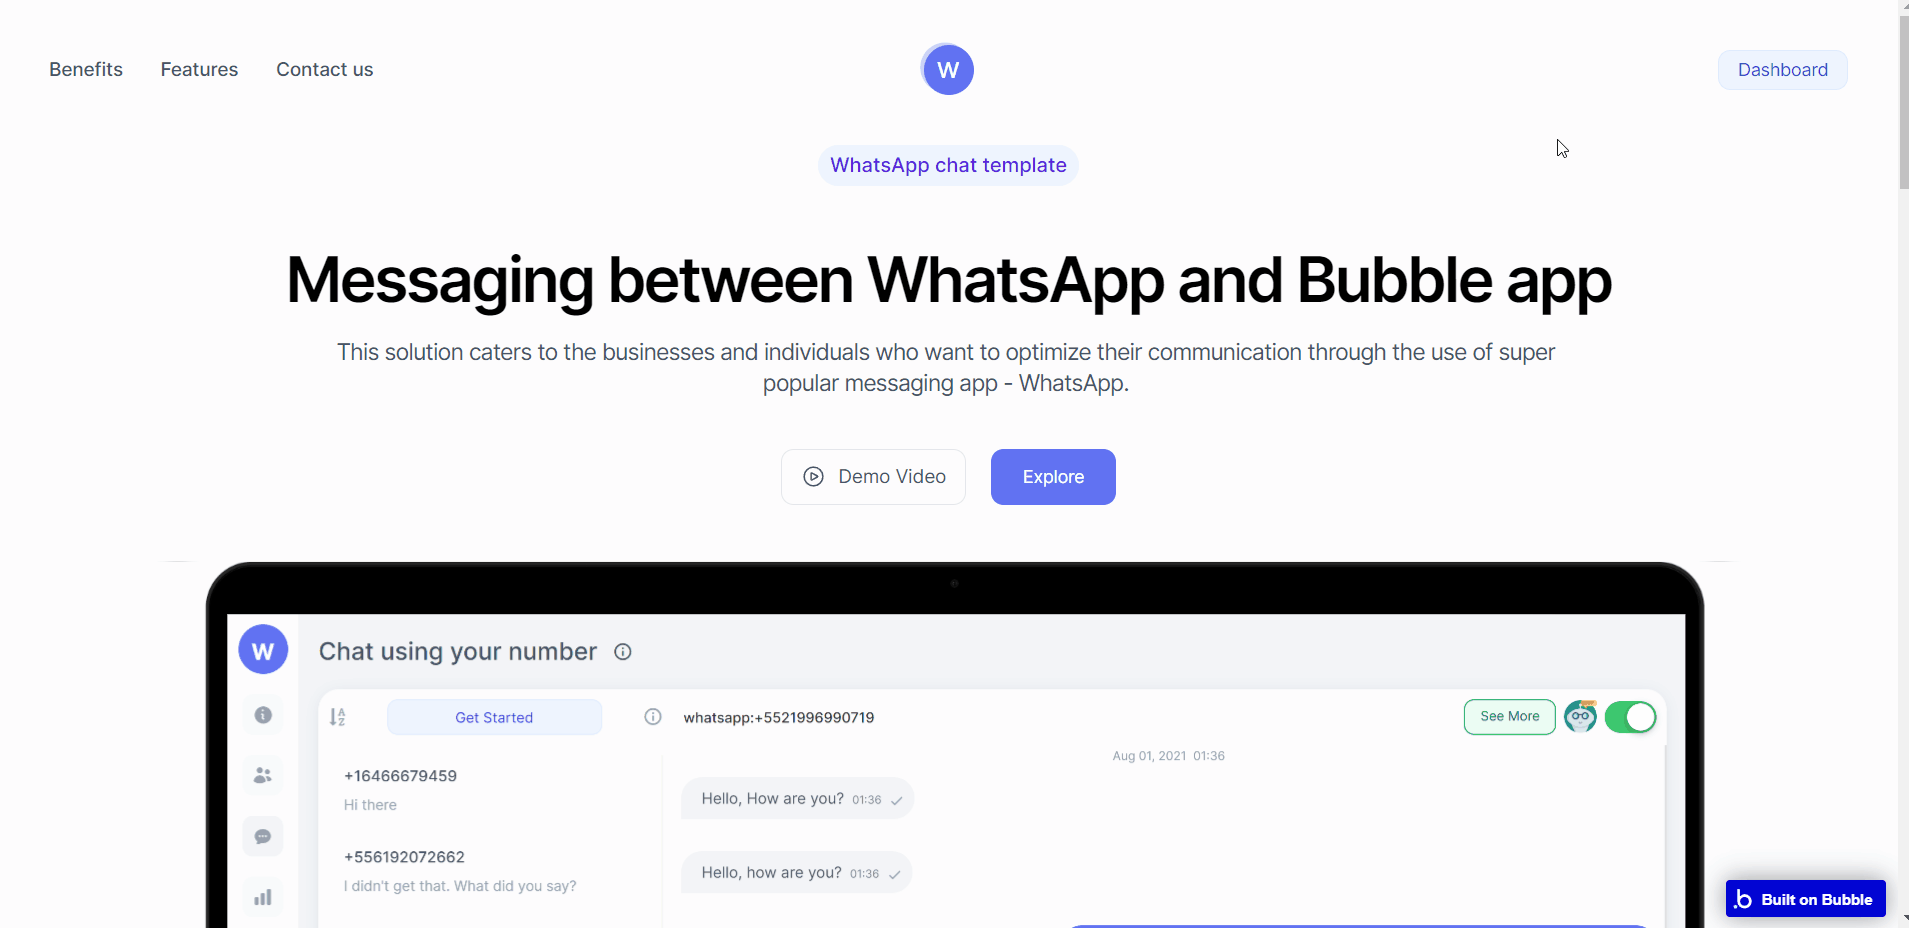
Besides presenting the information on the index page is a box for getting in touch where the users can send the messages to the admin.
All images and texts are displayed for demonstrational purposes and can be changed directly on the page.
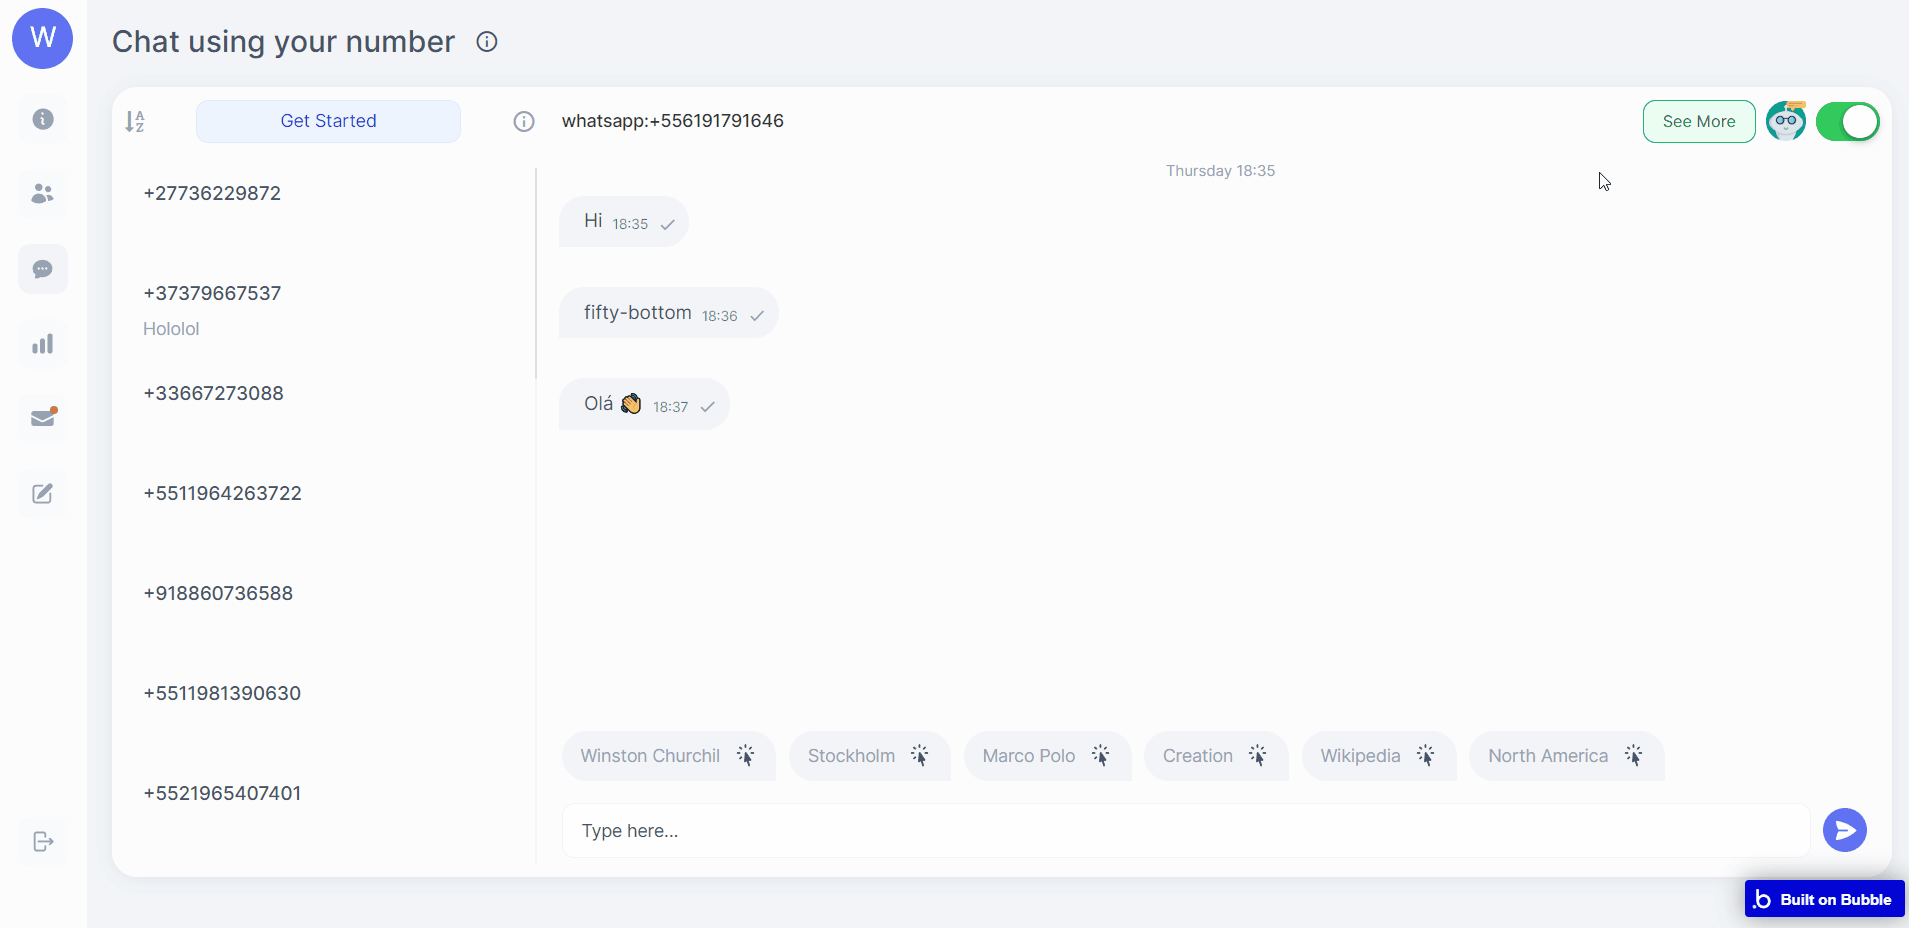
dashboard
This is the page where the main functionalities of the template can be used.
On the page, the users can access:
- The pop-up with the description of the steps needed to begin testing.
- The channels management tool where the user can manage the contacts from the chat.
- The chat is where the user can see all chats, read the conversation, answer, and use the templates for answering. On this page also is possible to turn off and on the chatbot for the specific channel.
- The statistics of the application with the number of channels, nr. of WhatsApp messages, nr of messages from “getting in touch” and the number of available templates of messages. Also, here is the chart with the number of WhatsApp messages over time.
- The list of messages from “getting in touch” where the user can read, answer, and delete the messages.
- The list of templates where is possible to read, edit, and delete the messages.
On the dashboard page is also available the button for adding template messages.
Note: Switching between tabs works by changing elements’ custom states.
reset_pw
Here, users reset their password after accessing the link in the mail.
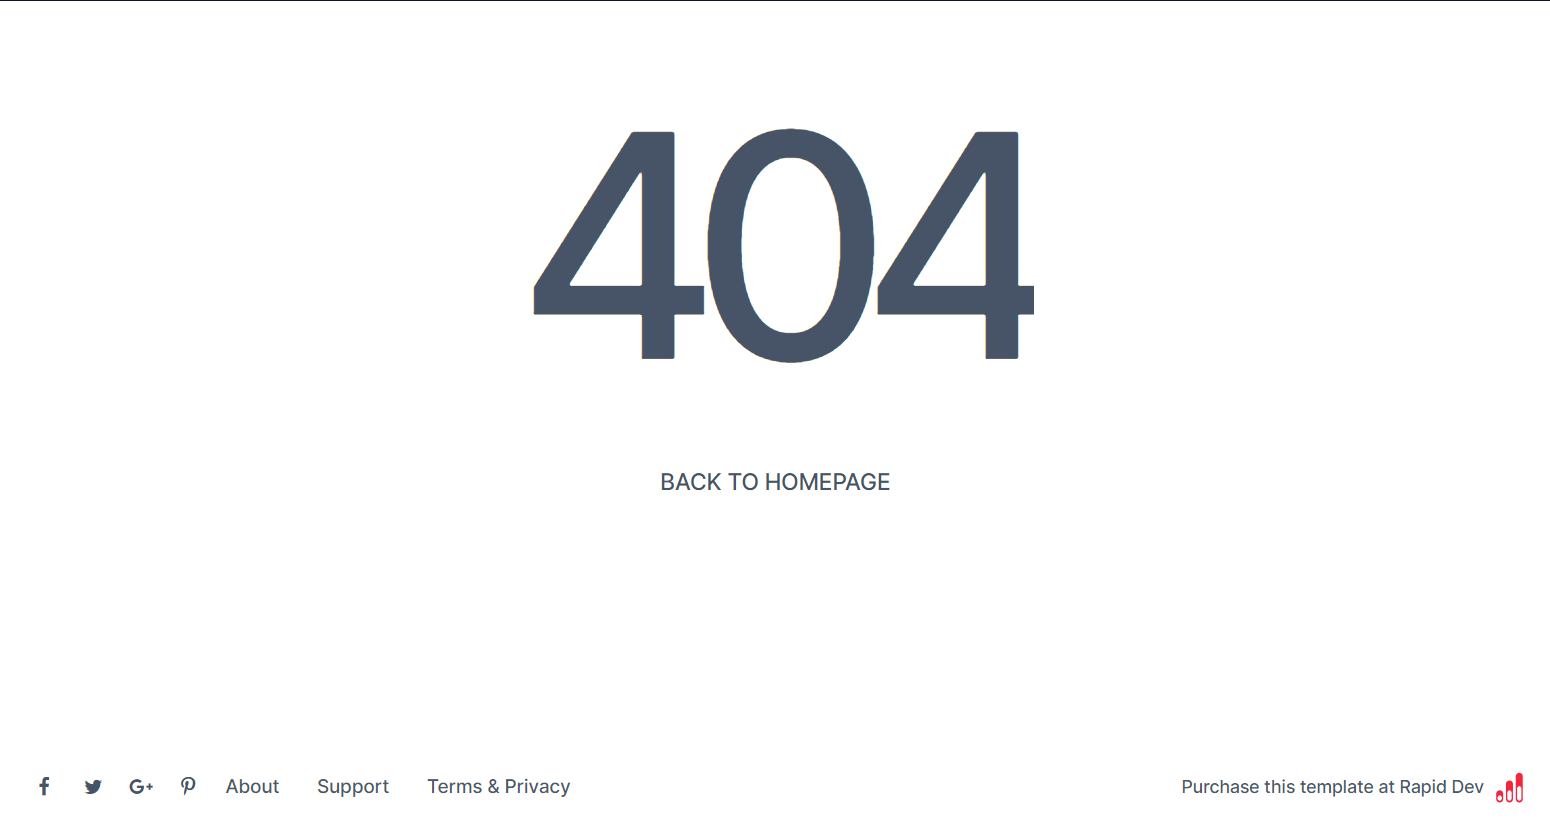
404
This is a page for 404 redirect errors, informing a user that the web page he or she is looking for cannot be found.
Reusable Elements Overview
Footer
The footer reusable element is located at the bottom of a page. It provides an example of how it can include external links, such as the company's social media, navigation, and copyright notices.
A great website footer design keeps people engaged and moving through the website. The workflows included with this element are pretty straightforward to follow.

This reusable element is customizable, so it is possible to change the styles and content of the element while keeping workflows or using it as inspiration for your own.
Data Types
Channels
Channels are all contacts from WhatsApp with whom was interacted through the chat.
The channels have a number corresponding with the WhatsApp contact and can be archived, blocked, deleted, and auto-piloted by the Twilio WhatsApp bot.
Contact Form
Contact Forms are the data of messages that come from the contact form from the index page. The data saved here are the email, message, and name of the user who sent a message through the Contact Us form.
Also, this data type is used for the identification of the status of the message (seen or not) by the admin.
Messages
The data type is used to save information regarding the messages from the chat. The data include:
- body with the text of the message;
- status with the states: sent, received, read, failed
- channels with the reference to the related channel
- from with the type of user who sent the message (currently only admin available)
- to the WhatsApp contact to whom the message was sent
- ID with the unique code of the message
- Created Date with the date and time when the message was created
Template Message
Template messages data type is used to save the text and subject of the template messages for the chat.
User
This data type stores user-related information.
Tip: The User data type has the following fields: email, Modified Date, Created Date, and Slug.
These fields' values can be used in workflows, conditional formatting, etc. To learn more, see the Bubble manual
Note: The data type has a privacy rule applied. See the 💬 in the database under the privacy section for details.
Release Notes
14 September 2023
UPDATE NOTE: This template received a complete overhaul of design as well as functionality. Most of the known bugs and issues have been fixed and new features added.
- 🔄 The template's design was reworked and updated to the new Bubble Responsive Engine
- 🎉 New template documentation
- 🔧 Added "Setup Guide" section
- ❔ Added "FAQs" section
- ✅ Added "Release Notes" section
- 🎬 Added "Video Overview" section
Note: Template updates don’t apply to the apps that were built on the template prior to updates becoming available.
Tip: To check changes in workflows and design after the release update, you can create a new block copy and compare the settings (design/workflow) of the new copy and the app you have.
So you don't have to "move" your customizations from your already edited template to the new block copy.
Ready to move further?
Enhance your app with powerful plugins
🔌 Rapid Dev Plugins: add Superpowers to your App
Boost your Bubble skills within our Lab
🎓 Rapid Dev Labs: no-code Courses and Tutorials