This section states the purpose of each page.
Introduction
In this summary, we will describe each page and its content. The Page Element is the fundamental one that contains all the other elements.
Tip: See Bubble Reference for more information about Pages element https://bubble.io/reference#Elements.Page 🙂
Pages
index
This is the main page typically encountered first on the web app that usually contains links to the other pages of the site. A homepage includes a variety of menus that make it easy for users to find the information they need.
Index page of this template includes the signup and login forms with beautiful animations.
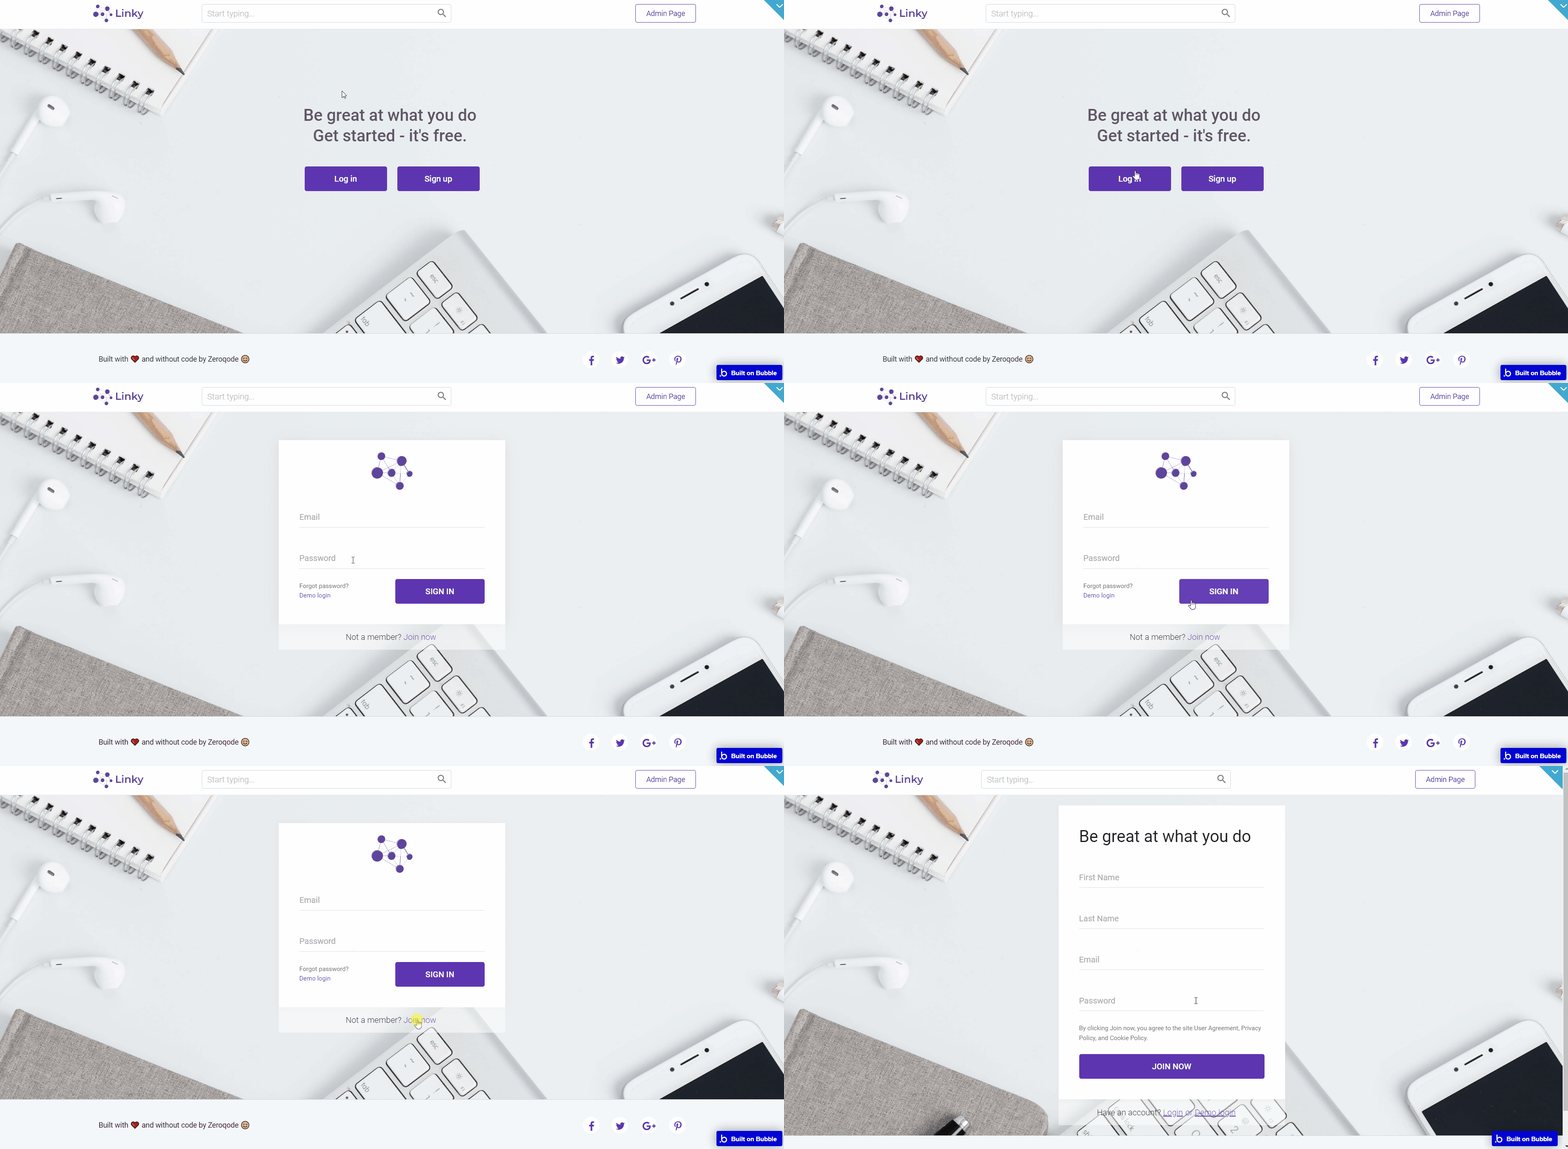
Tip: The search box and admin page redirect can be found in the Header reusable element.
Tip: Initially, the design element might be hidden.
Here is how to unhide 👀 them:
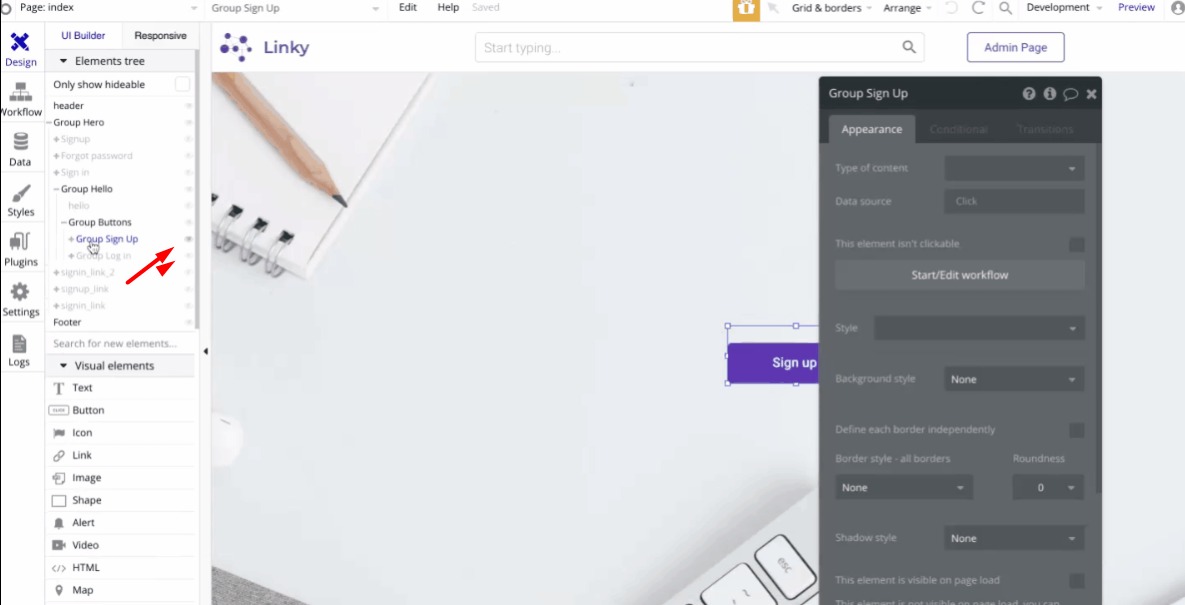
admin
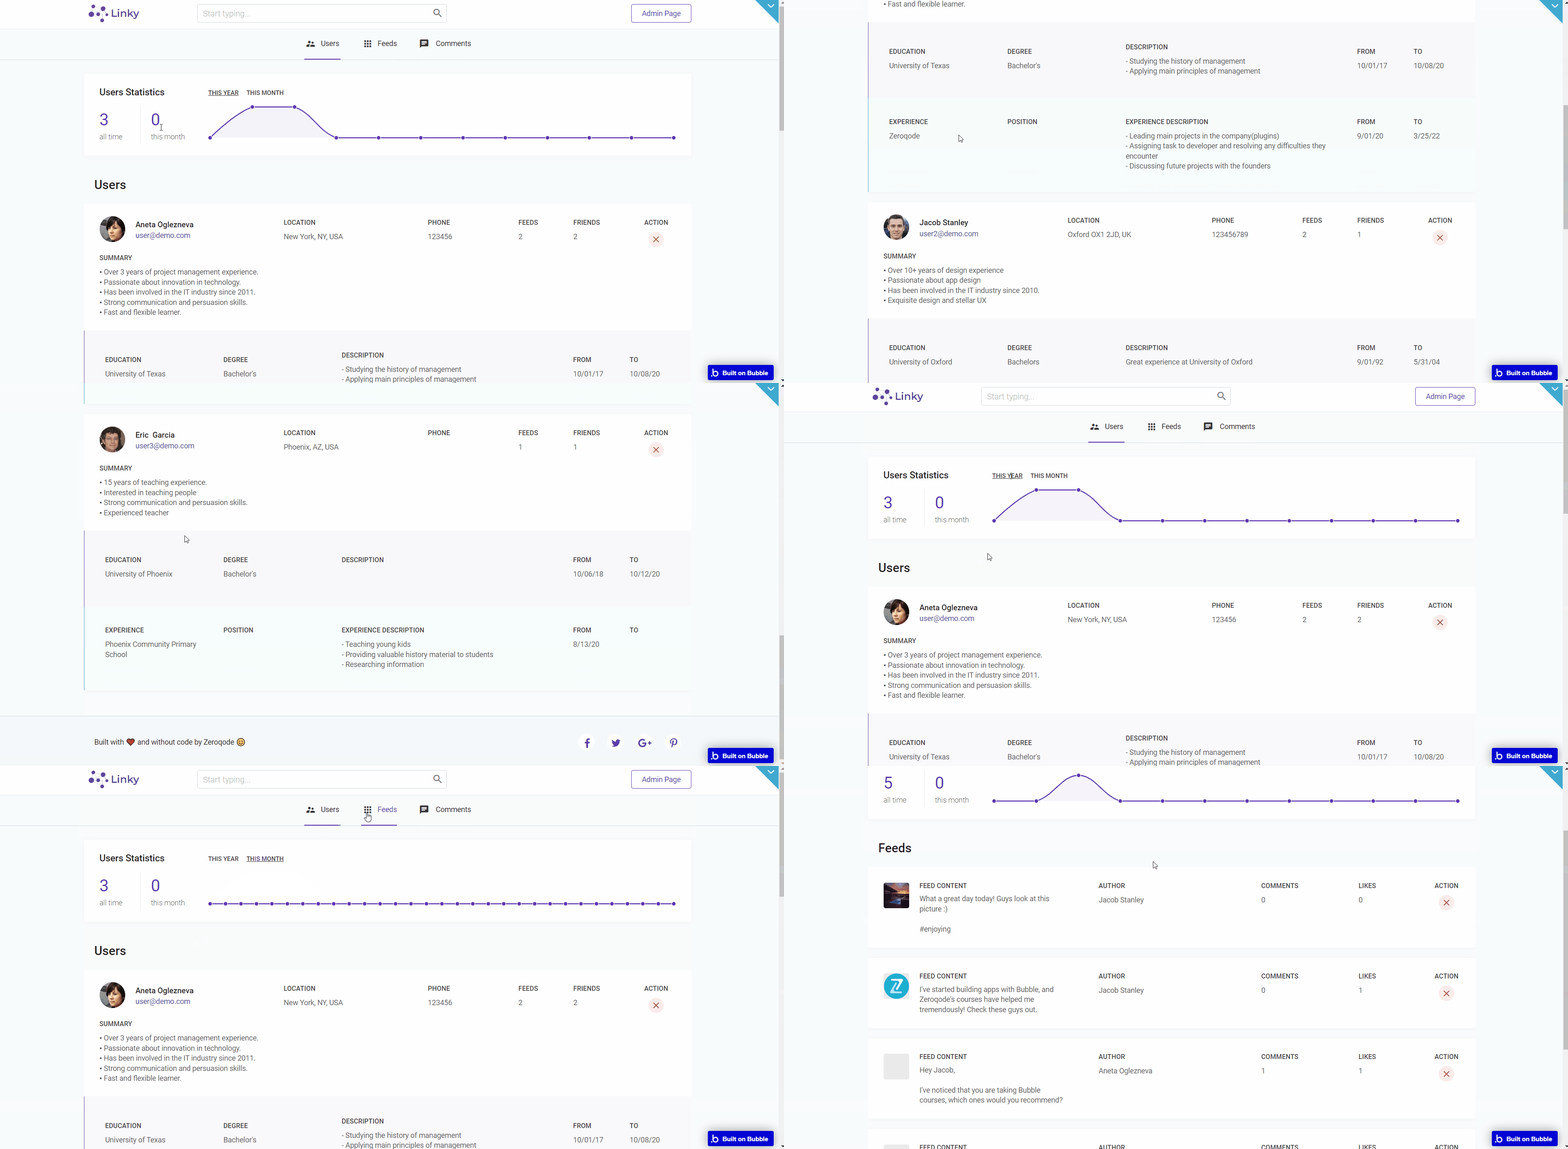
This page is designed to manage platform data, e.g. Users, Items, Payments… and others. Only users with admin rights are able to access this page (in read-only mode), and those users who have access rights can edit or delete anything here.
Here, the admin user manages platform data like Users, Feeds, and Comments, as well as 📈 stats for each tab.
feed
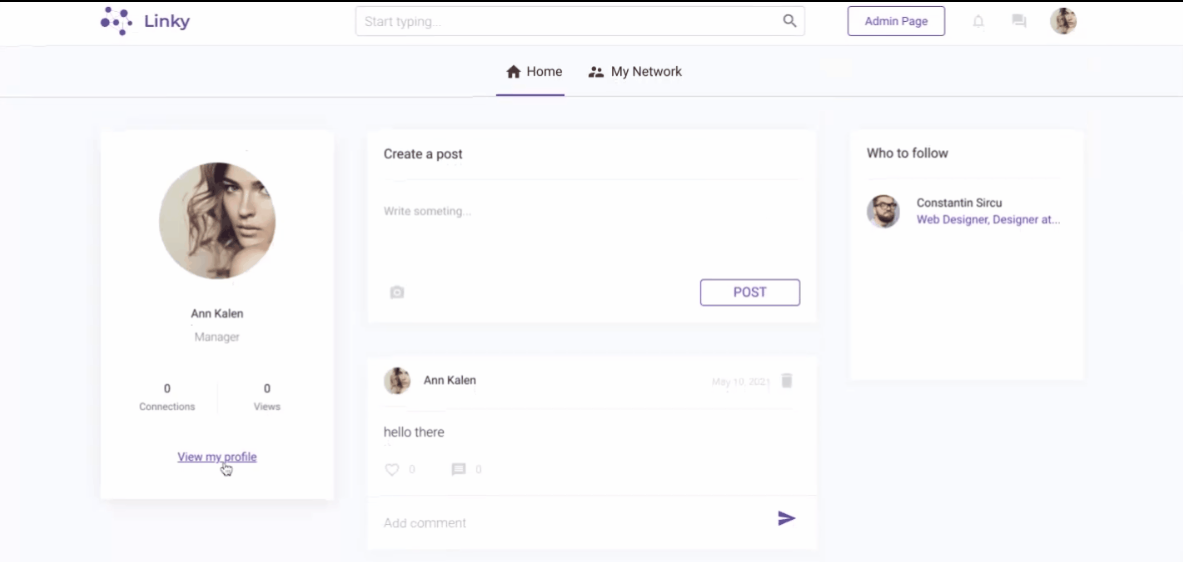
This page is the 🏠 home page of this template. Here, the users will find a short overview of their profile on the left-hand side, showing the profile photo, number of profile views, and connections.
In the middle is the live update of posts from the different accounts users are following with 🖼️ pictures and 💬 comments and the number of likes with it.
On top of the live posts, an update is the user's personal post section, here it is possible to compose a post and add pictures or videos, and post it live.
On the right-hand side is a list of suggested 👤 accounts for the user to follow.
When a user hits the "POST" button, a
Feed new object is created: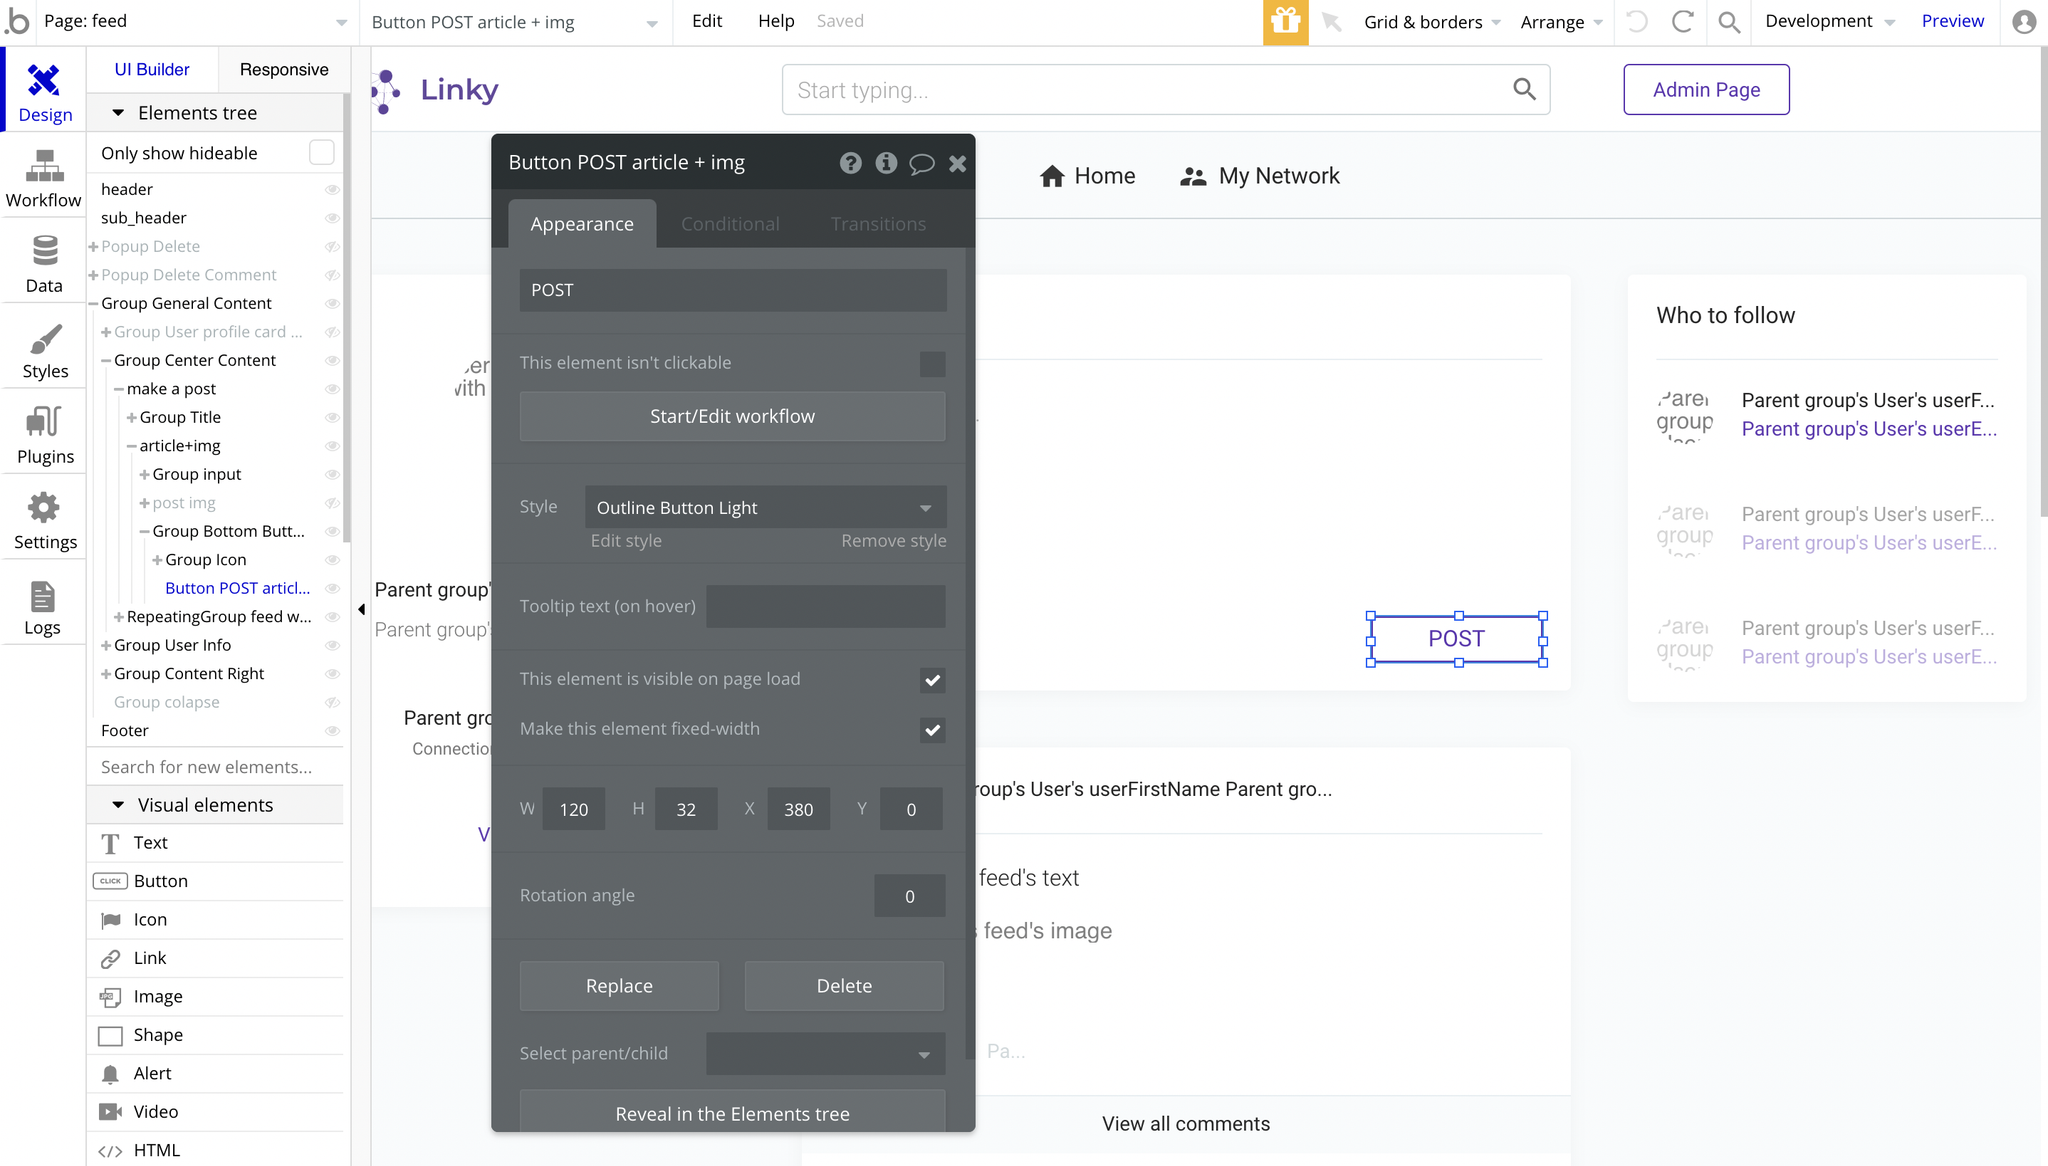
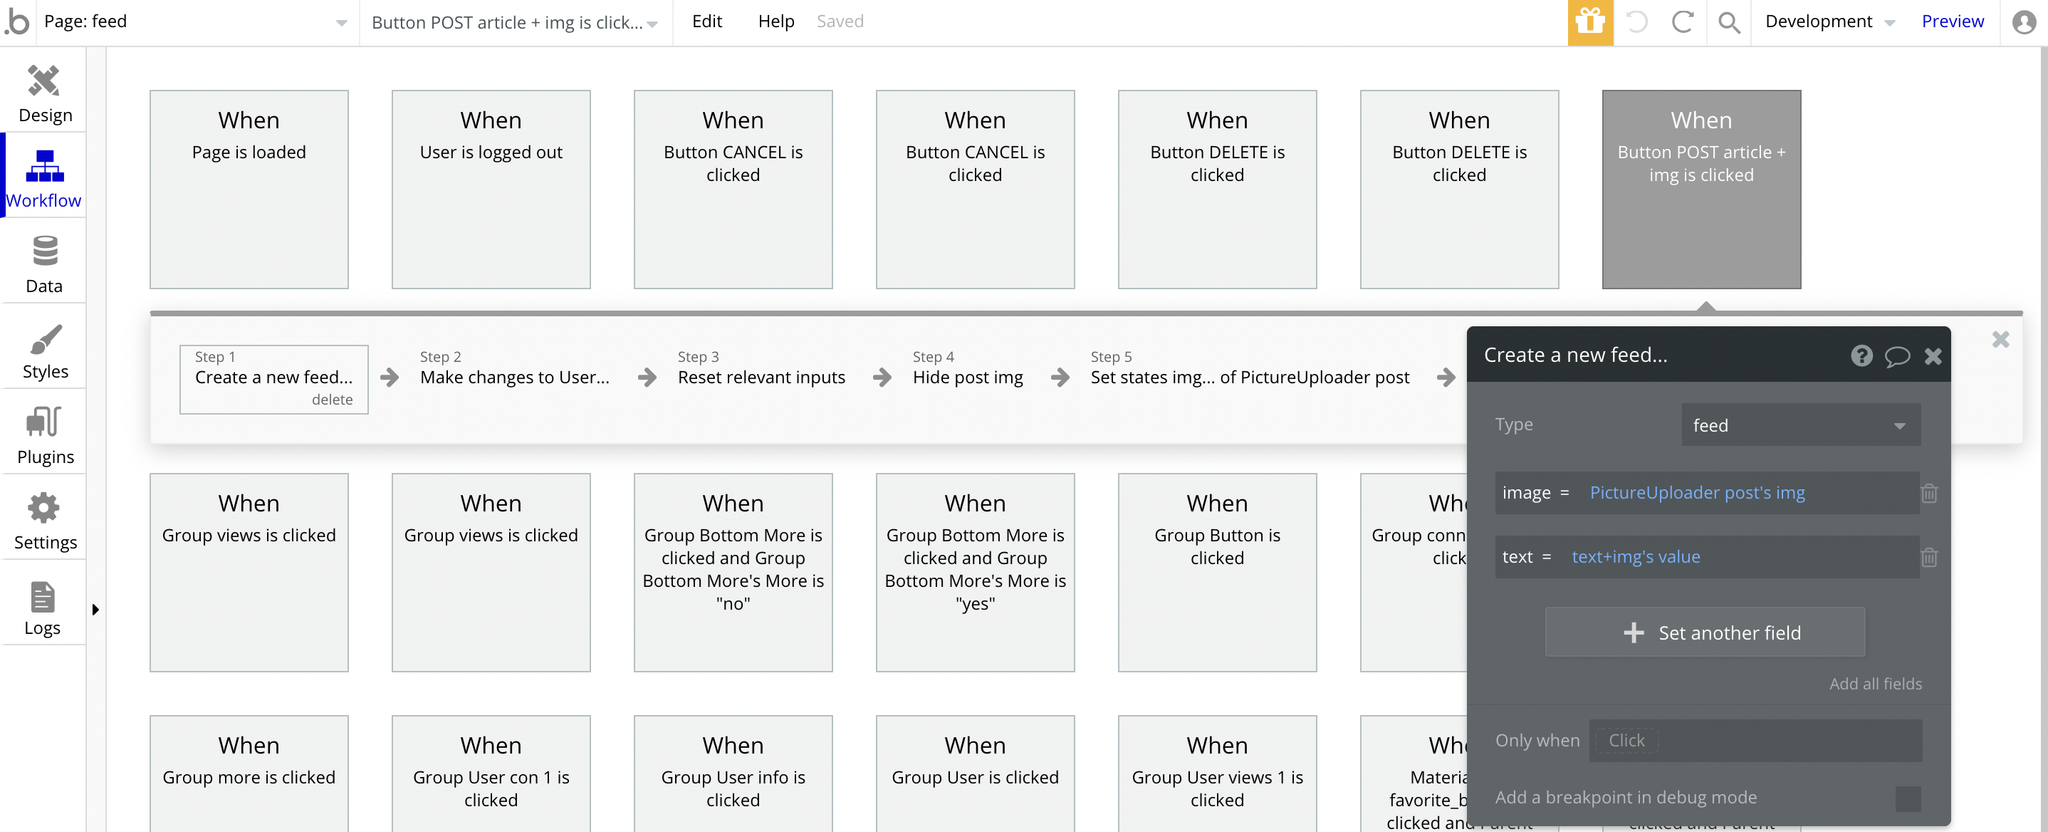
Then, the Current User's
userFeedlist is updated: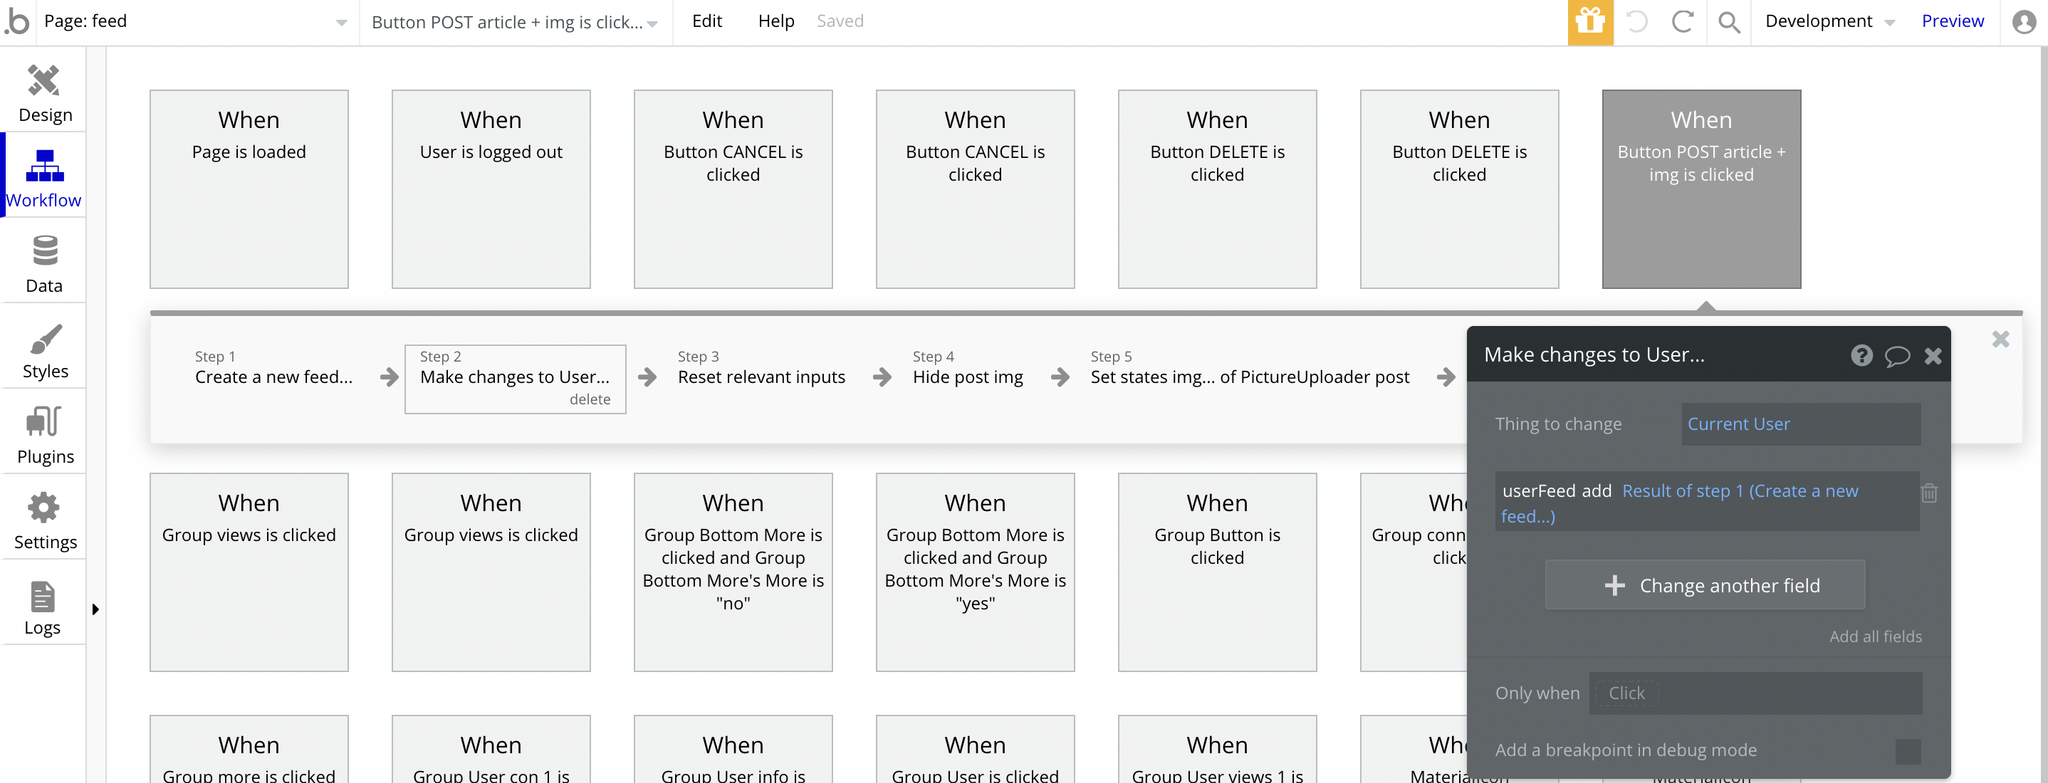
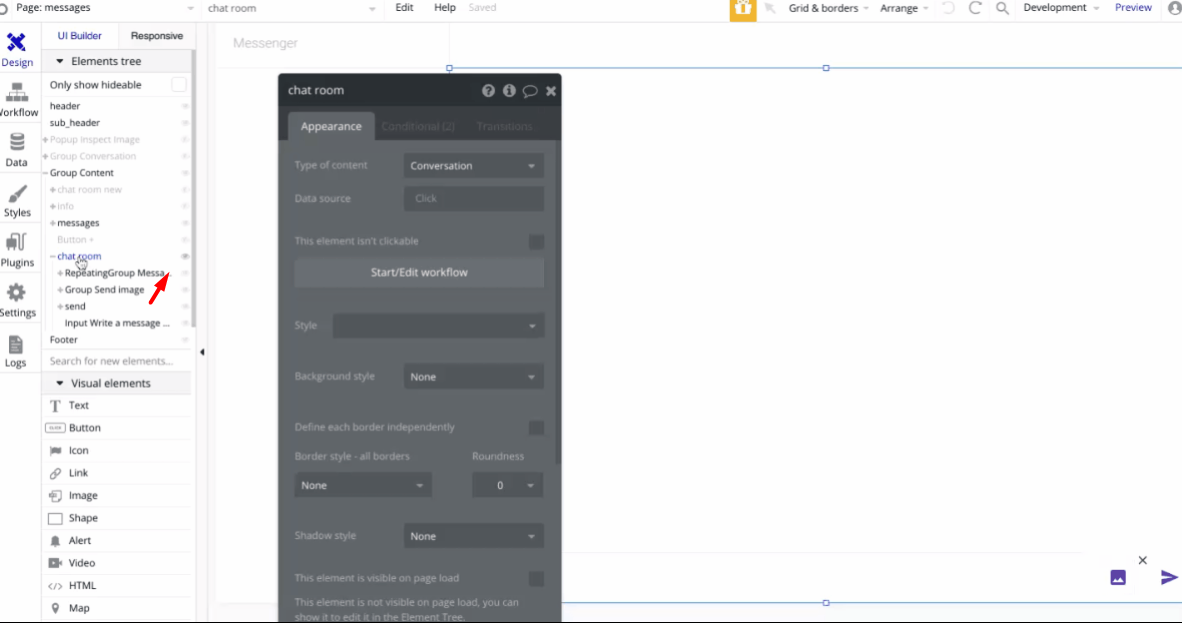
messages
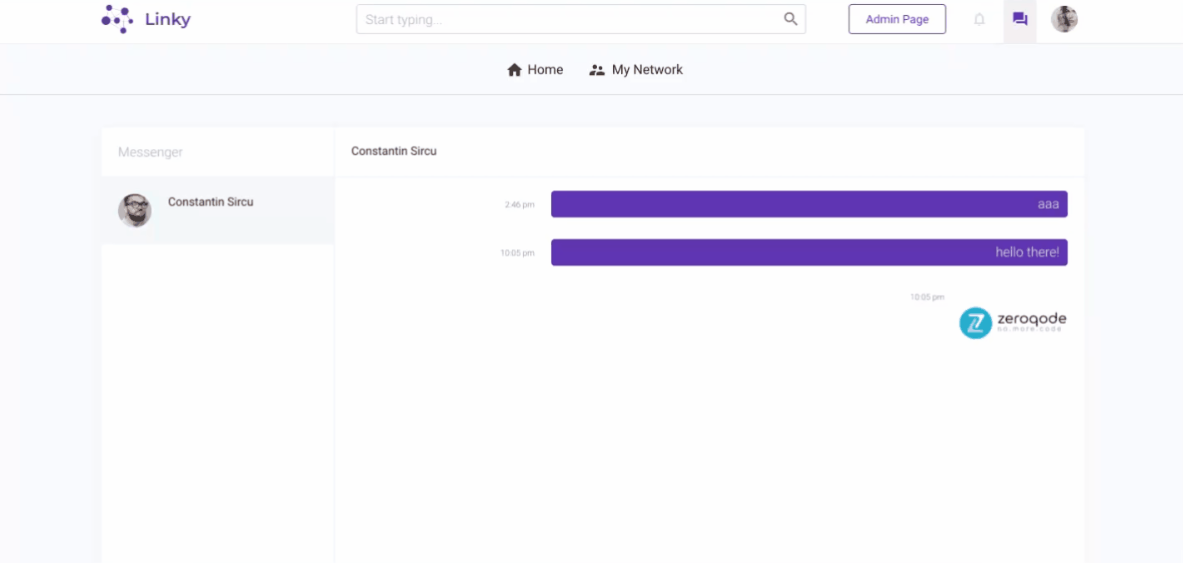
This page is the 💬 chatting page. Here, Linky users are exchanging messages, being able to send 🖼️ image messages as well.
Tip: Initially, the design elements might be hidden.
Here is how to unhide 👀 them:
my_network
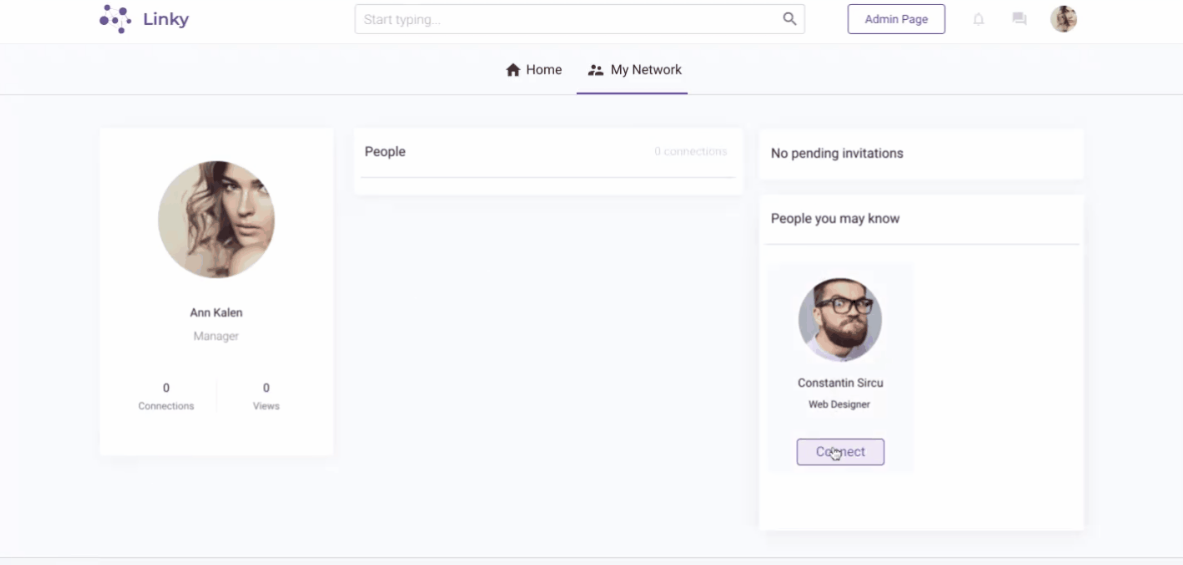
This page shows an overview of a user's 🤝 network. On your left-hand side, there is a short overview of the profile showing a profile photo, number of views and connections.
In the middle, there is a list of accounts under the tab of 🙋♂️ People a user may know.
On the right-hand side is the total number of connections a user has made.
Here is how a user can send an invitation request:
And here is how to accept the invitation:
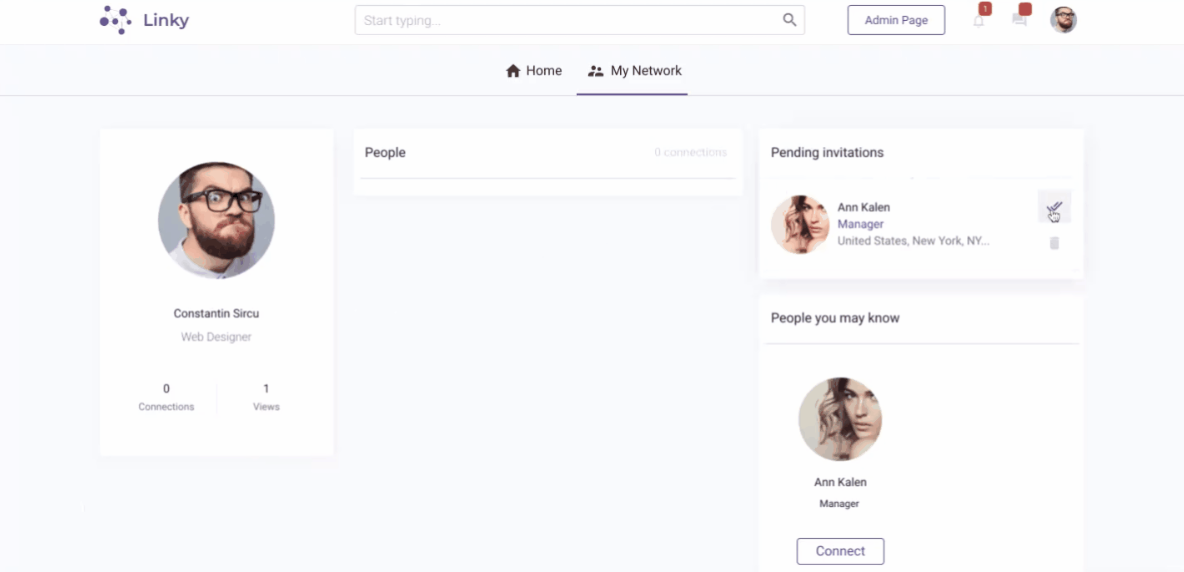
When pressing the "Connect" button, it is adding the Current User to the invitation list
userWaitingForApprovalof the selected User:
profile
Here, users are able to modify their personal information: name, profile photo, background photo, education, experience, etc.
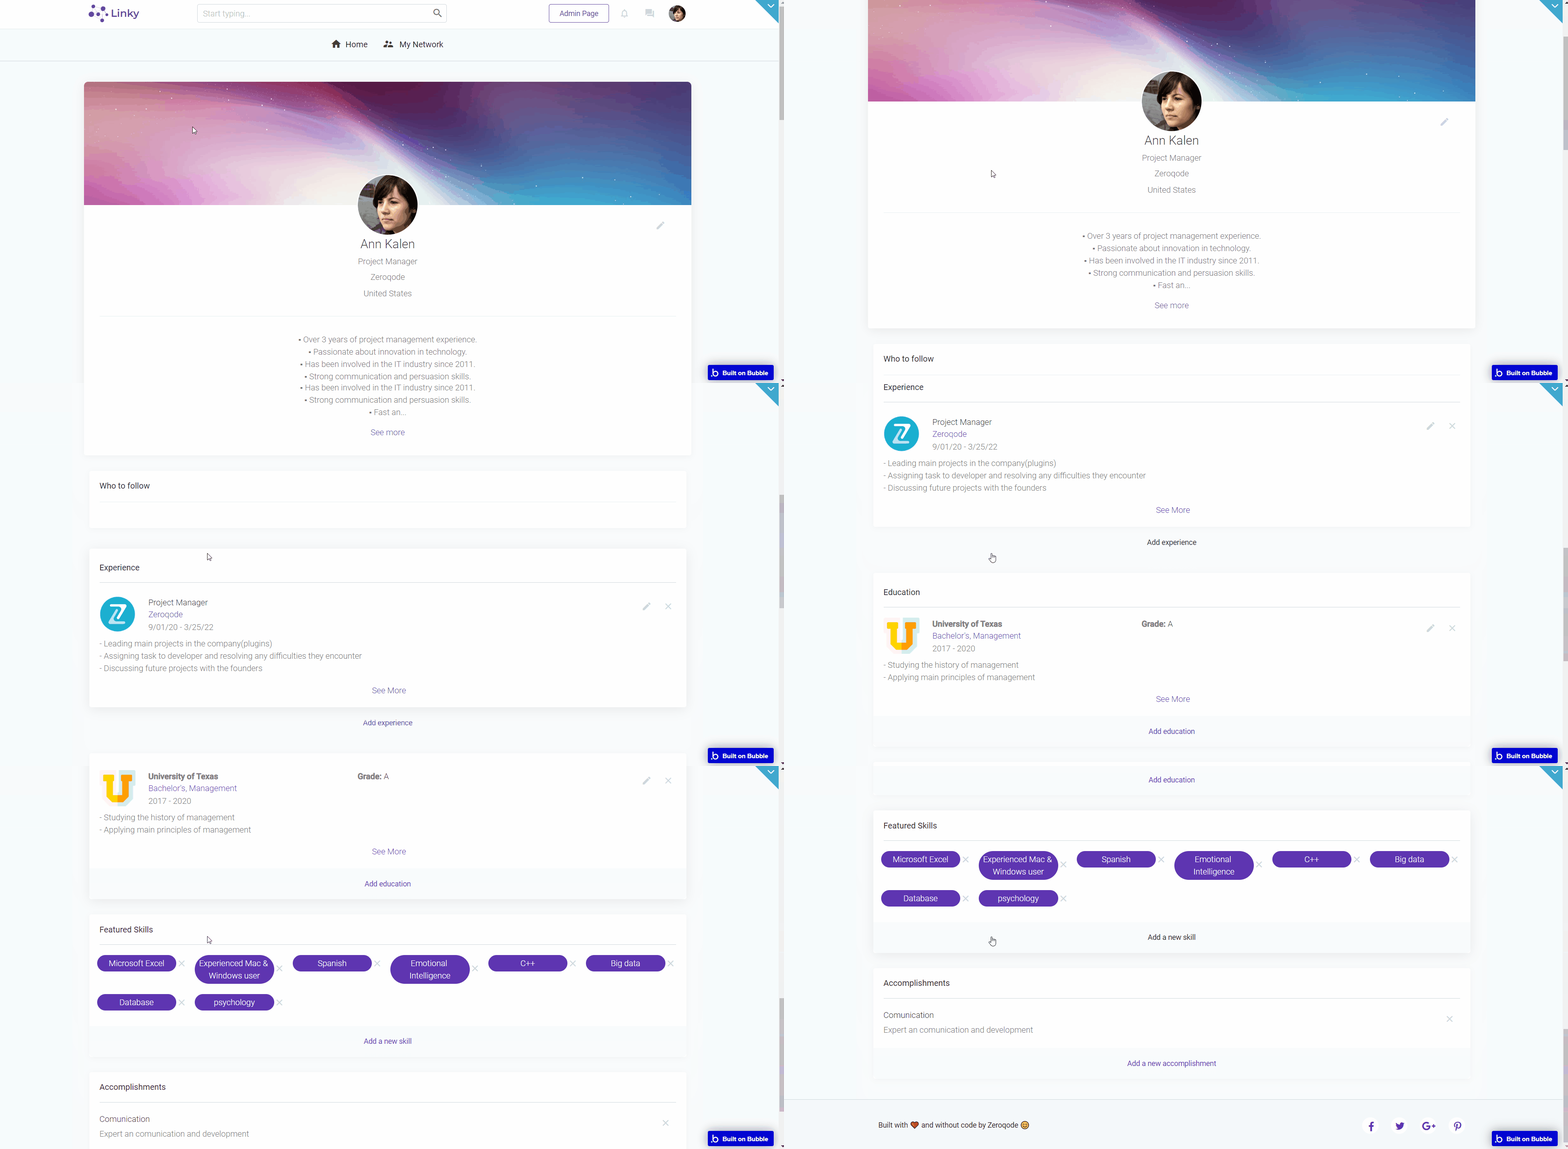
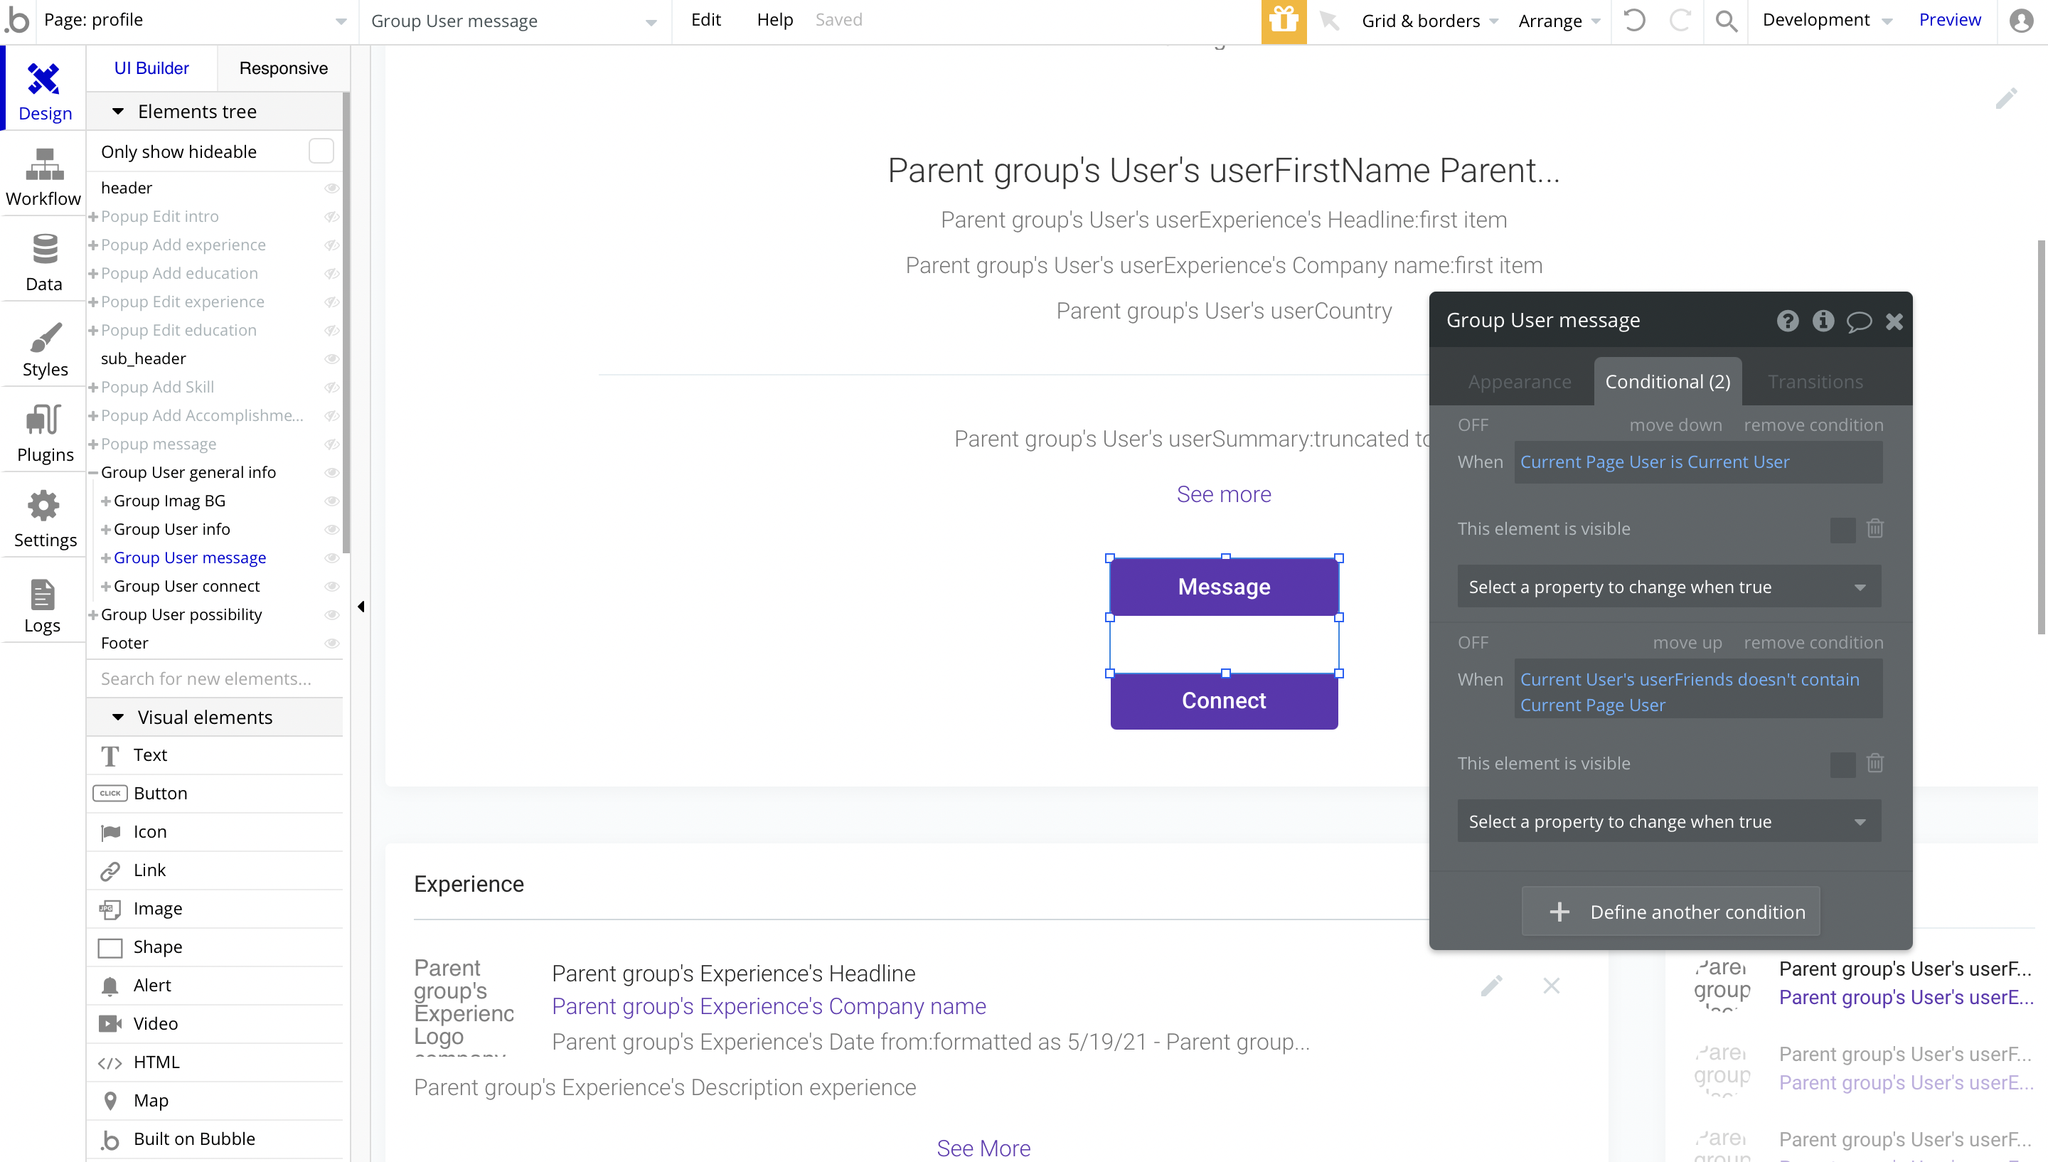
On this page, there are a couple of buttons that are hidden on preview in case the Current User is viewing his own profile:
Group "User message"
Group "User connect"
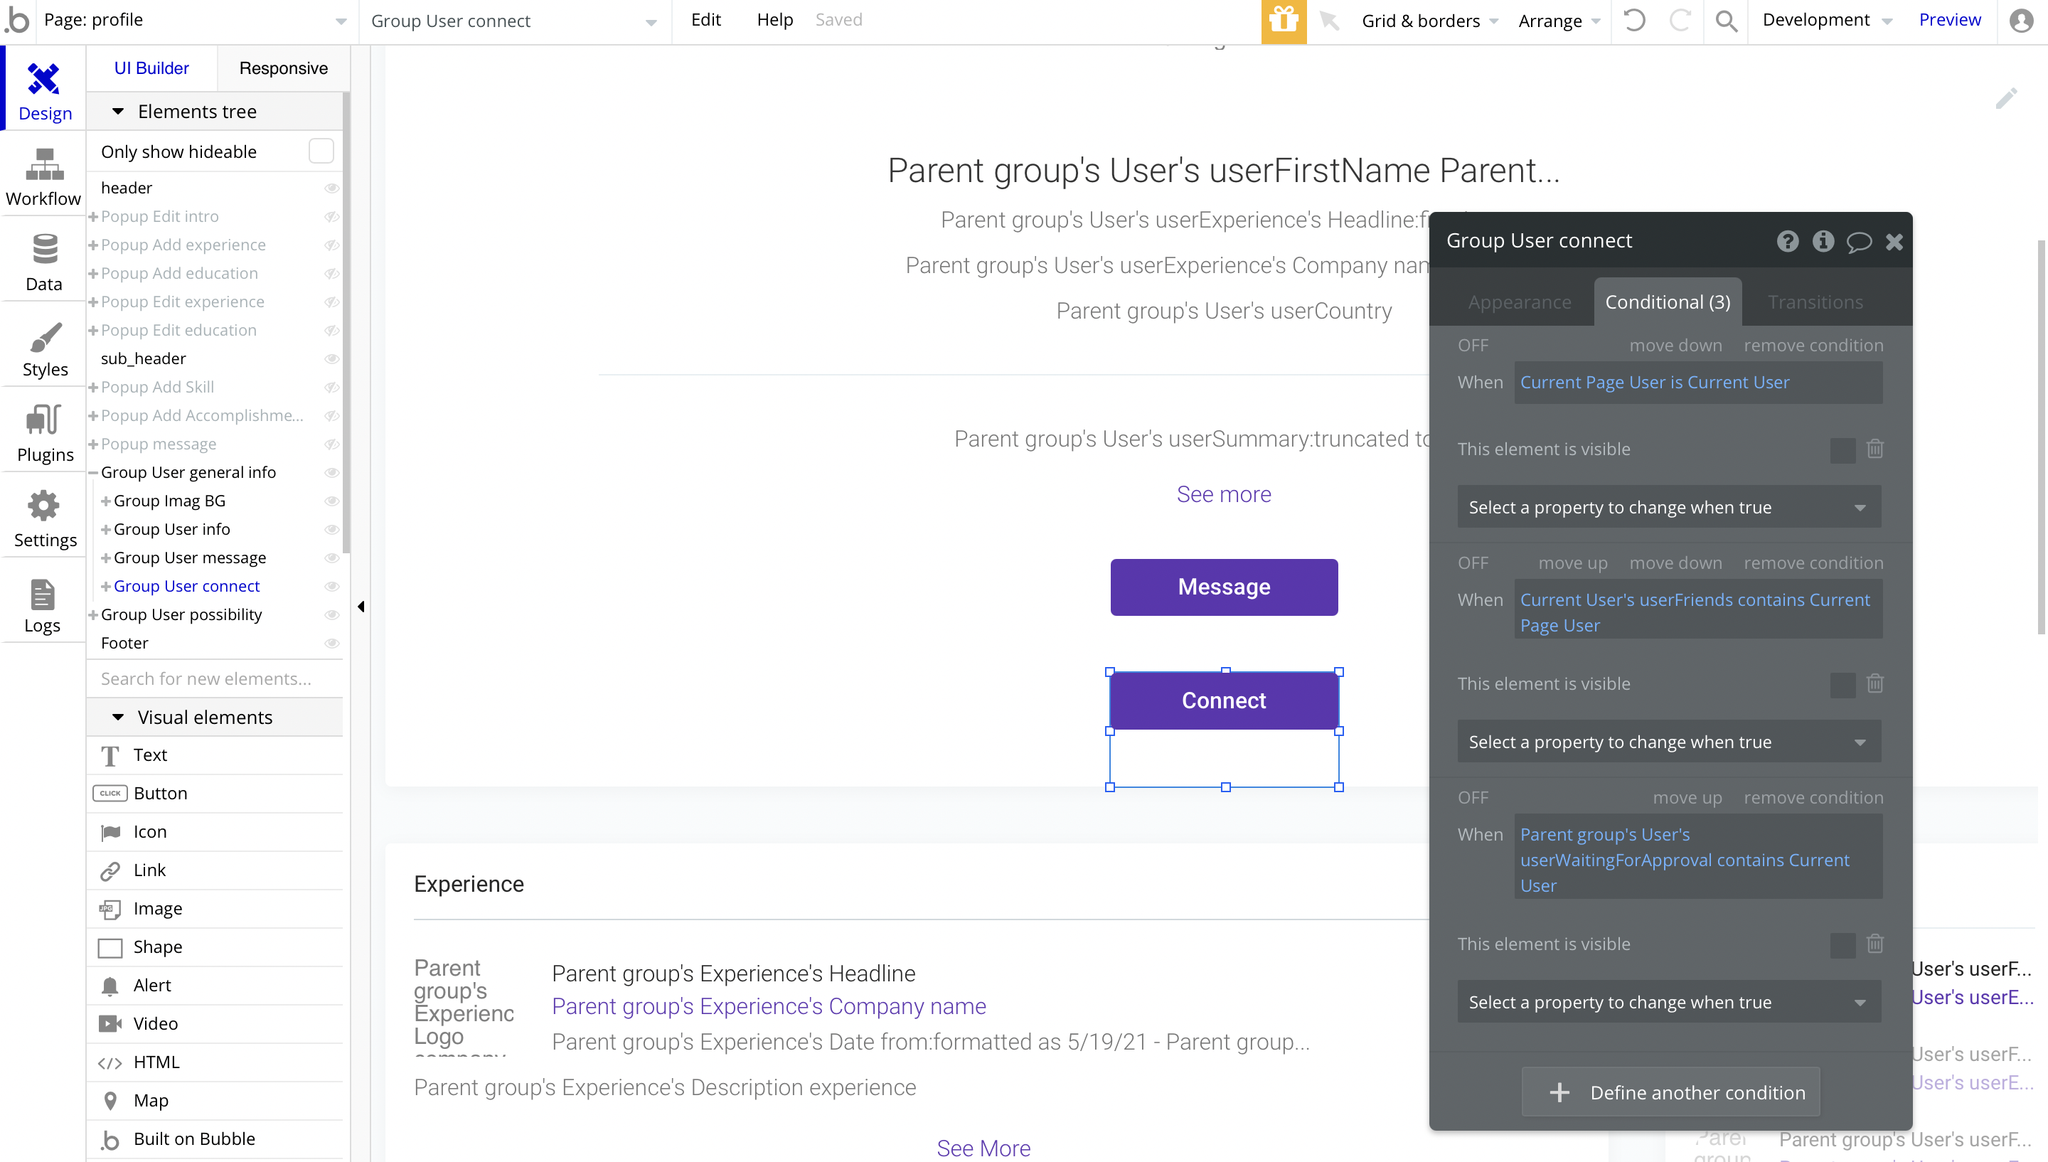
Tip: These groups are hidden to the Current User to prevent from sending an invitation request to himself.
And if user tries to Connect, the Current User's
userWaitingForApproval list is updated:
profile_views
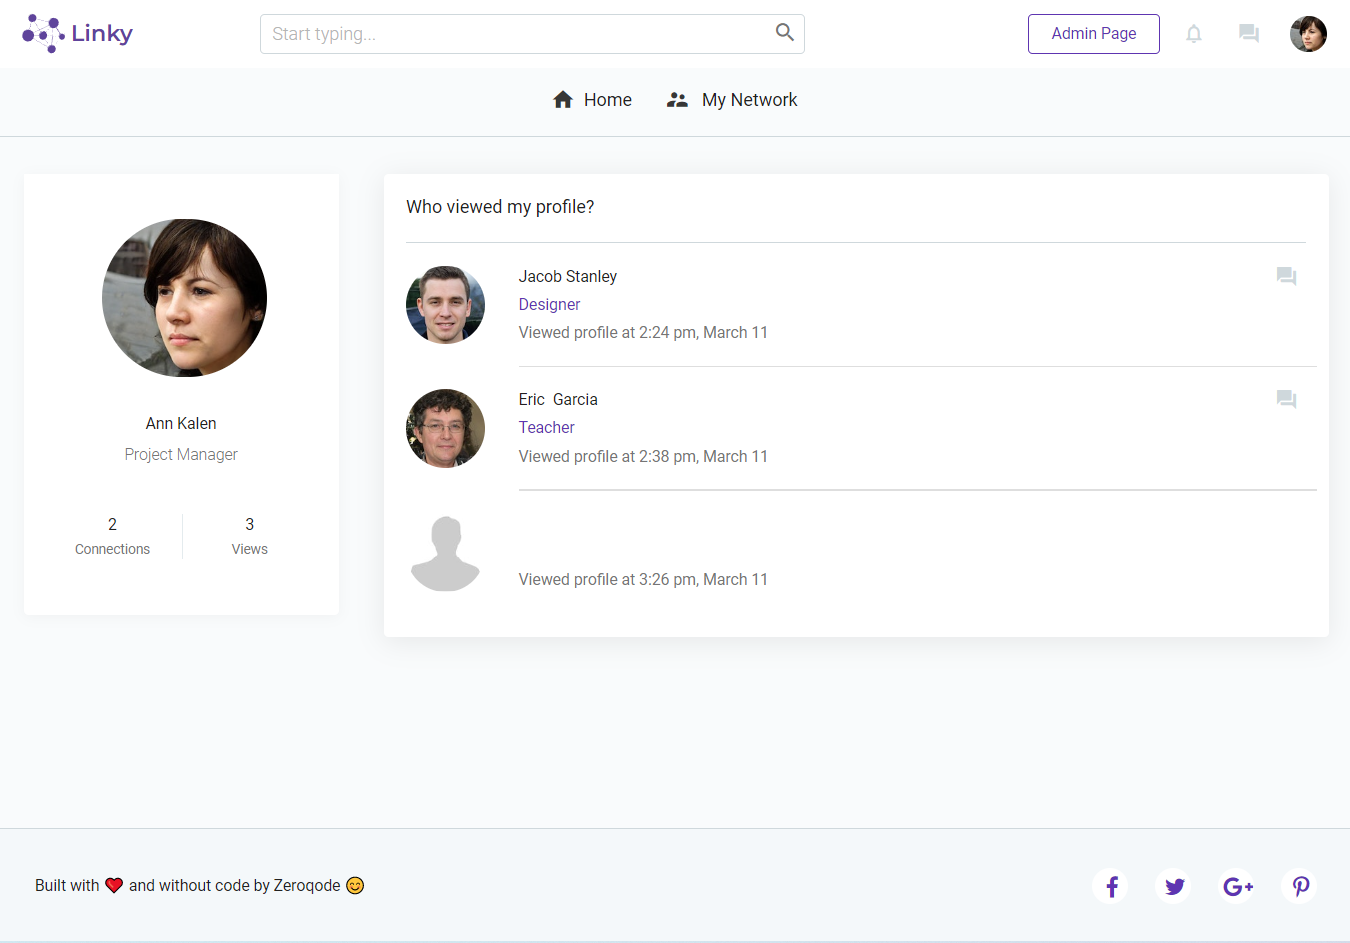
This page is simply displaying the list of users that have viewed the profile.
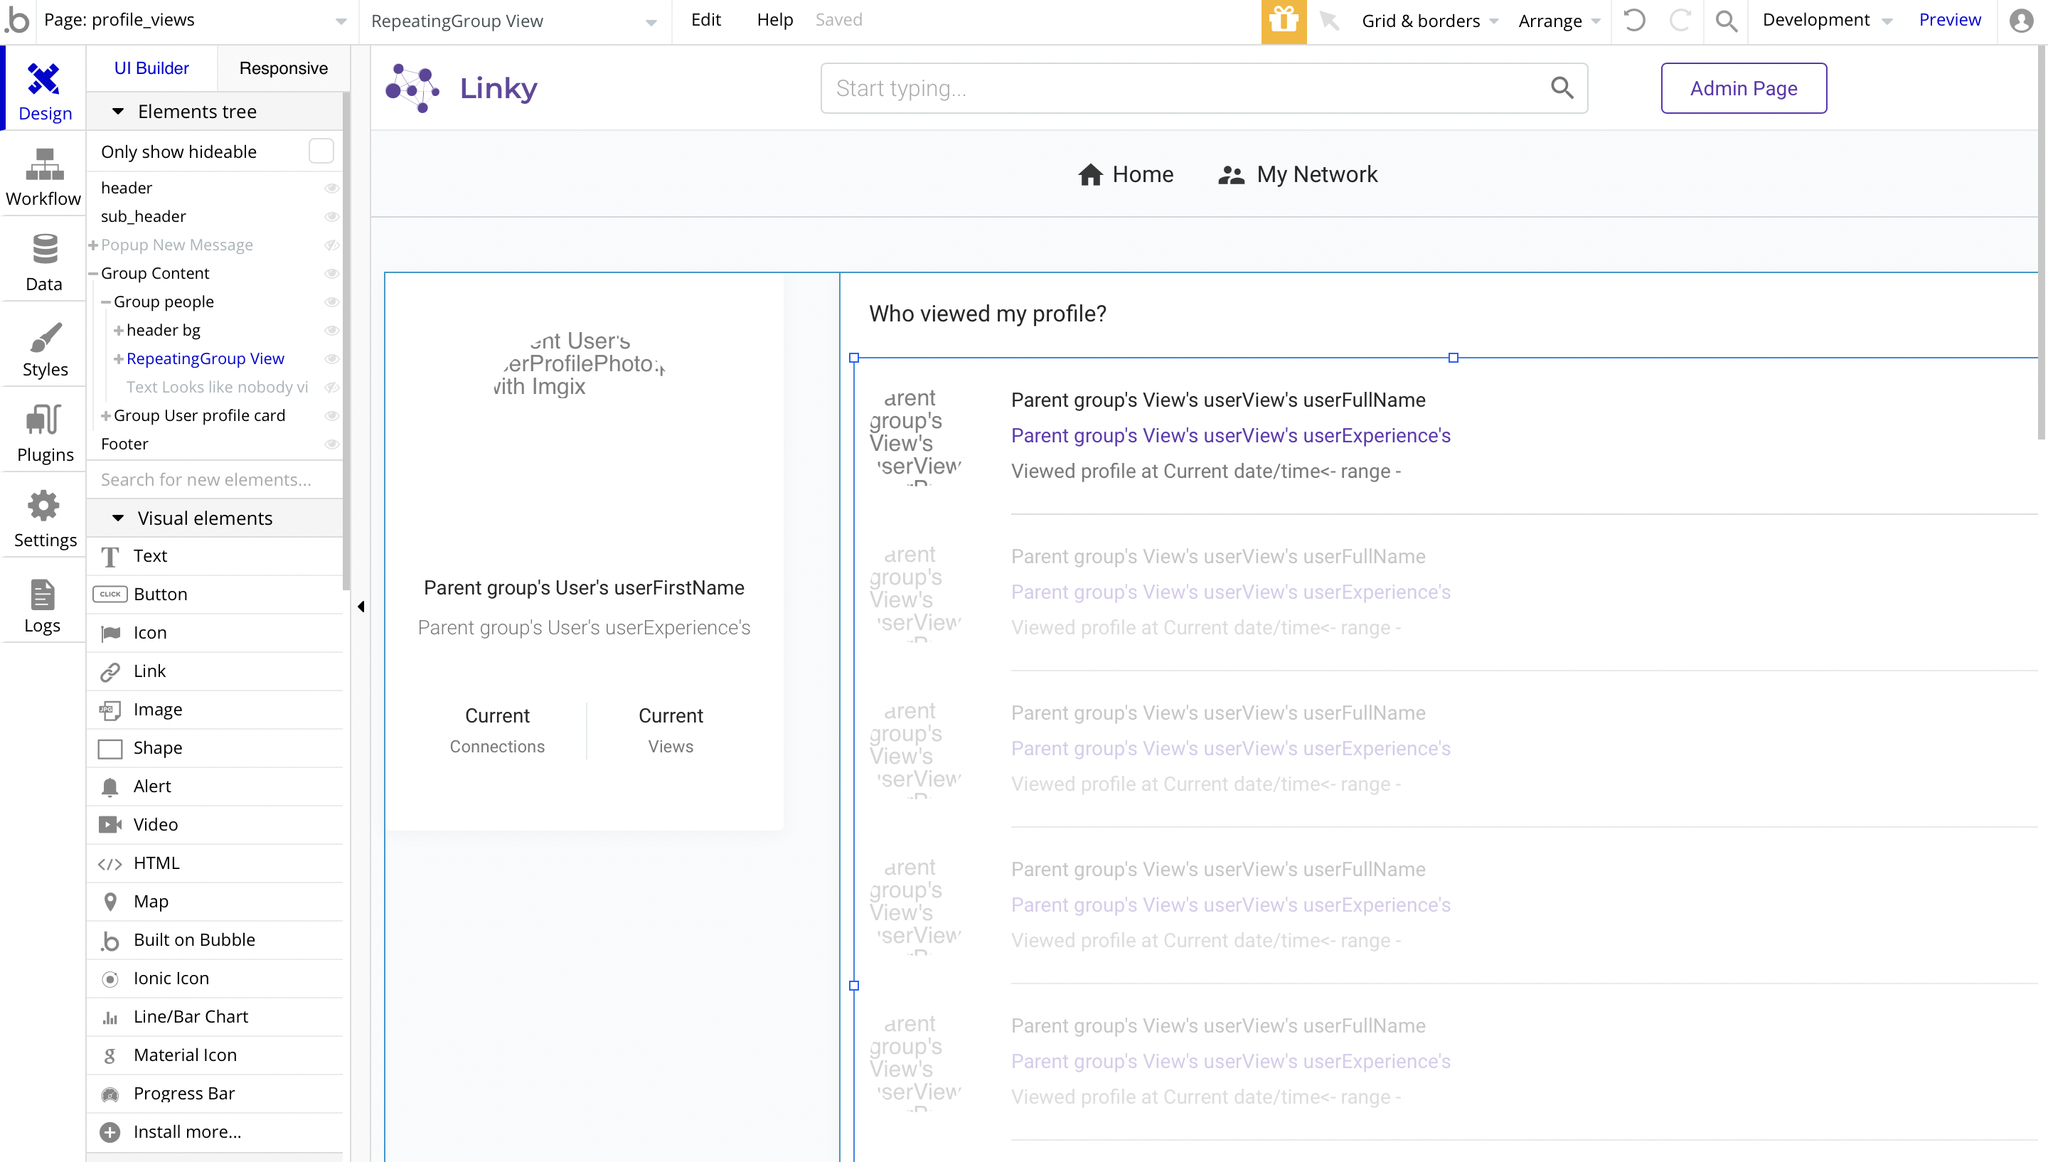
The RepeatingGroup element is located here:
The profile name is clickable. It redirects to the
profile page, also sending the Creator (User) object:
reset_pw
This page is used for resetting the password. It simply comes with a form to set the new password and confirm it.
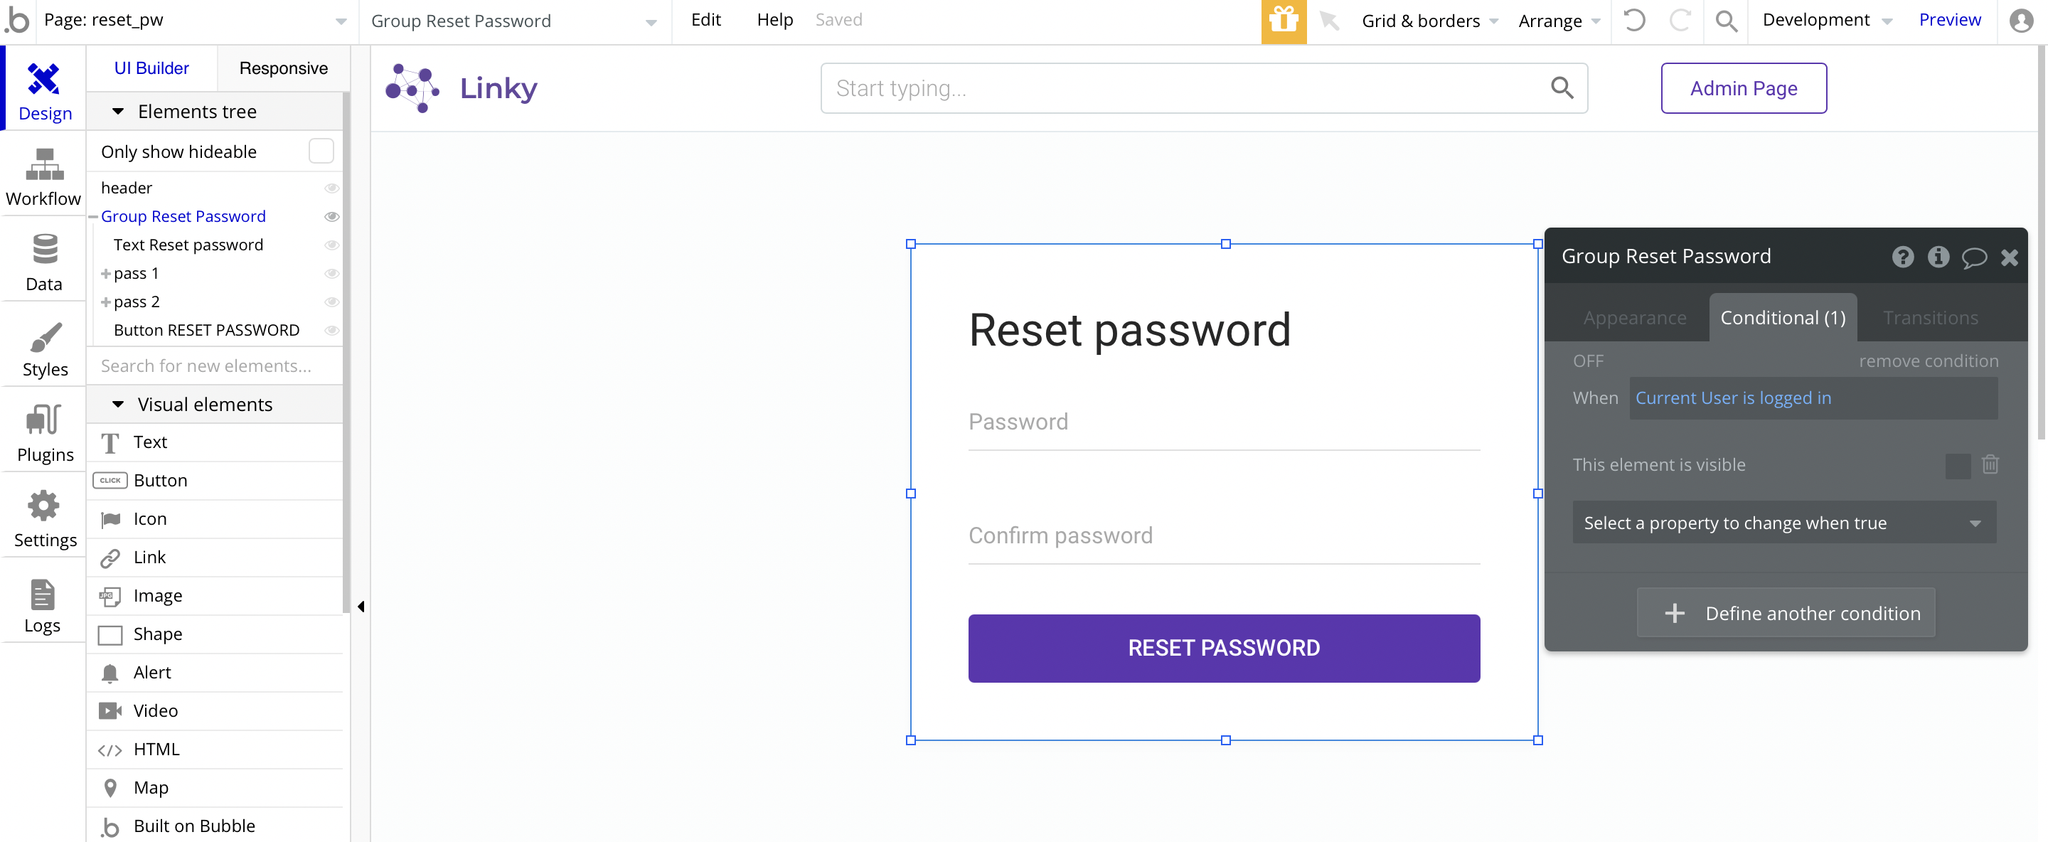
Tip: The Group "Reset Password" has a conditional to be hidden when the Current User is not logged in, so it doesn't cause any troubles when users simply preview the page, without being logged in.
404
This is a custom-designed page for 404 redirect errors, informing a user that the requested web page cannot be found, or it doesn't exist.
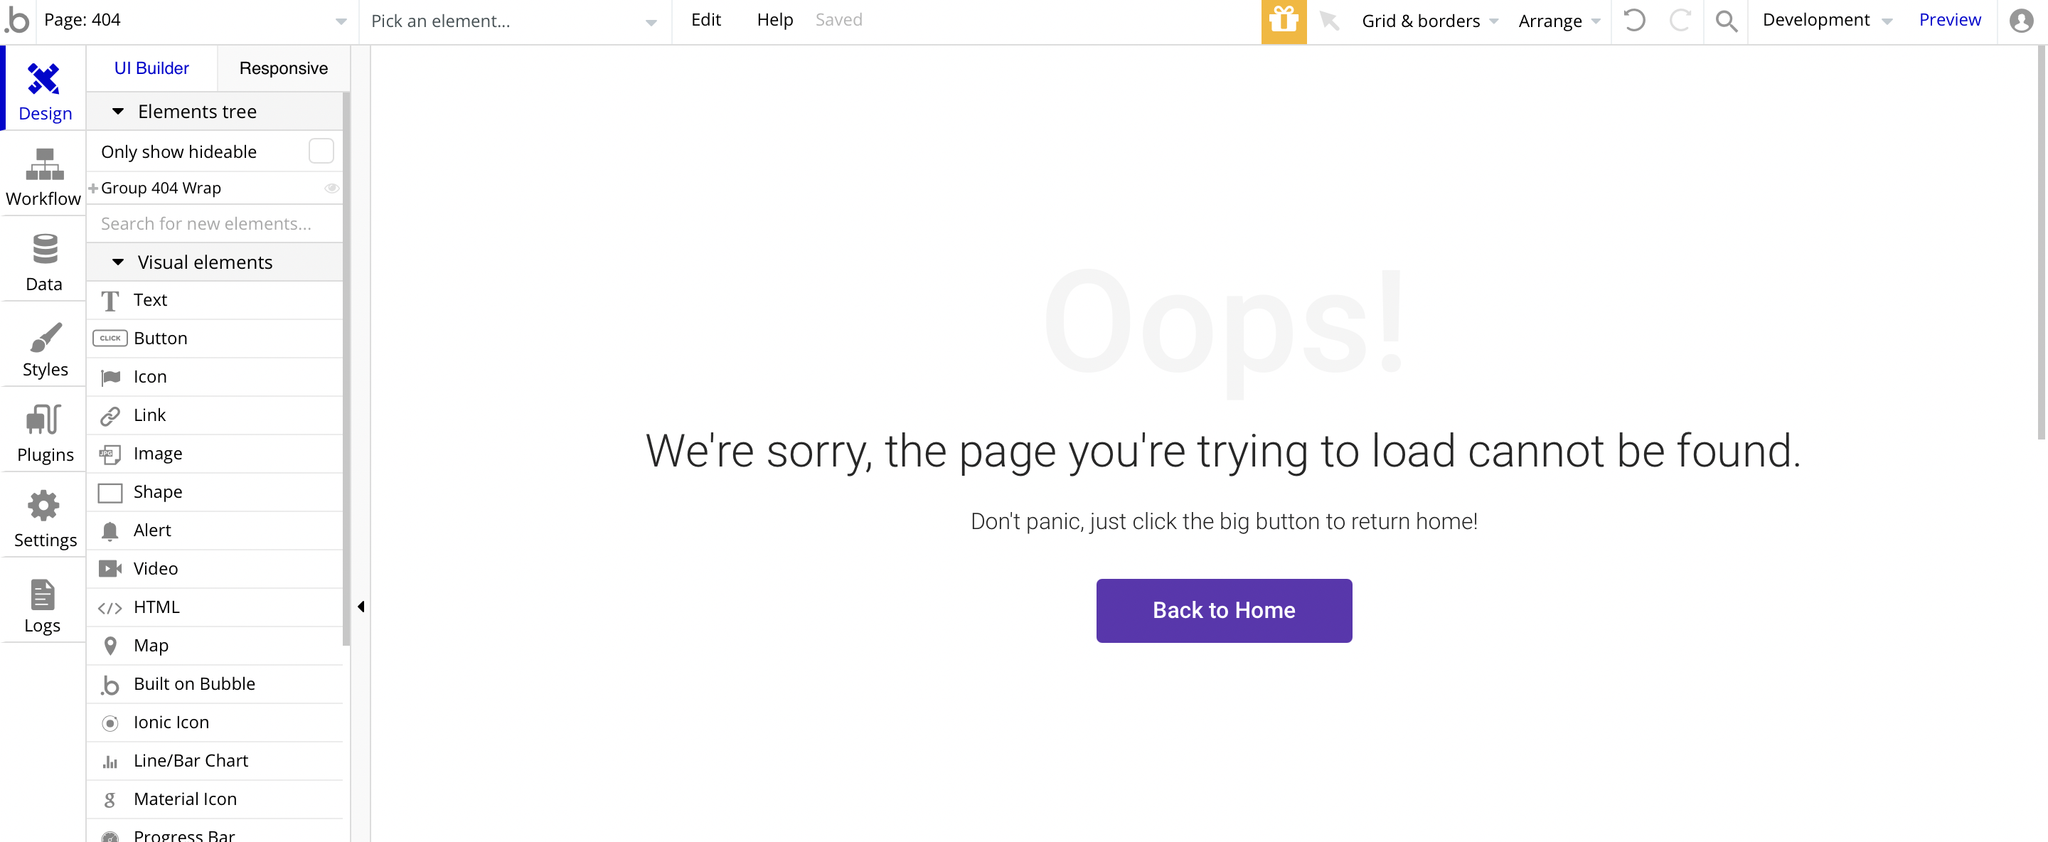
It is simply redirecting back to the
index page when users click on the "Back to Home" button.