This guide is the beginning of the documentation with the built-in Notes for database. Will help you gain a better understanding of how the template and Bubble works.
Starting with Template
Once you have bought or added a template to your account, you will see a dropdown in the New Application popup that lets you pick a template as the basis for the new application.
Note: this can only be done when you create a new app.
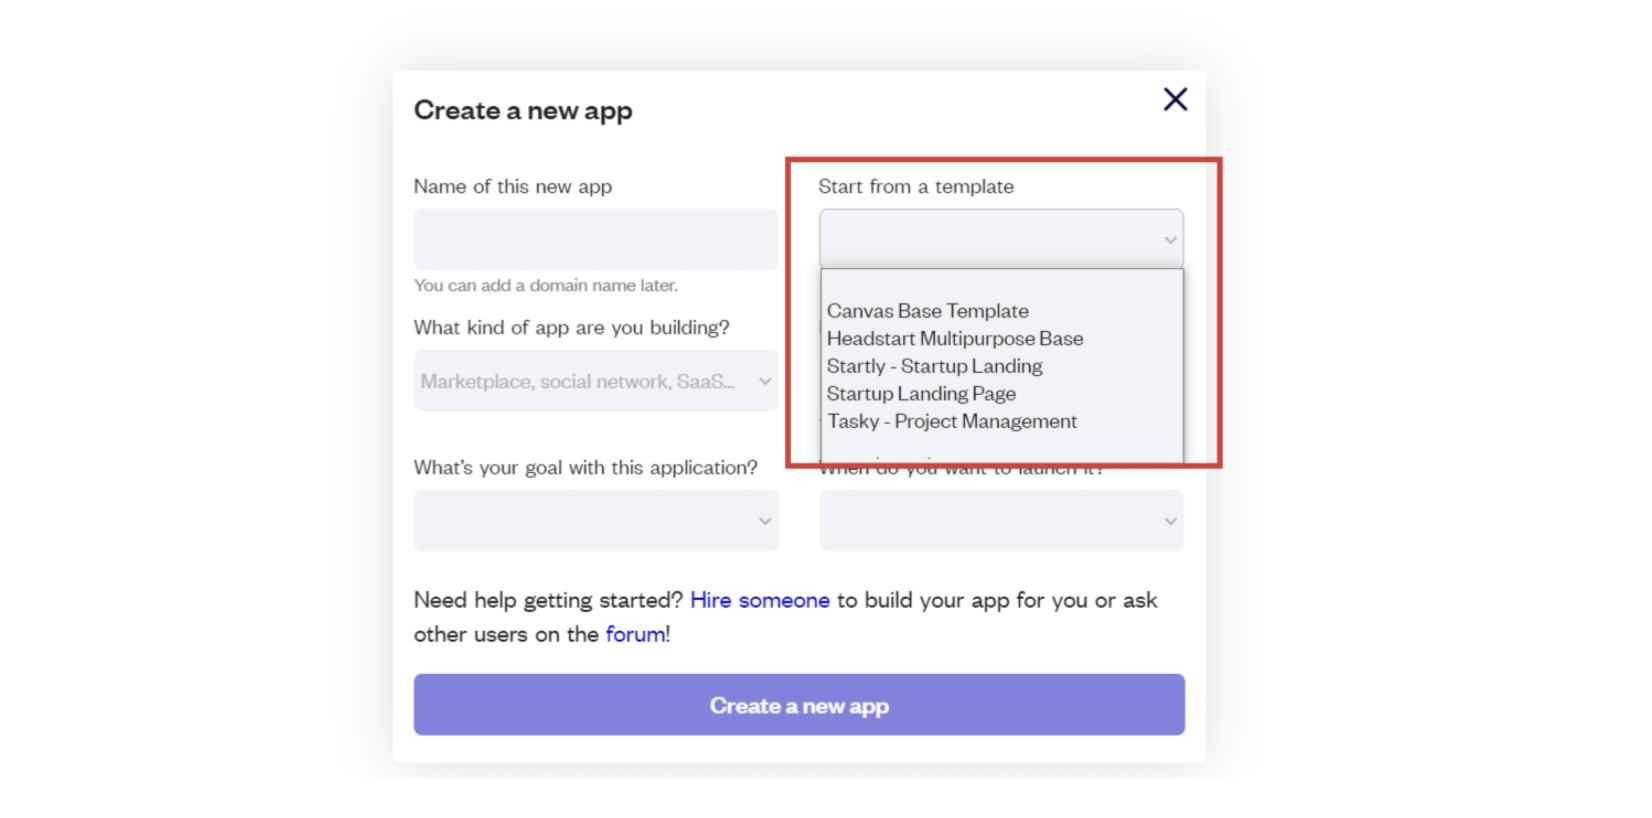
After you've selected a template you bought, complete the other fields with necessary data (i.e: Name of the new app, What kind of application your are building, etc) and press Create a new app.
Tip: A template isn't a theme for your app, but a pre-built set of elements and workflows. You can modify the template as you would modify another app.
Wait for Bubble to load the application with all the data.

After the application has loaded, you'll see the Bubble Assistant on the left side for New Application. You can close it or follow the assistant steps to adjust different settings.
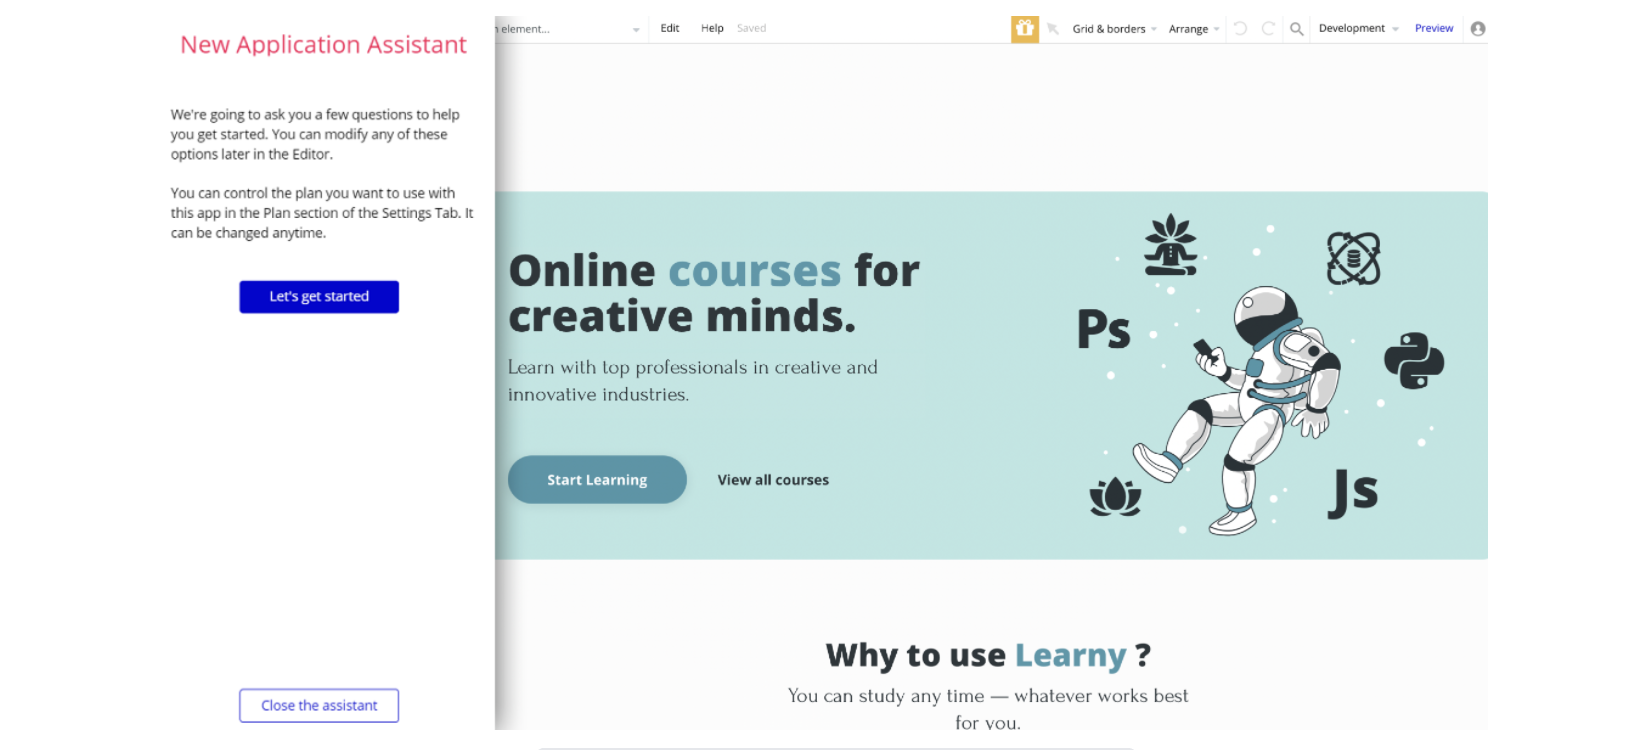
Now you're ready to go and dive into Bubble no-code development toolset.
Congrats! You have successfully created a Bubble app based on your template. Now, you can proceed with the setups.
Payments
Card payments in this template are powered by Stripe using the default card checkout providing a secure environment for users. To set up your Stripe account, go to https://stripe.com, and create an account.
Note: You will be allowed to access your dashboard once you have successfully verified your email address and activated your account.
1. The first step is to configure the Stripe dashboard, and the API Connector within your editor. Please follow the Stripe payments instruction below to configure.
2. The second step is to configure the API Connector plugin within your editor. Go to Plugins -> API Connector -> Learny Saas Stripe and hit to expand it, here:
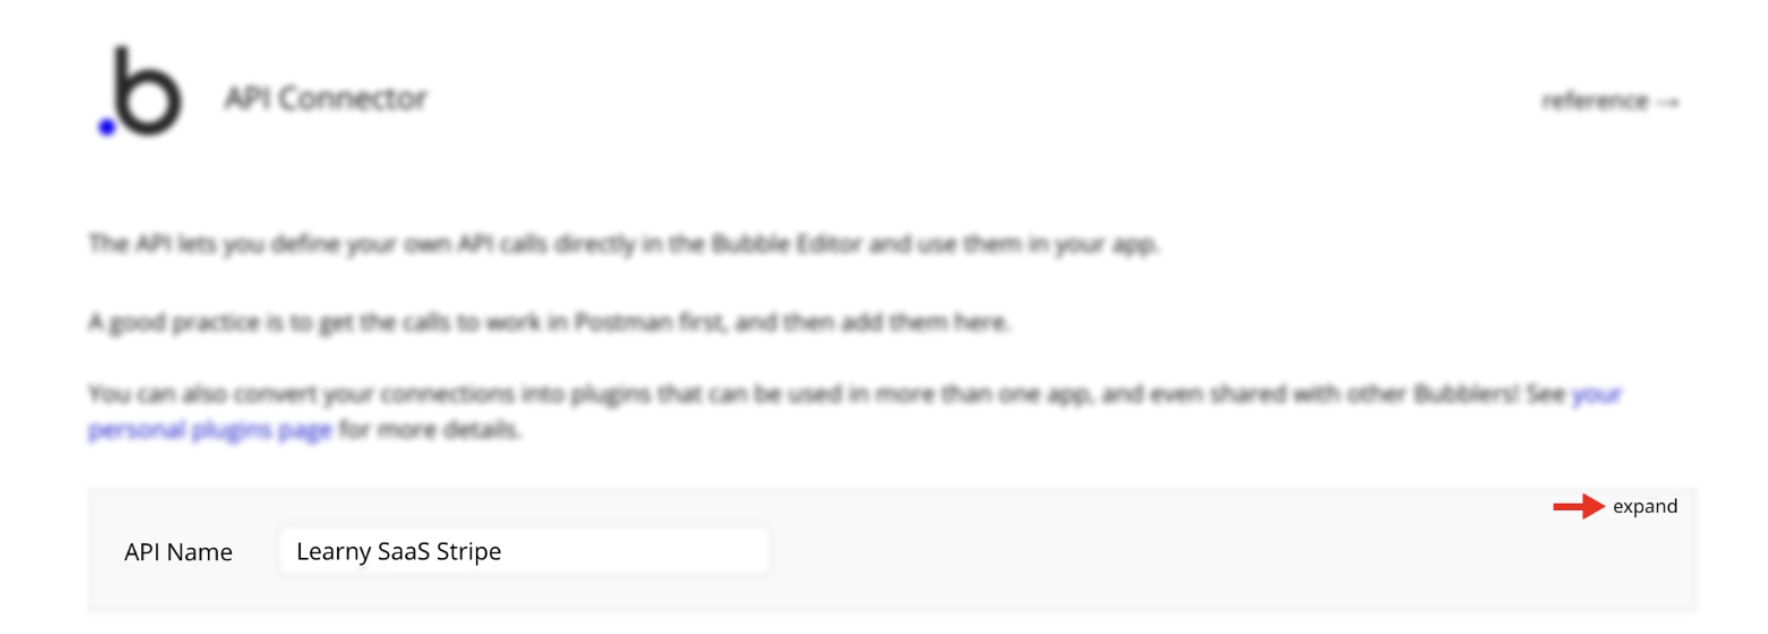
The API will expand, where you will be able to configure it with your own API 🔑 keys, here:

Add Bearer keyword in front of the keys values. And remember to change to Live keys when you decide to go live with your app.
Learny Saas Stripe API has 7 action calls (just for information):
- Create subscription upgrade session - Creates a session of the customer portal.
- updated_plan - Updates an existing subscription to match the specified parameters. When changing prices or quantities, we will optionally prorate the price we charge next month to make up for any price changes. To preview how the proration will be calculated, use the upcoming invoice endpoint. By default, we prorate subscription changes. For example, if a customer signs up on May 1 for a €100 price, she'll be billed €100 immediately. If on May 15 she switches to a €200 price, then on June 1 she'll be billed €250 (€200 for a renewal of her subscription, plus a €50 prorating adjustment for half of the previous month's €100 difference). Similarly, a downgrade will generate a credit to be applied to the next invoice. We also prorate when you make quantity changes.
- API new subscription - Creates a new subscription to an existing customer. Each customer can have up to 25 active or scheduled subscriptions.
- Retrieve subscription - Retrieves the subscription with the given ID. Details: https://stripe.com/docs/api/subscriptions/retrieve
- Create subscription session - Creates a Session object. Details: https://stripe.com/docs/api/checkout/sessions/create
- Retrieve a session - Retrieves a Session object. Details: https://stripe.com/docs/api/checkout/sessions/retrieve
- cancel plan SaaS - Cancels a customer’s subscription immediately. The customer will not be charged again for the subscription.
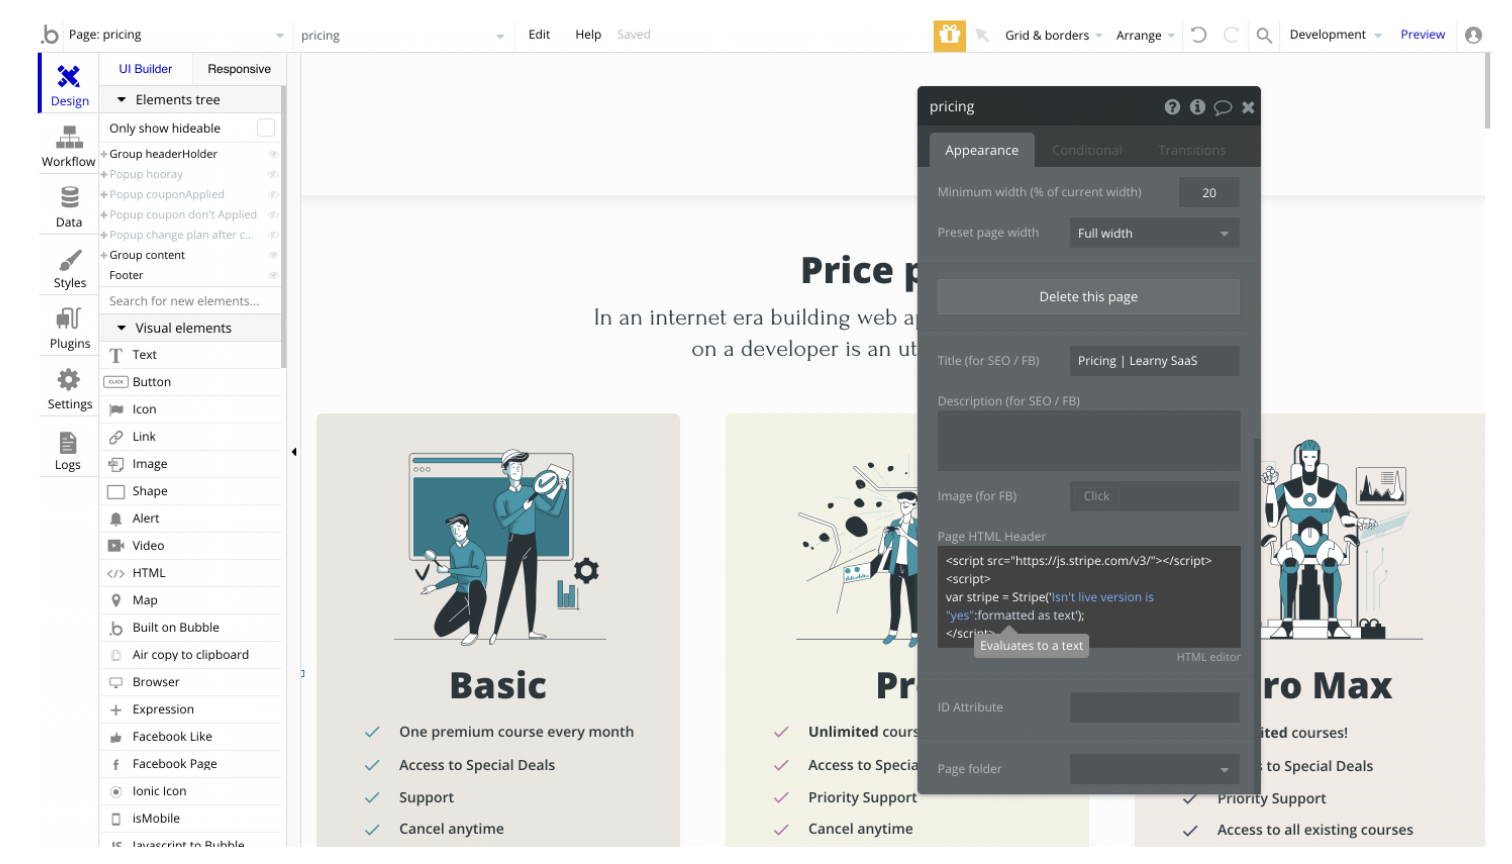
3. Third step is to configure the
pricing Page HTML Header.1⃣ Open the property editor of this page, and click on :formated as text:
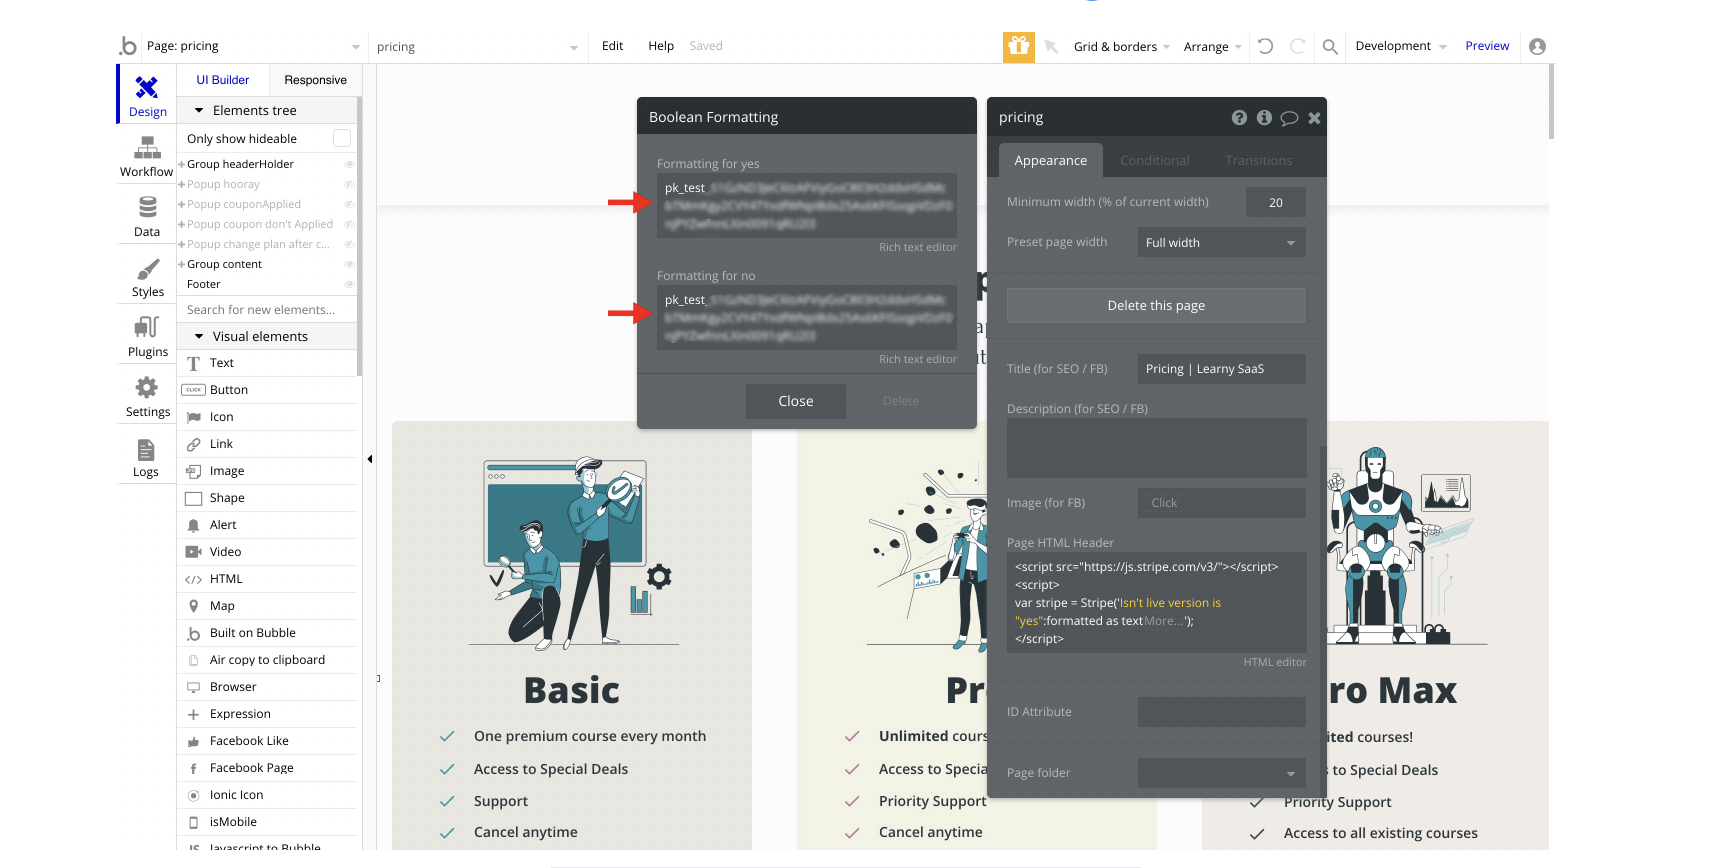
2⃣ Then configure the Boolean Formatting window with your own API🔑keys:
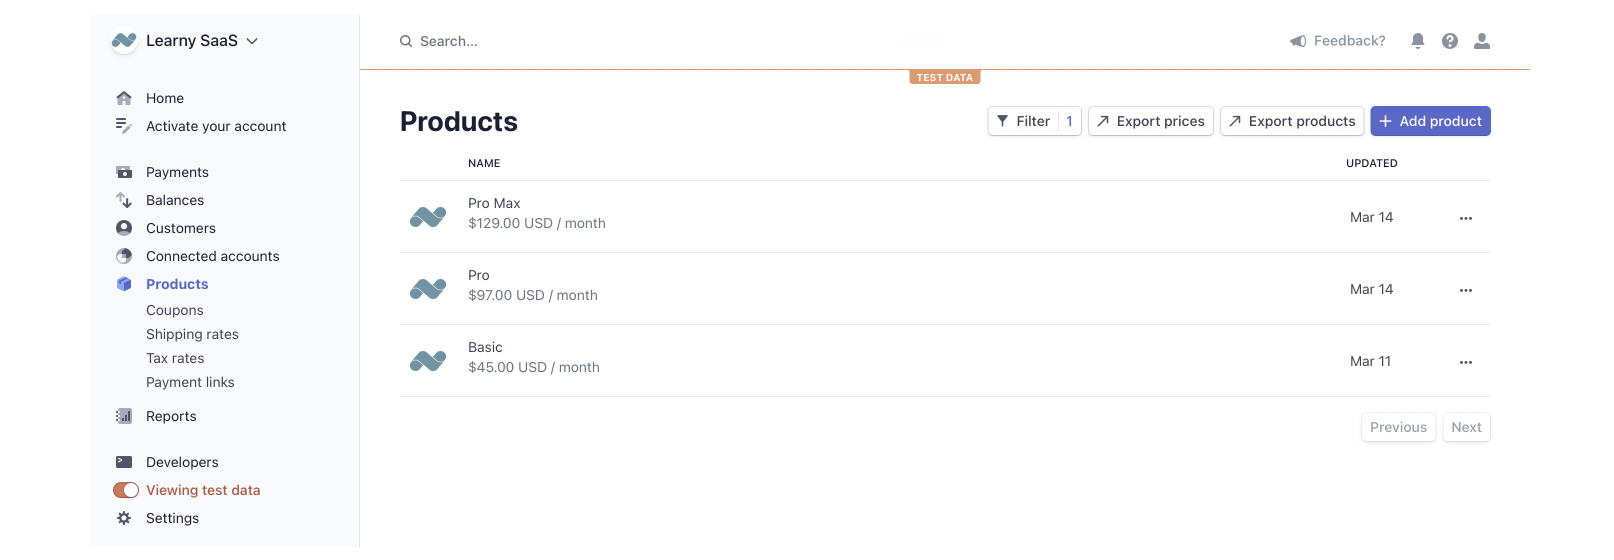
4. Go back to your Stripe dashboard -> Products tab. Now, it is required to create 3 different Products that will be your 3 subscription models: Basic, Pro and Pro Max (the order doesn't matter).
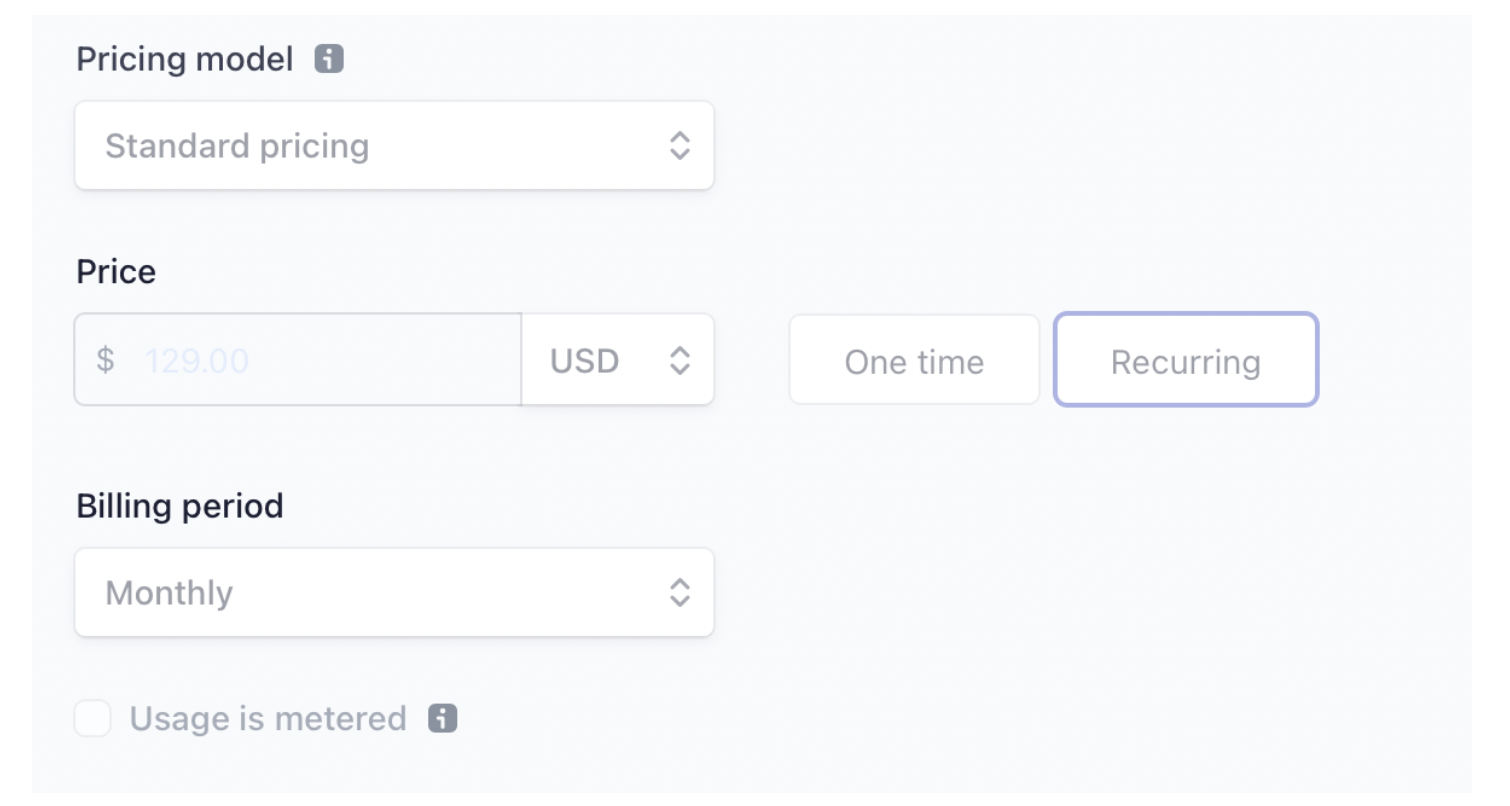
1⃣ When creating a Product, you can add a name, photo, description to it, then set the following fields this way:
So you need to have three different products with their own pricing:
- $45.00 USD / month
- $97.00 USD / month
- $129.00 USD / month
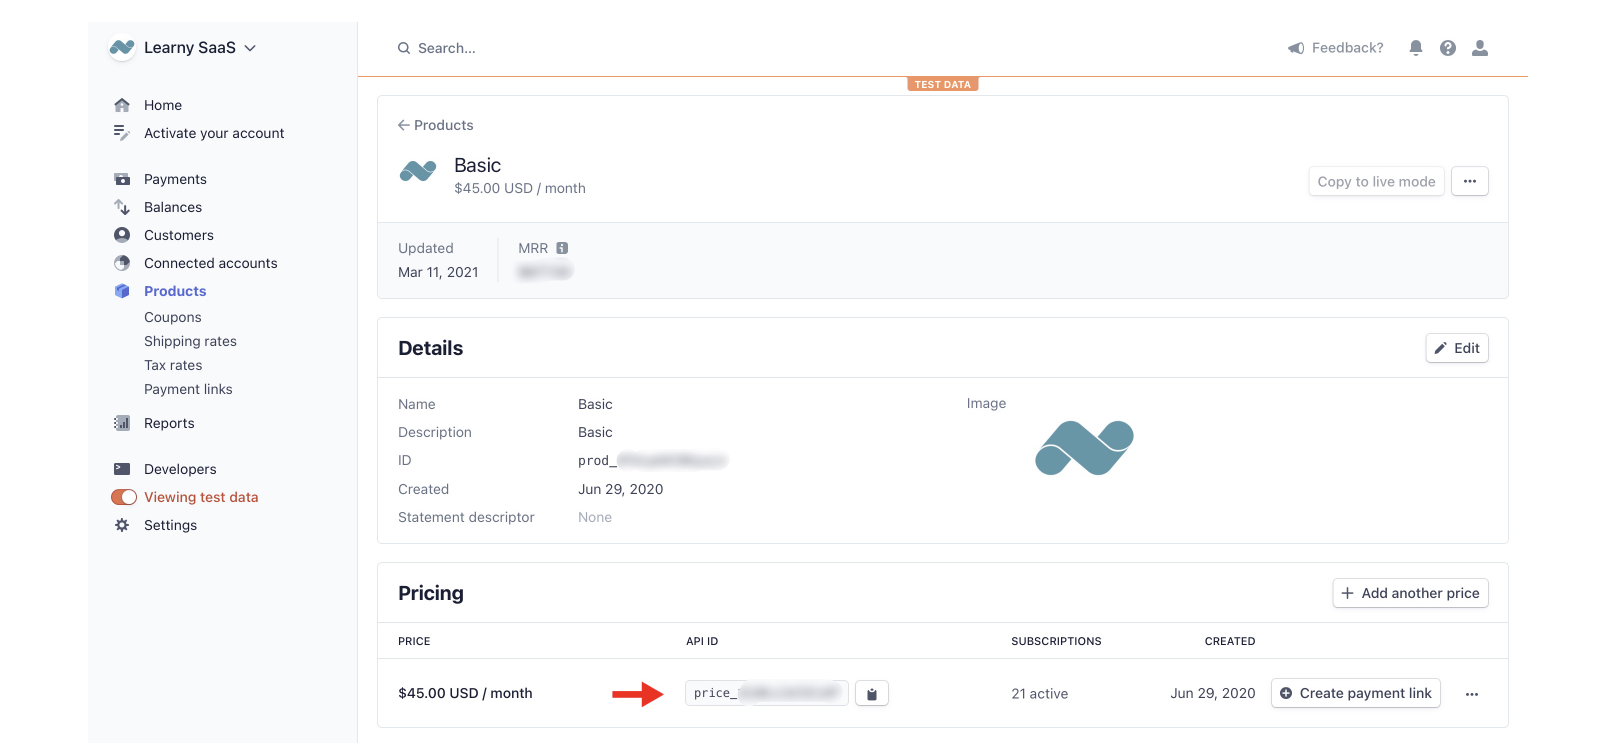
2⃣ After creating the products with their pricing, you will be able to see the API ID of each pricing, for example:
3⃣ Go back to the
pricing page, and locate the 3 workflow events responsible for creating the subscription models: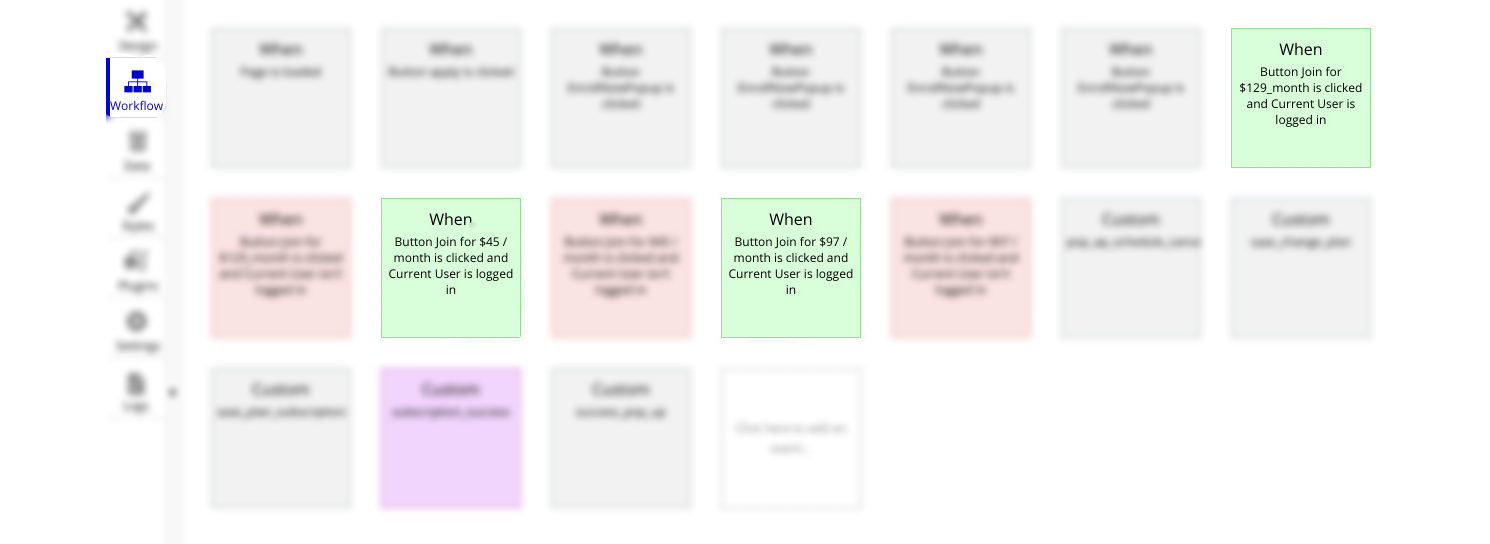
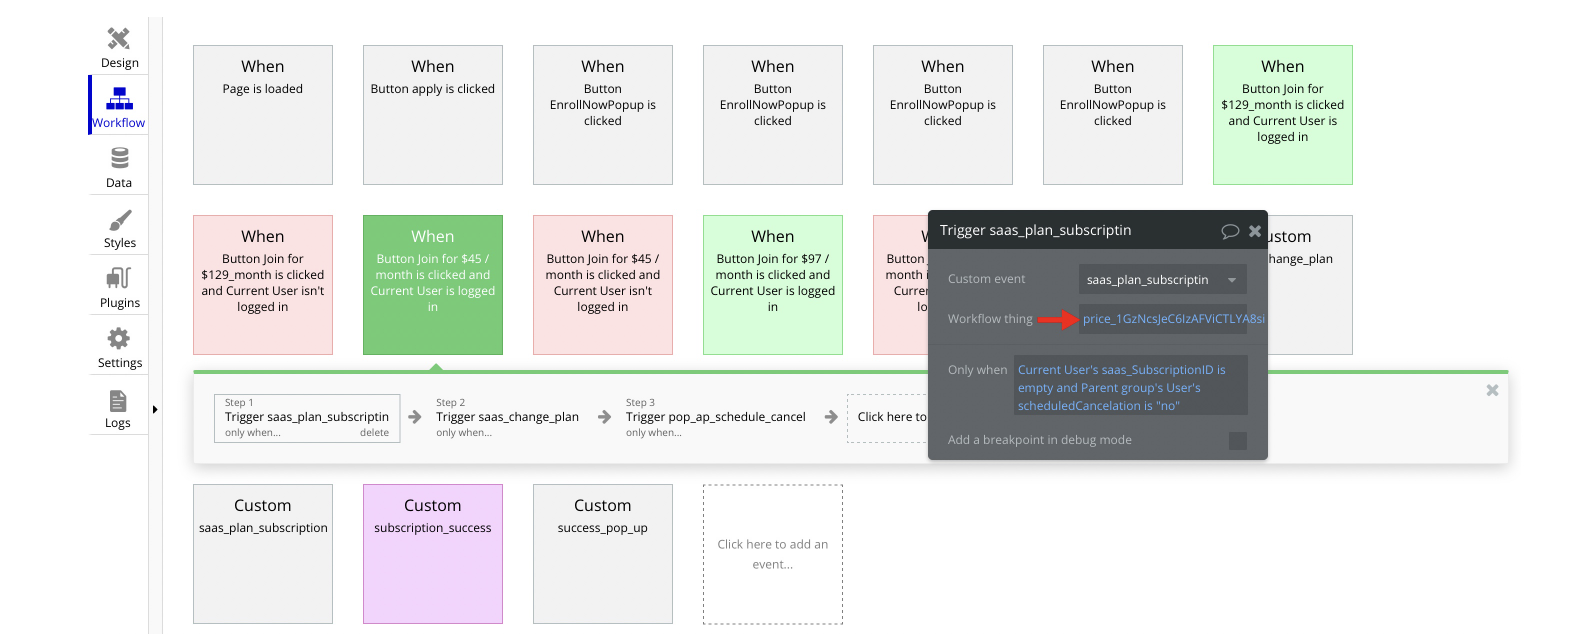
Then open the Trigger saas_plan_subscription action for each of these events, and paste the obtained API IDs into the Workflow thing field, for example:
Tip: Genuine card information cannot be used in test mode. Instead, use test Stripe cards credentials.
Wistia Hosting
This template uses the Wistia service as a hosting for video courses. Please sign up for a developer account then configure the Wistia plugin in the Plugins Tab.
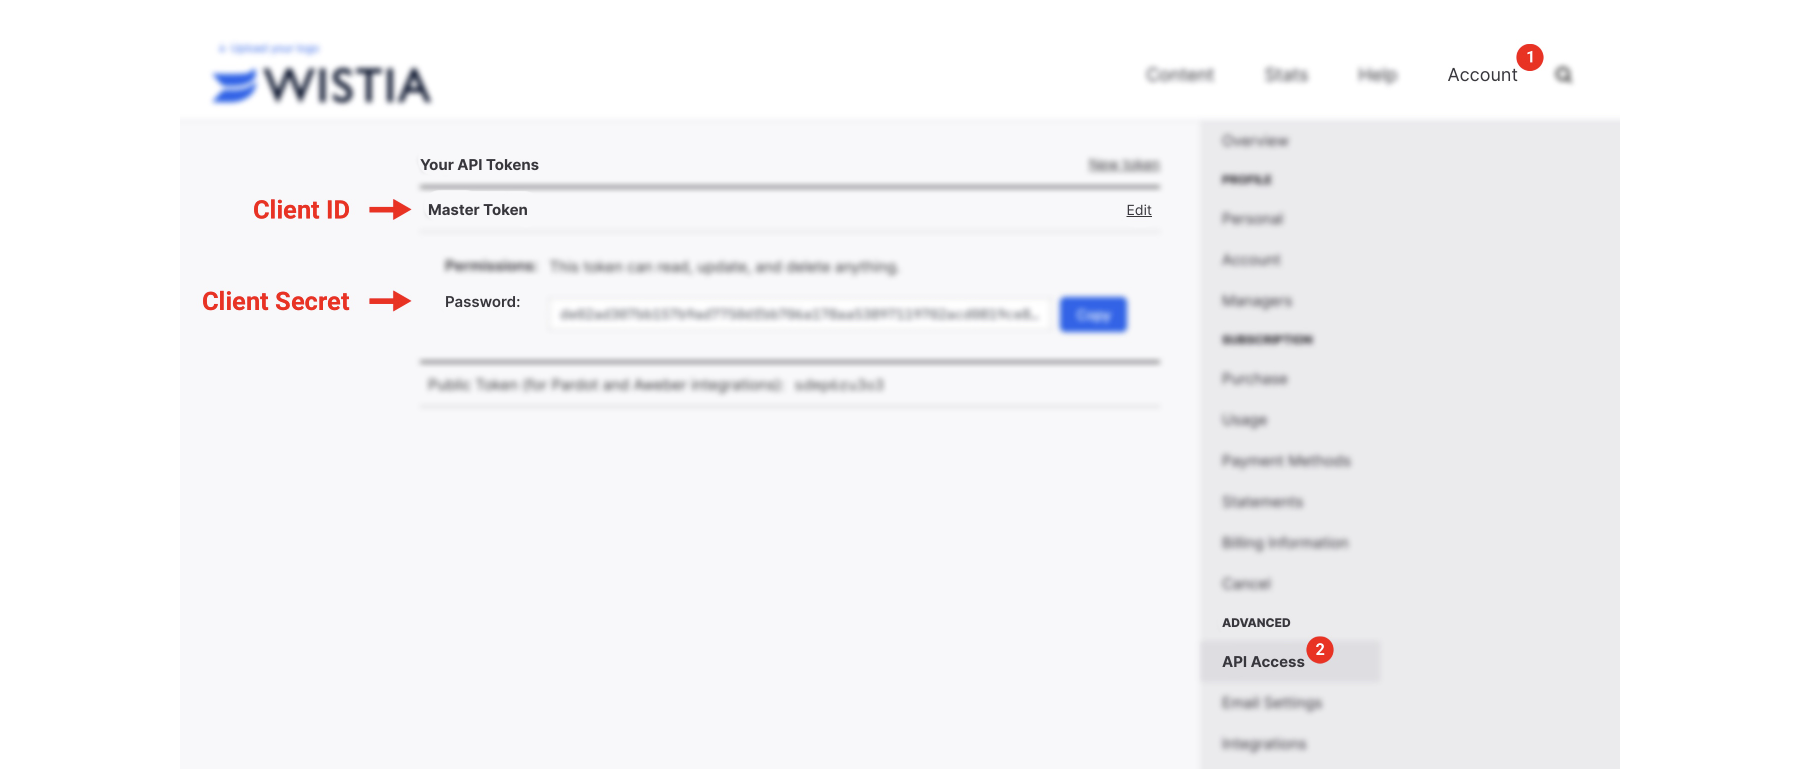
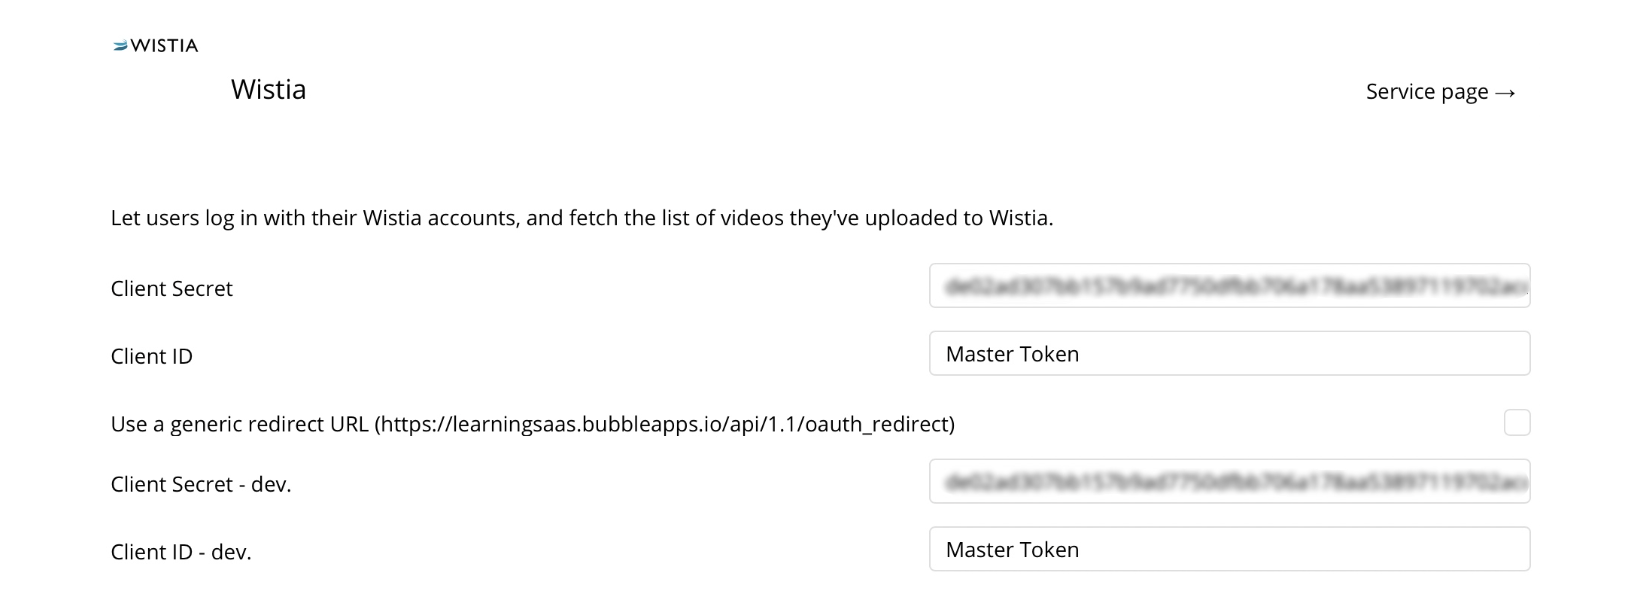
2. Go to Plugins -> Wistia within your Bubble editor. Paste the obtained Client ID and Client Secret into the following fields:
Note: Most of the template functionality is based on the Wistia service. Removing this feature will affect the other aspects of this template.
To learn more about where the Wistia service is used, please check the Things to Note -> Custom Code section.
Google Plugin
In order to make the Sign in with Google option work properly, it is required to configure the Google plugin within your Bubble editor.
Facebook Plugin
In order to make the Sign in with Facebook option work properly, it is required to configure the Facebook plugin within your Bubble editor.
Remove Demo Login
This template comes with demo logins for testing purposes, which do not require a full sign-up process in order to test the platform features. Feel free to delete these login options in your app.
The template is using 2 demo logins, for Demo User and Demo Admin.
Go to the
signup page, locate the Group "mainButtonHolder" elements, and simply delete them: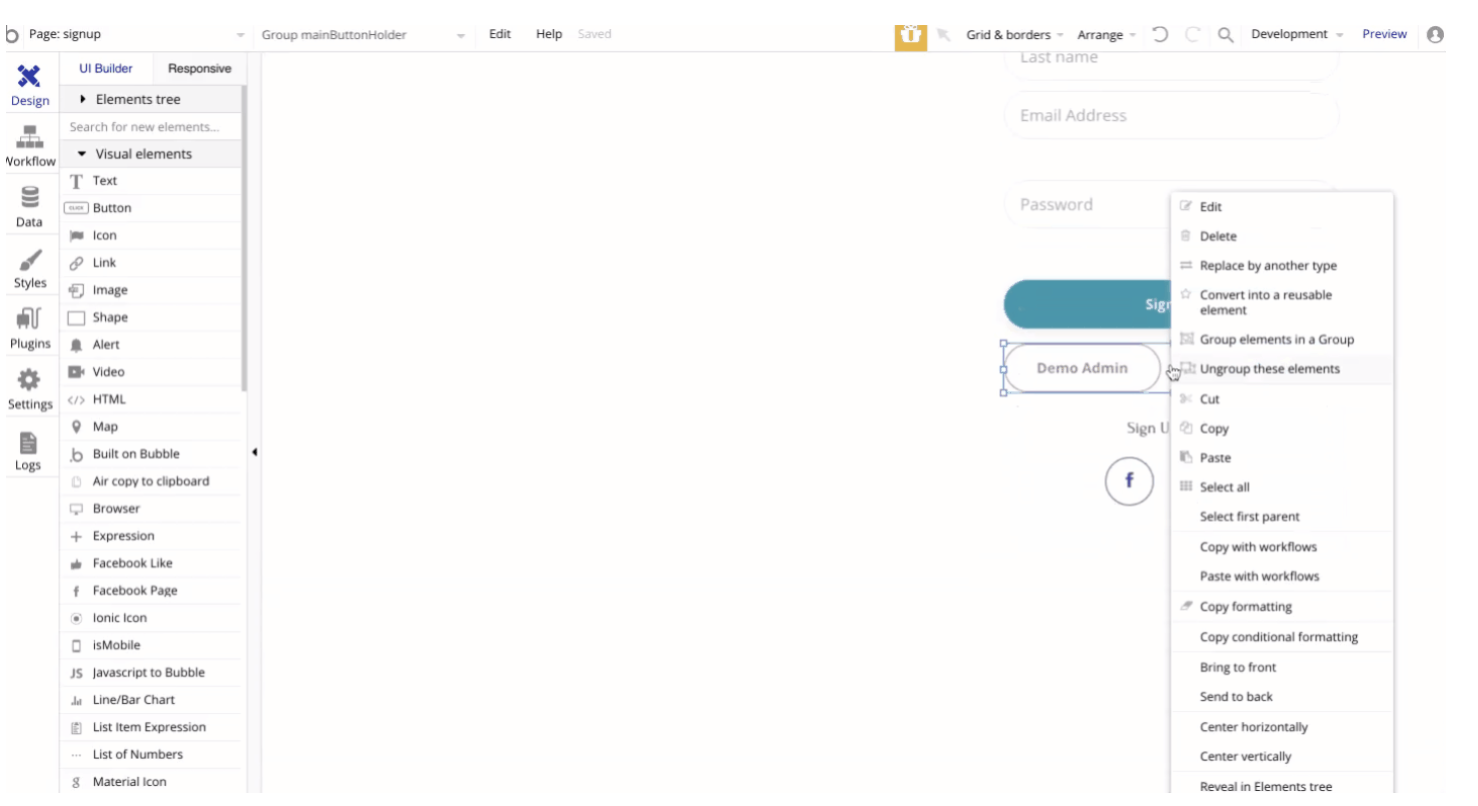
VAPI AI Call Assistant Integration
Check out a new feature that is powered by the VAPI AI Platform.
It allows your application to have a completely customizable voice assistant that will answer any customer’s questions within the framework of the set prompt.
Please note that this is a paid plugin, so to use it, you need to subscribe or buy it.
As for the traffic, you only pay for the minutes you use. Check the pricing details here: https://docs.vapi.ai/pricing
Call Assistant Setup: See the documentation on how to set up the Enhanced VAPI AI Call Assistant in the Bubble App.
If you don't need this feature within your app, feel free to remove it.
In this case, remove the:
- reusable element “AI Assistant” from the index page and reusable elements
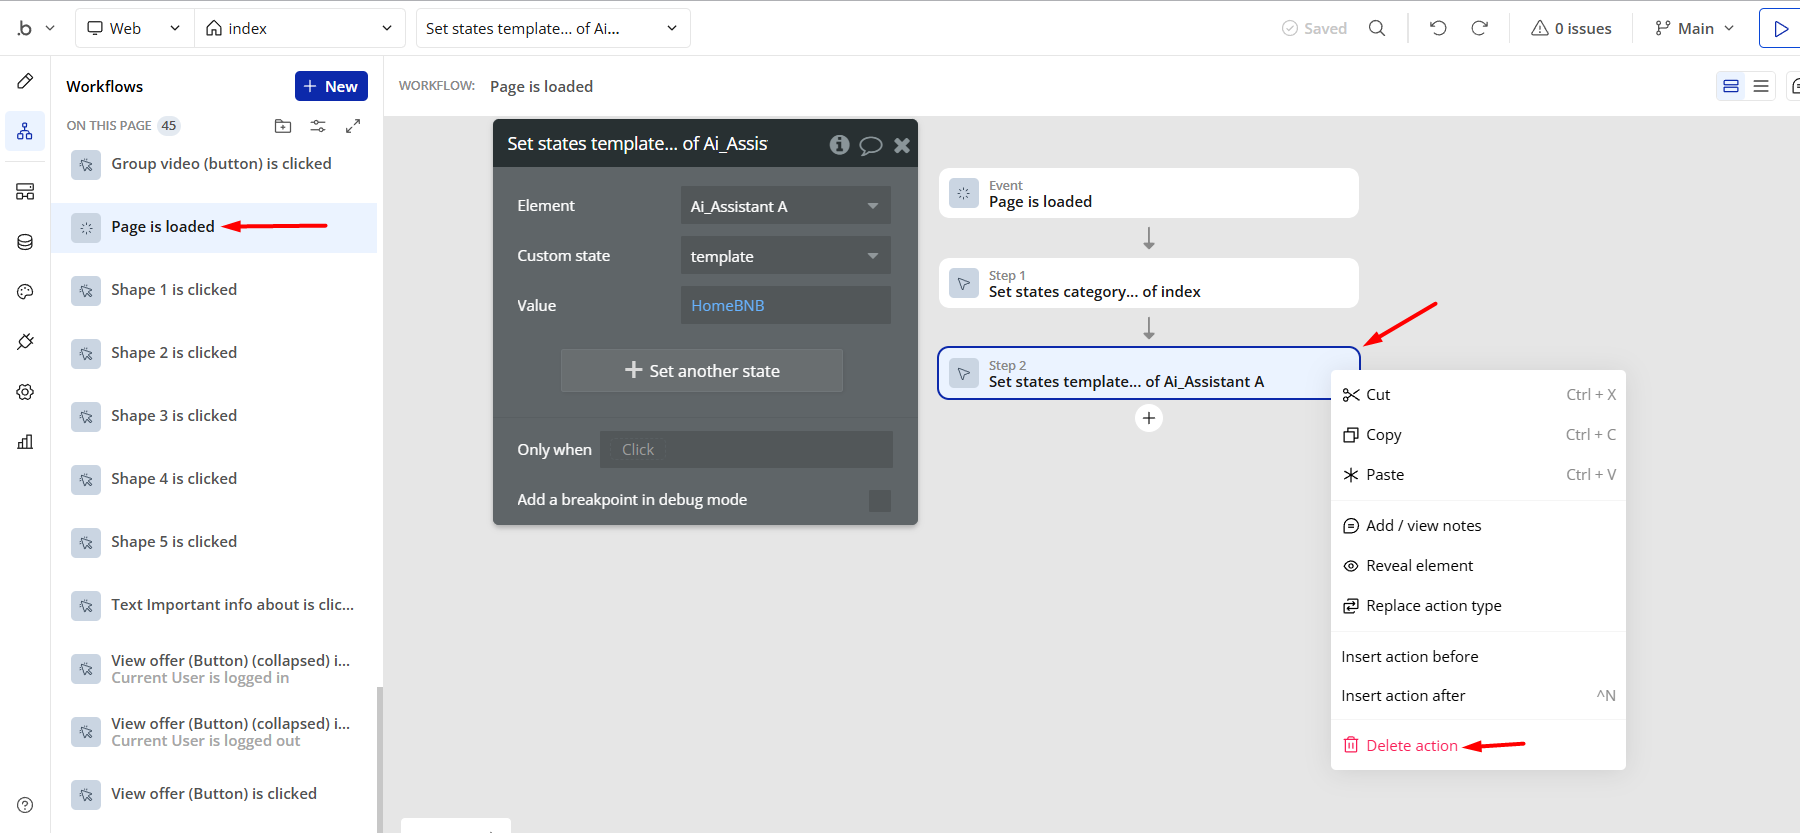
- remove the following step in the workflow:
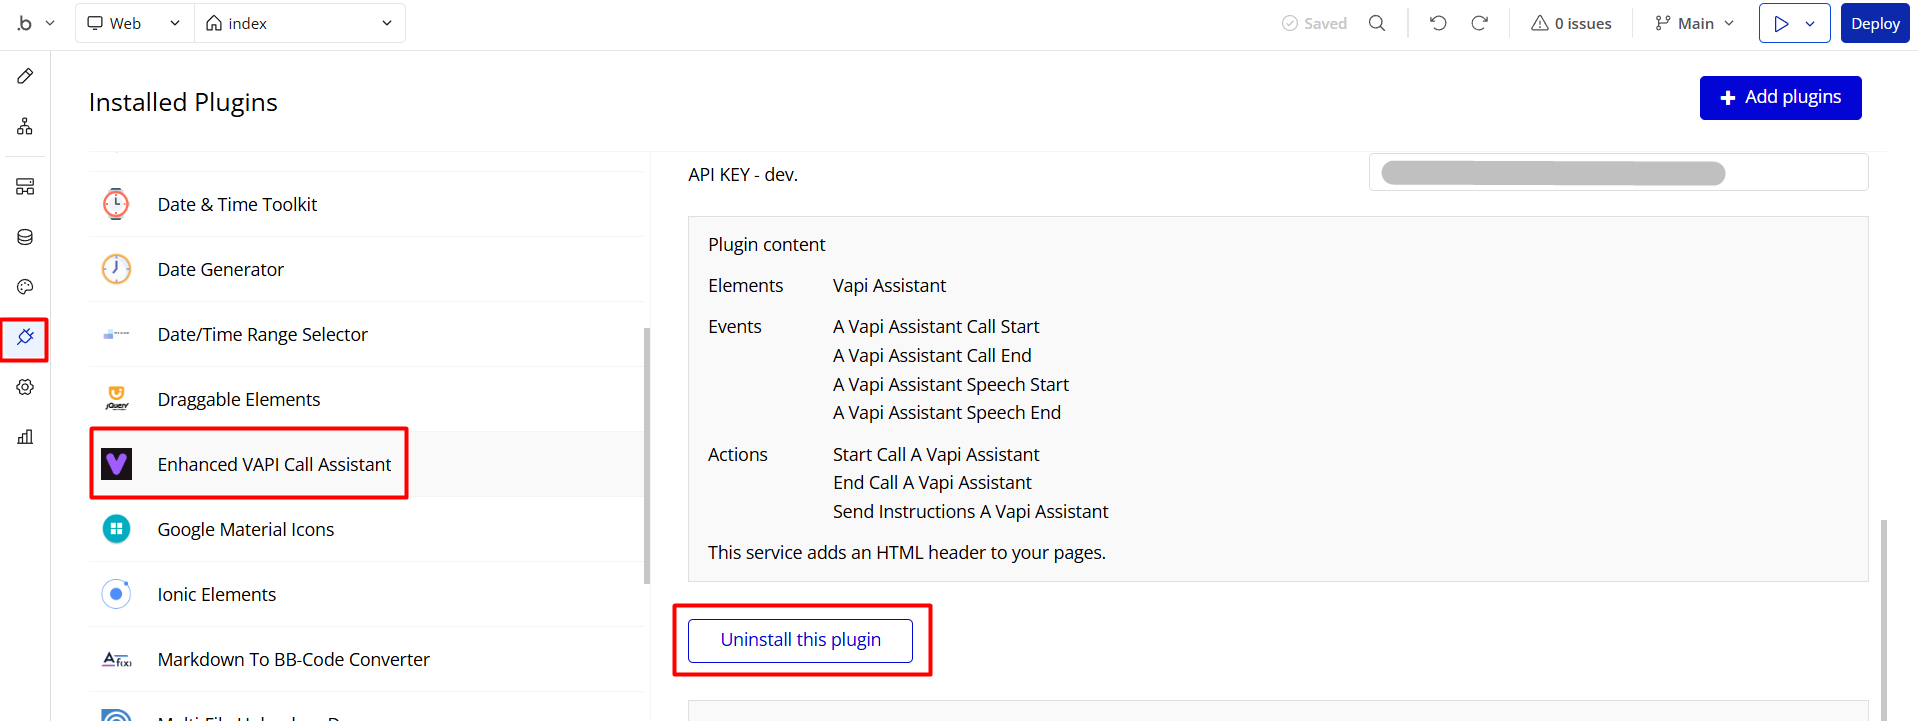
- Remove the Enhanced VAPI Call Assistant plugin from the plugin tab.
Remove Banner
This template comes with a promotional banner above the Header element. Feel free to remove it from your app.