This guide is the beginning of the documentation with the built-in Notes for database. Will help you gain a better understanding of how the template and Bubble works.
Starting with the Template
Once you have bought or added a template to your account, you will see a dropdown in the New Application popup that lets you pick a template as the basis for the new application.
Note: this can only be done when you create a new app.
After you've selected a template you bought, complete the other fields with necessary data (i.e: Name of the new app, What kind of application you are building, etc) and press Create a new app.
Tip: A template isn't a theme for your app, but a pre-built set of elements and workflows. You can modify the template as you would modify another app.
Wait for Bubble to load the application with all the data.

After the application has loaded, you'll see the bubble assistant on the right side for New Application. You can close it or follow the assistant steps to adjust different settings.
Congrats! You have successfully created a Bubble app based on your template. Now, you can proceed with the setups and dive into Bubble no-code development toolset.
Payments
This template uses Coinbase Commerce for both cryptocurrency funding and withdrawals and Stripe (Card Payments) for funding only.
Funding is adding money by the users to their own Investy wallet (account balance) to be able to make an investment.
Note: There is also Voguepay API configured for withdrawals, but to use it you'll have to create workflows first.
Note: There is also Paystack API configured for funding but currently, it is disabled. Find the instructions on how to enable it below.
Stripe
This template is using the Bubble's Stripe plugin for card payments, by users to add money to their Investy wallet (account balance) to make an investment. Please follow the Stripe payments instruction below to configure.
1. Click on the "Developers" button and then, "API keys" button. Copy your API key. Ensure to use a live API key when your template goes live.
Paste the API keys in the Stripe plugin as well as in the API connector for the Stripe Custom (don't forget to add "Bearer " for the last one).
2. The second step is to configure the API Connector plugin within your editor.
Go to Plugins -> API Connector -> Stripe Custom API and hit to expand it, here:
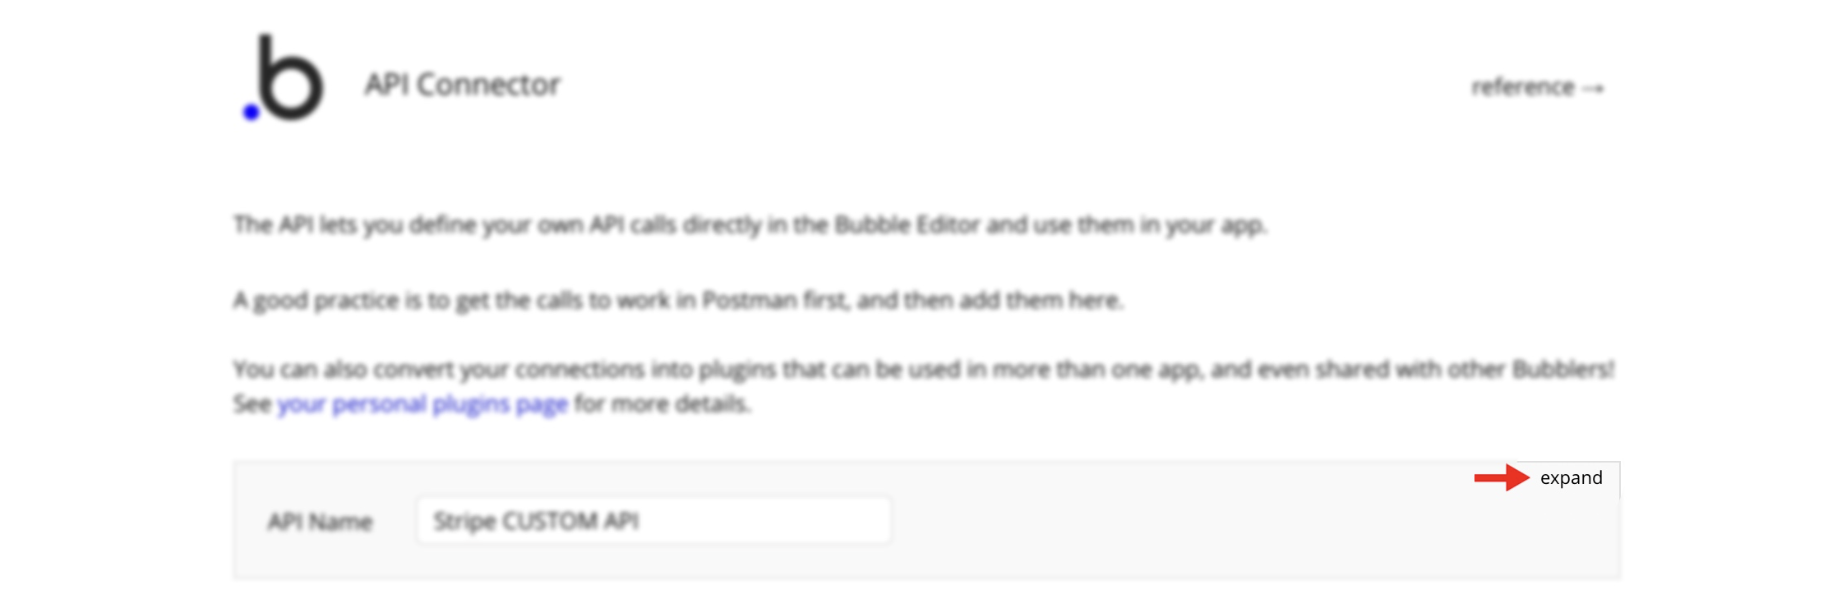
The API will expand, where you will be able to configure it with your own API keys, here:

Add Bearer keyword in front of the keys values. And remember to change to Live keys when you decide to go live with your app.
Coinbase Commerce
Coinbase Commerce is used by users to add cryptocurrency to their Investy wallet (account balance) to make an investment and withdrawal cryptocurrency.
- Visit https://commerce.coinbase.com/ and sign up. You will be given a mnemonic seed to use to create a new crypto wallet. Do that and be sure to back up the seed.
- Go to settings in your Coinbase commerce, scroll to whitelisted domains and add your root domain. Example https://myinvest.bubbleapps.io Be sure to add your live domain when you go live.
- Copy your API key and use it for the Coinbase Commerce API connector call in plugins.
- Go to Settings -> API in Bubble to generate an API token to use below.
- Go back to Coinbase Commerce and under Webhook subscriptions add two endpoints for your dev and live version like so:
Voguepay (optional, just API calls configured)
Voguepay is used by users to add money to their Investy wallet (account balance) to make an investment.
- Visit https://voguepay.com/ and sign up for a business account.
- Locate the merchant ID in your Settings and copy it.
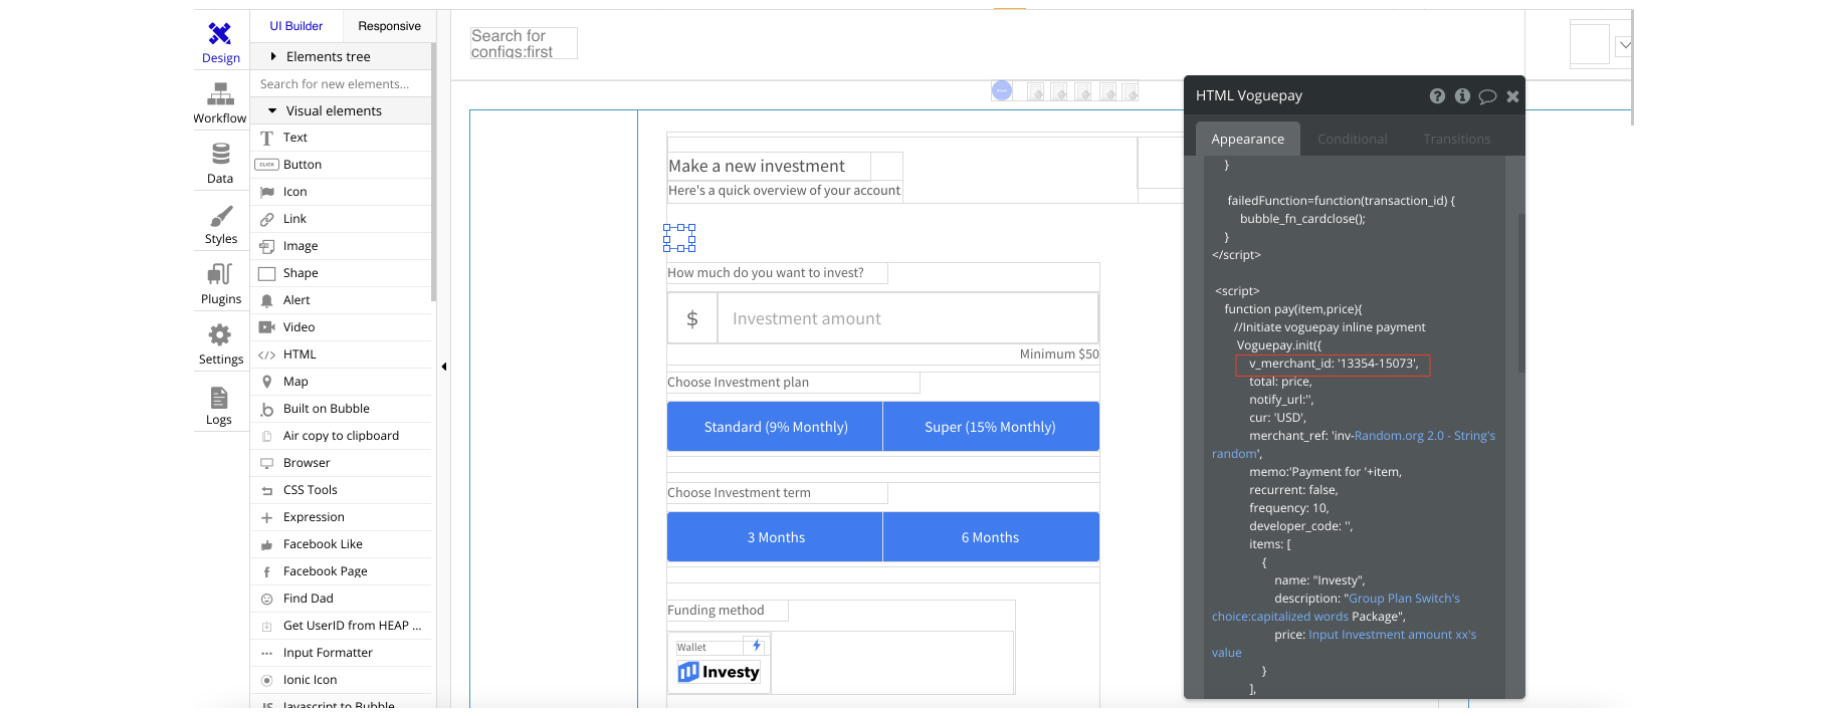
- Open dashboard page in your Bubble editor, search for the element HTML Voguepay and replace the merchant ID parameter inside the code snippet with the one you copied from you Voguepay settings. You can also change your currency here (supported currency codes: NGN - Nigerian Naira, USD - US Dollar. EUR - Euro, GBP - British Pound). For more details please go to https://documentation.voguepay.com.
- Create workflows for withdrawal via Voguepay.
Note: You will be allowed to access your Voguepay dashboard once you have successfully verified your email address and activated your account.
Paystack (optional, disabled configuration)
Paystack is used by users to add money to their Investy wallet (account balance) to make an investment.
Tip: We strongly recommend following the API documentation provided by Paystack for more details: https://paystack.com/docs/api
Now it's disabled, but can be enabled and configured.
To enable:
- Remove conditional for "Pay with card" button Current date/time is empty on dashboard page win workflows Tab
- Click on the "Pay with card" button and edit the workflows
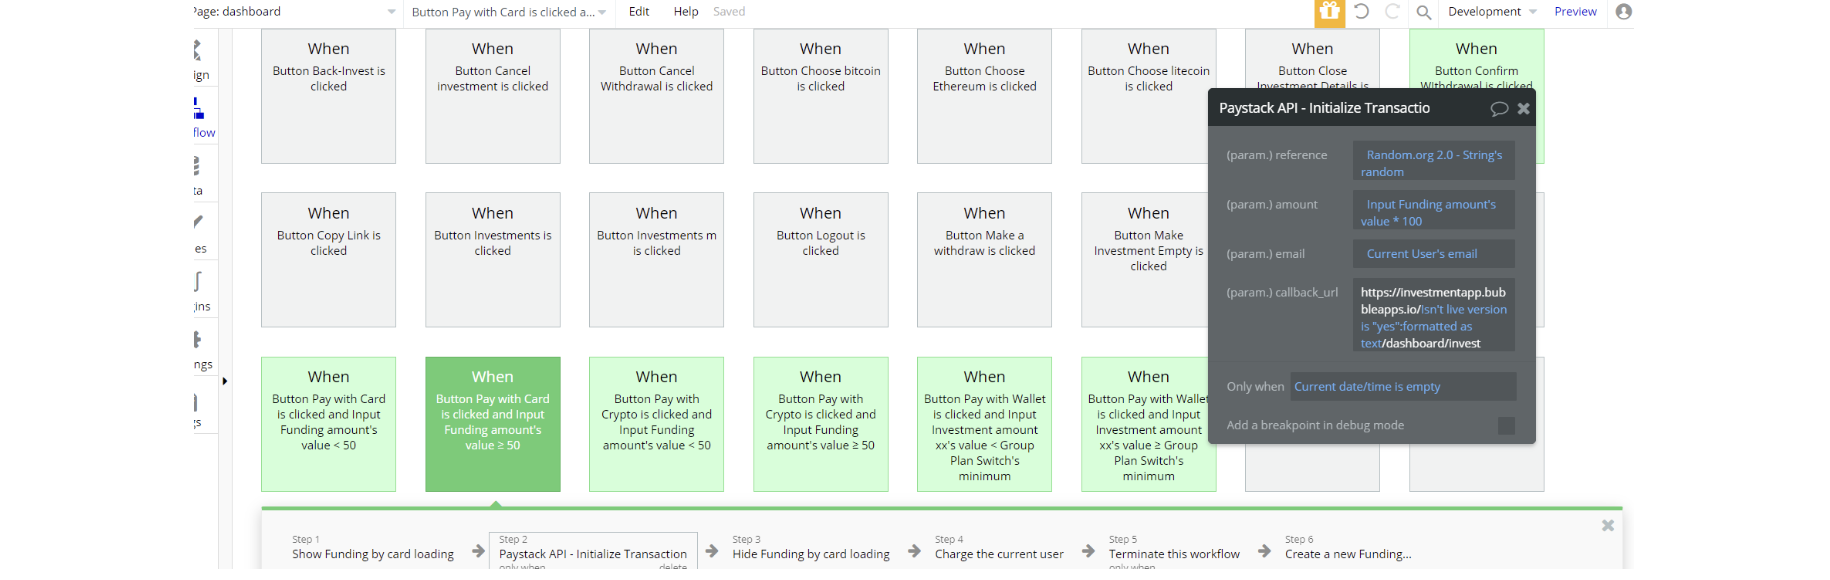
3. Enable step 2, change steps 6,7 accordingly for Paystack API Transaction where amount and fundingID should be -> ex <Result of Step 2> '
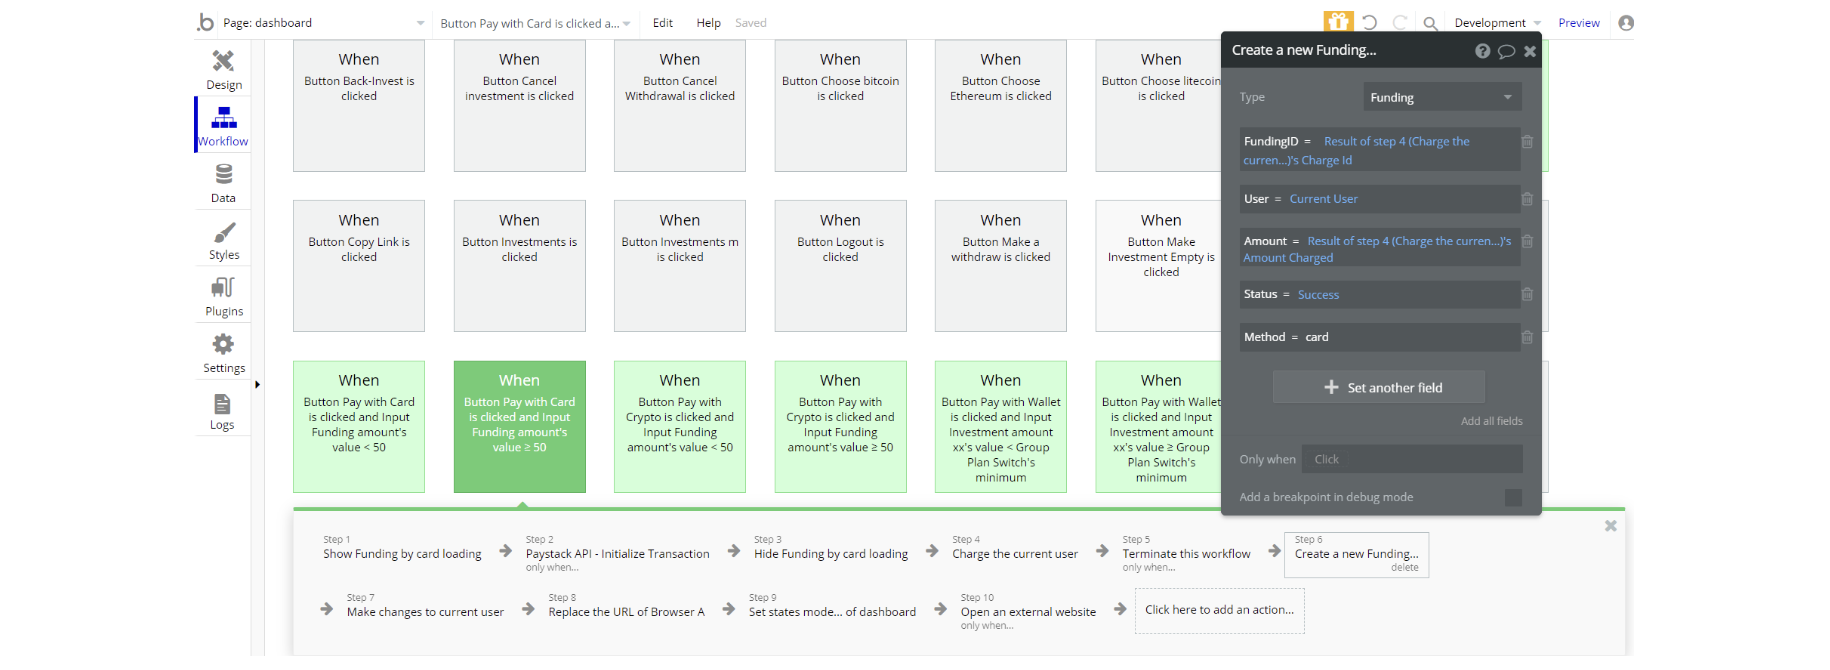
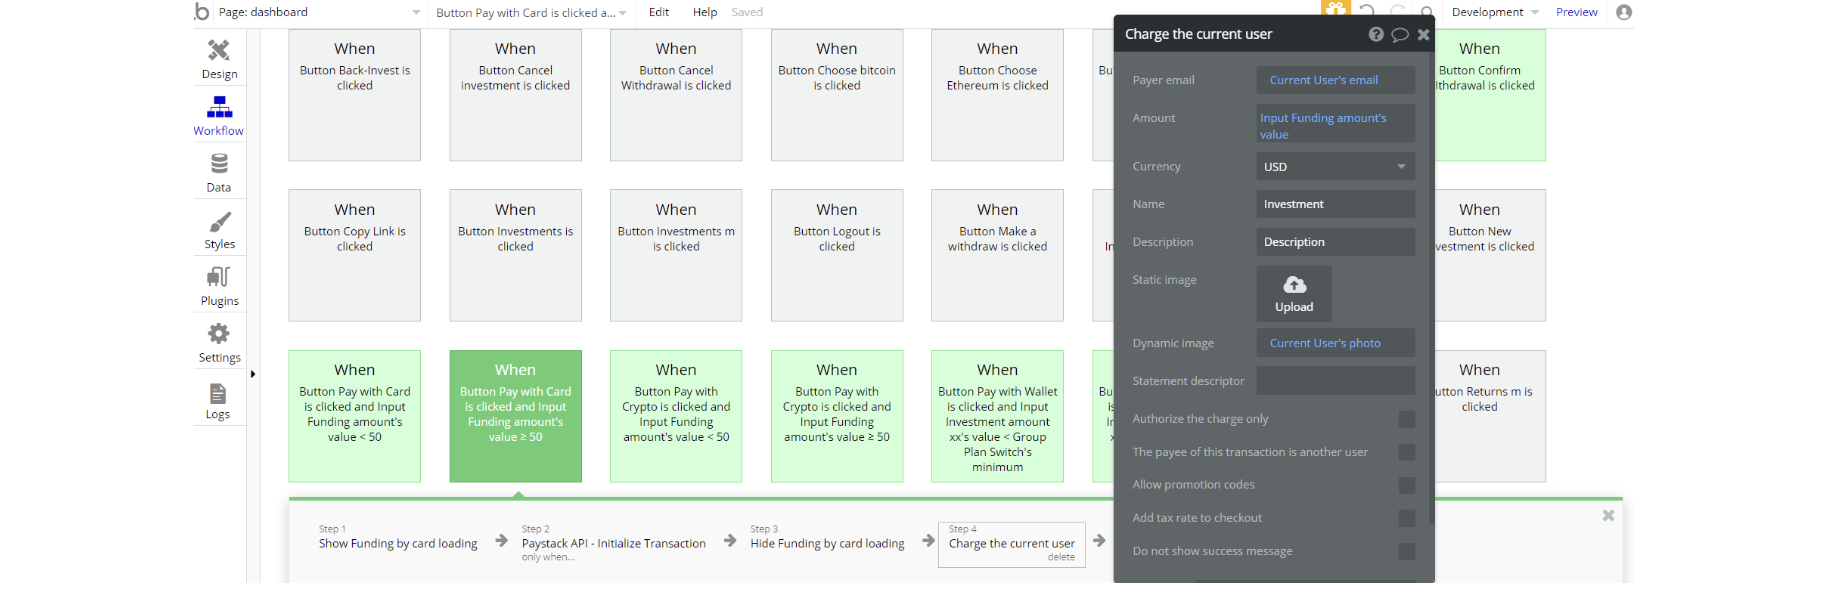
4. Remove step 4 which the action related to Stripe in the workflow
Tip: Please note and be cautious, that thus you enable Paystack and remove Stripe for this template.
We have configured Paystack API calls. To use Paystack in your app, please follow these steps:
- Visit https://paystack.com/ and sign up as a developer;
- Go to Settings > Developer;
- Under API Keys and Webhooks get your Test and Live keys respectively.
Note: In order to obtain your Live keys, you will need to register a business account.
Once you want to proceed working with real money, you need to activate a Paystack Starter Business account: https://support.paystack.com/hc/en-us/articles/360009972779-How-do-I-activate-my-Paystack-Starter-Business- and update the API keys in your application.
After this, the corresponding error ("You cannot initiate third party payouts as a starter business”) should disappear.
VoguePay and Paystack integrations are regionally restricted. Please check their location of business. (Optional)
Paystack payments for Africa - https://paystack.com/
Voguepay empowers businesses in Africa - https://www.voguepay.com/
Google Plugin
In order to make the Sign in with Google option work properly, it is required to configure the Google plugin within your Bubble editor.
Facebook Plugin
In order to make the Sign in with Facebook option work properly, it is required to configure the Facebook plugin within your Bubble editor.
Random String Generator Plugin
This plugin is used for generating random strings. This is a free plugin that requires API key configurations.
Random String Generator: See the instructions on how to set the Random String Generator Plugin in Bubble.
VAPI AI Call Assistant Integration
Check out a new feature that is powered by the VAPI AI Platform.
It allows your application to have a completely customizable voice assistant that will answer any customer’s questions within the framework of the set prompt.
Please note that this is a paid plugin, so to use it, you need to subscribe or buy it.
As for the traffic, you only pay for the minutes you use. Check the pricing details here: https://docs.vapi.ai/pricing
Call Assistant Setup: See the documentation on how to set up the Enhanced VAPI AI Call Assistant in the Bubble App.
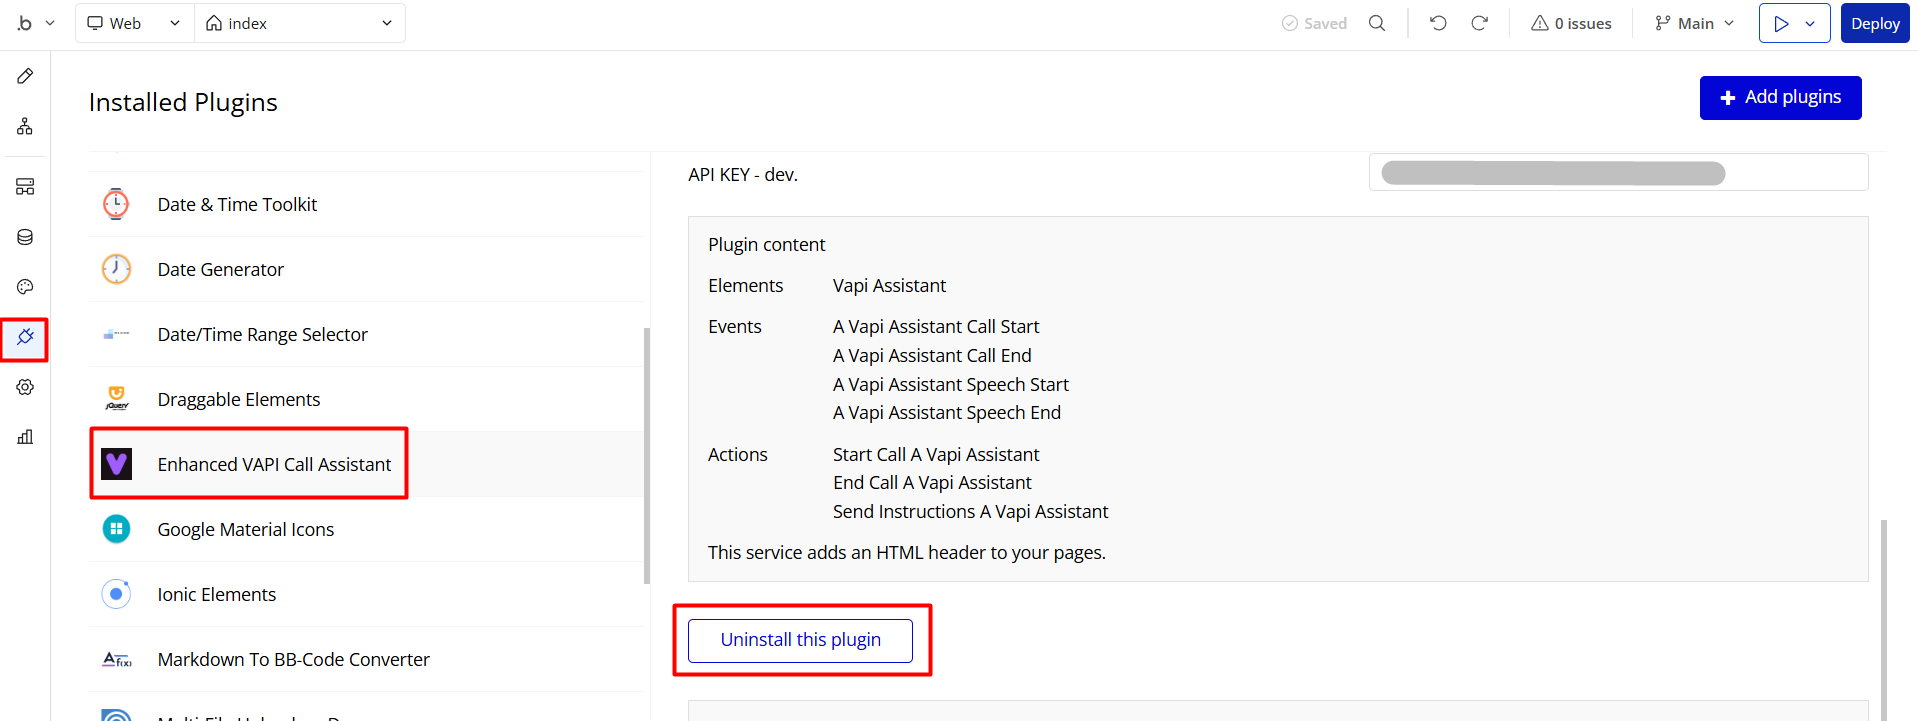
If you don't need this feature within your app, feel free to remove it.
In this case, remove the:
- reusable element “AI Assistant” from the index page and reusable elements
- remove the following step in the workflow:
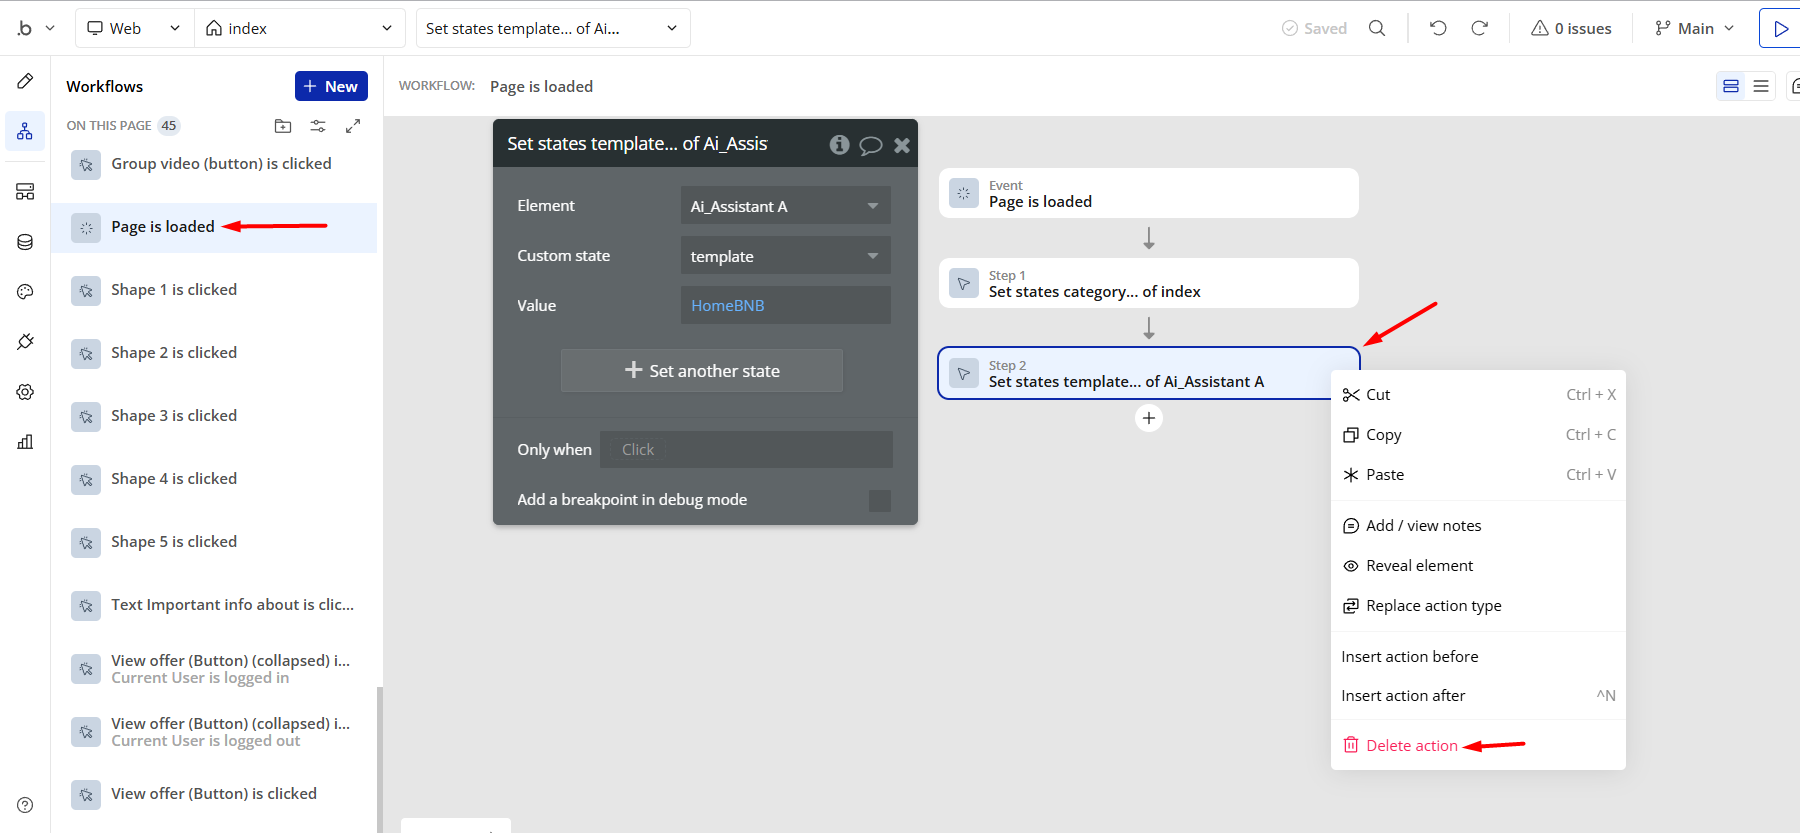
- Remove the Enhanced VAPI Call Assistant plugin from the plugin tab.
Remove Demo Login
This template comes with demo accounts and demo buttons for testing purposes, which do not require a full sign-up process in order to test the platform features.
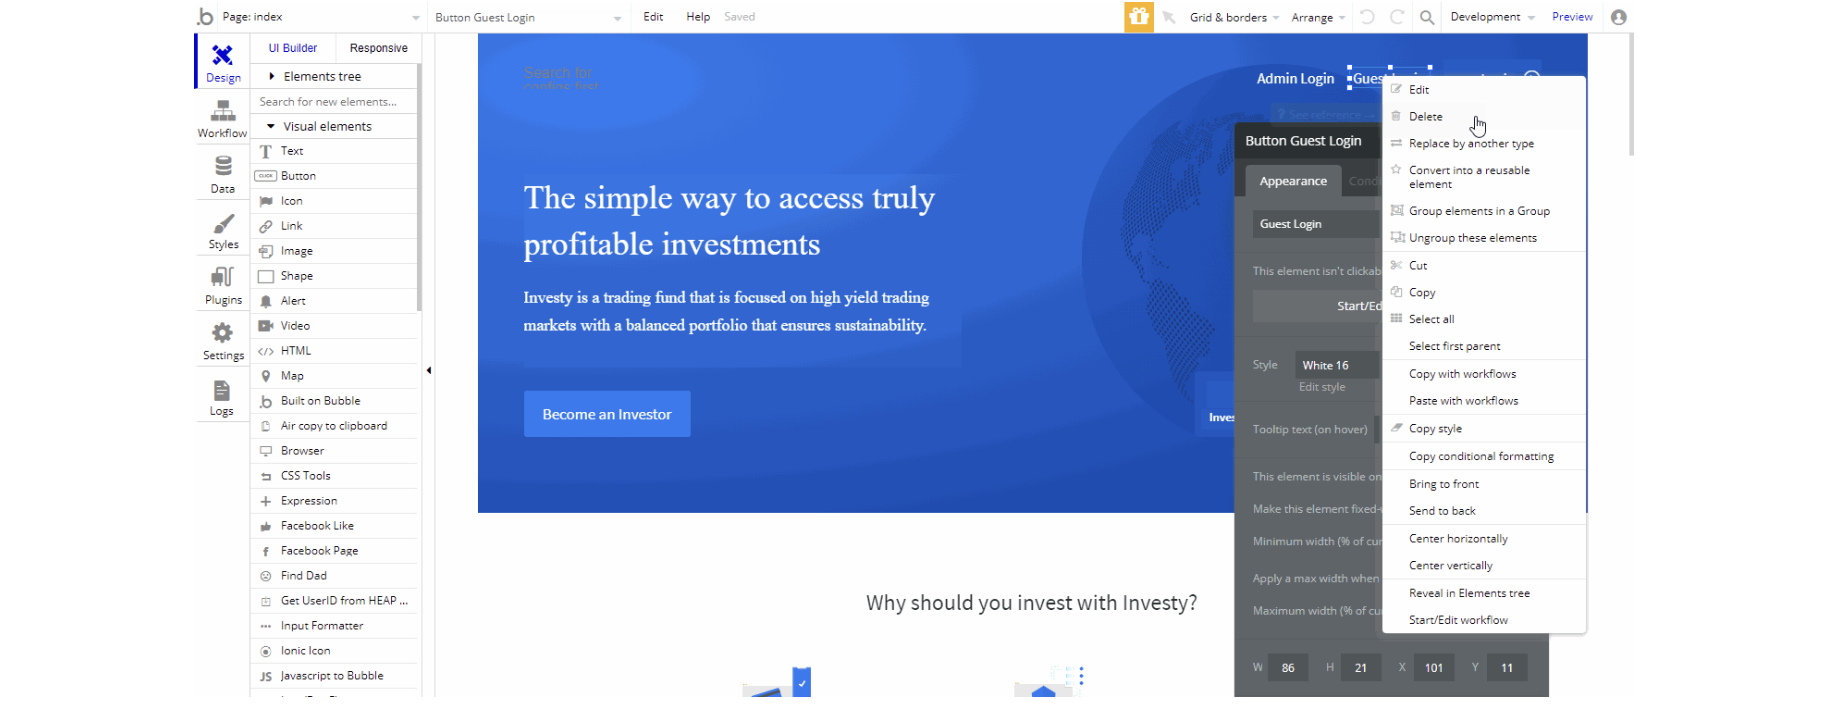
In order to delete demo items, follow the instructions:
Tip: Please note that deleting the demo buttons will delete the button workflows as well. Removing these demo options doesn't affect any other aspect of the template.
- Go to the
Indexpage, find and delete the "Guest login" button:
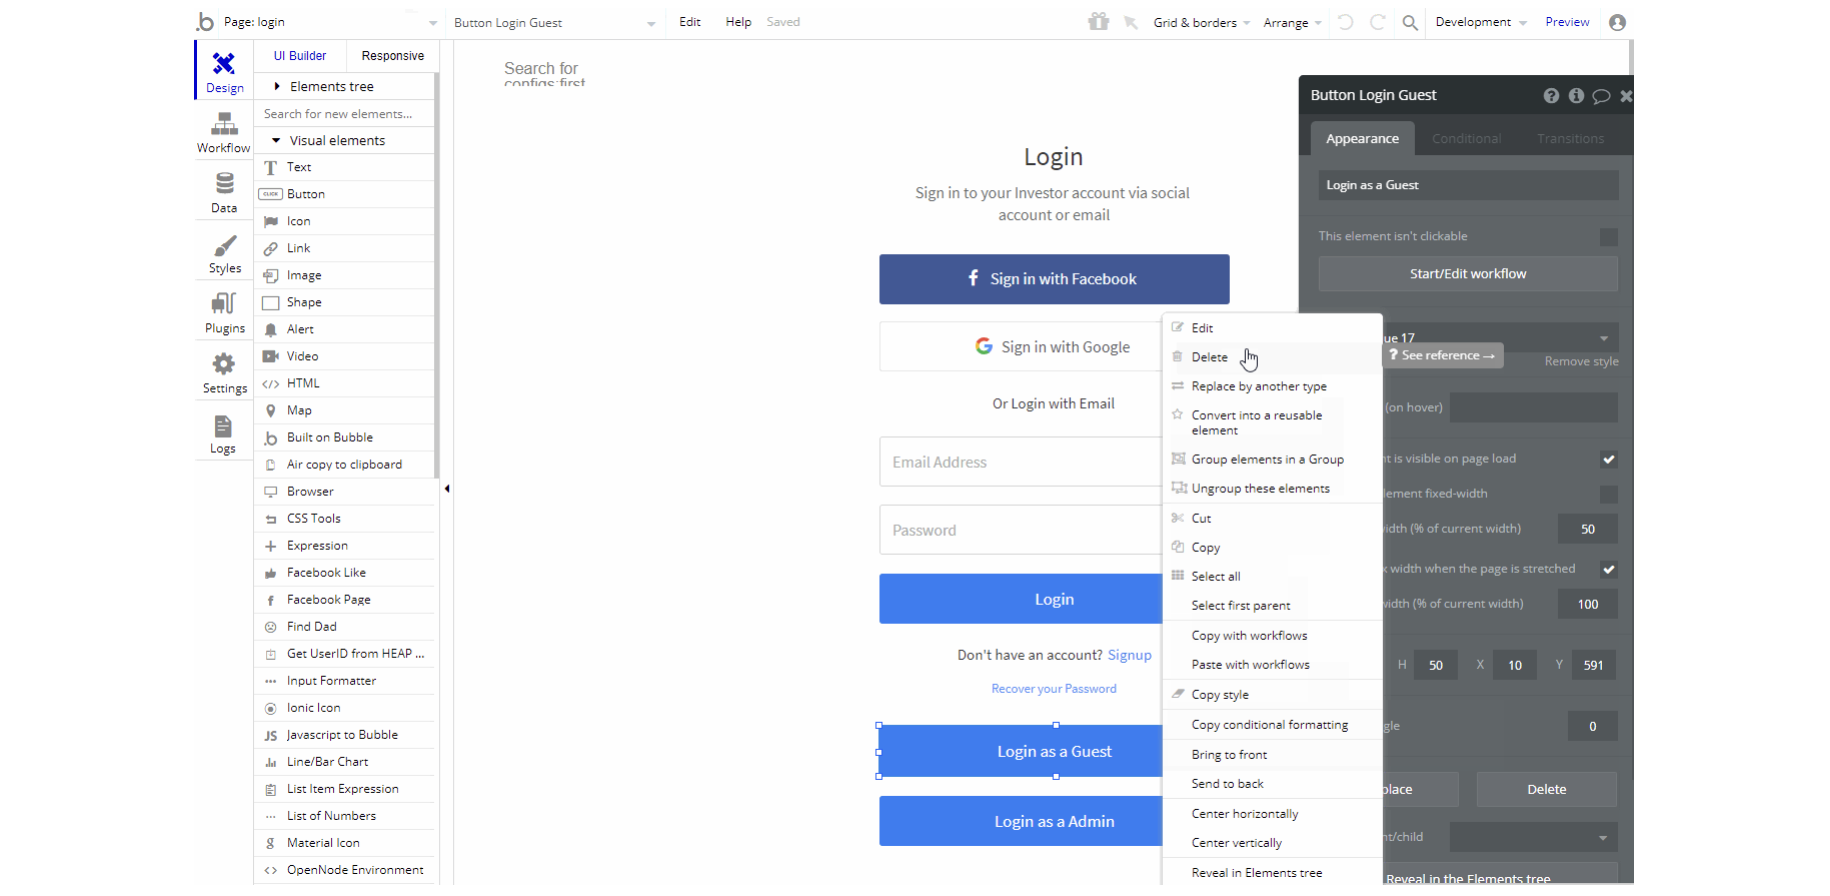
- Go to the
loginpage, find and delete the "Login Guest" button:
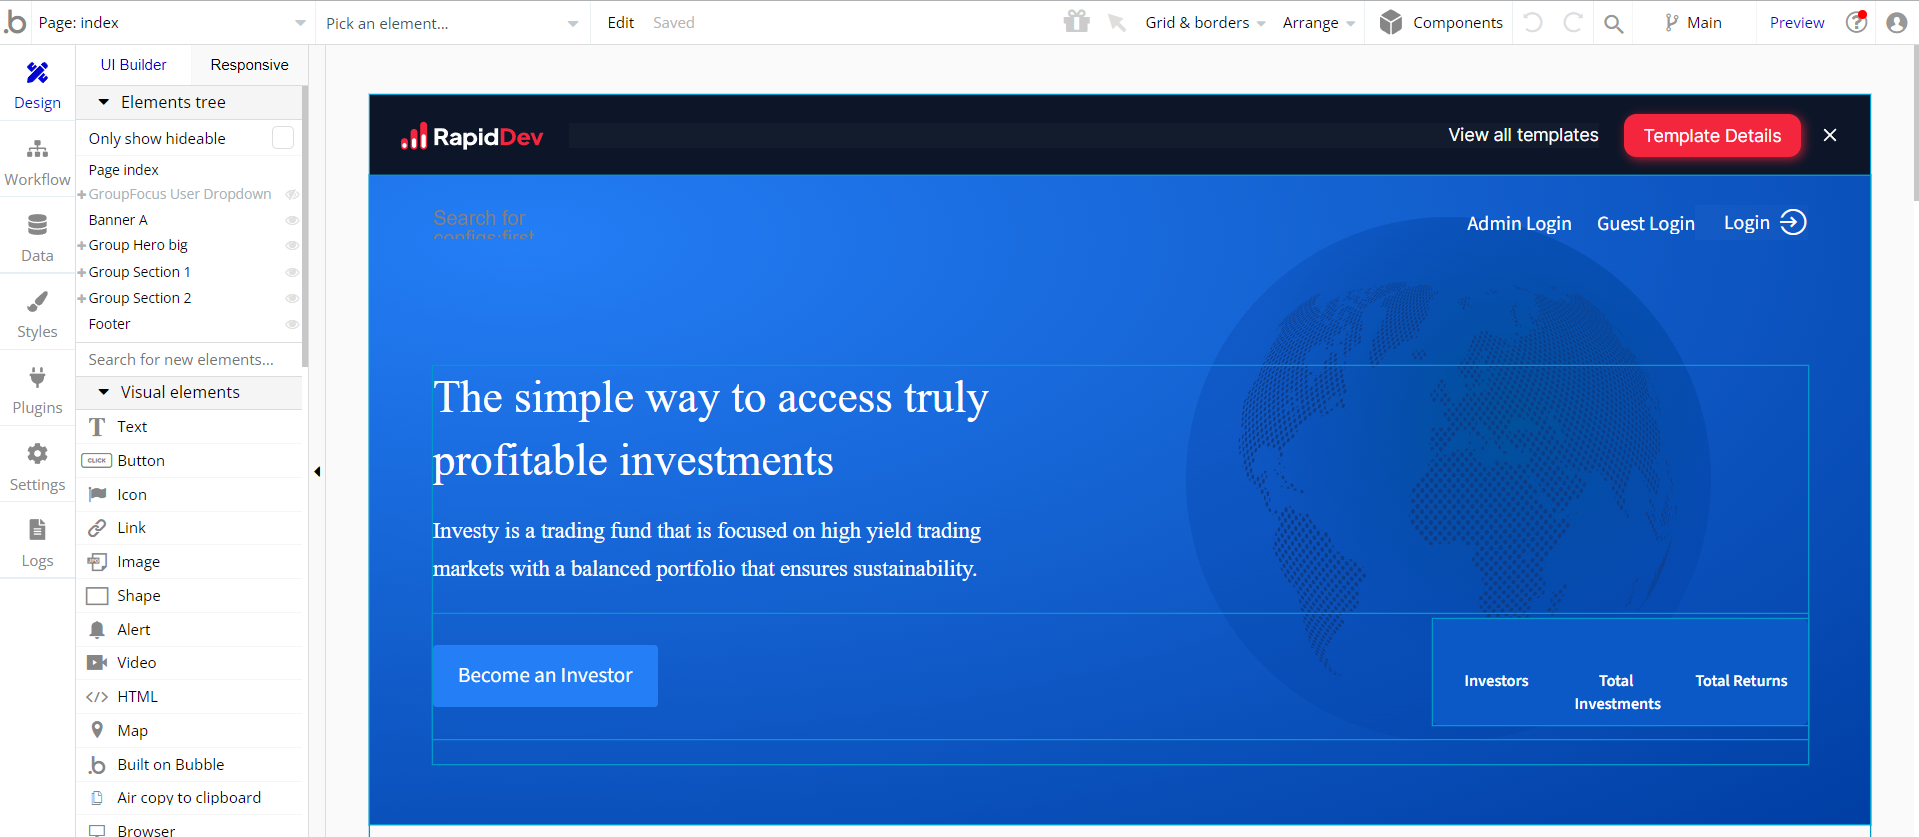
Remove Banner
This template comes with a promotional banner at the very top of each page. Feel free to remove it from your app.