This section states the purpose of each page.
Introduction
In this summary, we will describe each page and its content. The Page Element is the fundamental one that contains all the other elements.
Tip: See Bubble Reference for more information about Pages element https://bubble.io/reference#Elements.Page 🙂
Pages
index
This is the main page typically encountered first on the web app that usually contains links to the other pages of the site. A homepage includes a variety of menus that make it easy for users to find the information they need.
Here, users can go to signup/login, view popular/new/with discounts restaurants or they can type in an address and jump straight to the search page where they can see the restaurants (within the customer radius of the location they provided) and filter the restaurants by tags.
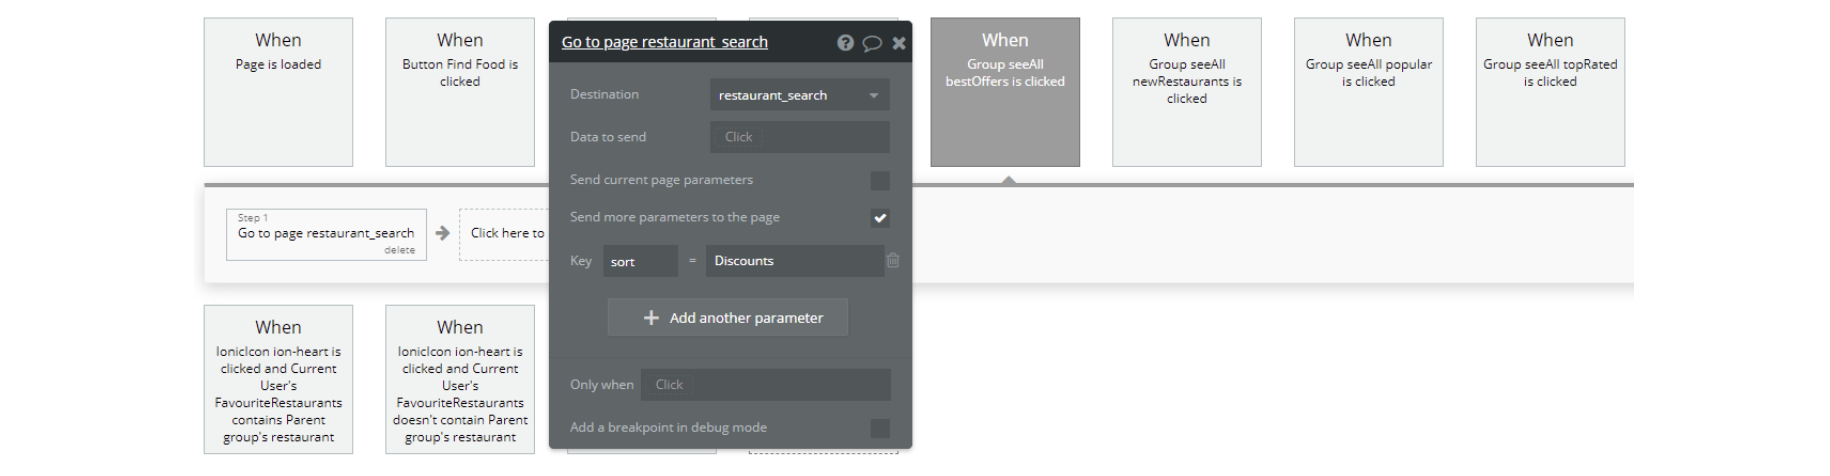
There are 4 "seeAll" groups that redirect to the
Restaurant_search page, but form it according to 4 different filters:- by restaurant rating
- by the popularity of the restaurant
- according to the novelty of the restaurant
- by largest discounts in a restaurant
Once an unlogged user accesses the index page, he will see in search box an address that starts with: New York Botanical Garden, 2900 .....
This was made for demo purposes, as most of the demo restaurants are registered in NA region.
To remove it, please delete the address from
User data type, currentAddress field, stored in default value:
admin
This page is designed to manage platform data, e.g. Users, Items, Payments… and others. Only users with admin rights are able to access this page (in read-only mode), and those users who have access rights can edit or delete anything here.
This is a dashboard with many tabs meant to help to manage everything that happens on the platform. It also displays a lot of information that makes it easier to have a better platform overview.
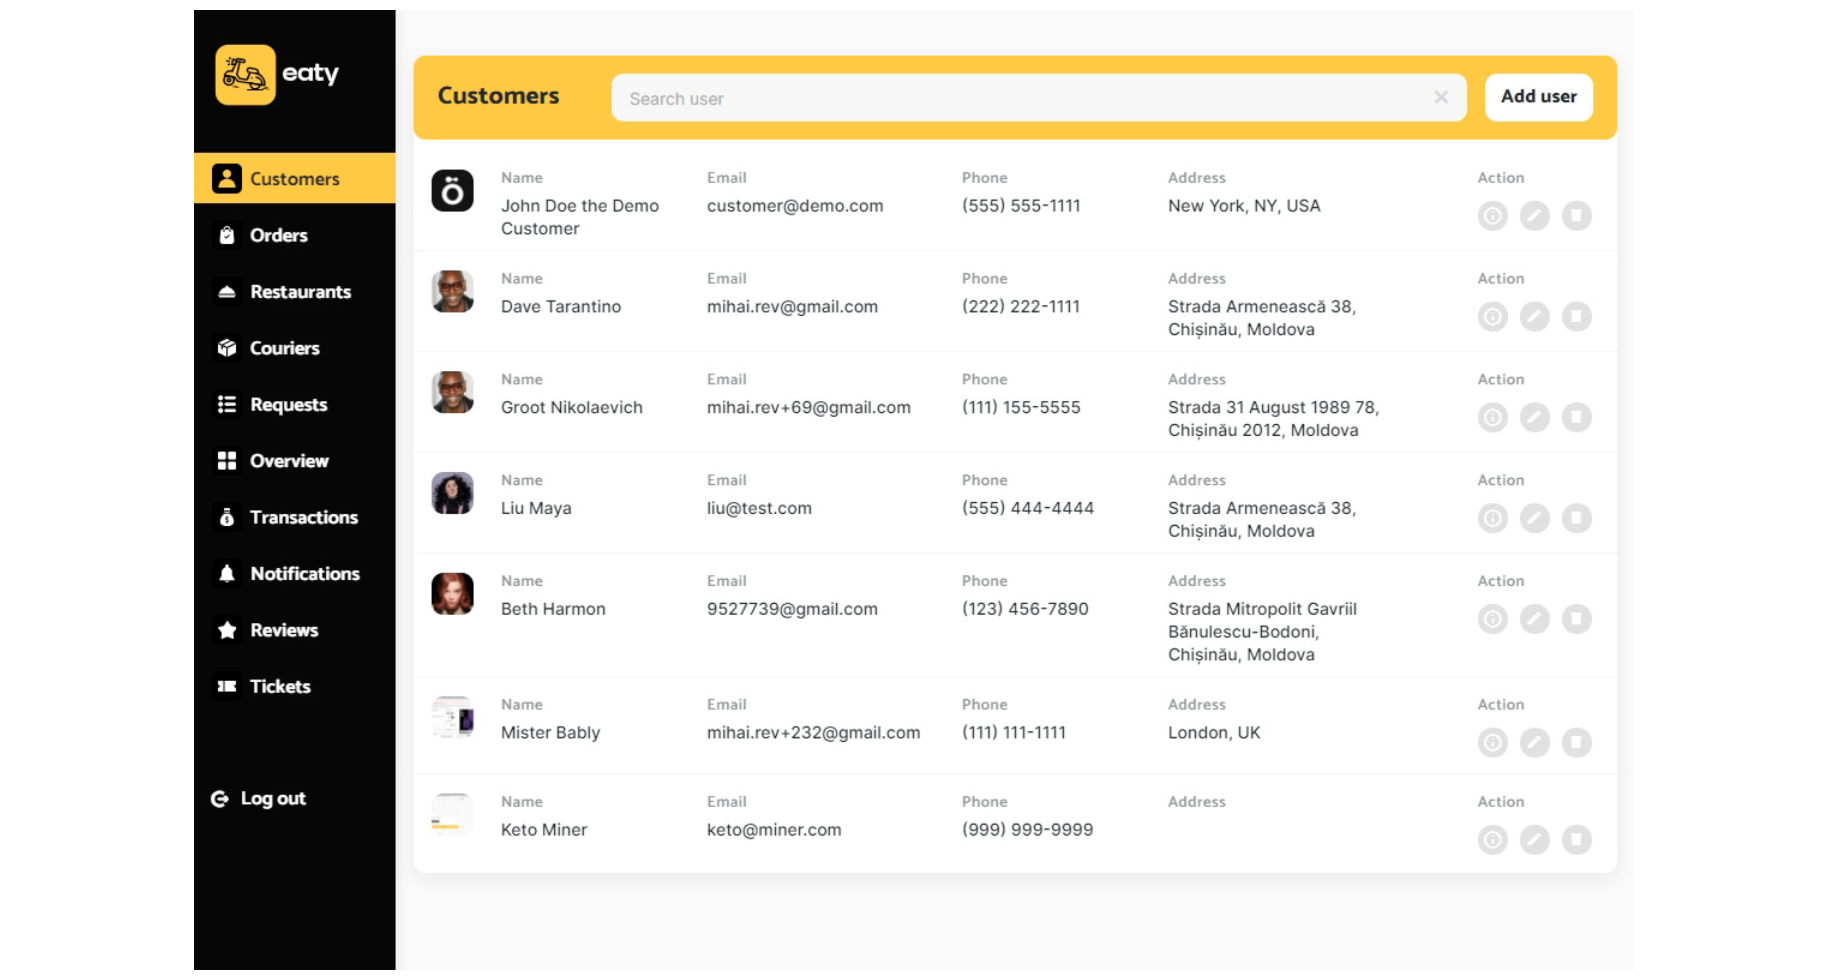
- Customers
The tab is where all the customers on the platform are displayed but on top of that, their orders are being displayed too. You can edit their information or simply delete them if needed.
- Orders
The tab is similar to the one found on the
Restaurant page. There the admin can accept/decline incoming orders and then track their status (until delivery) the way the restaurant owner does on his end.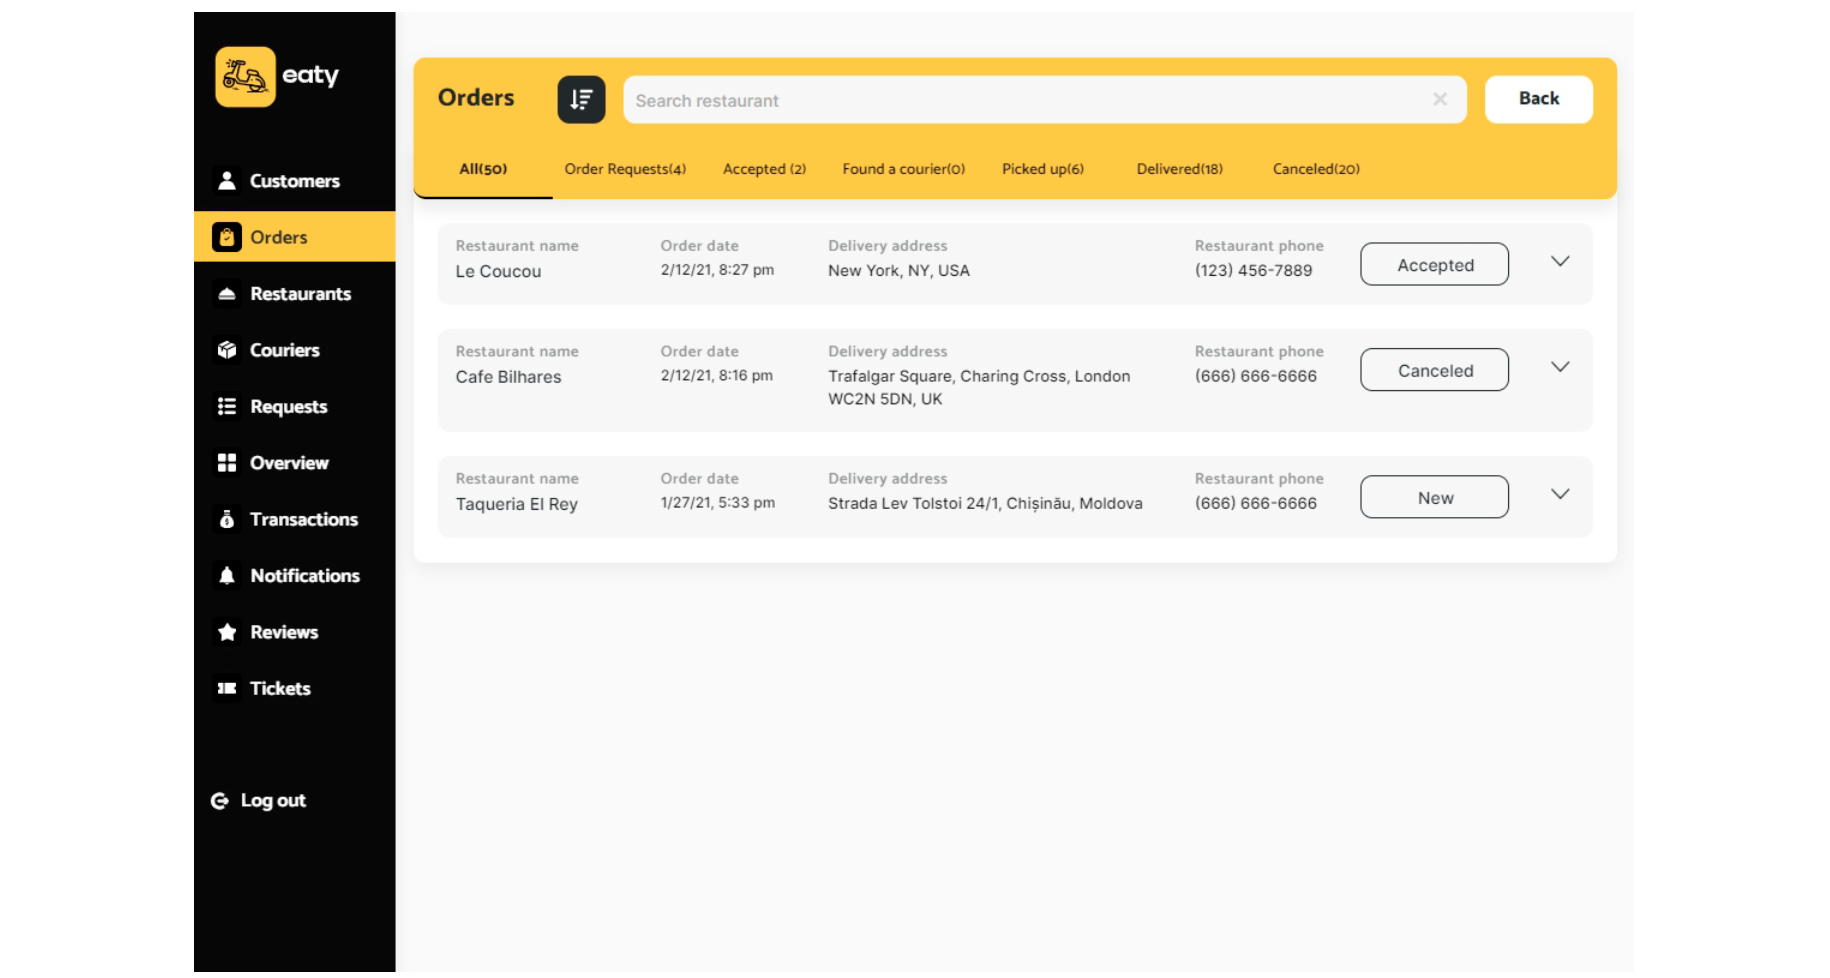
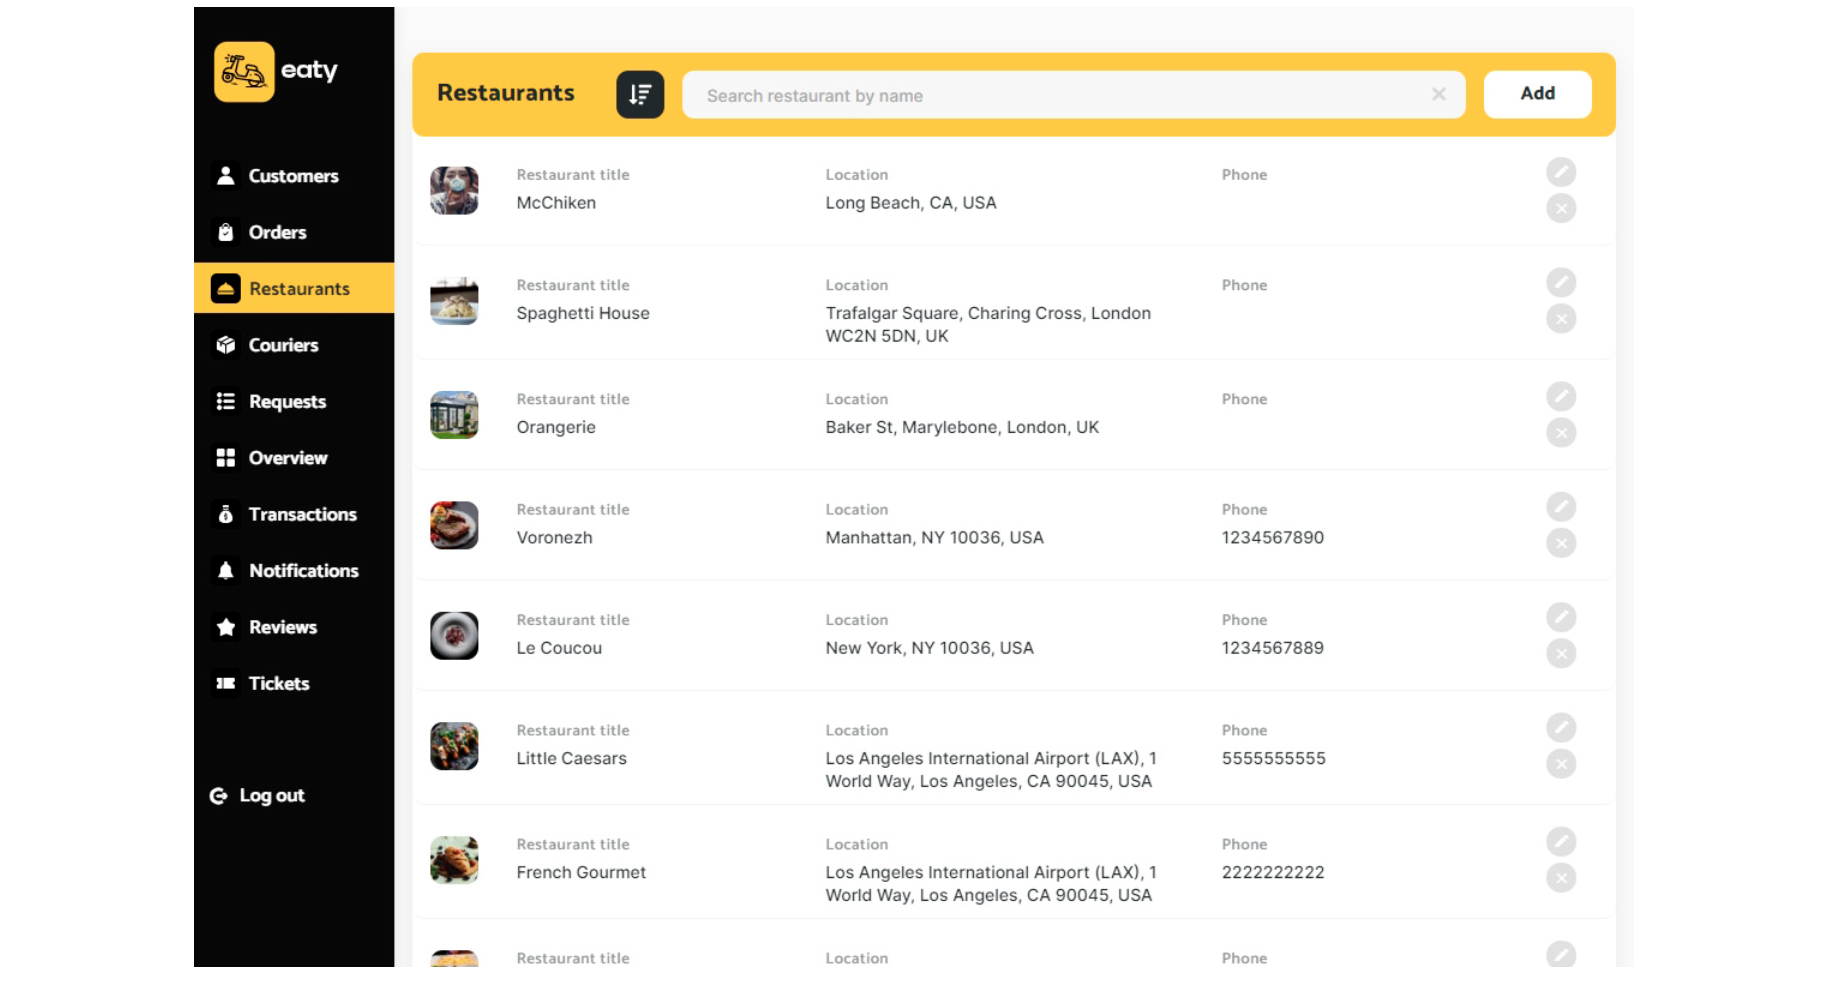
- Restaurants
The tab is where all the restaurants on the platform are listed. The admin can view or edit the information about them or he can delete those if needed.
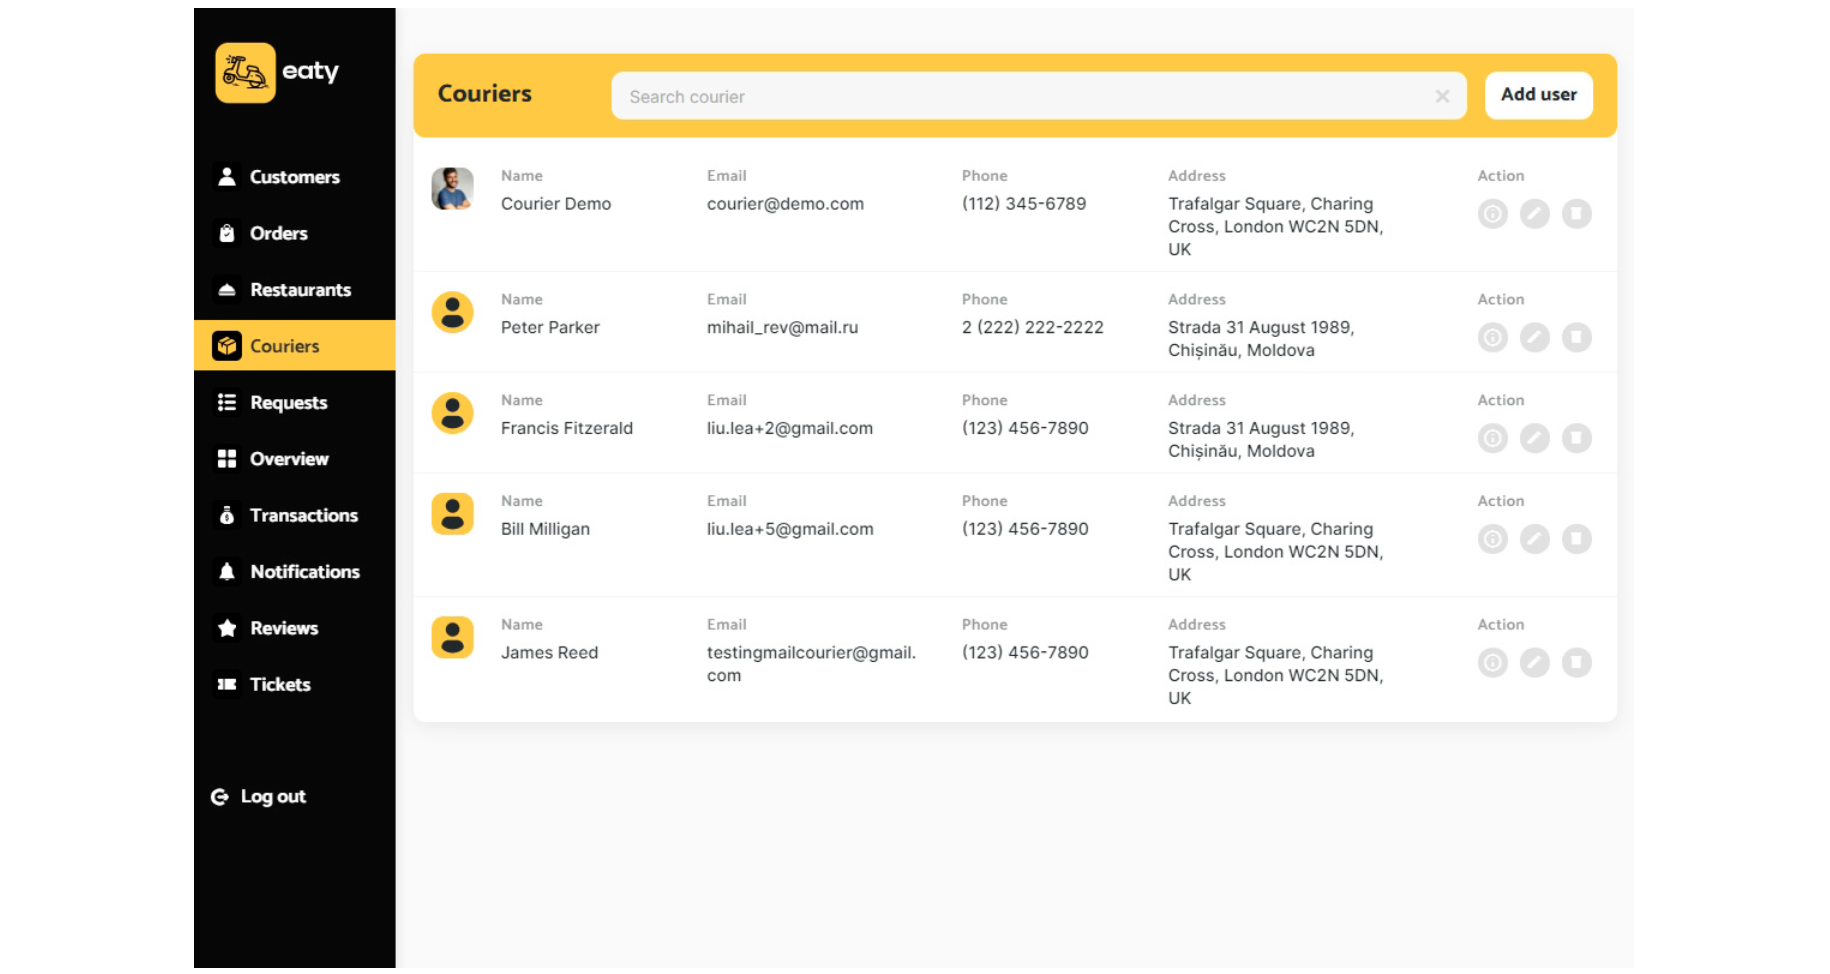
- Couriers
The tab is where all the available couriers on the platform are listed. On top of that, the orders that they have taken are being displayed too. And admin can edit their information or delete the couriers if needed.
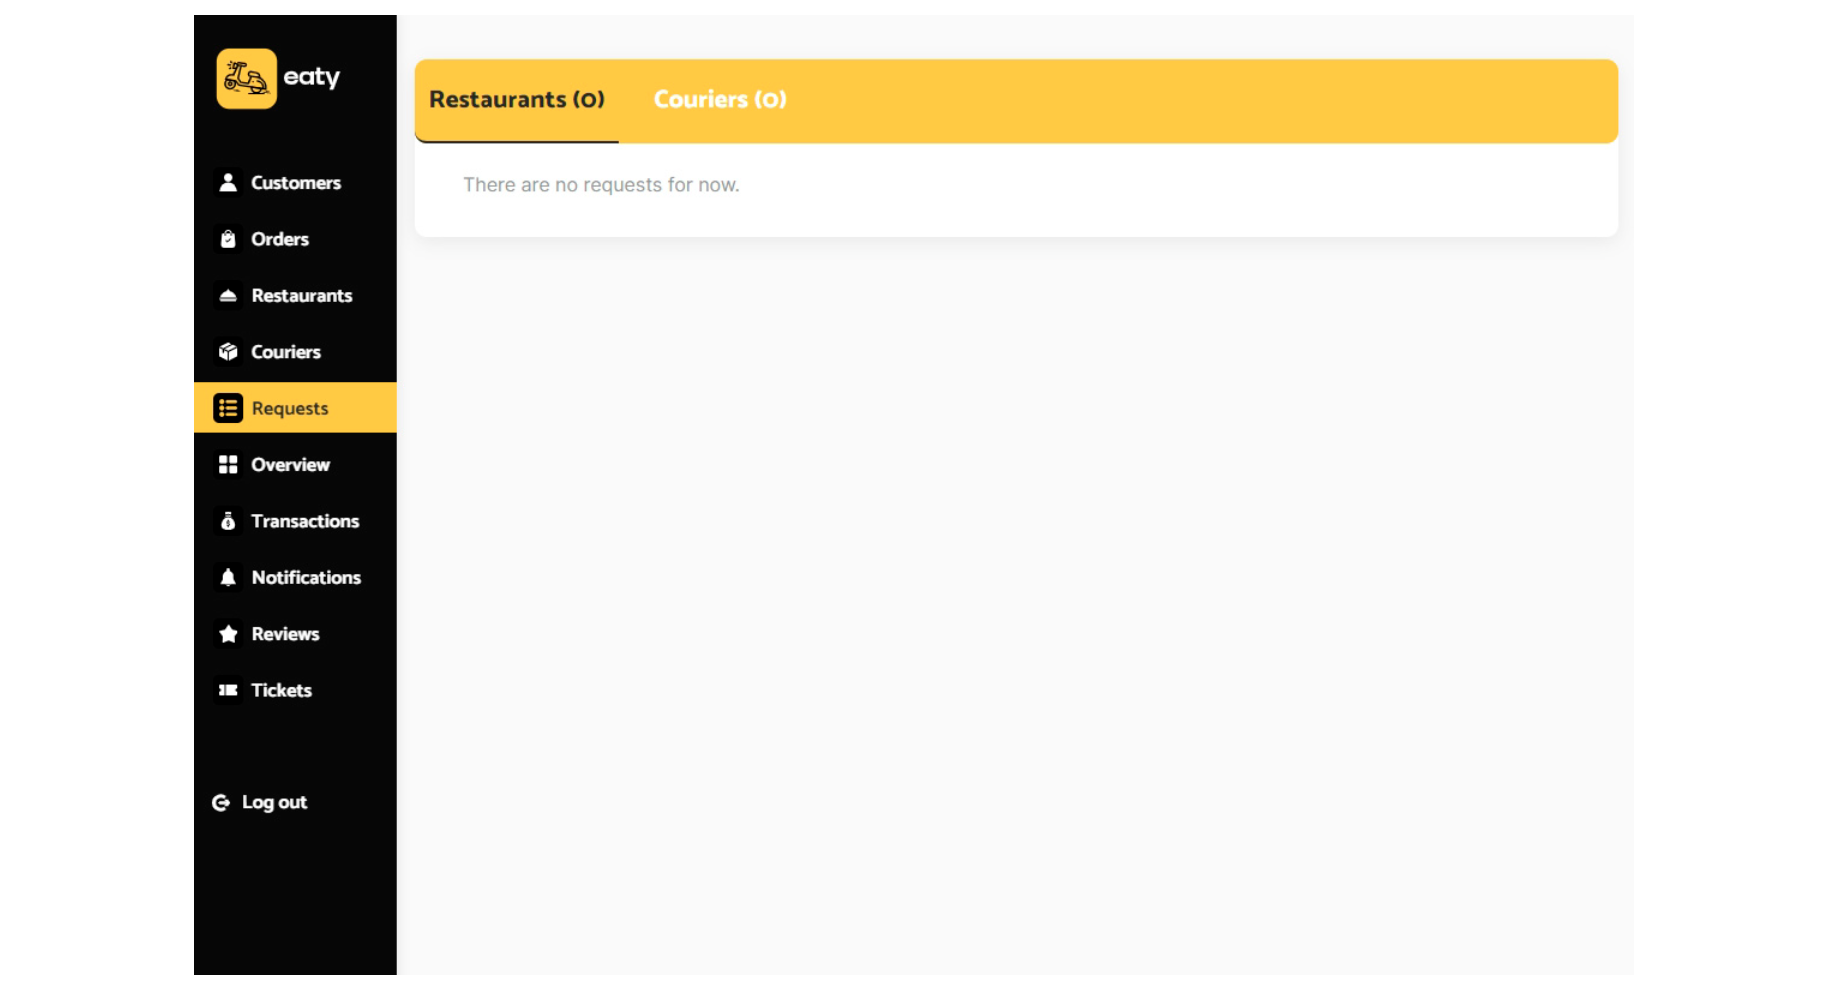
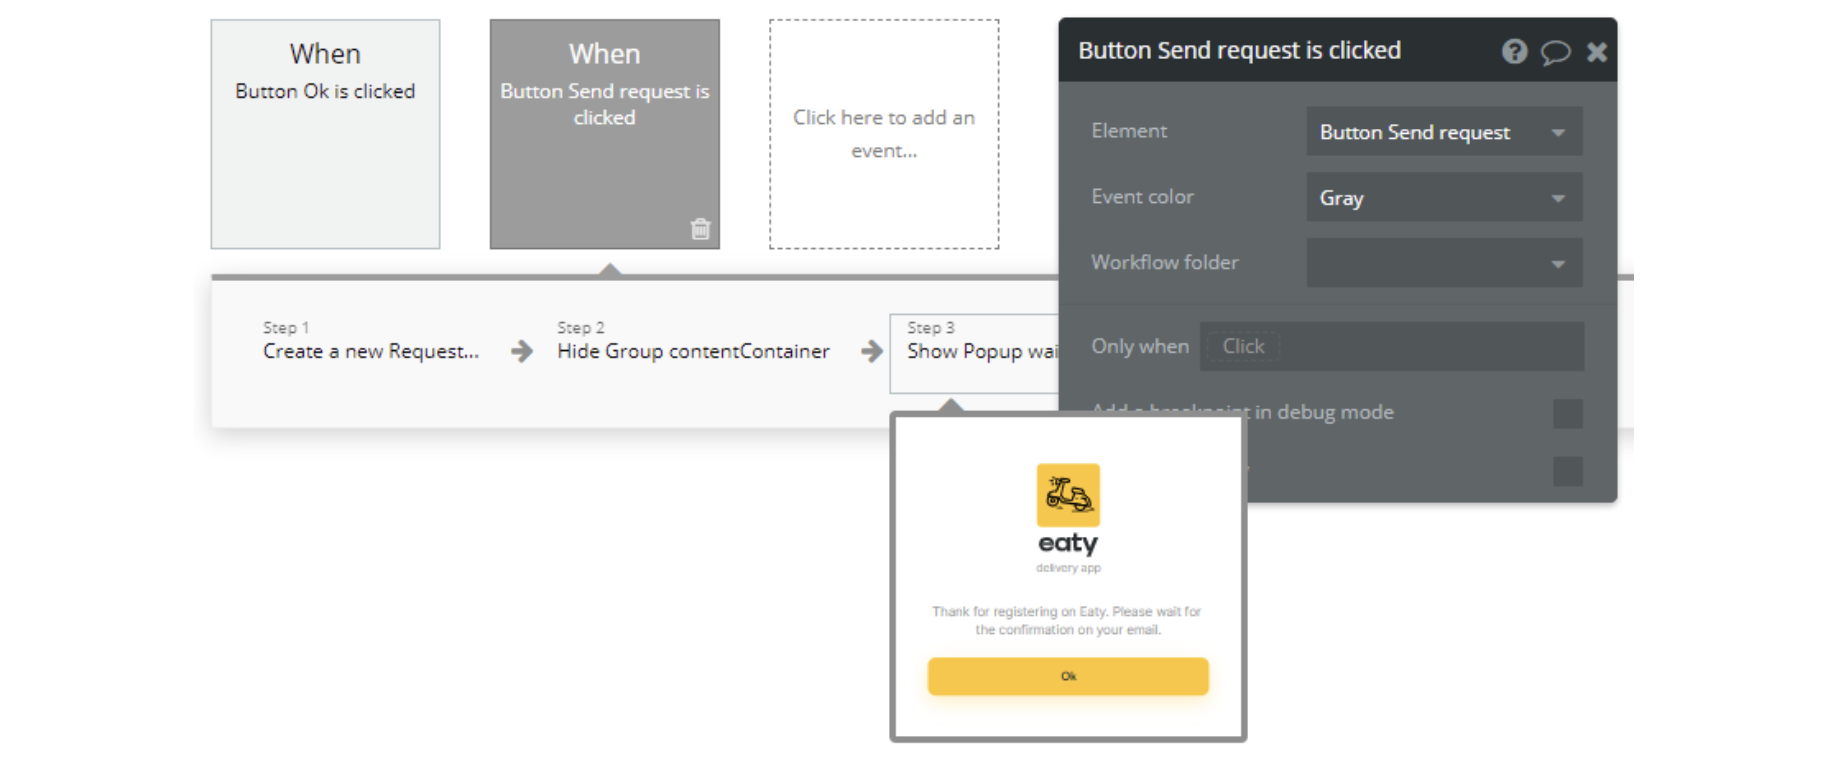
- Requests
The tab is where all the incoming courier/restaurant registration requests are displayed. The admin can accept or reject a request. Upon acceptance, a new restaurant will be created using the email provided by the restaurant owner in the request. The credentials will be sent to the restaurant owner via the email provided in the sign-up form.
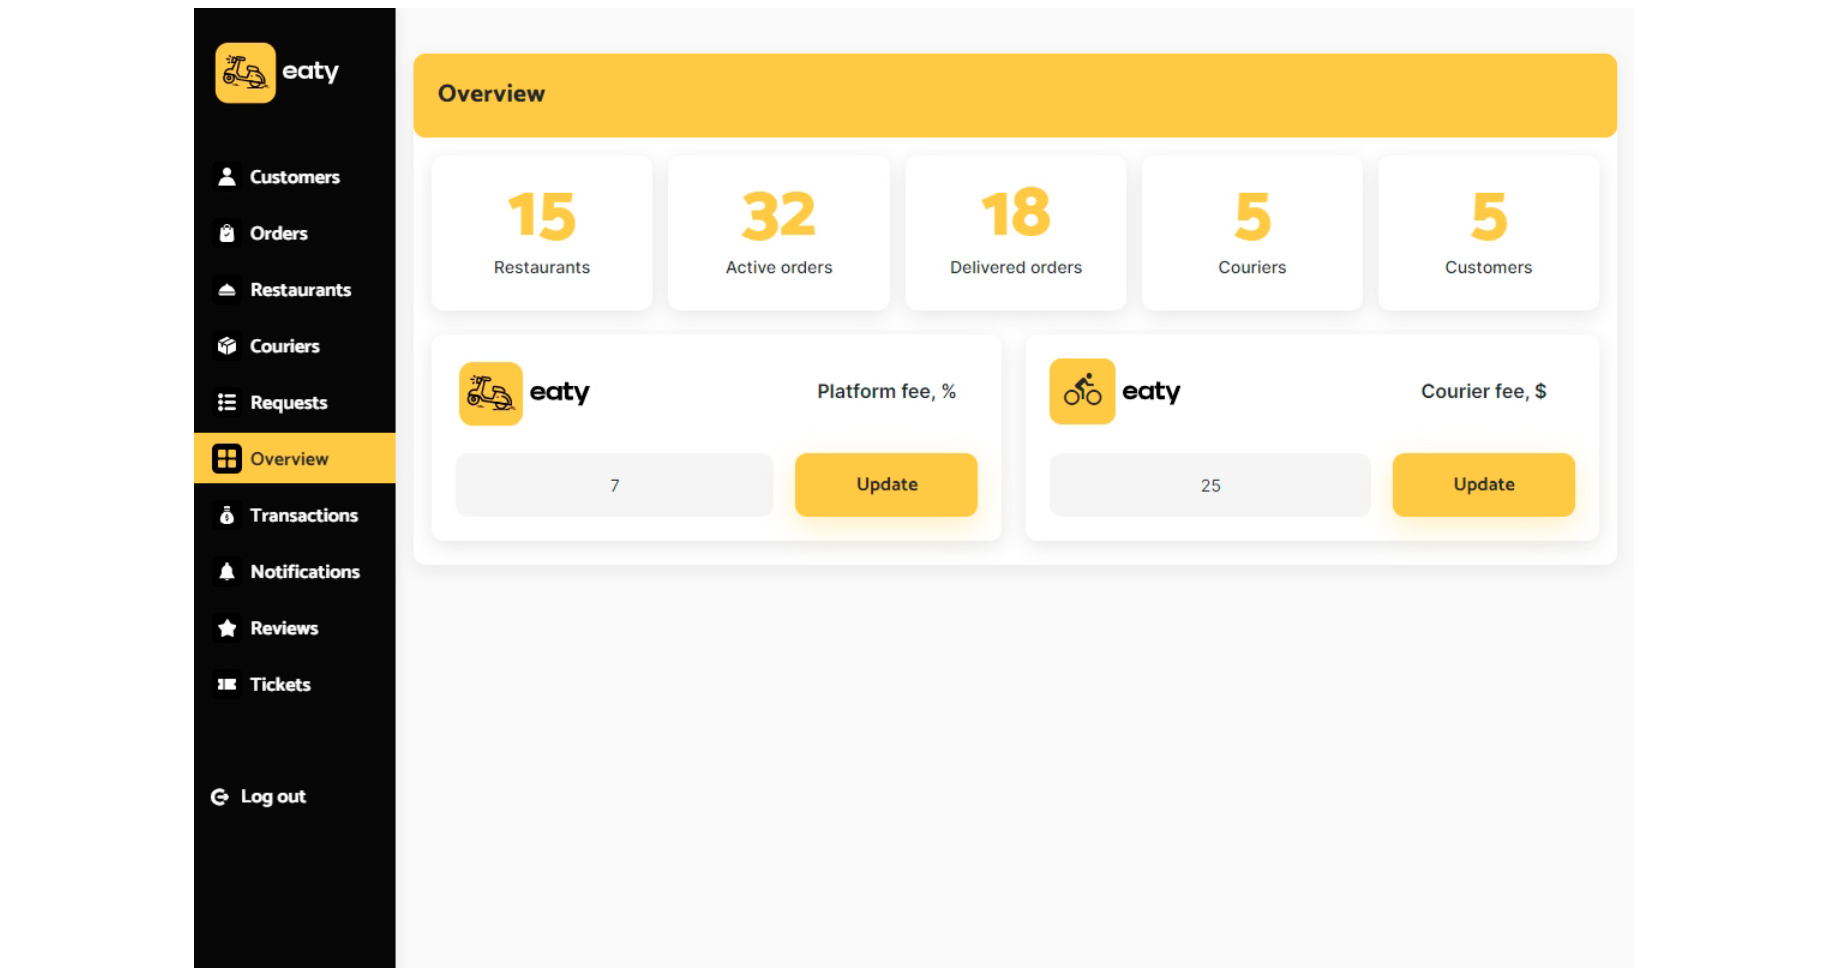
- Overview
The tab is where some useful platform statistics are displayed. Here the platform owner can change the app fee and courier fee for the delivery.
- Transactions
The tab displays all the payments for orders made on the platform. This includes payments for orders that were canceled or completed.

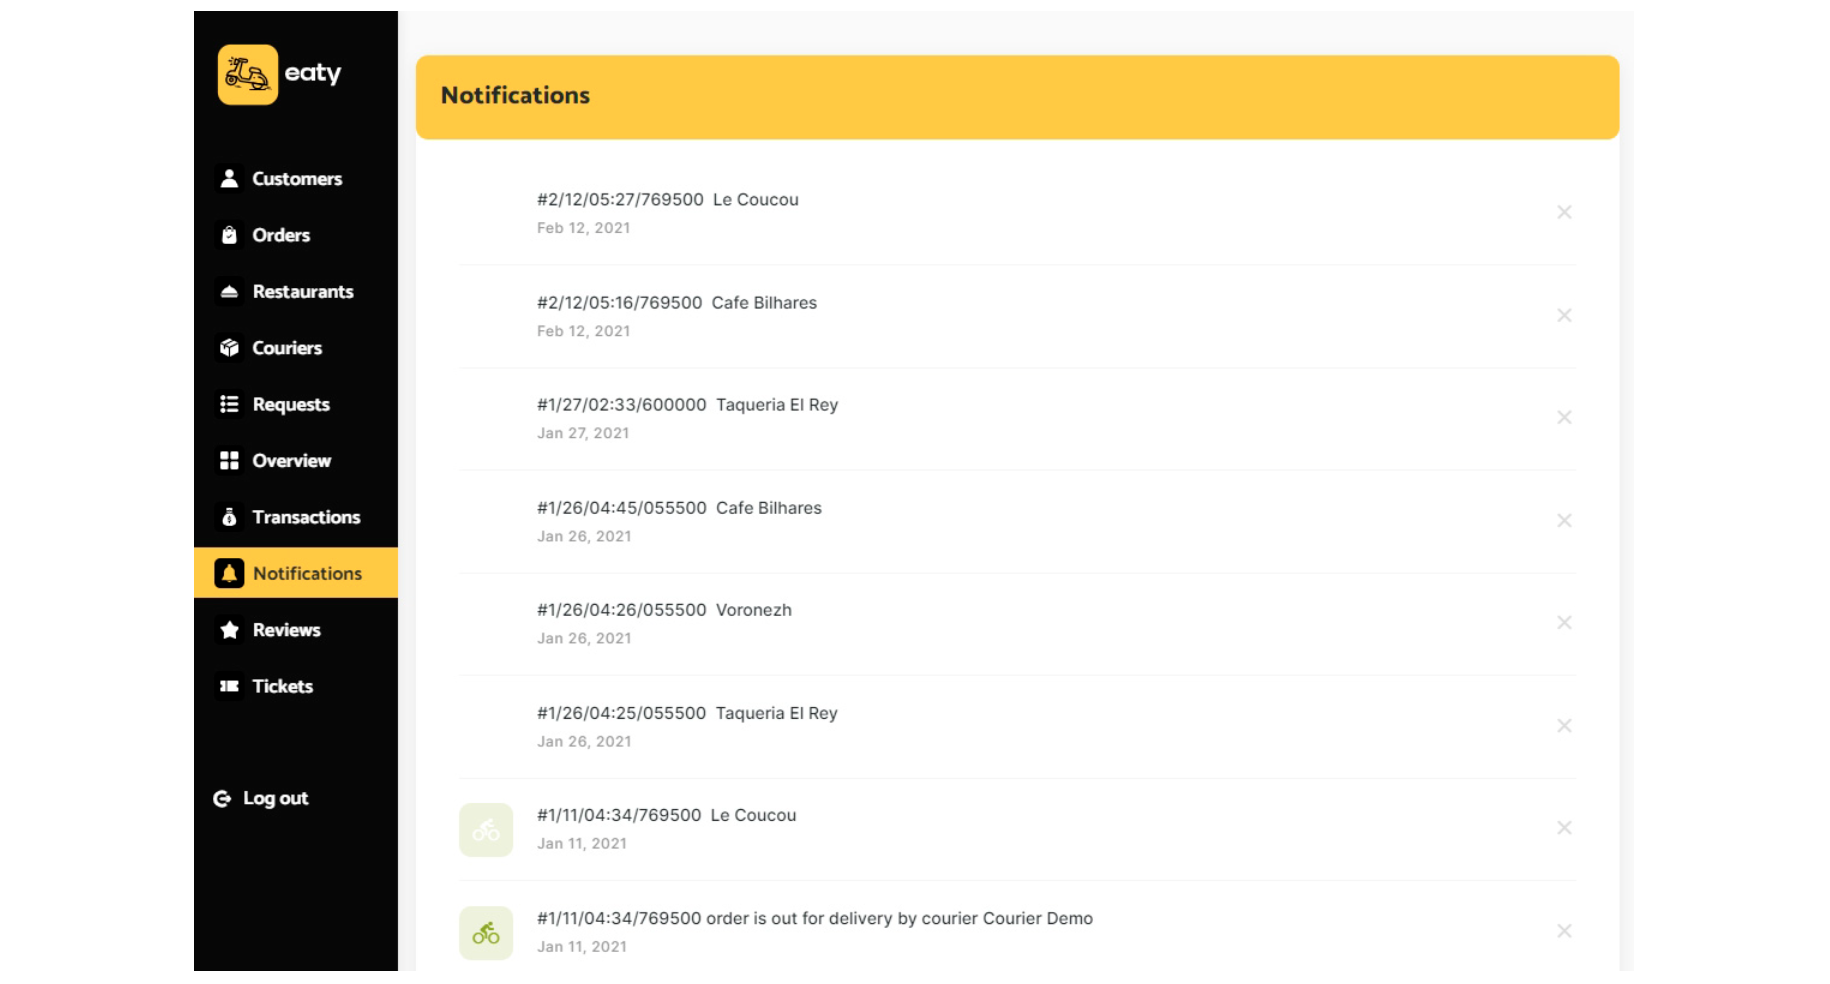
- Notifications
The tab is where all the notifications created on the platform are displayed for the admin. There is also an option to delete a specific alert notification.
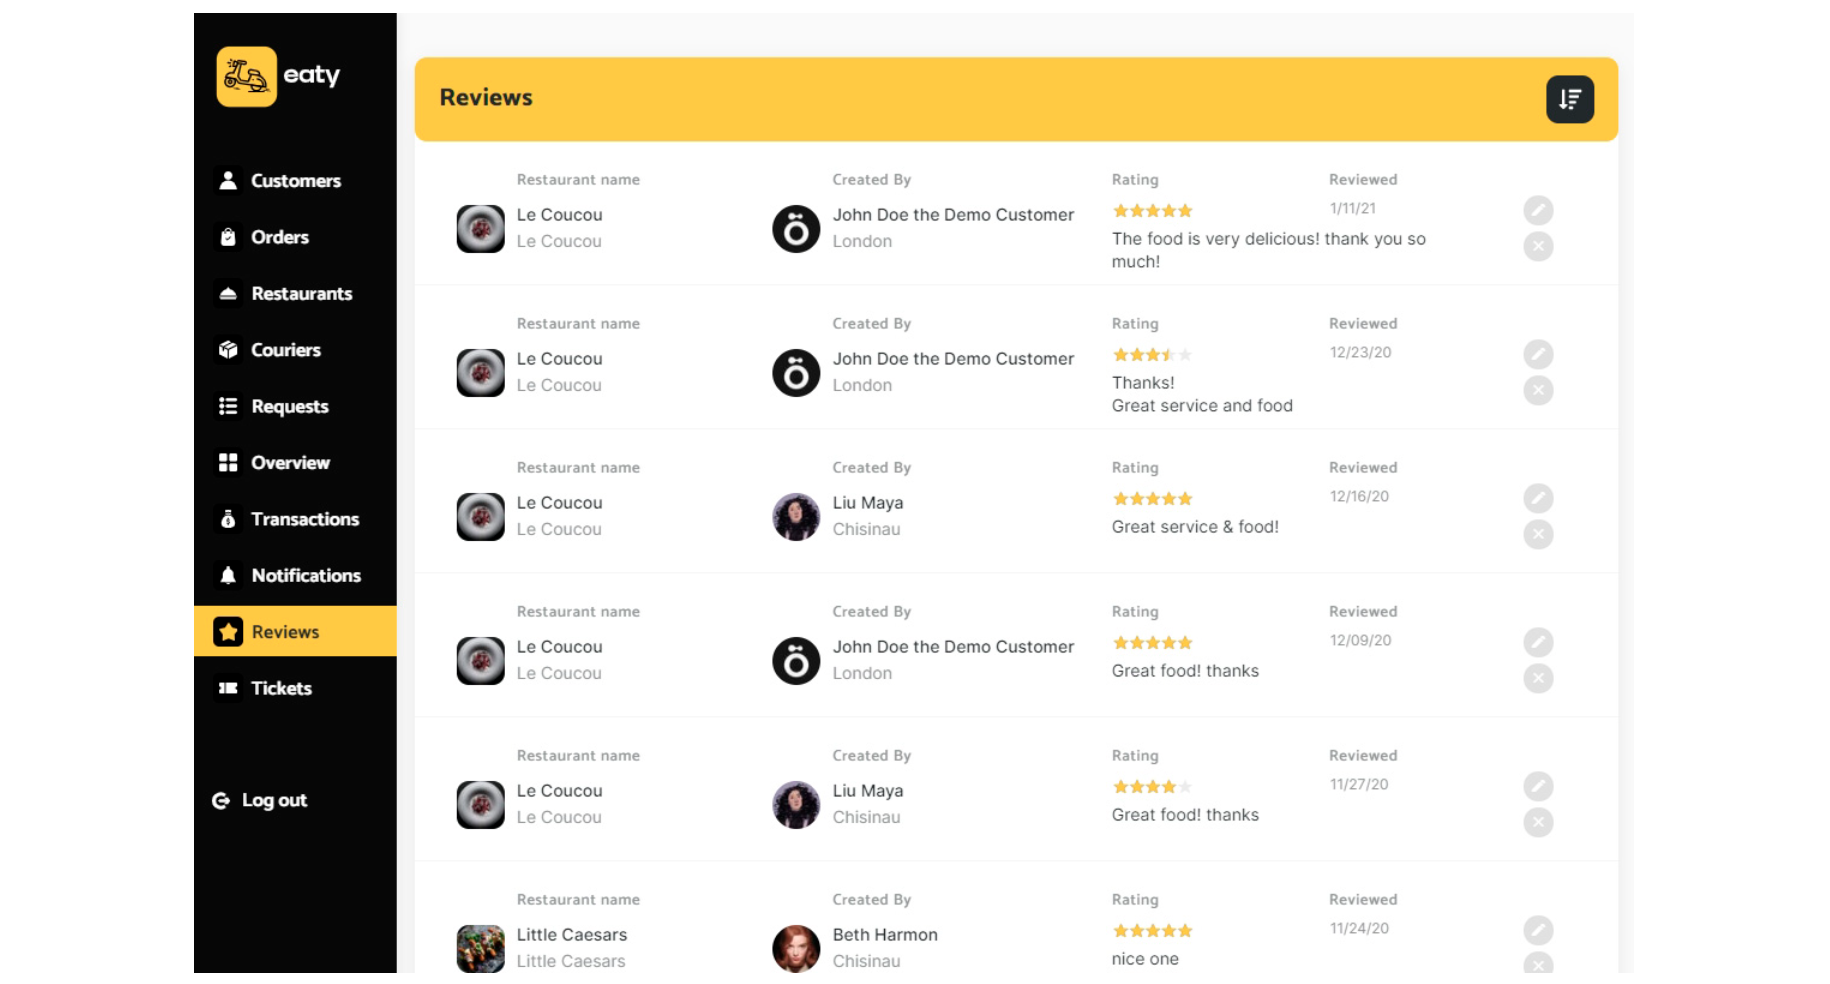
- Reviews
The tab displays all the customer reviews left for the restaurants on the platform. The admin can edit/delete them.
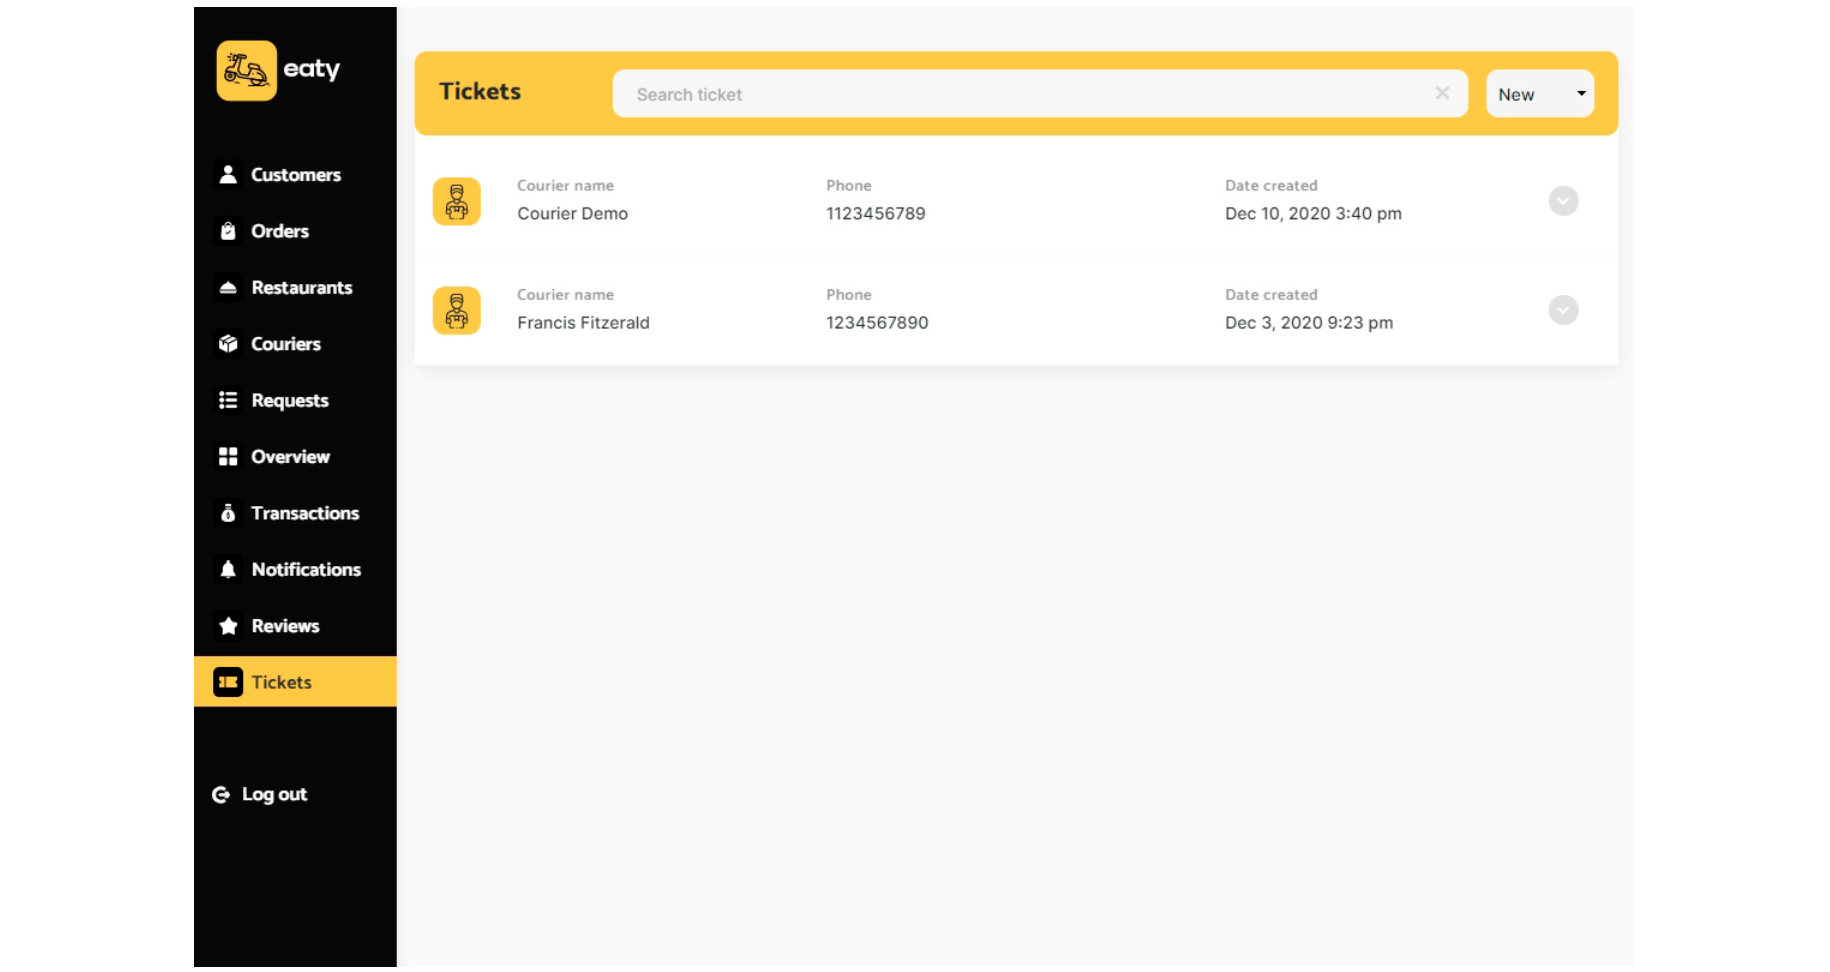
- Tickets
The tab is where the admin receives all the questions/reports from the platform users. He can reply to them and the user who submitted the ticket will receive an email containing his original question and the reply left by the admin.
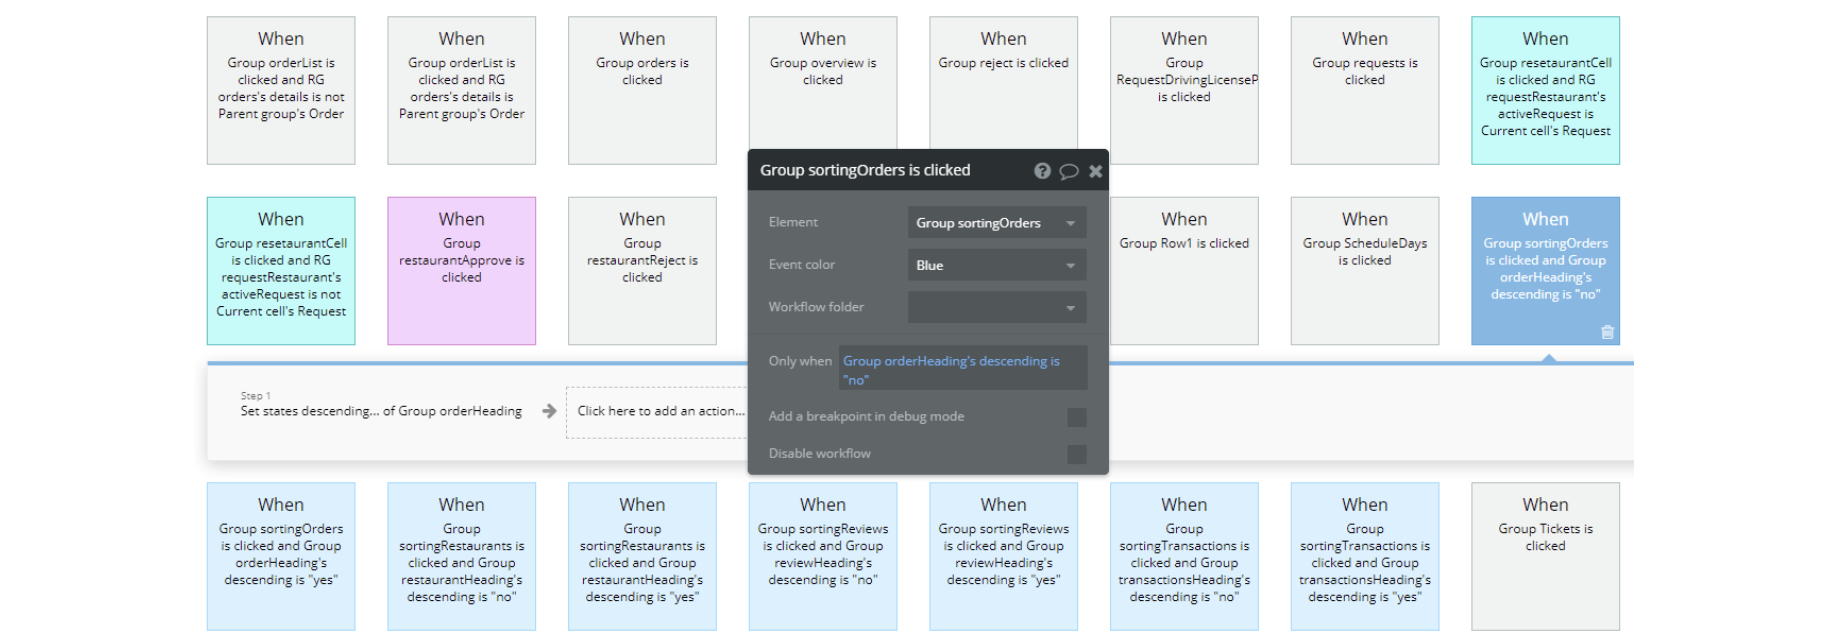
Do not be confused when you open the workflows of this page. There are many actions here, but most of them are repetitive, such as a Cancel, Close, or Back button.
Workflows are written here for approving or rejecting courier and restaurant requests. Also, various filters form lists to simplify navigation for the administrator.
chat
This is the page where the customer can communicate with the restaurant. The chat functionality includes messaging, sending images, and searching by name.
Tip: You can get to the chat page from the
profile page / Orders / Chat icon 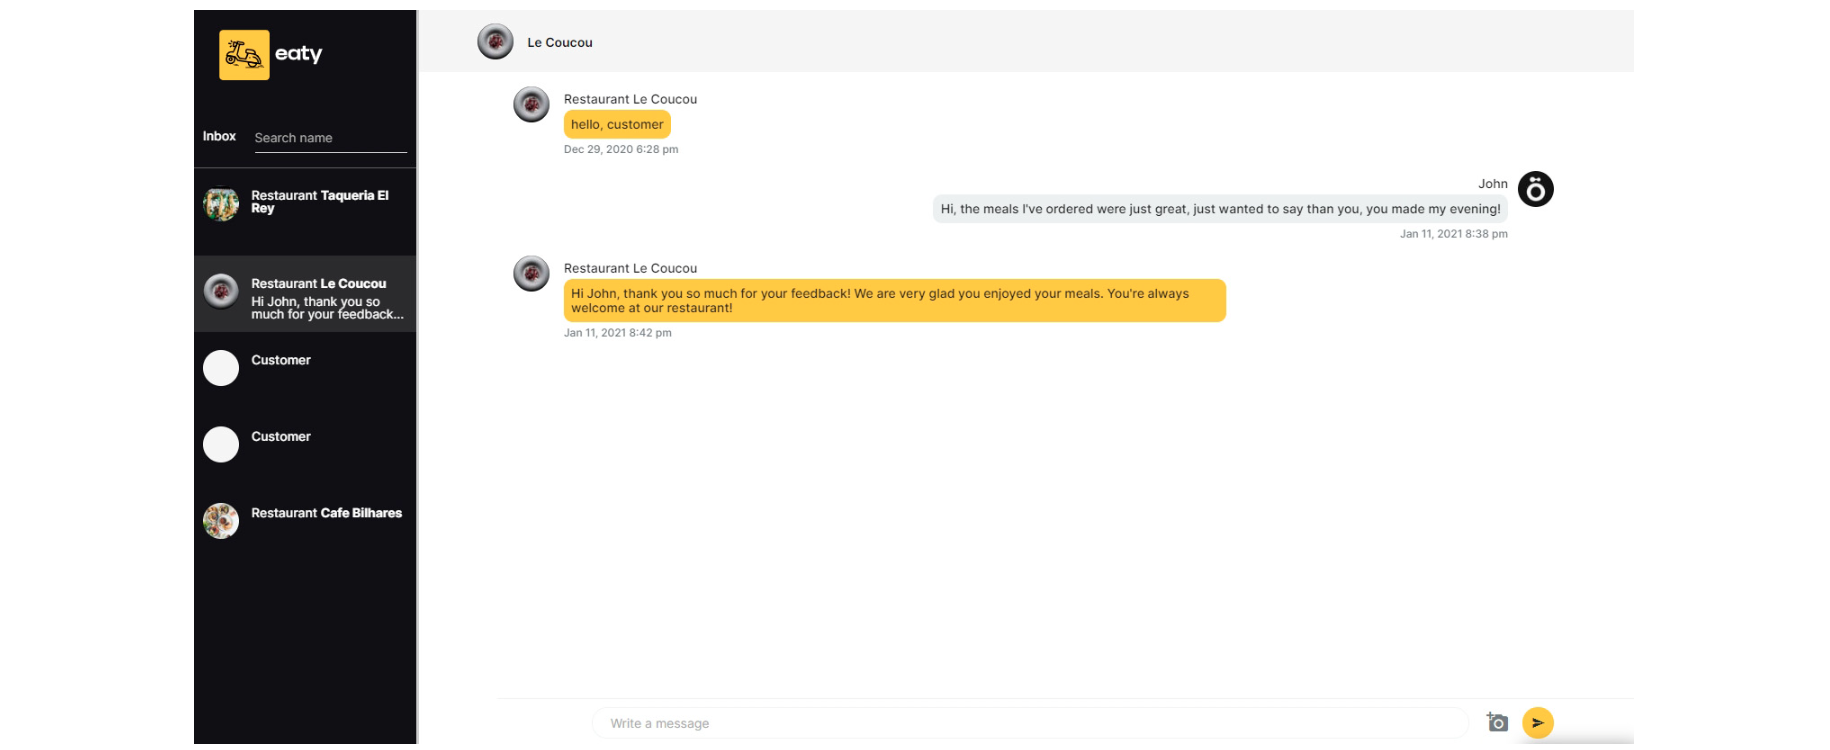

checkout
This is the page where the customer submits details necessary for delivery and pays for the selected meals. He can also remove meals or change their quantity. After the payment is successful he will be redirected to the
checkout_complete page.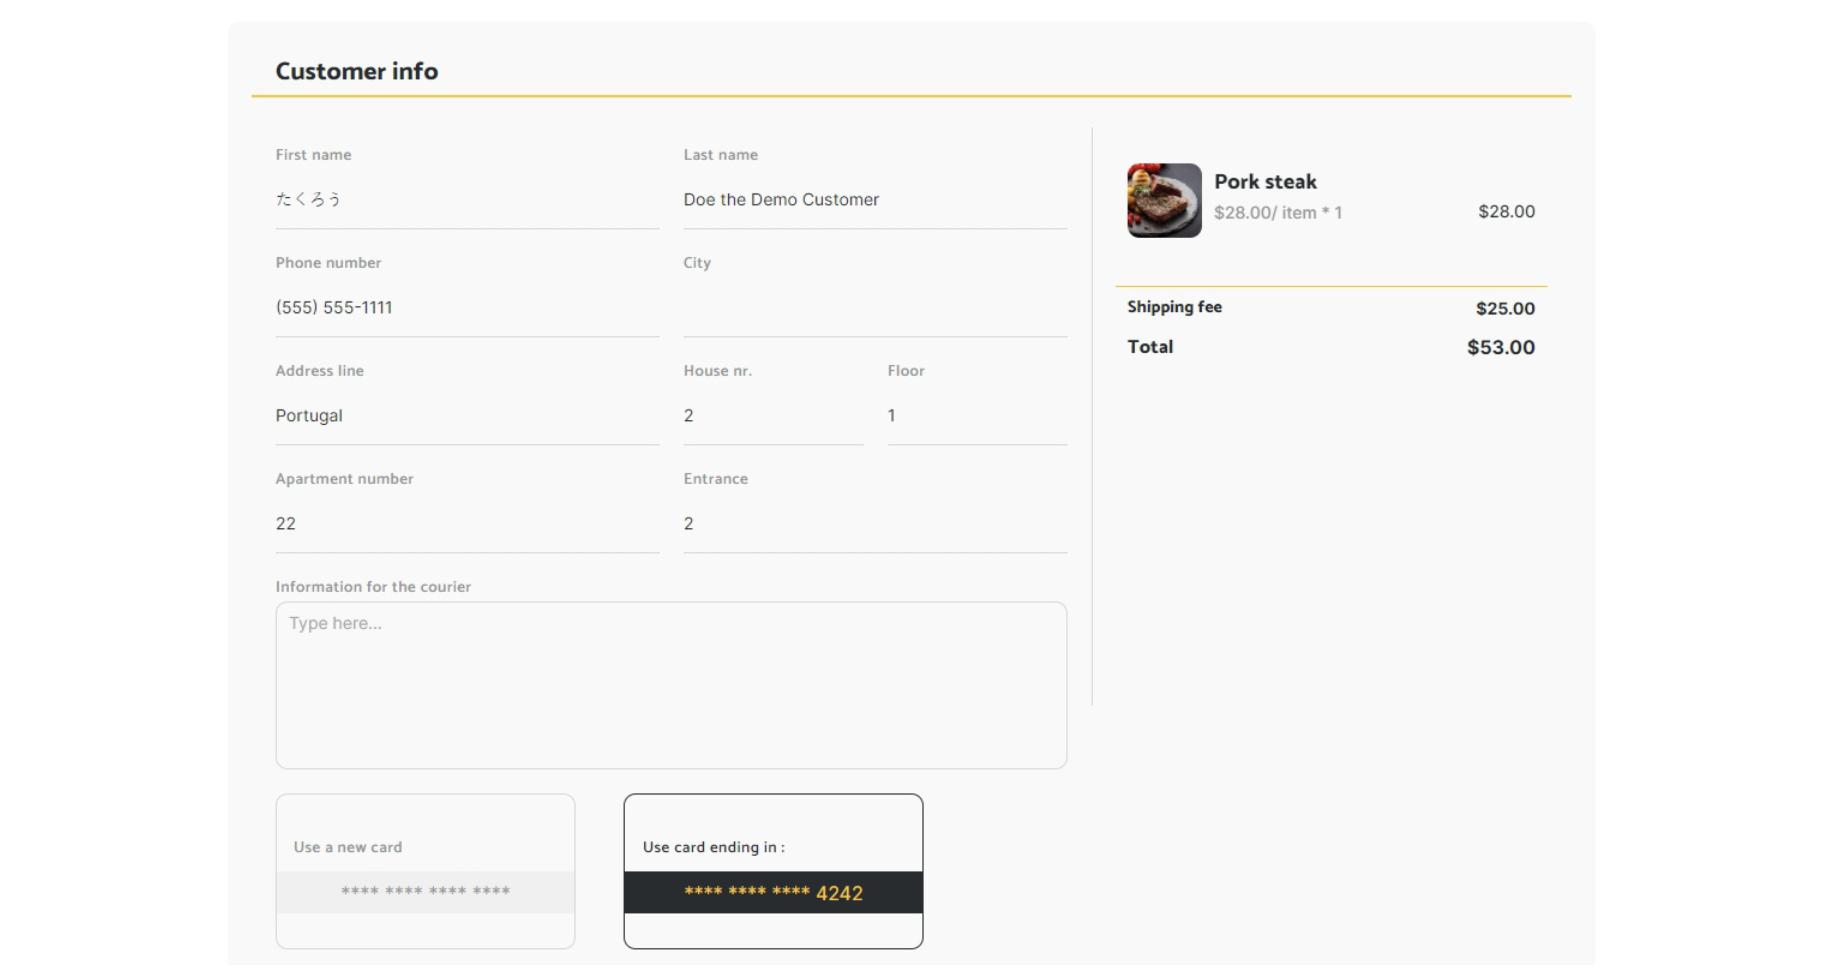
Previously saved card details are displayed on this page if there are any, and the user can either apply or remove the coupon here.
checkout_complete
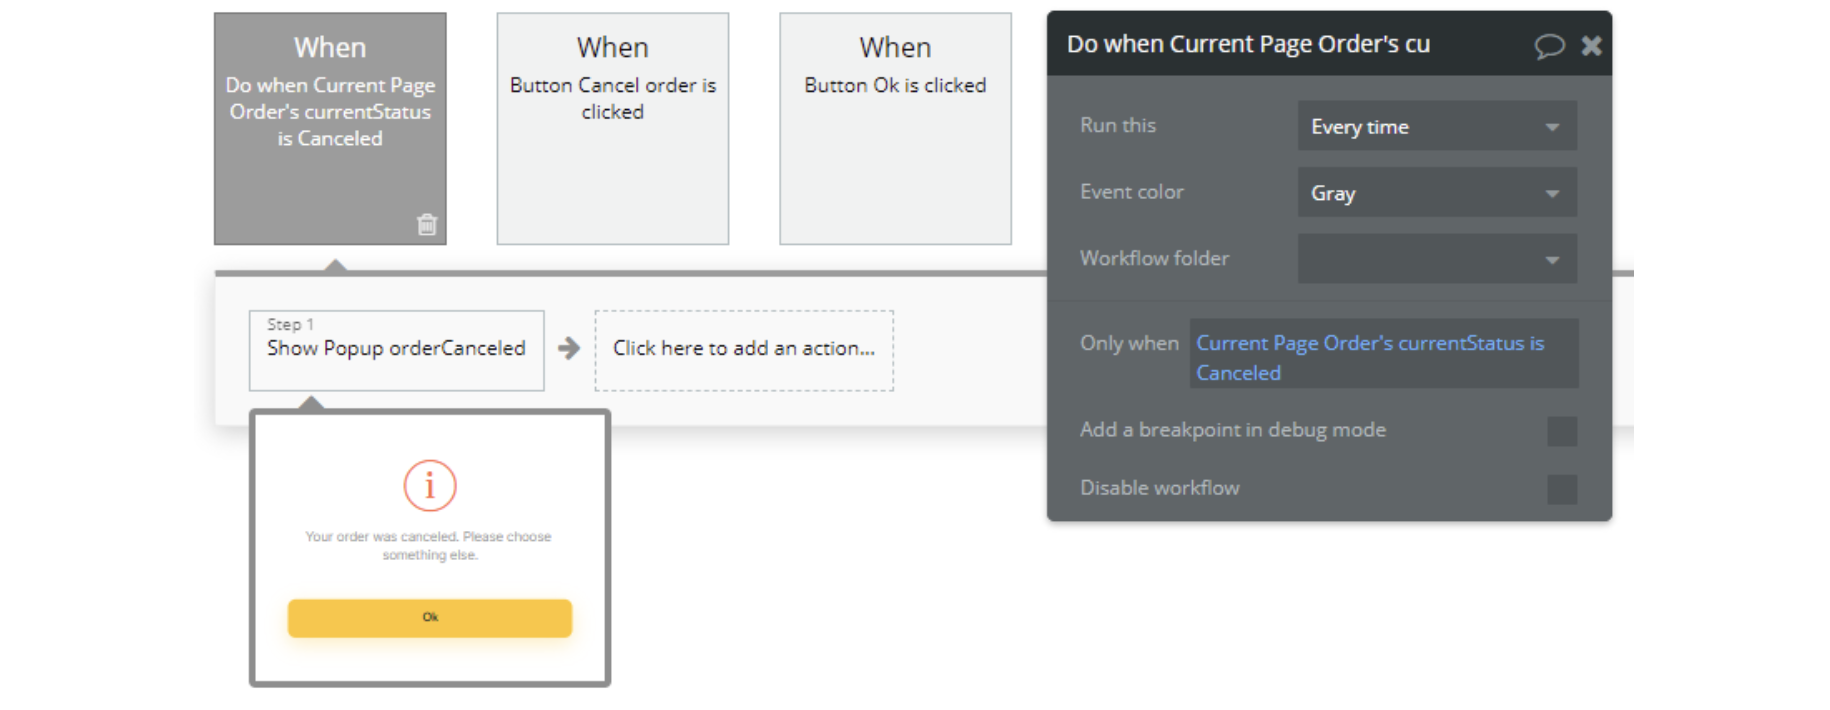
This is the page where the customer lands after paying for his order. Here he will be able to check the real-time status of the order and see the order summary. The customer has also a small window to cancel the order before the restaurant approves it.
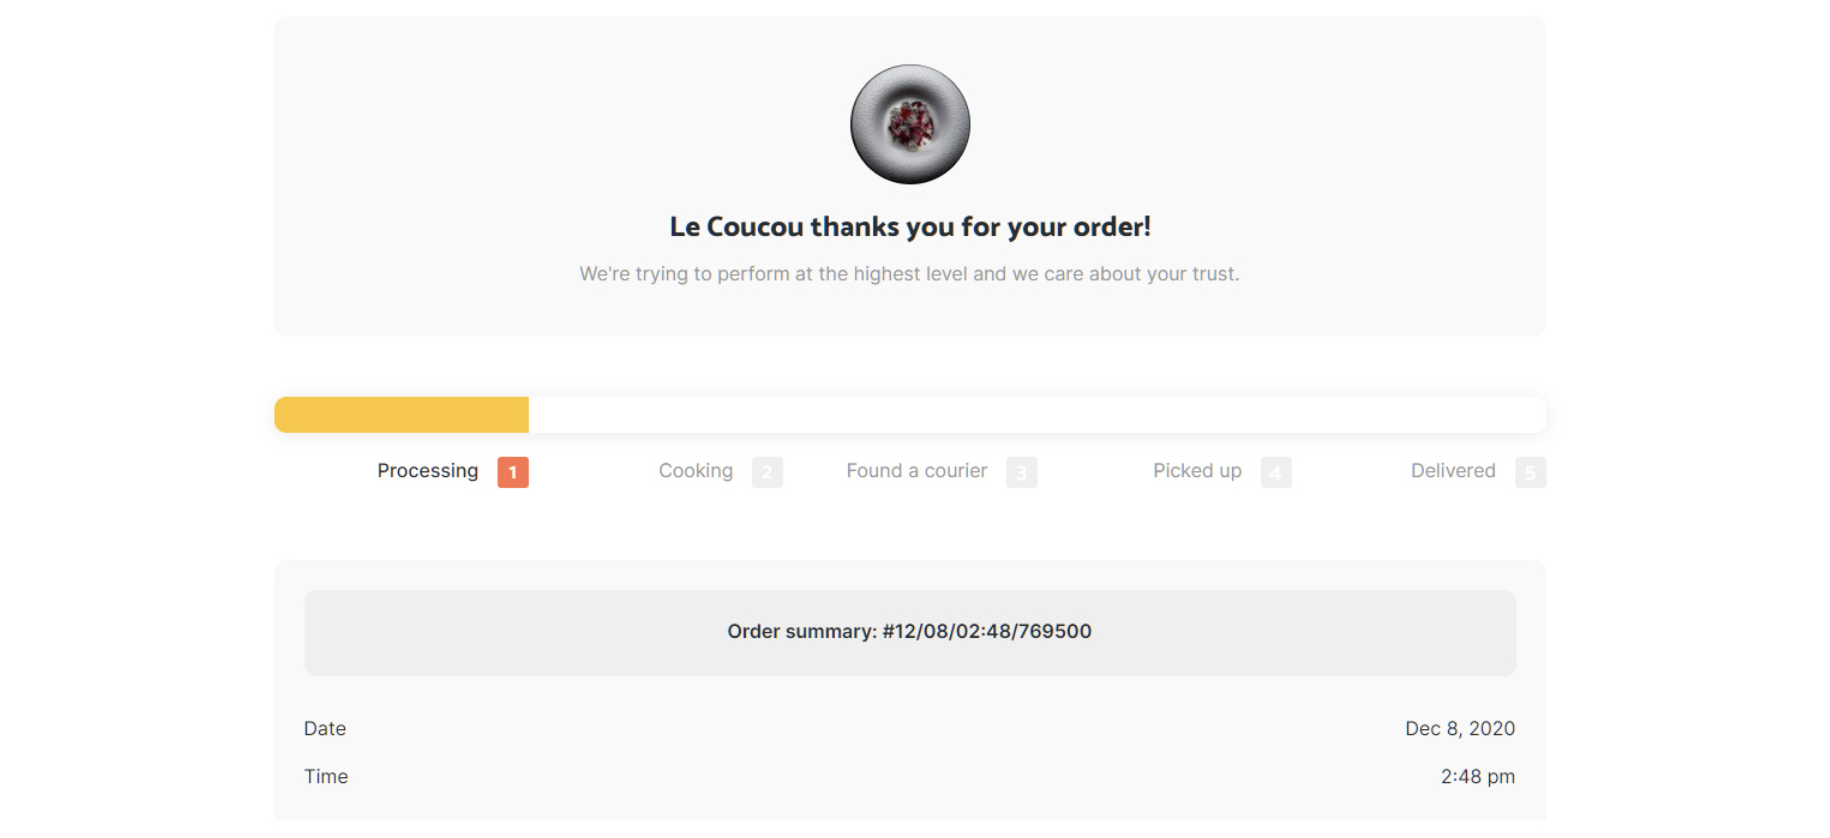
If the current order is canceled by the platform itself, the user will see a message about it.
courier
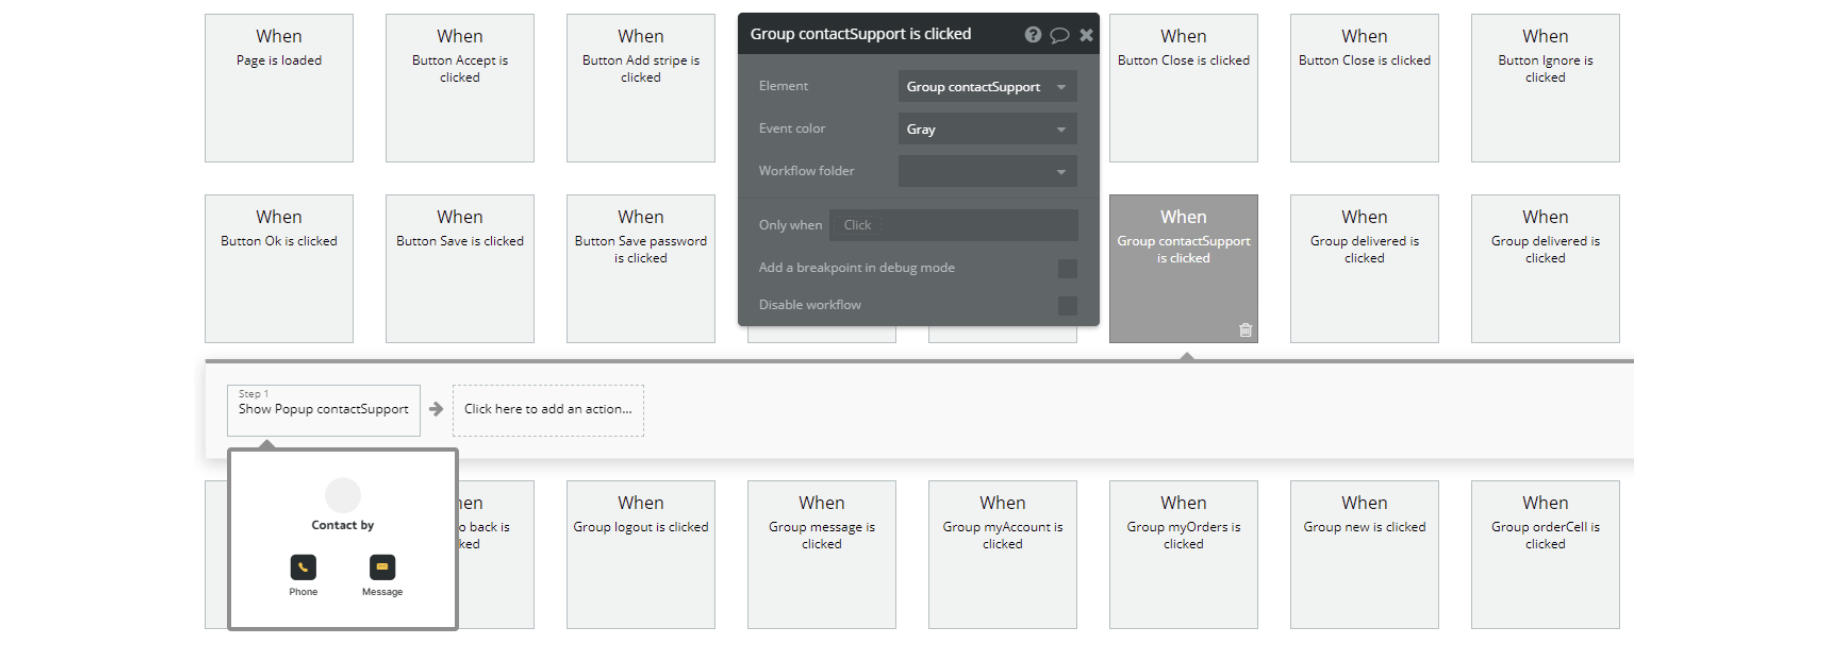
This page is designed specifically for couriers. There the courier can edit his personal information, connect his Stripe account, submit a ticket to support, and take new orders or view the existing ones.
Courier info - In the workflows of this page, you can change any information that the courier should provide during registration, as well as set up communication with the support team.
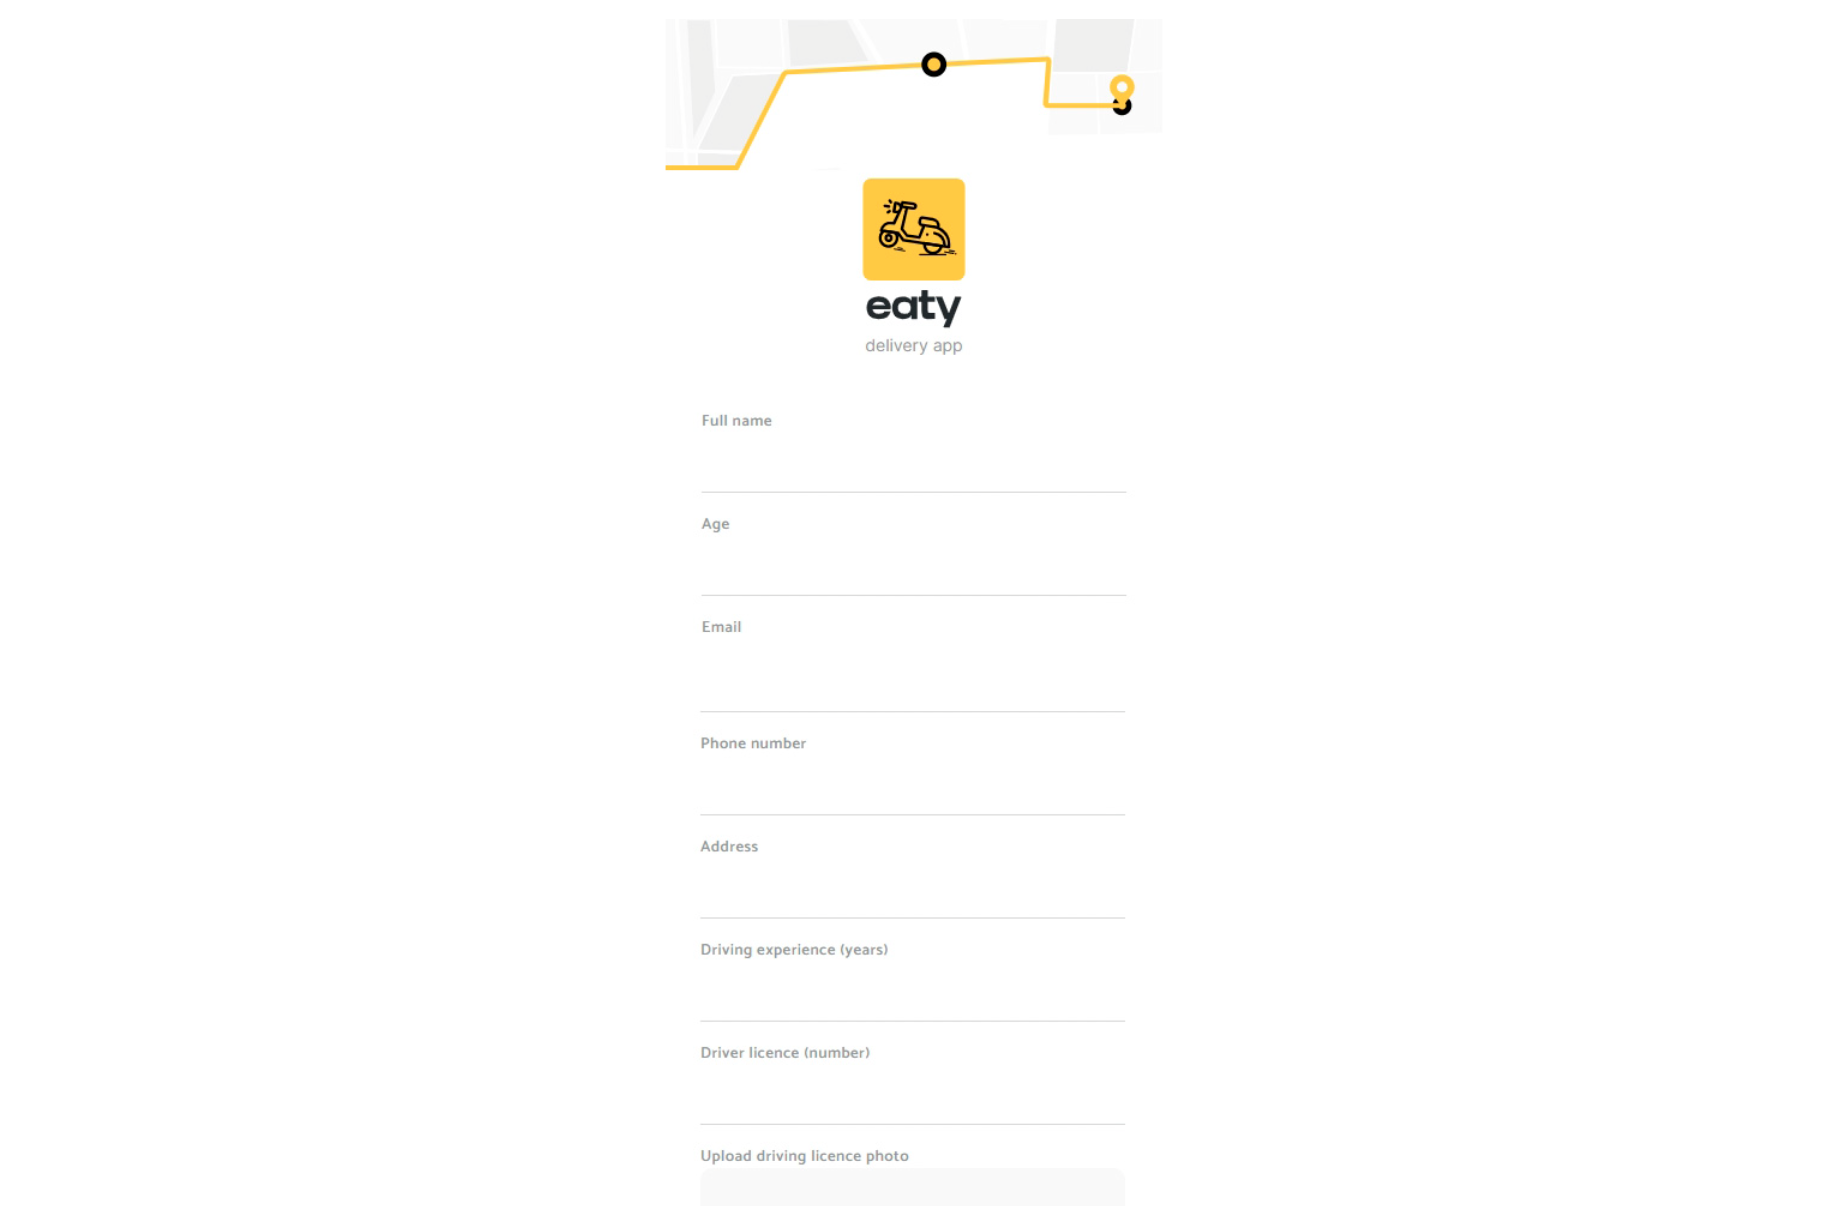
courier_request
This page is used to collect all the necessary information about the courier when the user (courier) fills in the sign-up form.
The sign-up form asks for the user's full name, age, email, phone number, address, driving experience, driver's license number, and license photo.
The logics of closing/opening windows when registering a courier is described.
login
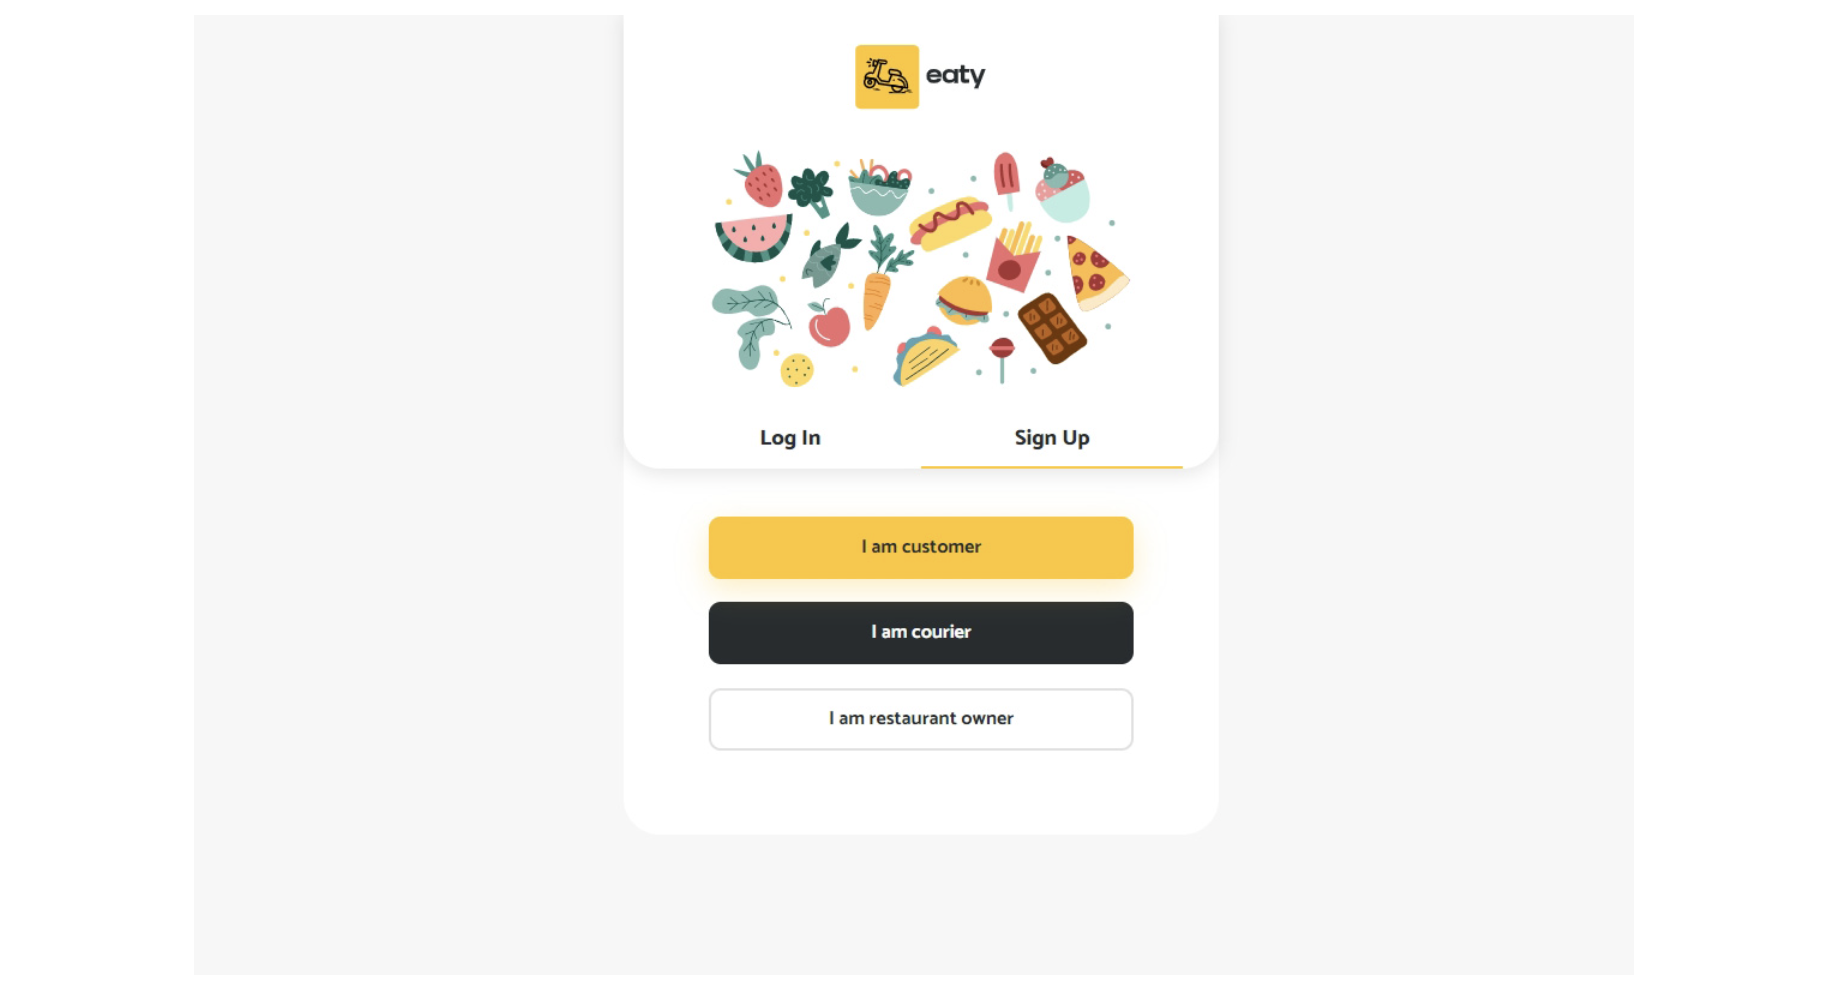
This page is used for creating an account or logging in to an existing one. To access it, users will click on “Signin” button in the header.
Besides standard registration, users can also use their social media accounts (e.g. Google or Facebook) to register or log in.
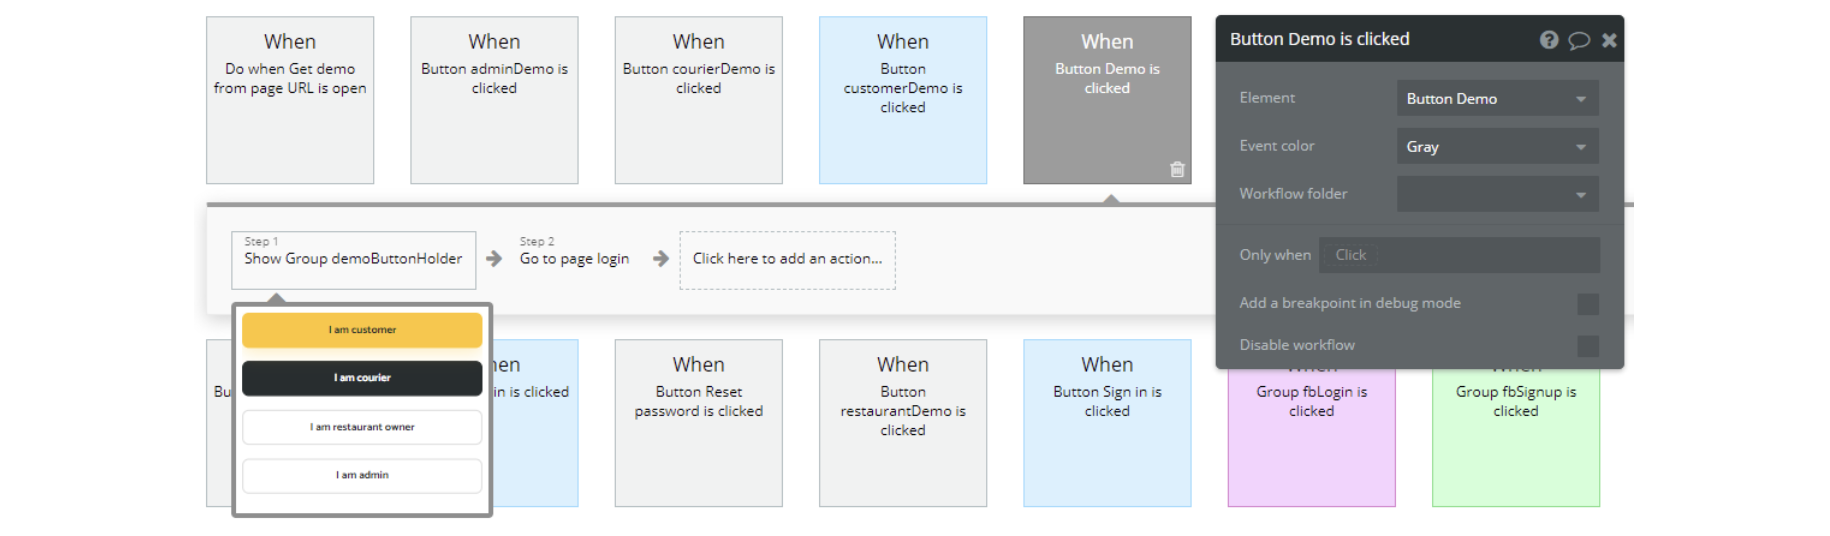
On this page, users are offered a demo user to log in and test all the template features. For detailed information on how to remove these buttons, please see the Remove Demo Login section.
The page is used for logging in all the user types and initiating a courier/restaurant request registration & customer signup. If the current guest user added some meals to his cart those will be saved in his cart after he logs in.
The user can use the demo version of the platform for testing purposes. To remove this feature, please read the information on the Remove Demo Login page.
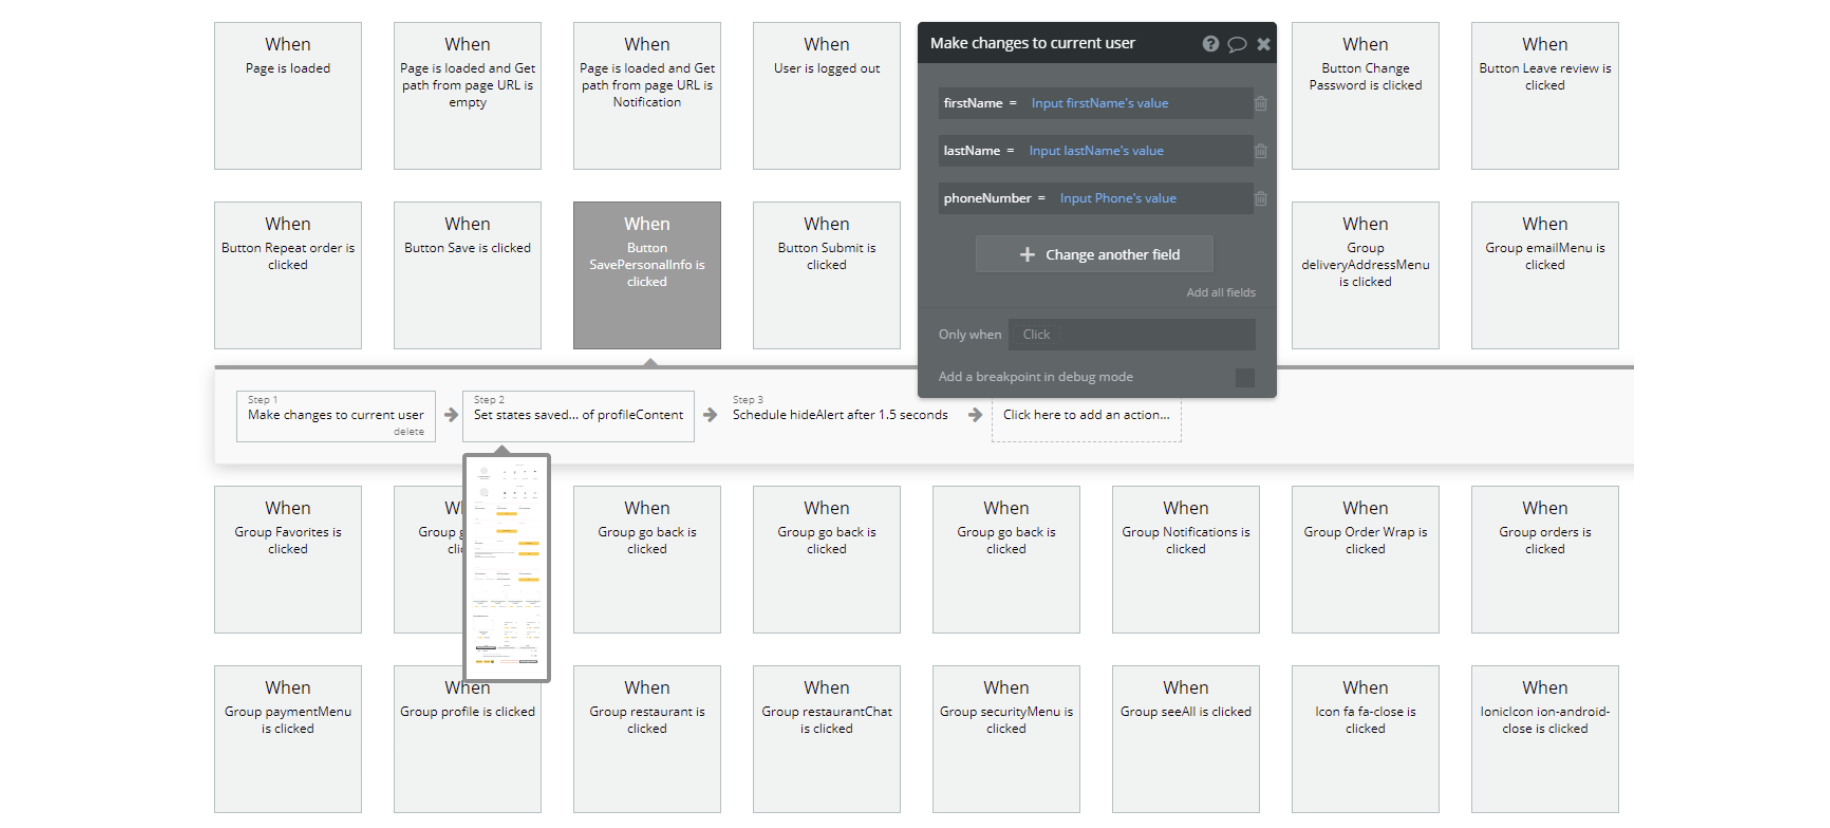
profile
This page is designed specifically for customers.
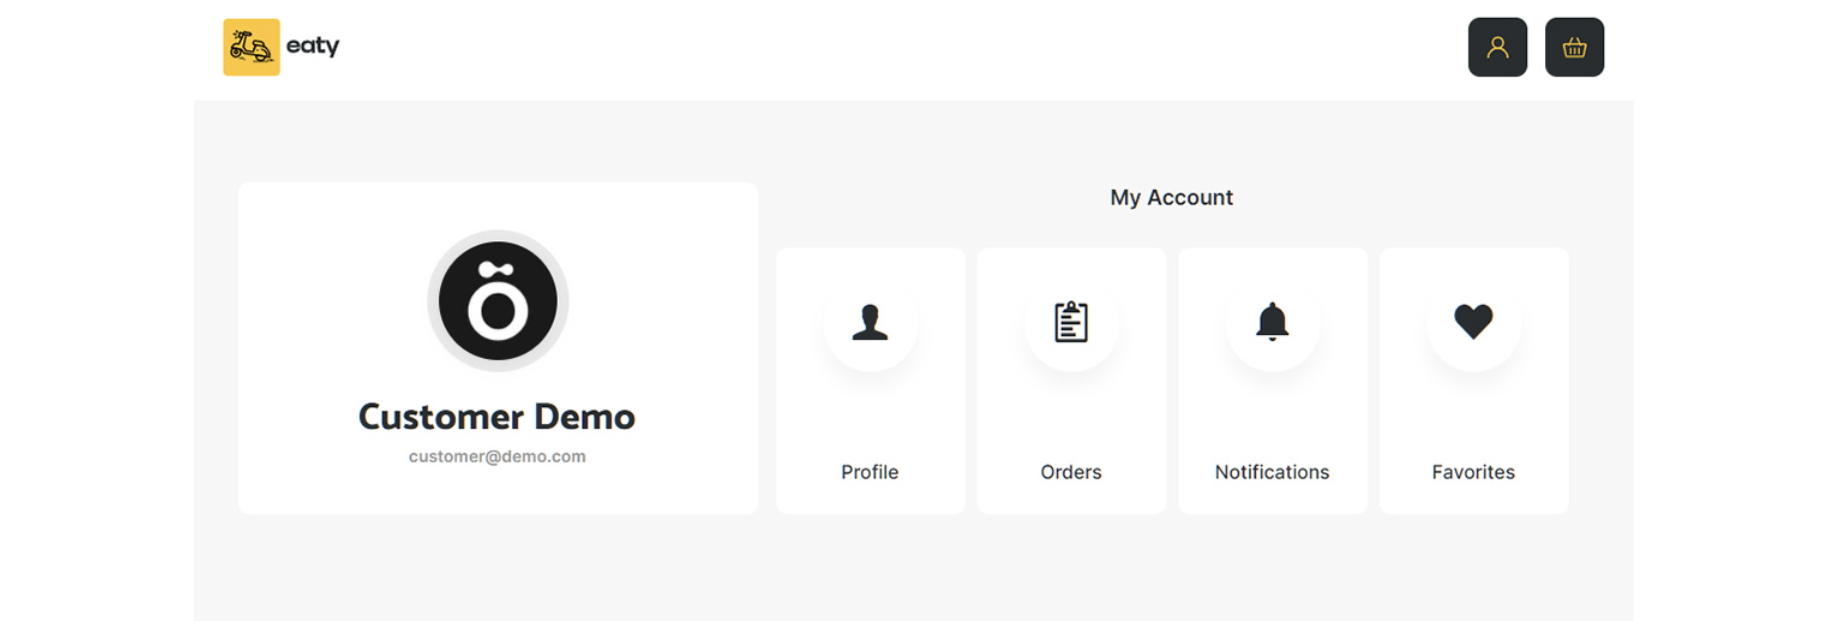
Here the customer can edit information regarding his account: change email, password, default address, and default payment source. The user can view order history and contact restaurants via chat, check notifications, and favorite restaurants.
In the Orders section, the customer can also leave a review for orders that have been completed. You can add or remove the information that the user can change.
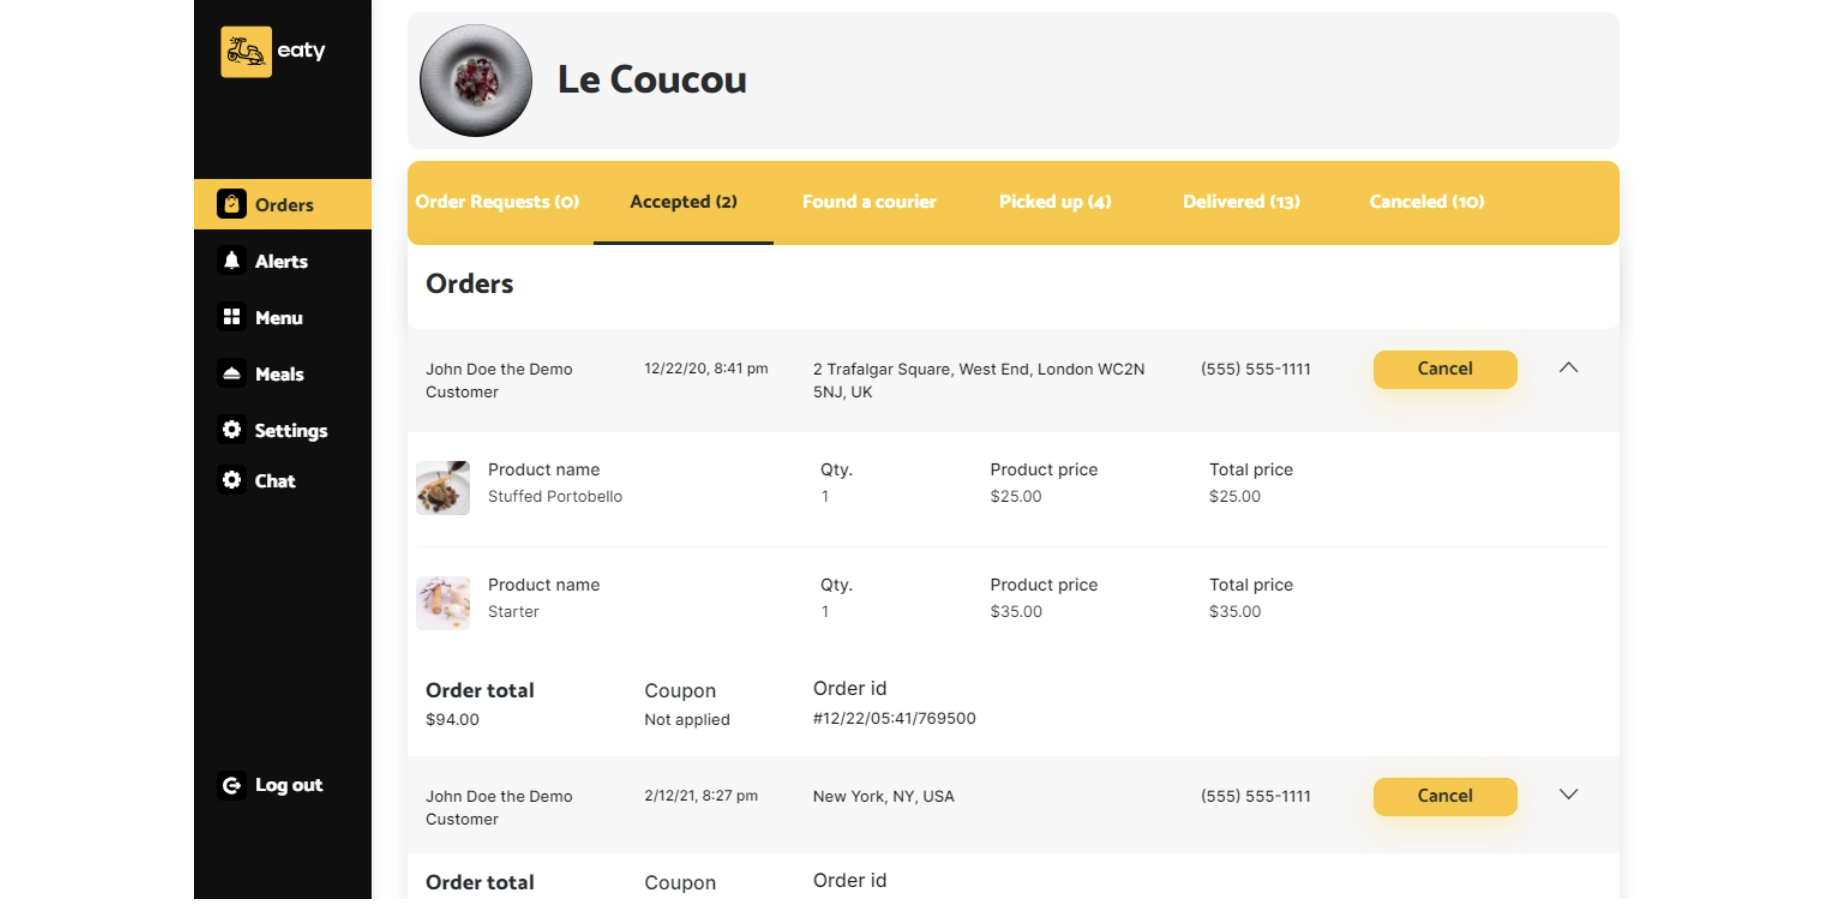
restaurant
This is one of the more complex template pages. It is basically a dashboard for restaurants.
Here a restaurant can add/edit meals, accept and manage orders, see alerts, chat with the users that messaged them, or simply edit the restaurant's information.
- Orders
The tab is where the restaurant accepts/declines incoming orders, and marks them as picked up when the courier takes the order from the restaurant.
Order statuses are changed automatically unless a certain action is required. The restaurant can cancel an order up until the moment a courier picks it up.
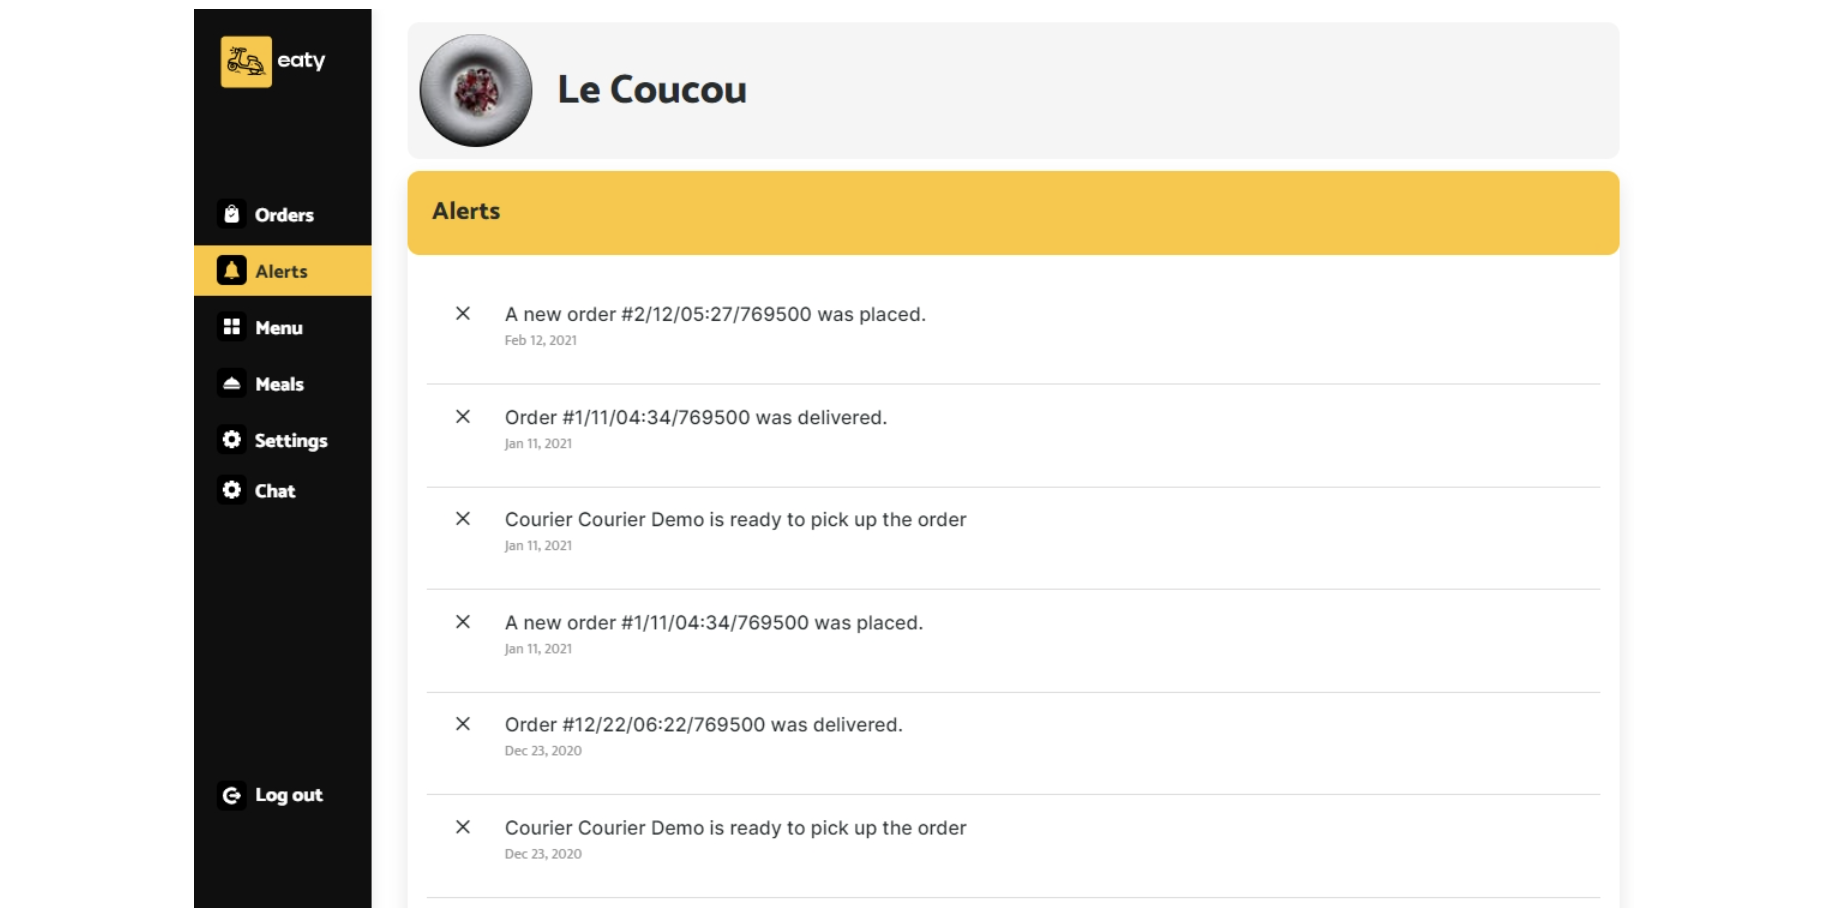
- Alerts
The tab is used to display notifications: e.g. when a new order is placed or one is canceled or a courier is found for an order. There will be a notification for orders that were delivered.
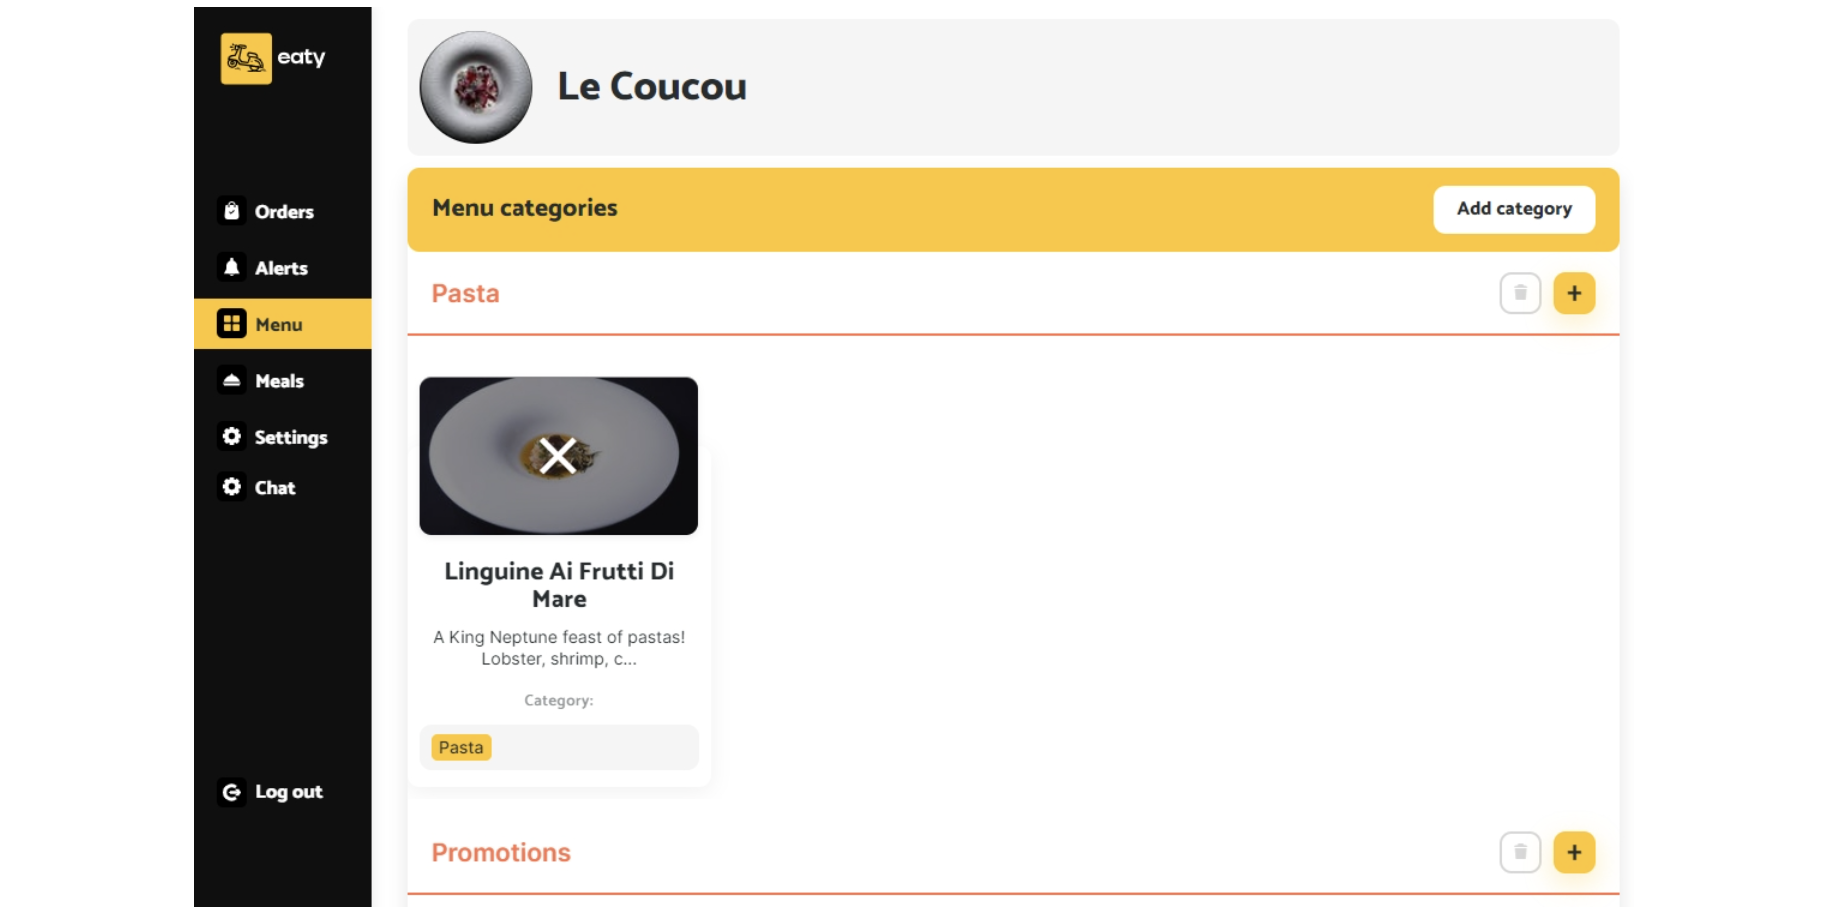
- Menu
The tab is where menu categories are being created and where the meals related to those categories are being displayed.
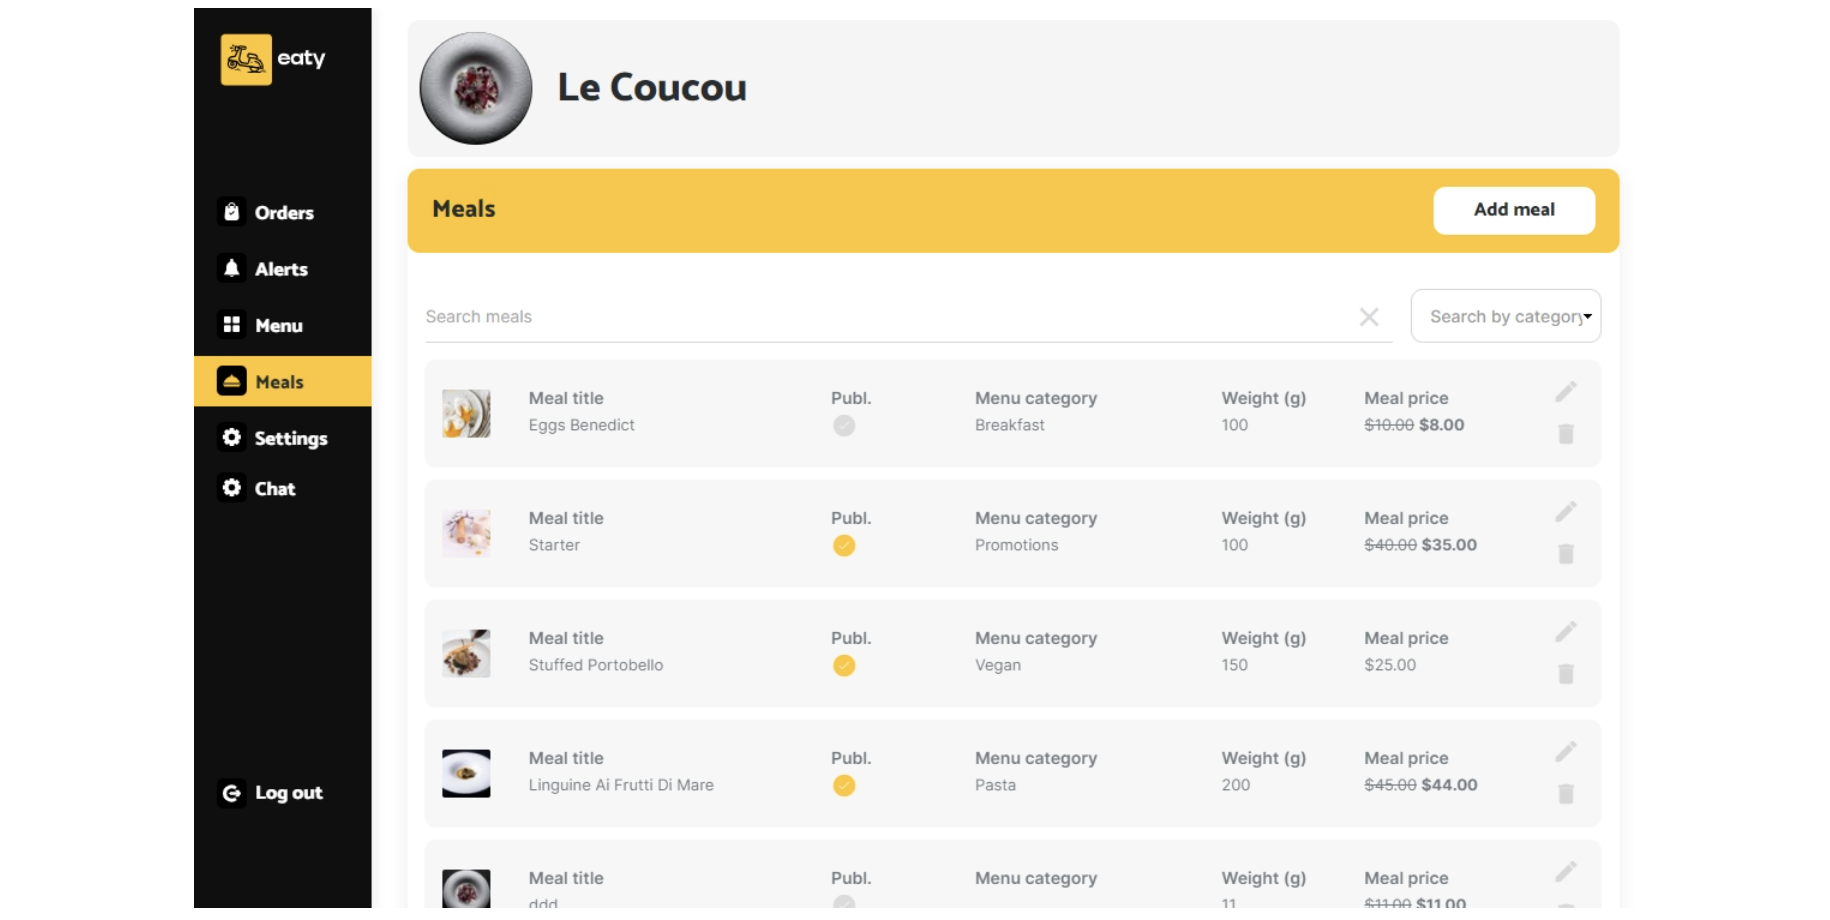
- Meals
The tab is where meals are being added/edited.
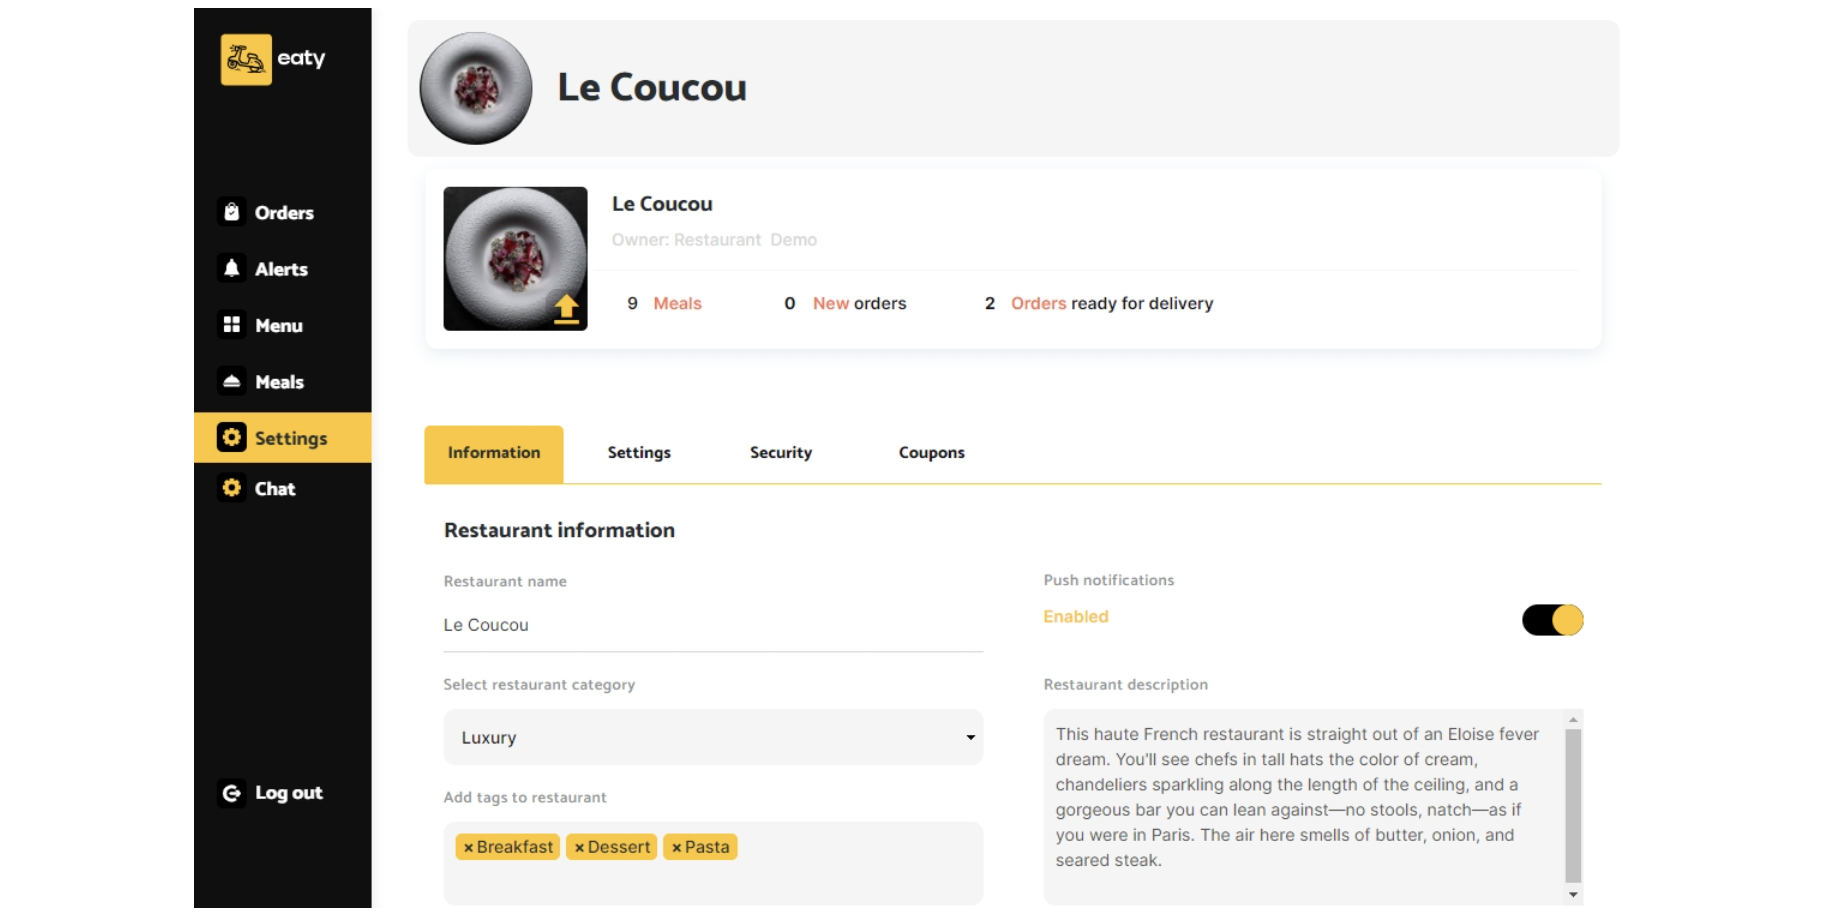
- Settings
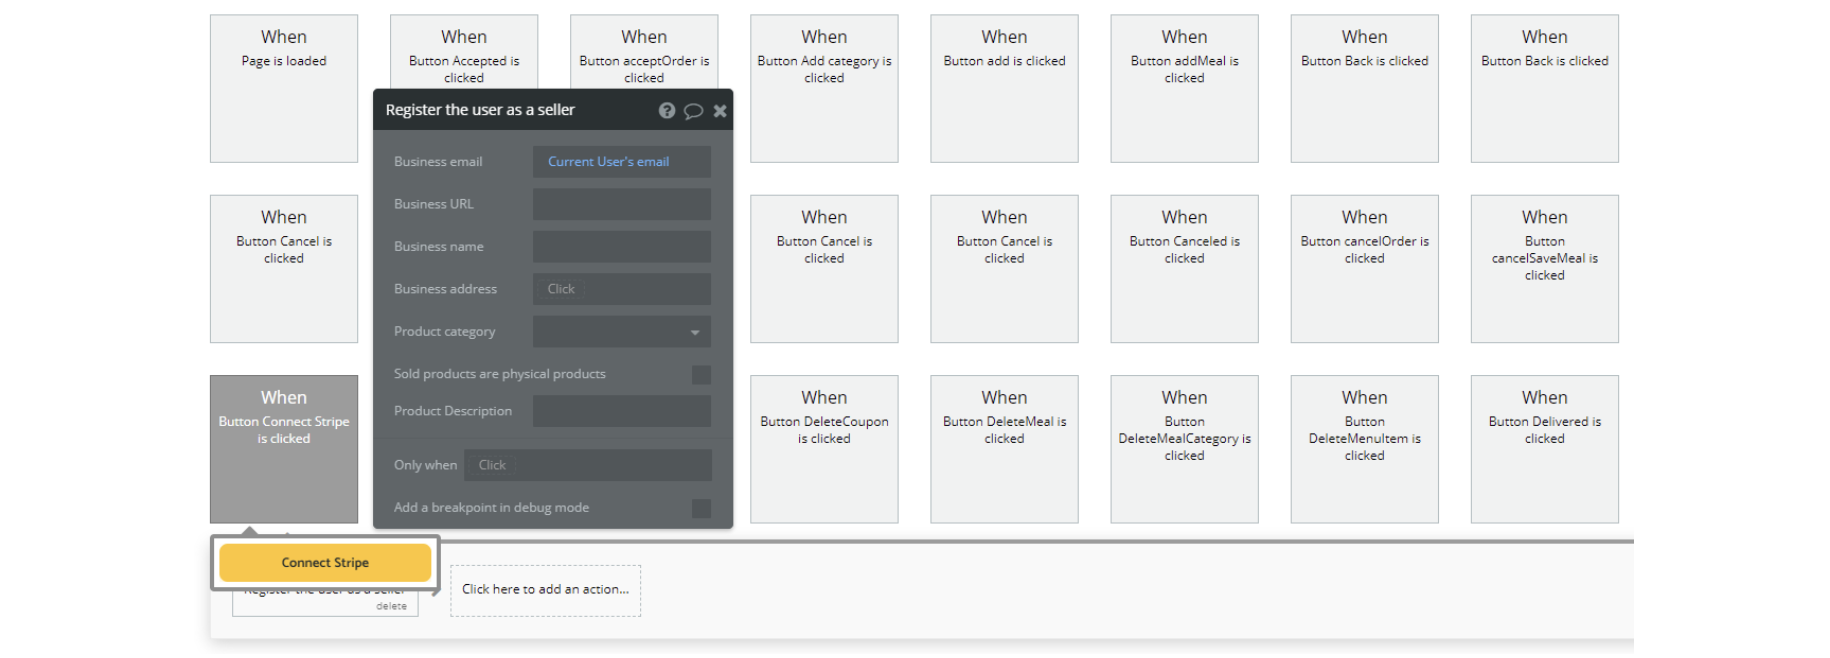
The tab is where all the restaurant's information can be changed. This also includes changing email and password, connecting a Stripe account, and creating/editing coupons for customers.
- Chat
The tab redirects to the
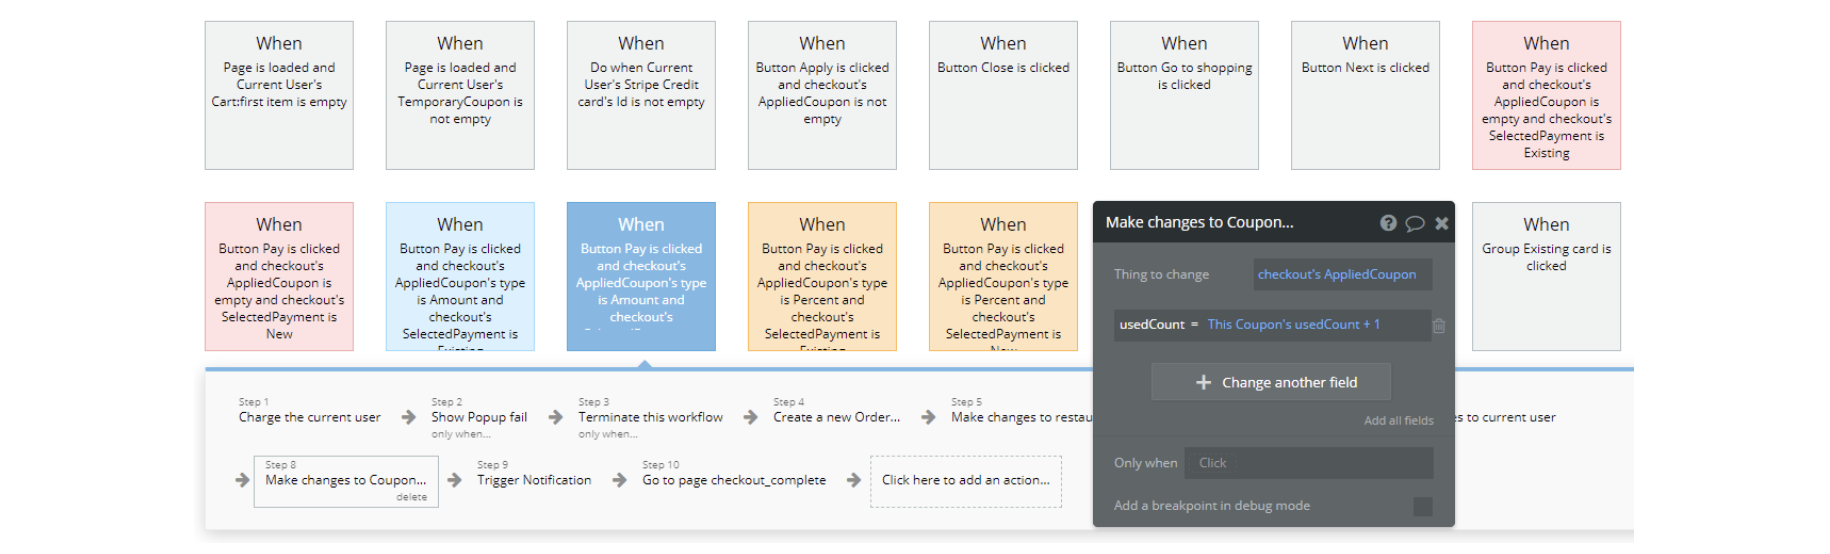
Chat page.Another extensive page that contains many repetitive actions for different situations (a lot of "Back", "Cancel" buttons). For example, here you can change the logic for creating /deleting/applying discount coupons.
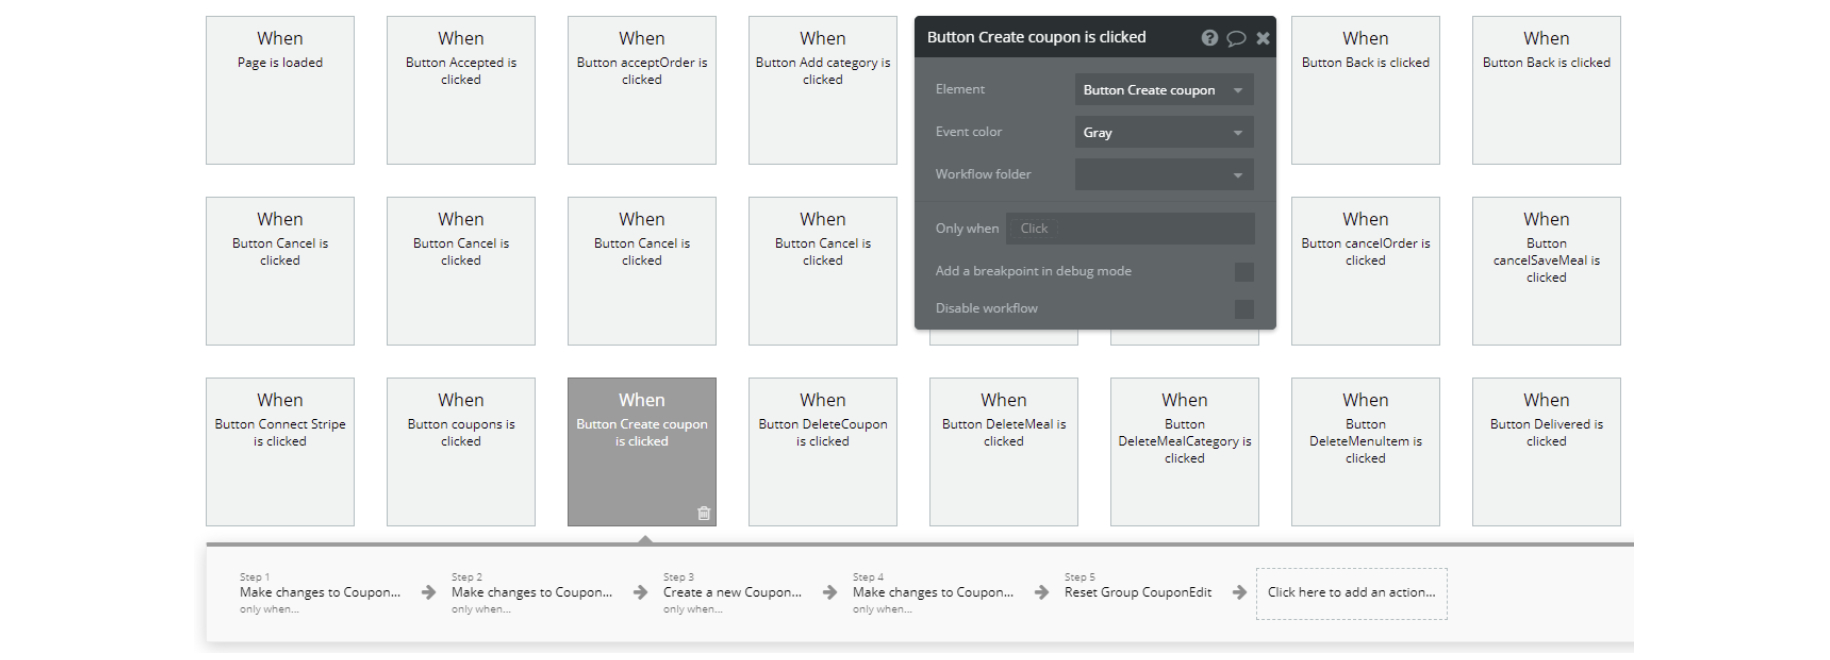
There is a workflow for connecting Stripe payment system.
Coupons can be one of two types: Percent and Amount.
You can add coupons on the Restaurant page in the "Settings" tab.
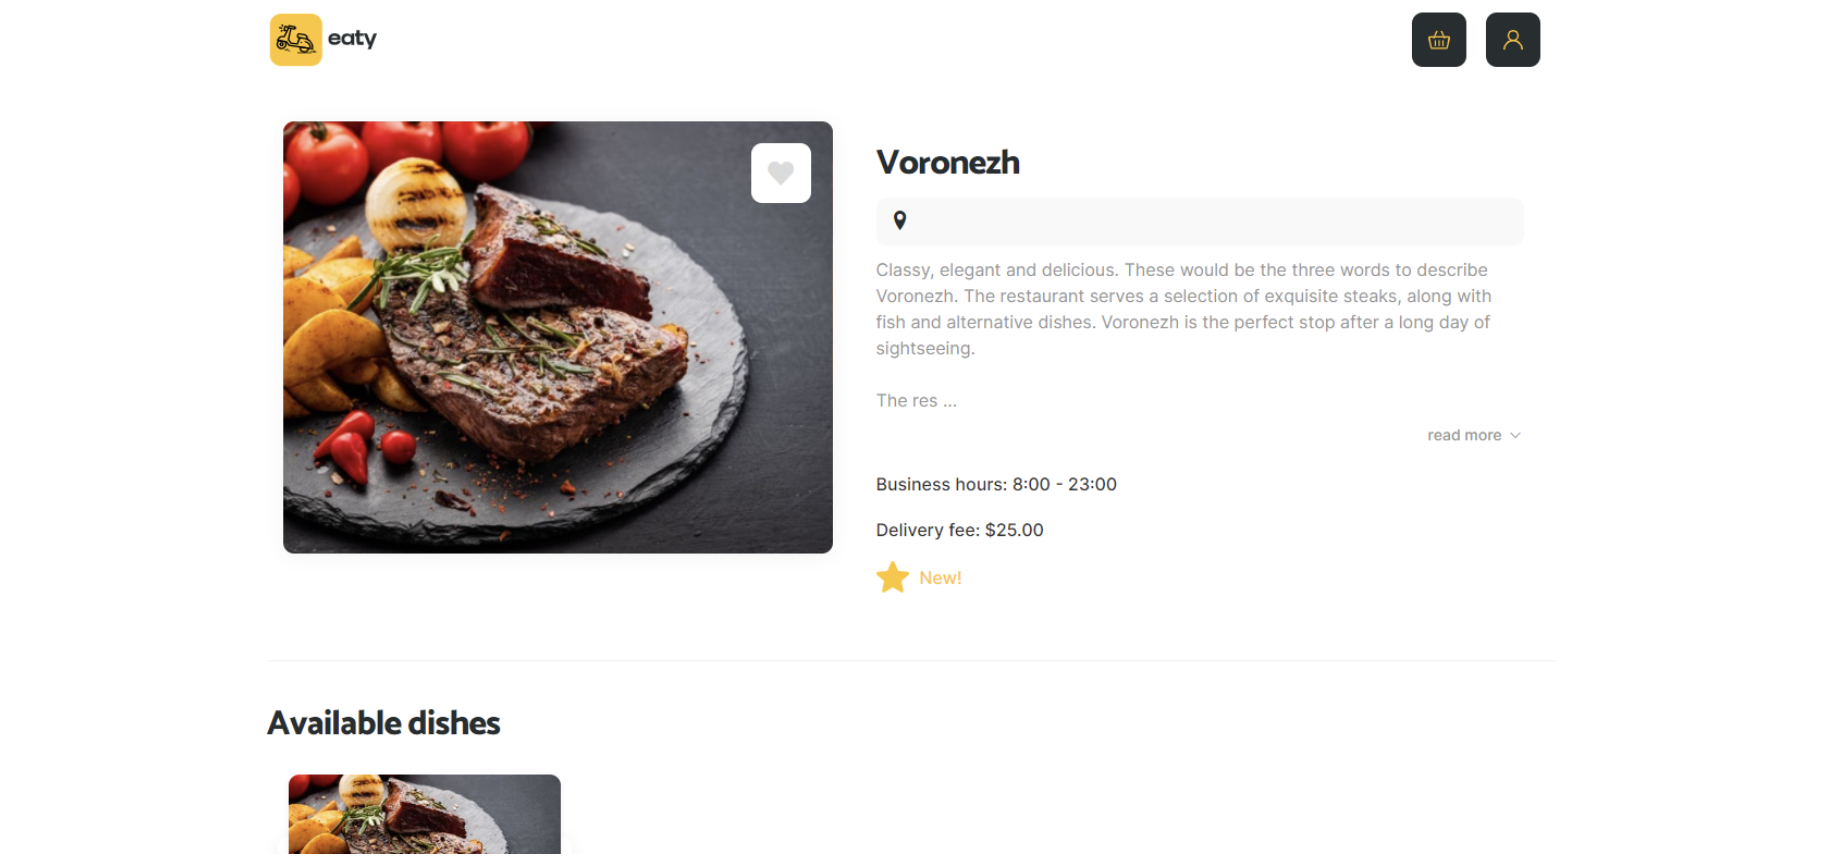
restaurant_details
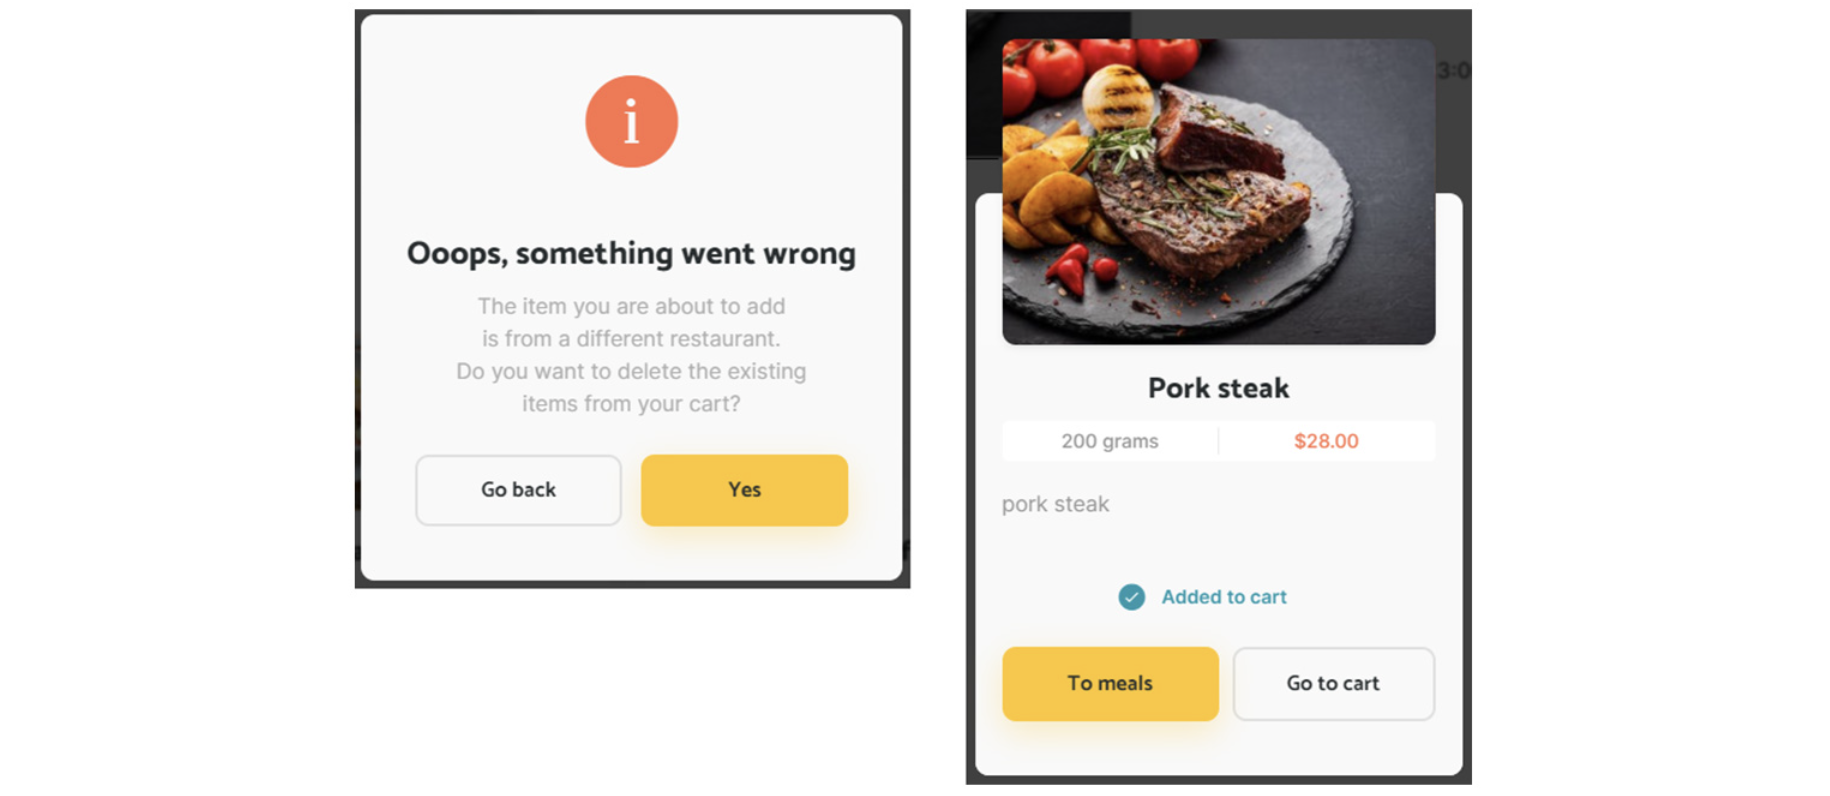
This page displays information about a specific restaurant and the meals available for order. You can also find there all the reviews left by the customers.
Tip: The user can order from one restaurant at a time, so when trying to add a meal from another restaurant, he will be asked to clear his cart.
You can configure the delay in sending requests here.

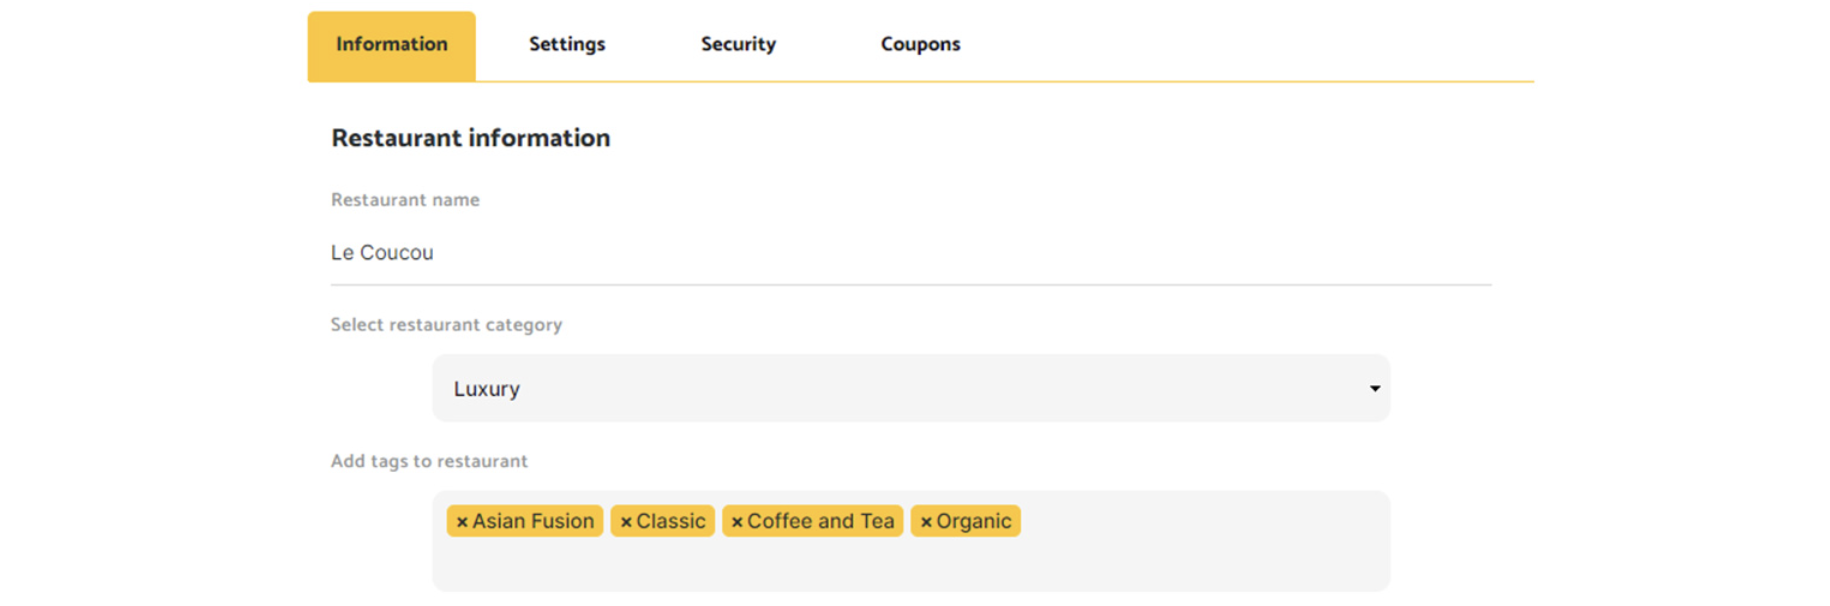
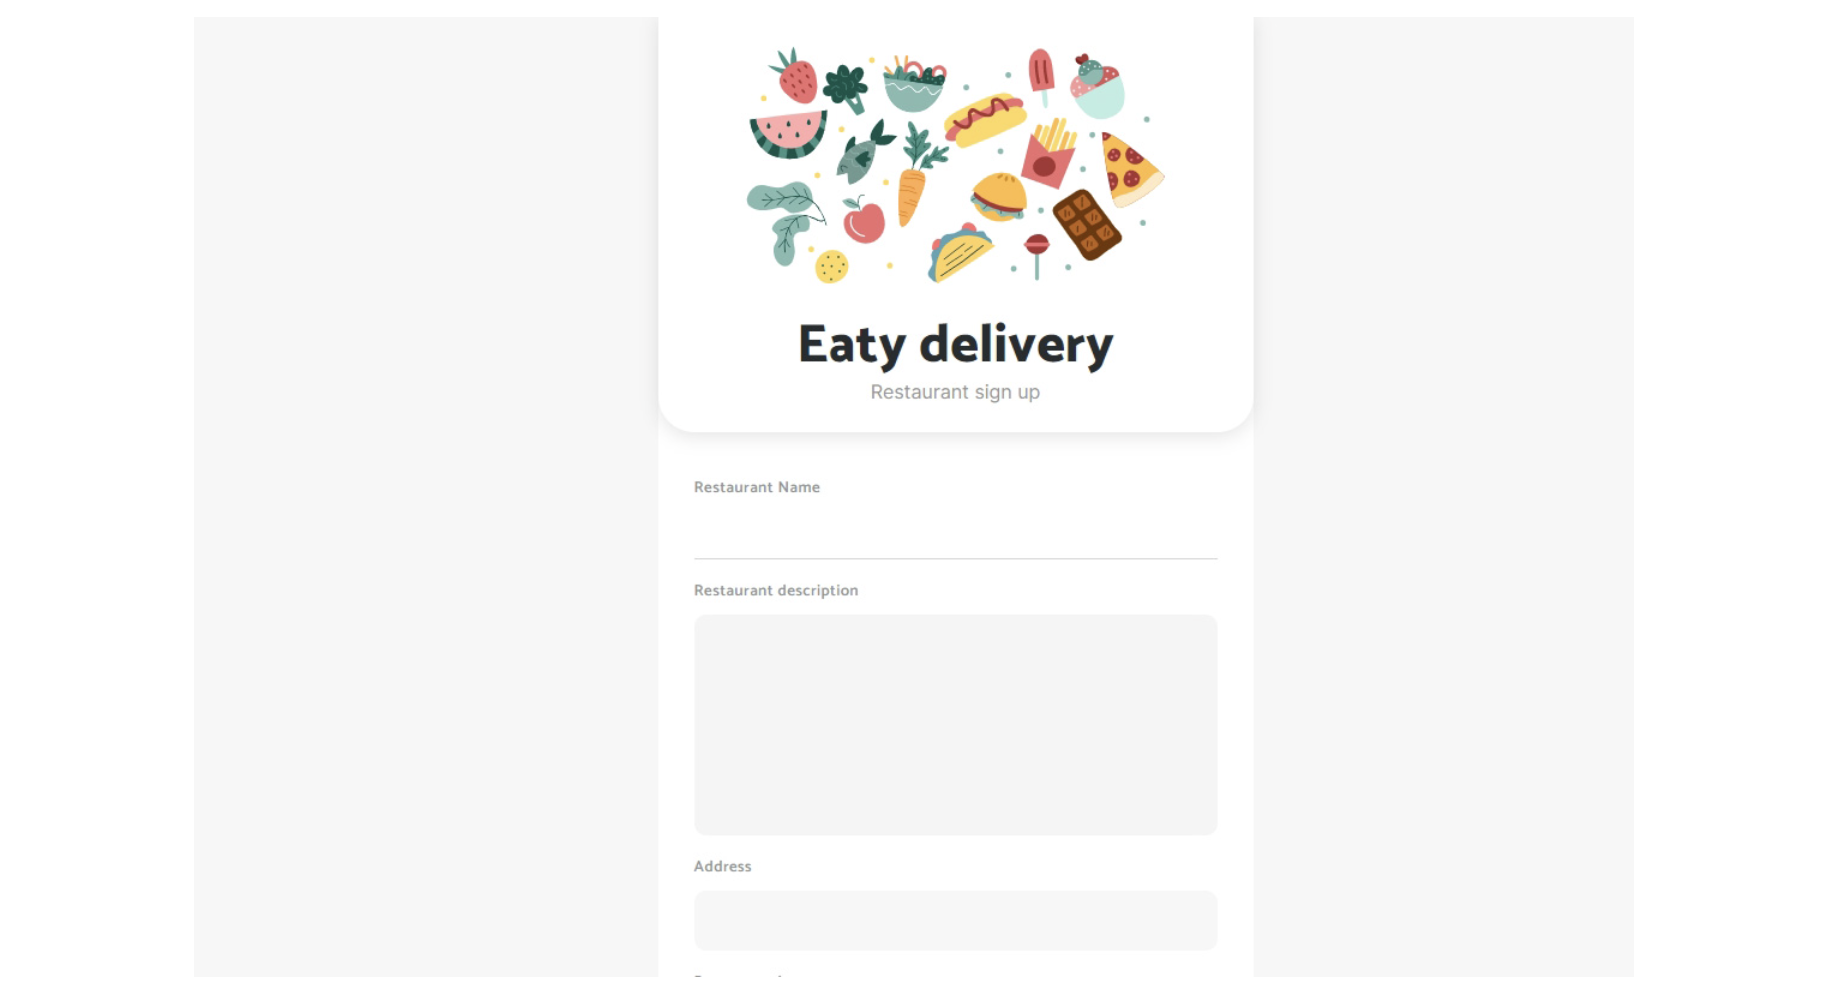
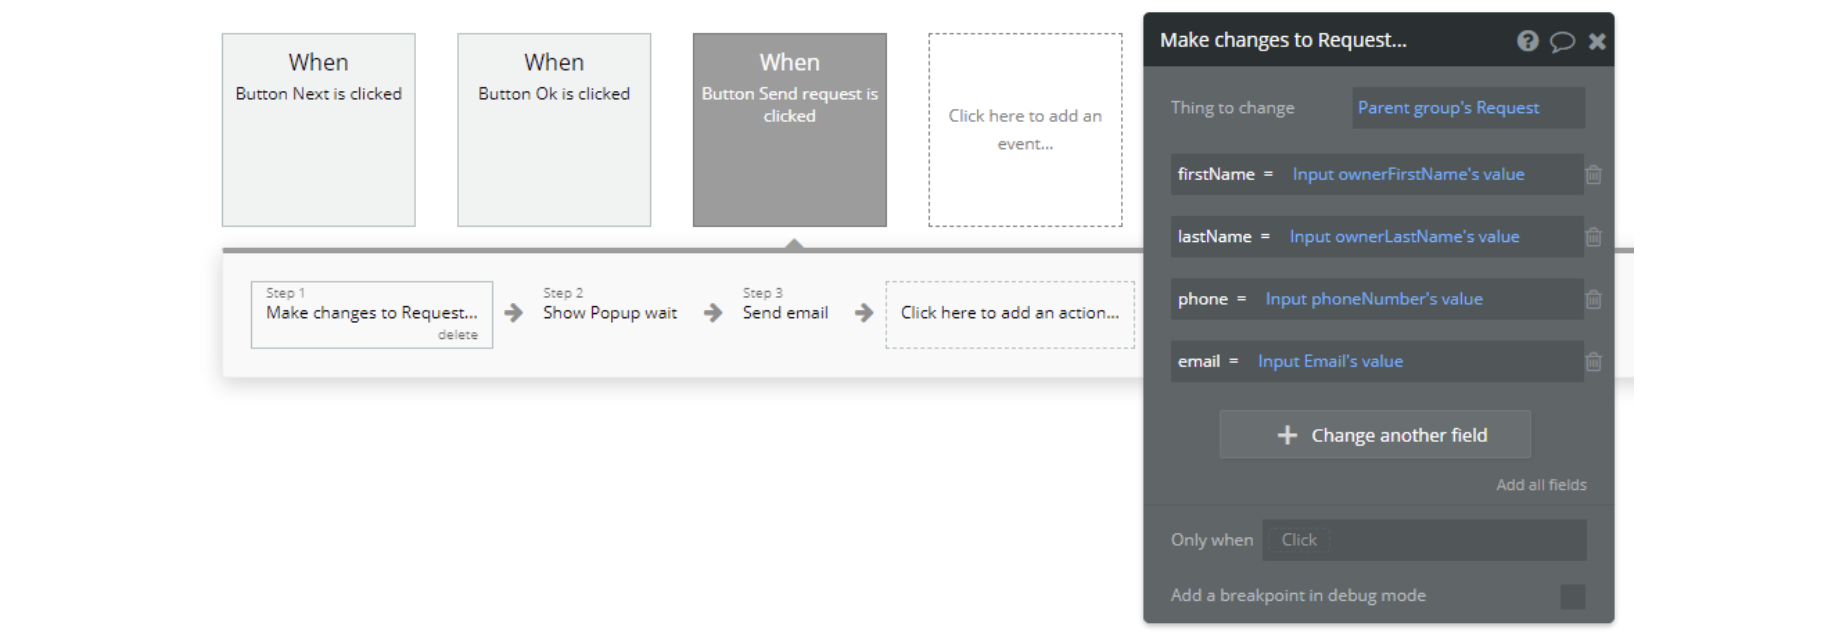
restaurant_request
This page is used to collect all the necessary information about the restaurant. Here restaurant owner fills in a restaurant request.
There we collect the restaurant’s name, description, address, logo, website, category, and tags. On top of that, we also collect the owner's first/last name, email, and phone number.
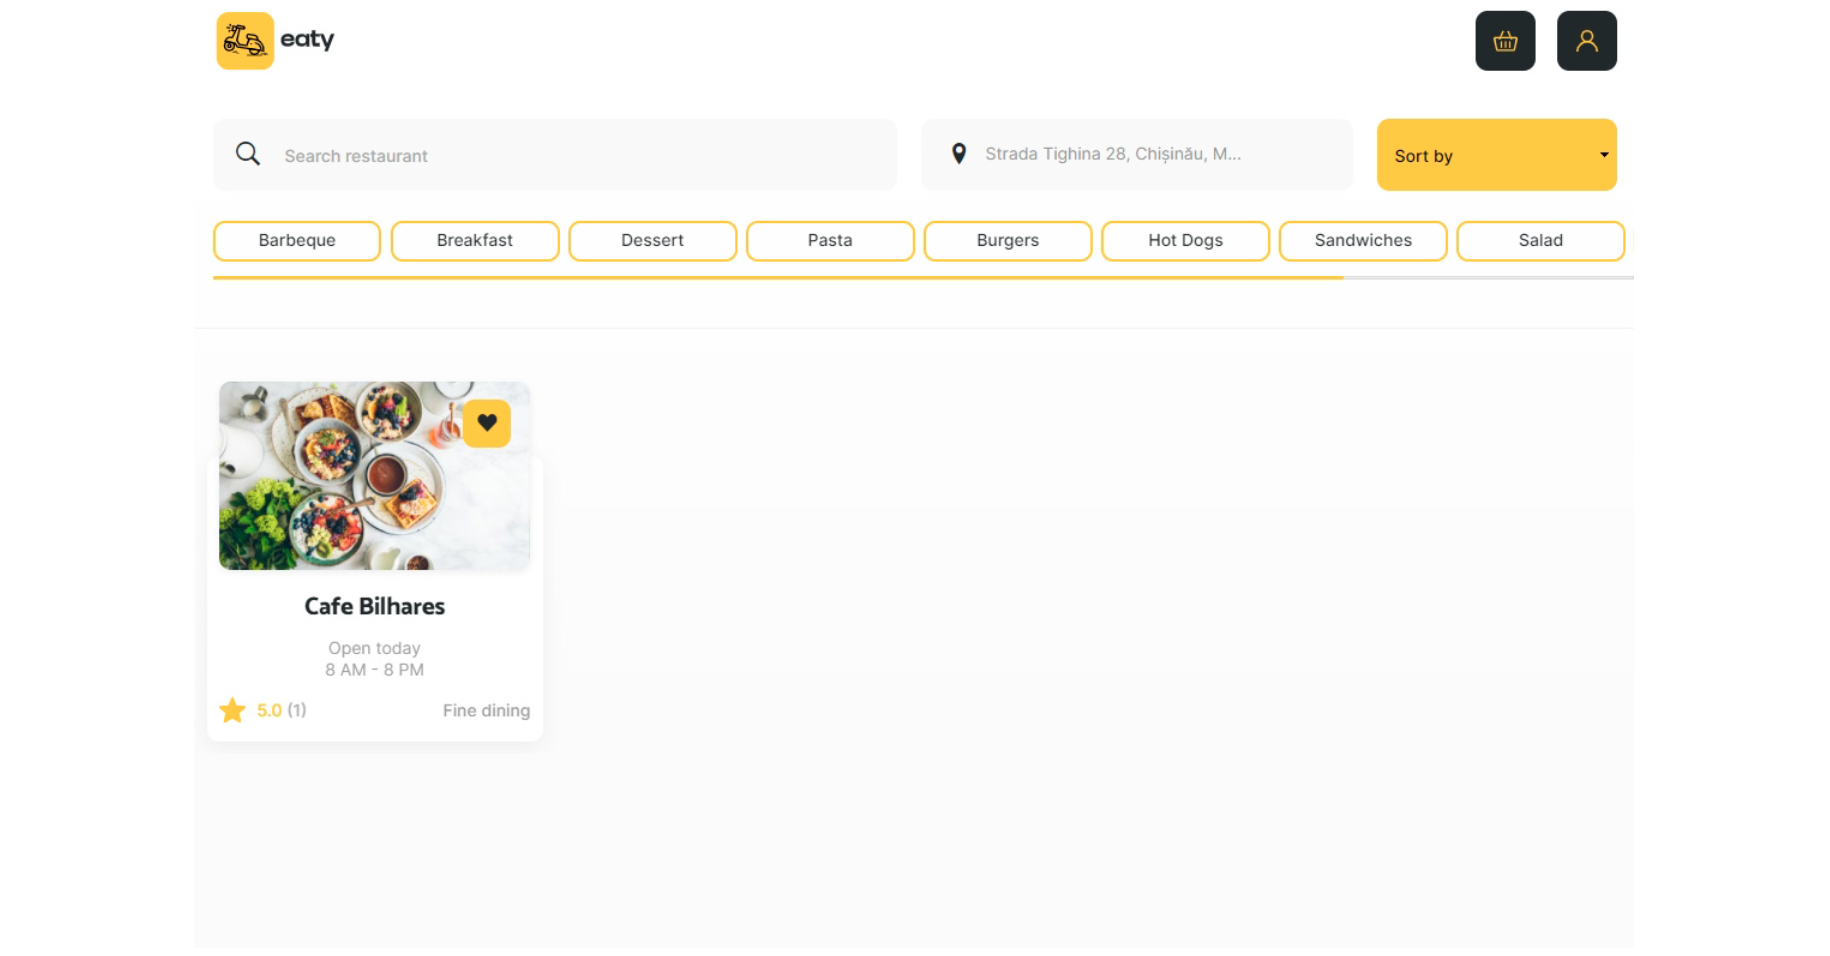
restaurant_search
This page is where the user can see a list of restaurants located within the customer radius of the location he provided on the index page.
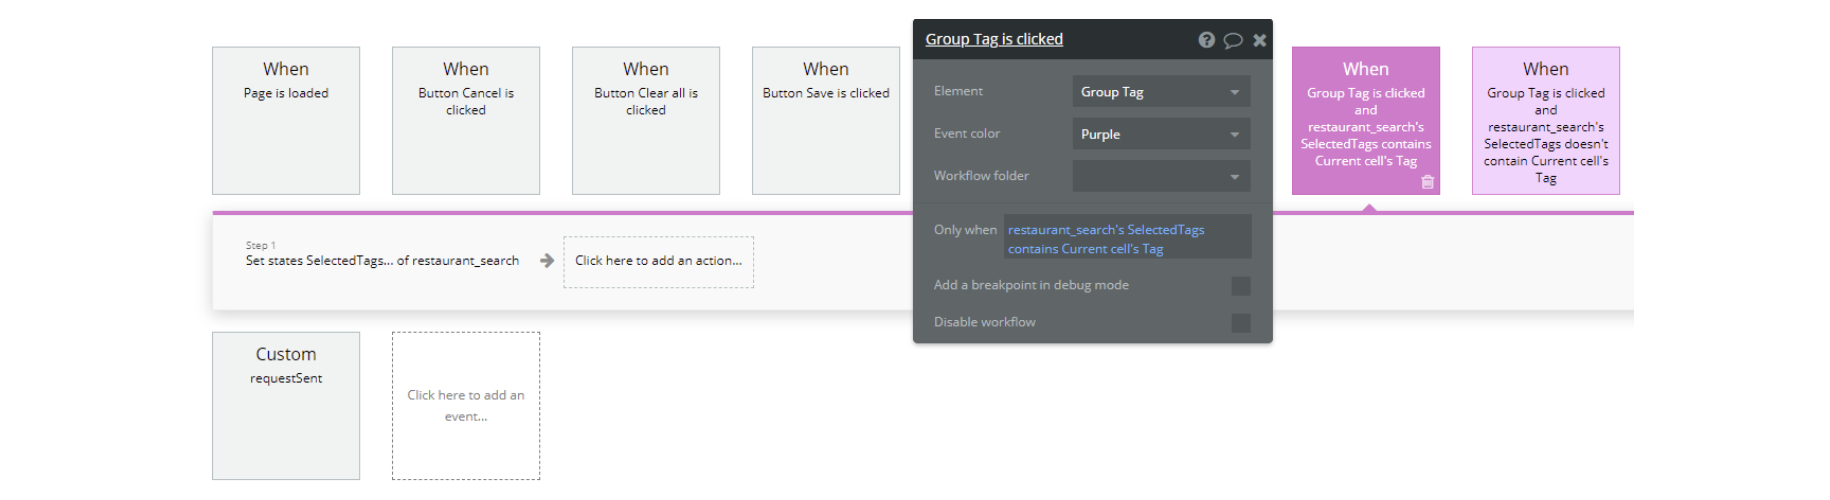
Here the user can search restaurants by name, filter them by tags, or sort by New, Top rated, or Discounts.
Tip: Only tags that have been added to existing restaurants on the platform are visible on the
restaurant_search page. Thus you will not see tags that are not associated with any of the restaurants.
Also, on closed restaurants, the inscription "Now closed" appears, and you cannot go to the pages.Also, just the restaurants that are open for business at the time of search are displayed. Only the restaurants that were approved by the platform and have connected a Stripe account are visible to the customers.
Here setting up filtering of search among the list of restaurants is possible by group filtering of search among the list of restaurants.
reset_pw
This page is used for resetting the password.
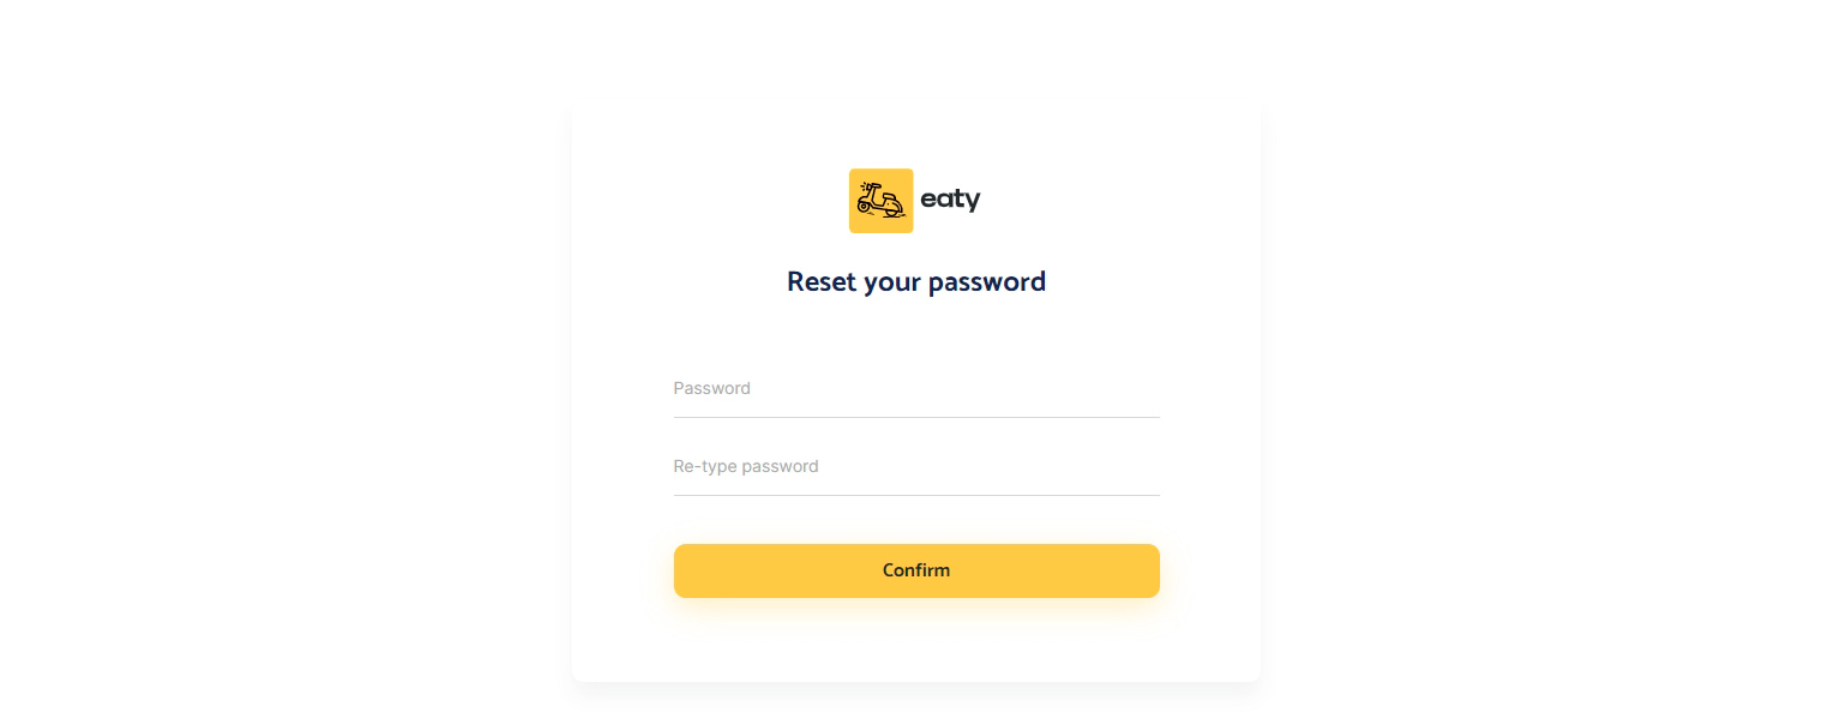
When opening the page, the cursor automatically goes to the "Password" field - the client does not even have to move the mouse 🙂

404
This is the custom-designed page for 404 redirect errors, informing a user that the web page he or she is looking for cannot be found.
It is empty in the "Workflow" section. Just go back to the previous page or close the current one.