This guide is the beginning of the documentation with the built-in Notes for the database. Will help you gain a better understanding of how the template and Bubble works.
Starting with the Template
Once you have bought or added a block to your account, you will see a dropdown in the New Application popup that lets you pick a template as the basis for the new application.
Note: This can only be done when you create a new app.
After you've selected a block you bought, complete the ”Name your app” field and press Create app.
Tip: A template isn't a theme for your app, but a pre-built set of elements and workflows. You can modify the template as you would modify another app.
Wait for Bubble to load the application with all the data.
After the application has loaded, you'll see the Component library on the right side for New Application. You can close it or follow the assistant steps to adjust different settings.
Now you're ready to go and dive into Bubble no-code development toolset.
Congrats: You have successfully created a Bubble app based on your template. Now, you can proceed with the setups.
VAPI AI Call Assistant Integration
Check out a new feature that is powered by the VAPI AI Platform.
It allows your application to have a completely customizable voice assistant that will answer any customer’s questions within the framework of the set prompt.
Please note that this is a paid plugin, so to use it, you need to subscribe or buy it.
As for the traffic, you only pay for the minutes you use. Check the pricing details here: https://docs.vapi.ai/pricing
Call Assistant Setup: See the documentation on how to set up the Enhanced VAPI AI Call Assistant in the Bubble App.
If you don't need this feature within your app, feel free to remove it.
In this case, remove the:
- reusable element “AI Assistant” from the index page and reusable elements
- remove the following step in the workflow:
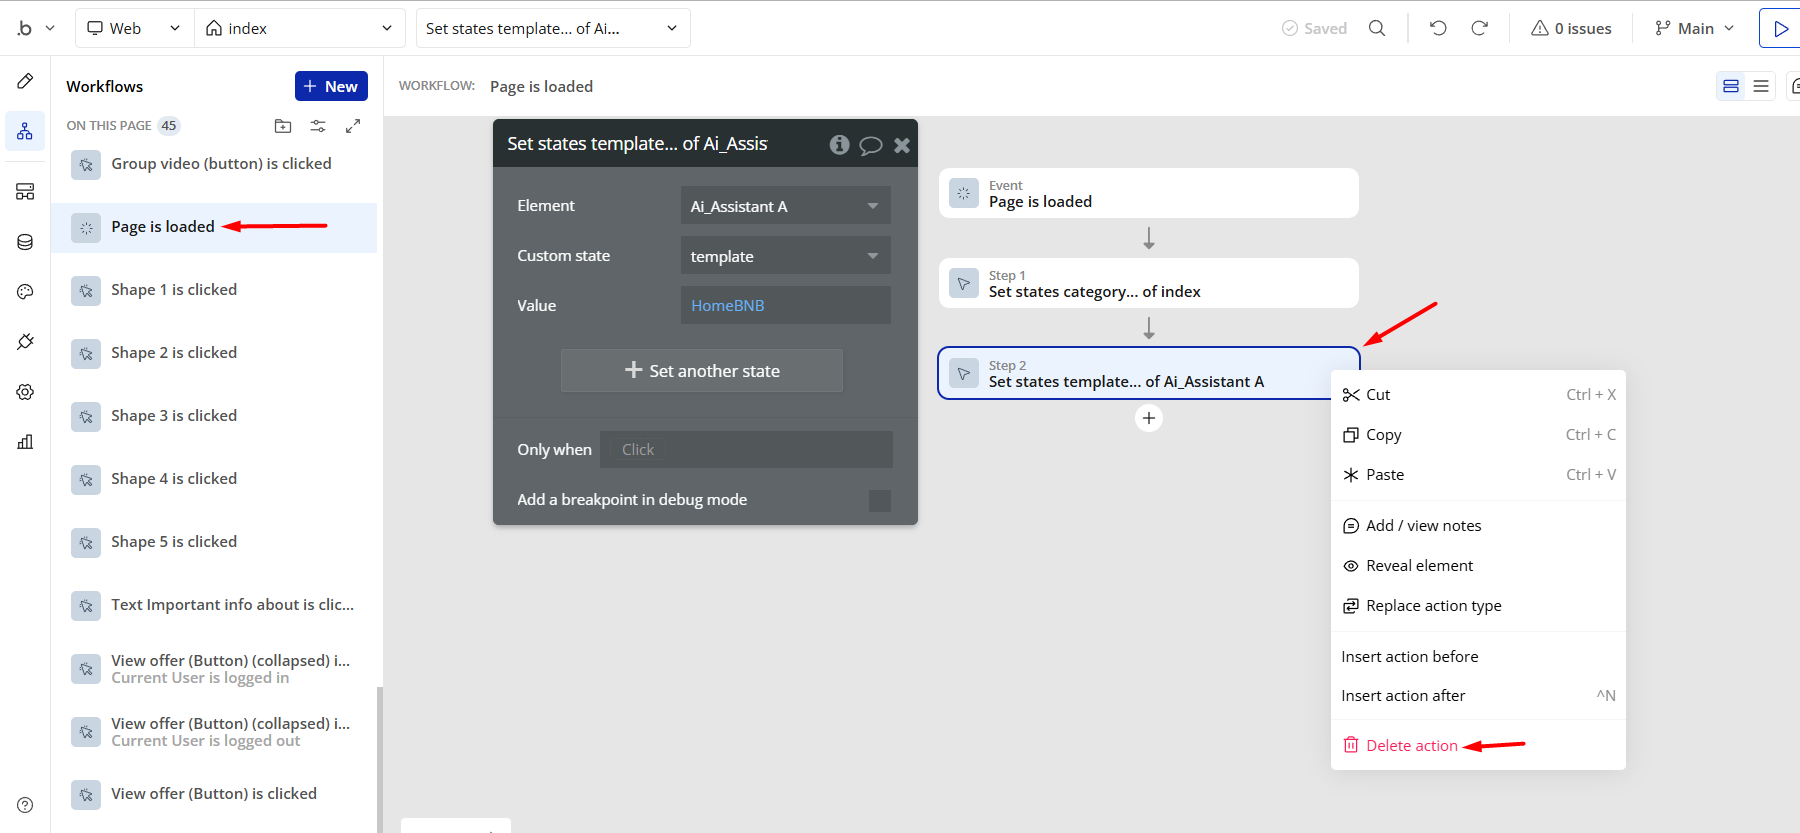
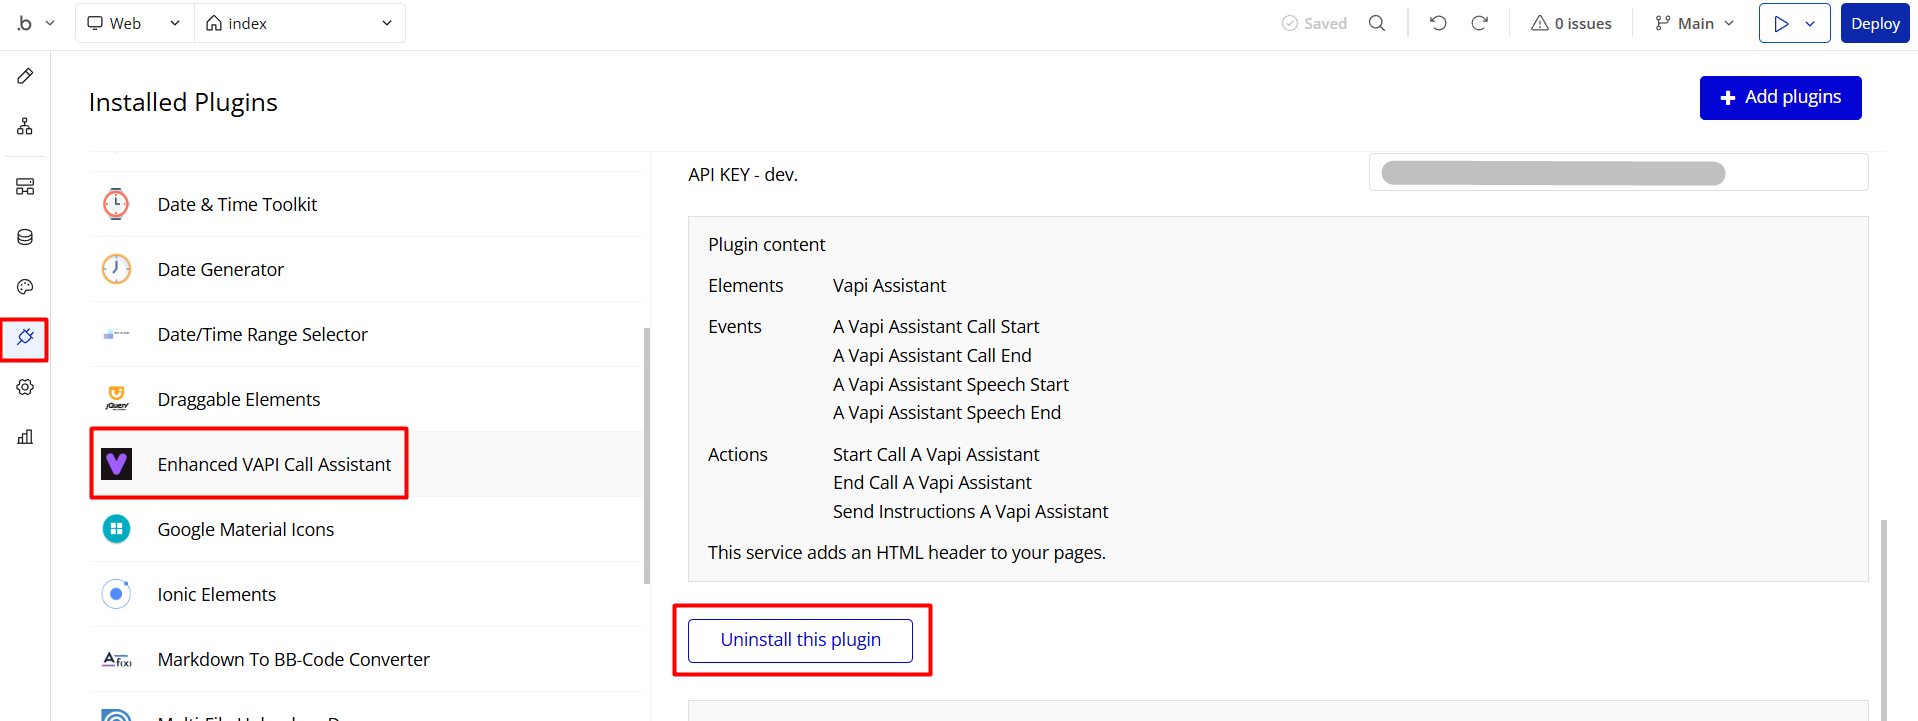
- Remove the Enhanced VAPI Call Assistant plugin from the plugin tab.
Remove Demo Login
This template comes with demo accounts and demo buttons for testing purposes, which do not require a full sign-up process in order to test the platform features. Feel free to delete these login options in your app.
Tip: Please note that deleting the demo buttons will delete the button workflows as well. Removing these demo options doesn't affect any other aspect of the template.
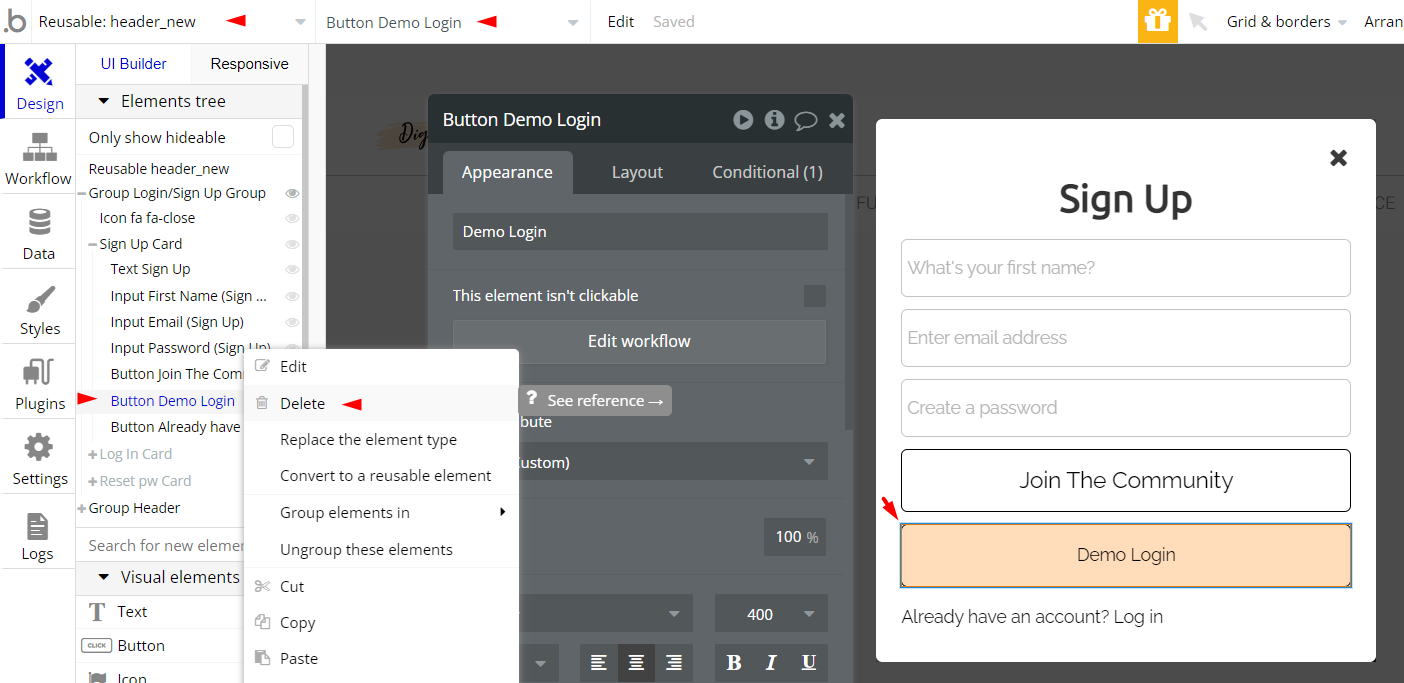
In order to delete demo items, follow the instructions:
- on the
headerreusable element, remove the Demo Login button:
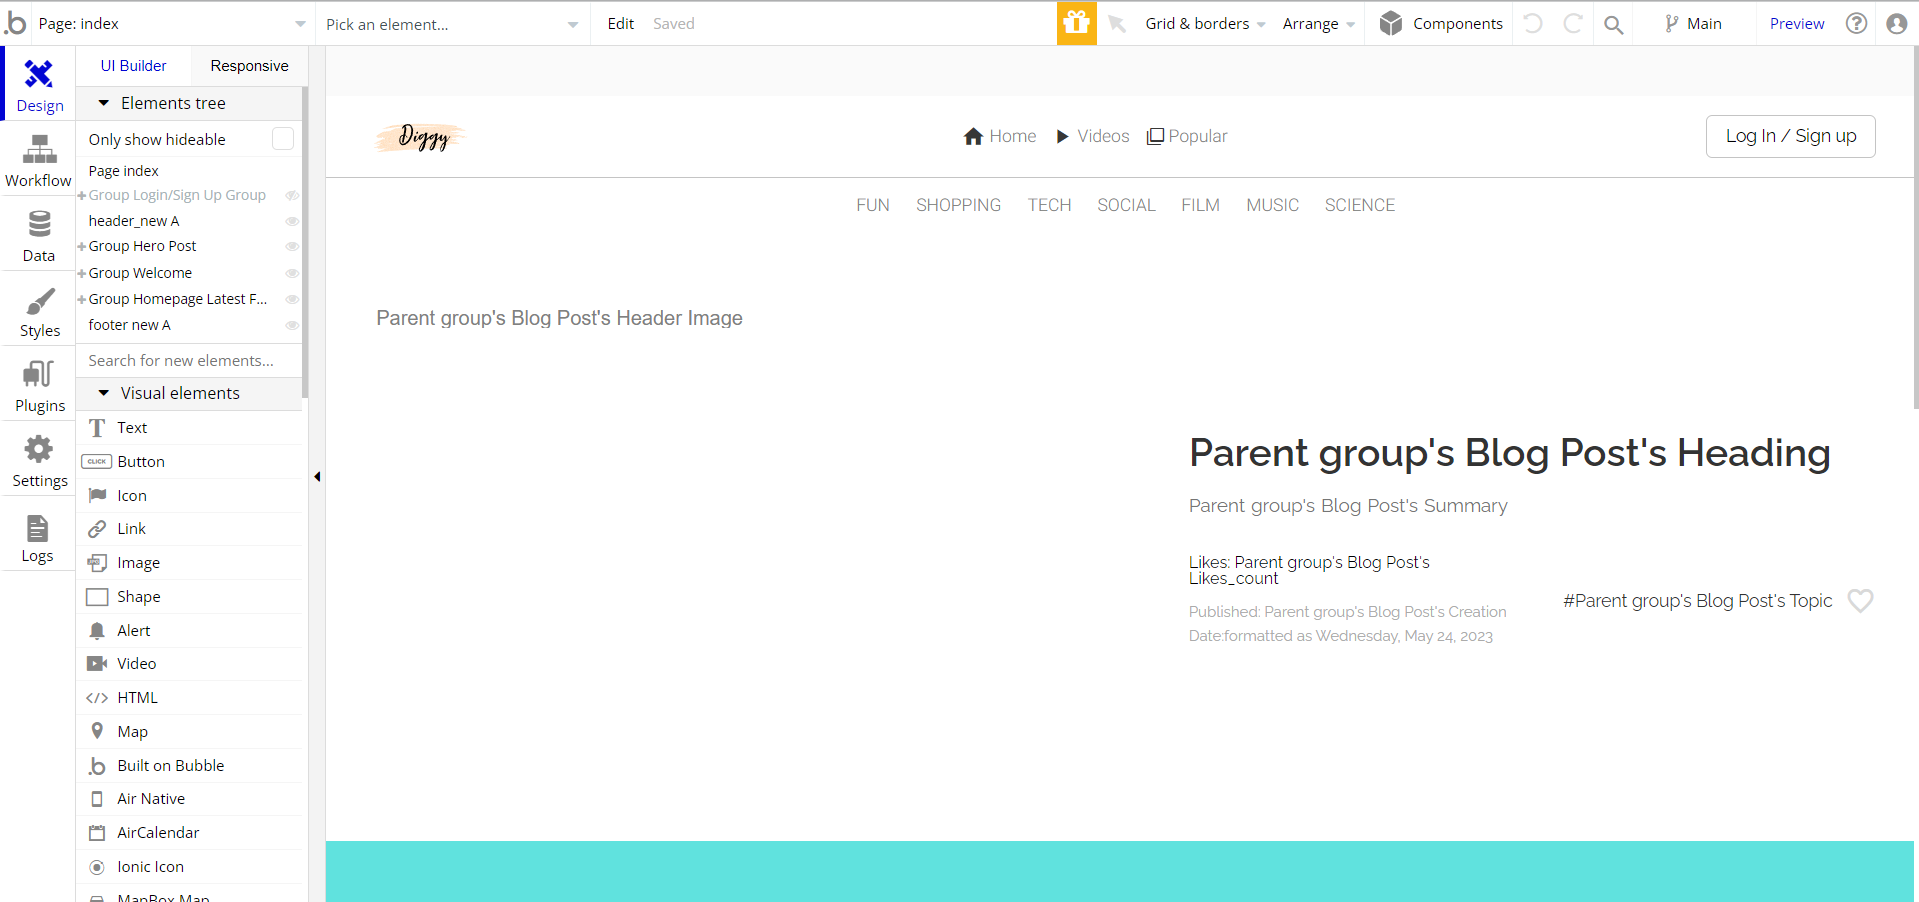
Remove Banner
This template comes with a promotional banner above the Header element. Feel free to remove it from your app.