This guide is the beginning of the documentation with the built-in Notes for the database. Will help you gain a better understanding of how the template and Bubble works.
Starting with the Template
Once you have bought or added a block to your account, you will see a dropdown in the New Application popup that lets you pick a template as the basis for the new application.
Note: This can only be done when you create a new app.

After you've selected a block you bought, complete the other fields with necessary data (i.e: Name of the new app, What kind of application you are building, etc) and press Create a new app.
Tip: A template isn't a theme for your app, but a pre-built set of elements and workflows. You can modify the template as you would modify another app.
Wait for Bubble to load the application with all the data.

After the application has loaded, you'll see the Bubble assistant on the left side for New Application. You can close it or follow the assistant steps to adjust different settings.
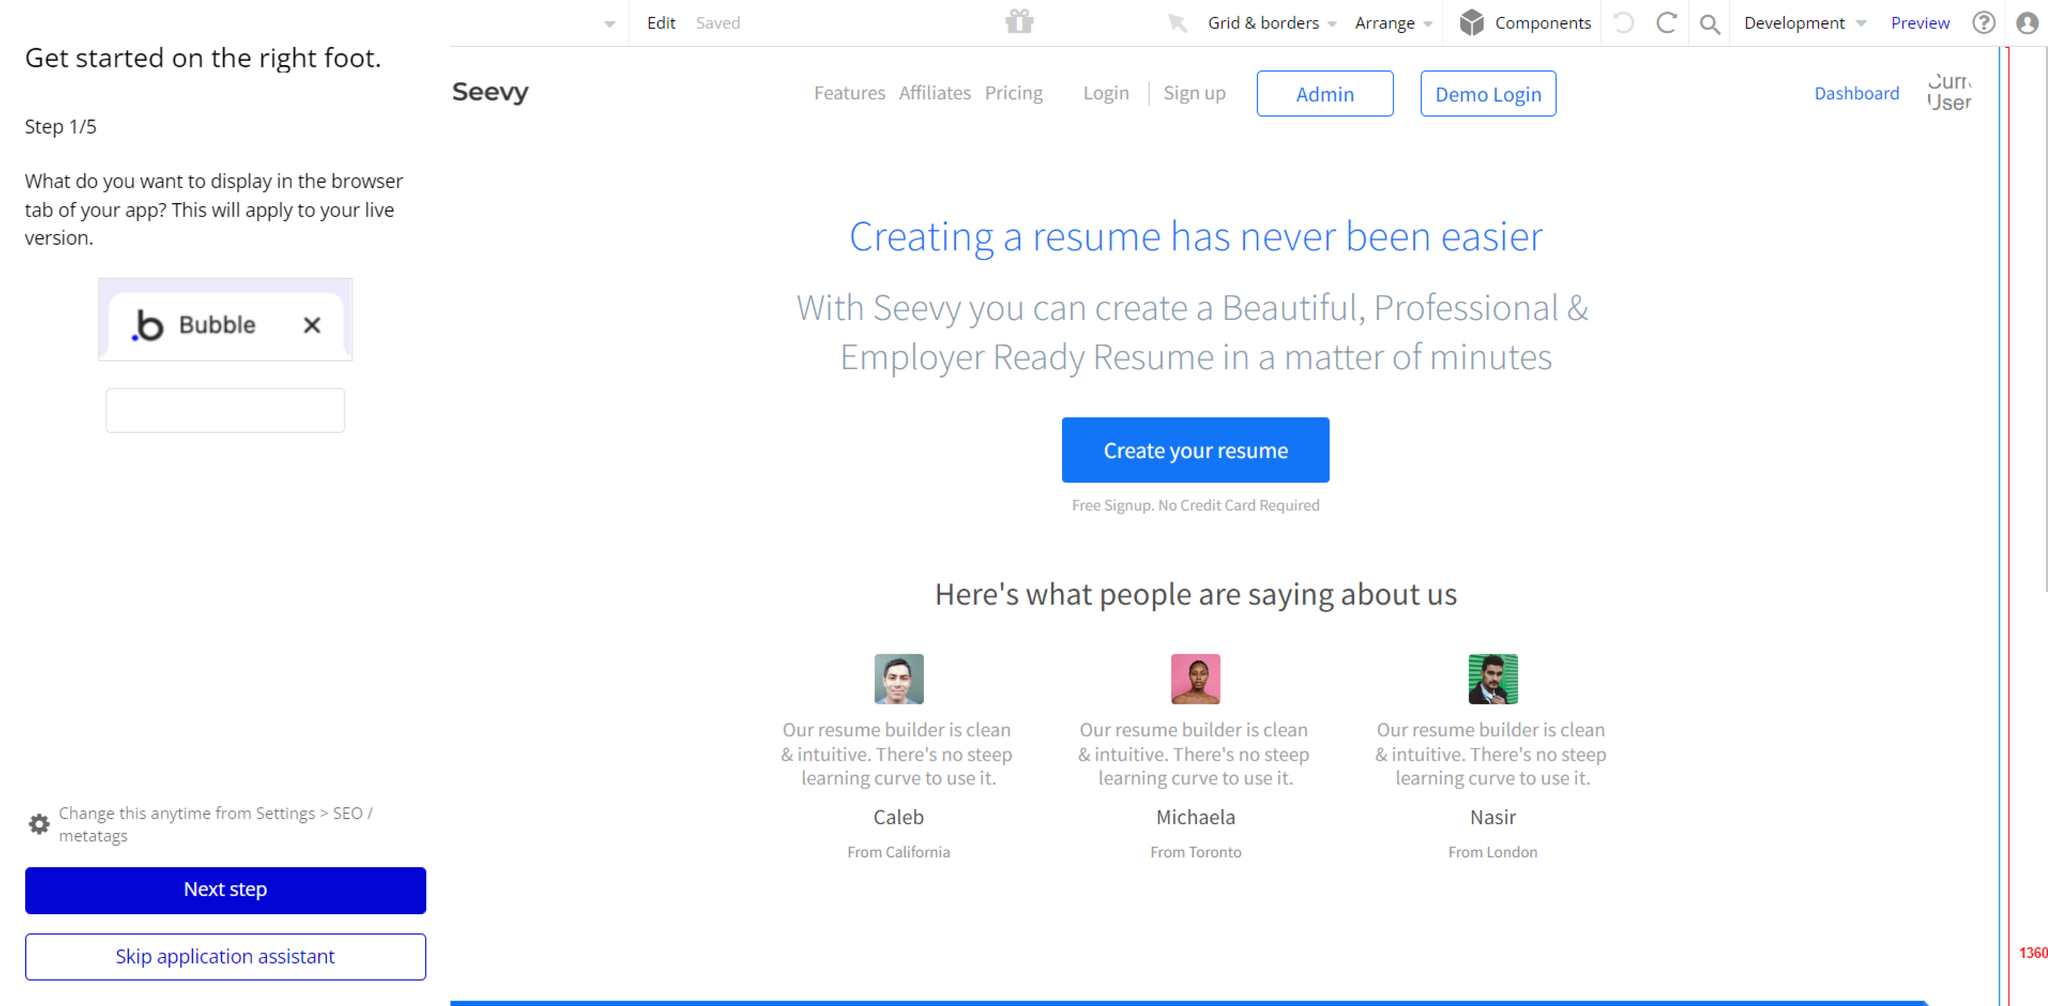
Now you're ready to go and dive into Bubble no-code development toolset.
Congrats: You have successfully created a Bubble app based on your template. Now, you can proceed with the setups.
Payments
This template is using both Bubble's Stripe plugin and API Connector for payments.
1. The first step is to configure the Stripe dashboard, and the Stripe plugin within your editor. Please follow the Stripe payments instruction below to configure.
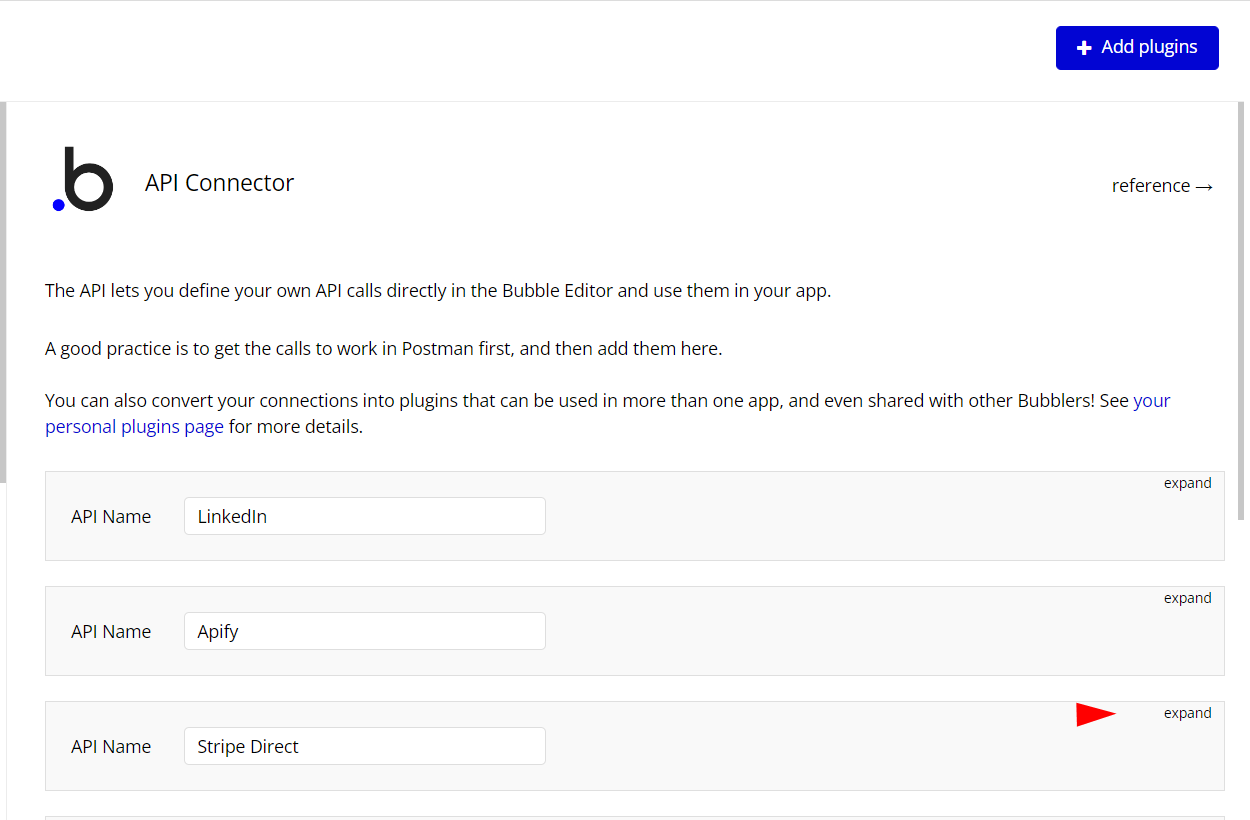
2. The second step is to configure the API Connector plugin within your editor.
Go to Plugins -> API Connector -> Stripe Direct and hit to expand it, here:
The API will expand, and you will be able to configure it with your own API🔑keys, here:

Note: Add the Bearer keyword in front of the key values. And remember to change to Live keys when you decide to go live with your app.
Stripe Direct API has 5 action calls:
- Update a subscription - used to update a user’s subscription in Stripe.
- Create a subscription - used to create a subscription for users in Stripe.
- Create a coupon - used to create a coupon for users in Stripe.
- Promotion Code - used to generate a promotion code in Stripe.
- Retrieve all invoices - used to retrieve all invoices from Stripe.
Tip: Genuine card information cannot be used in test mode. Instead, use test Stripe cards credentials.
API Connector
This template is using third-party services. There are some data calls left that require API Keys configurations in order to function properly. These services are:
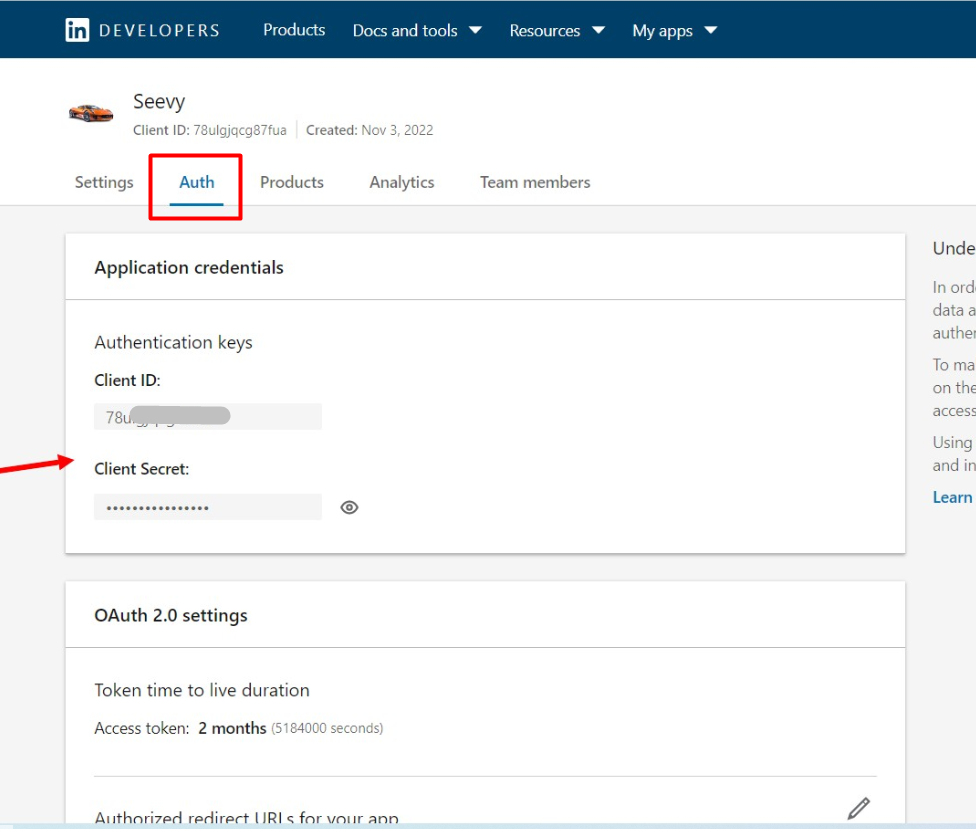
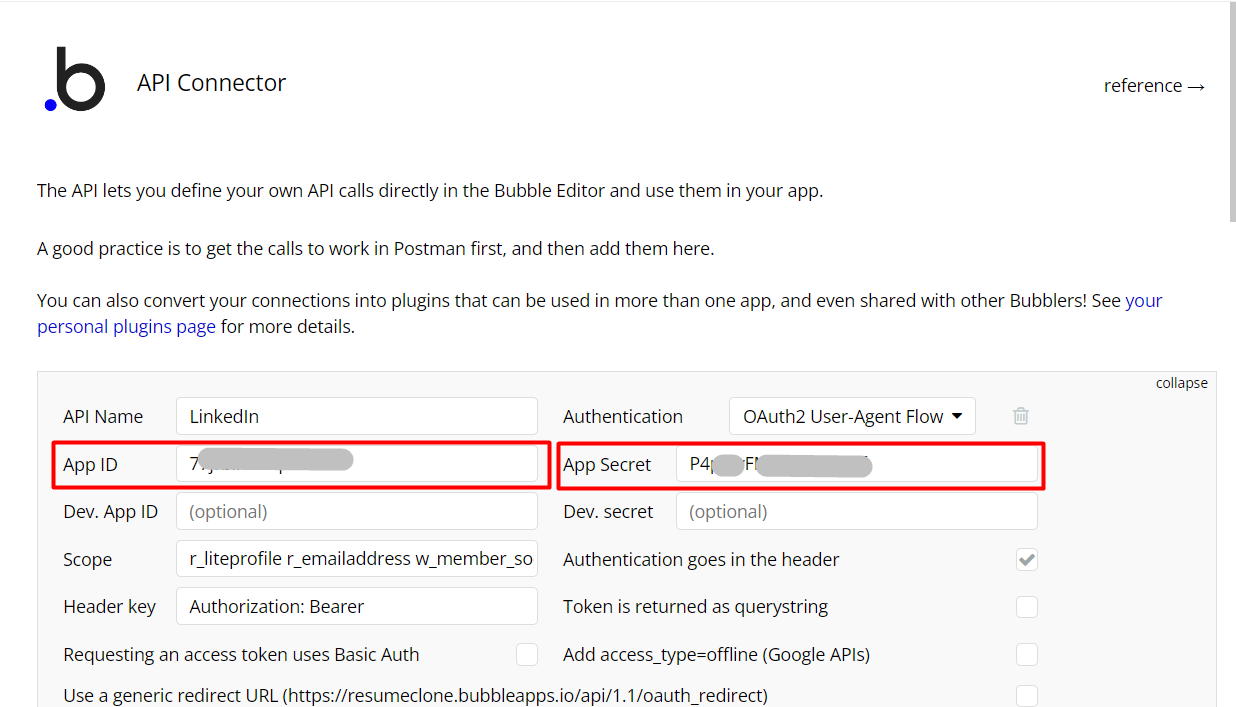
This API connection is used for new user registration through the LinkedIn platform. It comes with 3 calls:
- Profile - retrieves the user profile from LinkedIn
- Email - retrieves the user email from LinkedIn
- Profile Photo - retrieves the user profile photo from LinkedIn
To insert your own API keys, please access https://developer.linkedin.com/ and get the authentication keys.
Apify
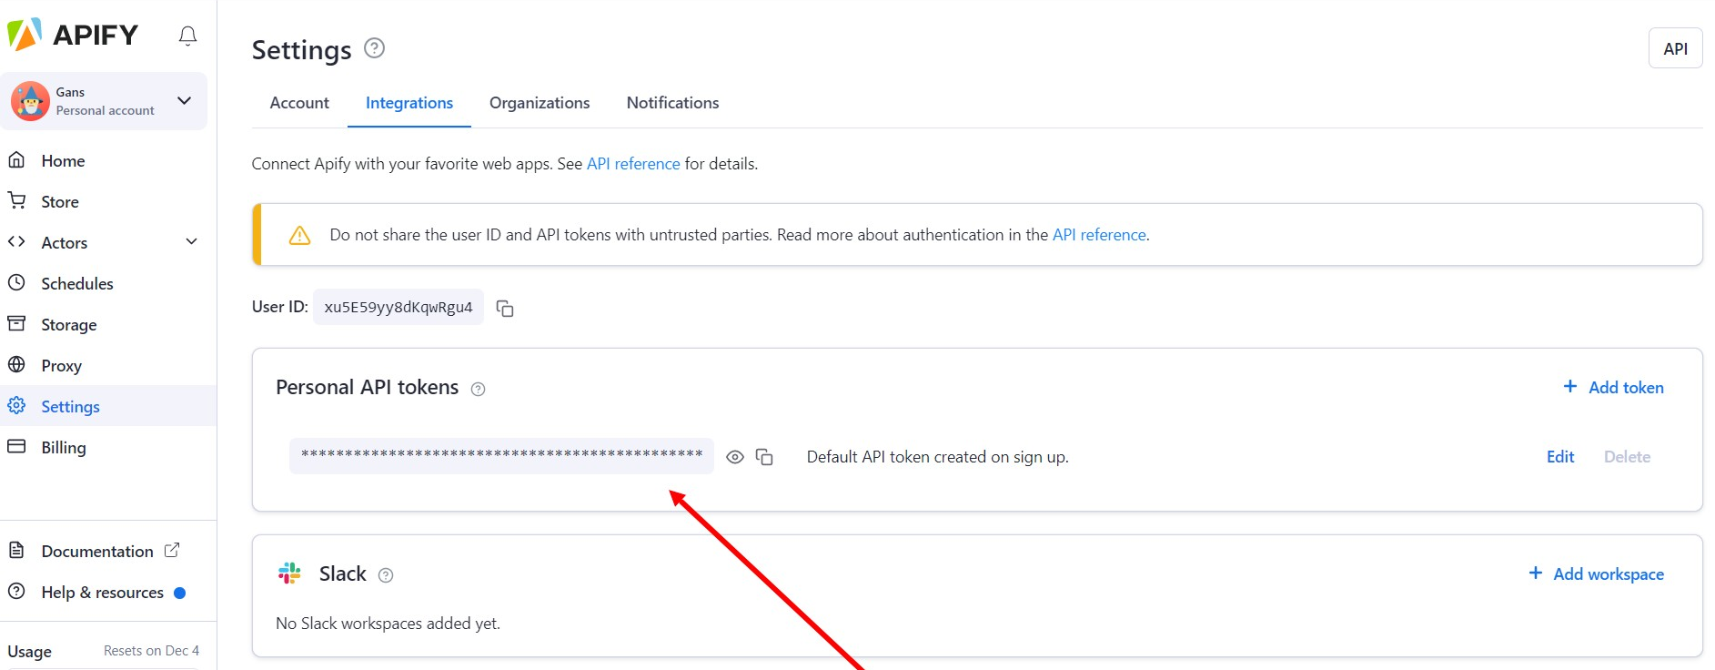
Each time a resume changes from unpublished to published, a new PDF is generated. This is done by converting a webpage to PDF using an external API - Apify.
The
/liveresume page is the webpage used to generate the resumes by passing the unique ID of the resume as a parameter. The group holding the resume is hidden when the resume’s owner doesn’t meet certain conditions.To insert your own API keys, please access https://console.apify.com/account?tab=integrations and get the authentication keys.
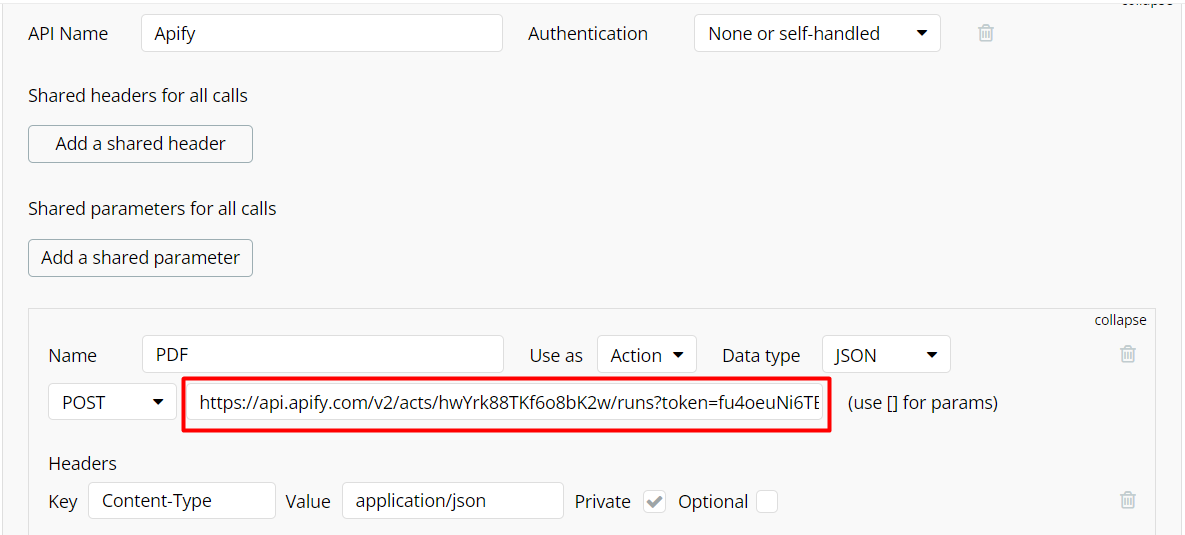
Expand the PDF call and you'll see the POST URL inside of which you need to insert your token (after "runs?token=") as can be seen on this screenshot
Coinbase
Payouts/Withdrawals of earnings are made in Bitcoin using the Coinbase API.
Steps to set it up:
- Create a Coinbase account
- Create an Oauth2 application at https://www.coinbase.com/settings/api
- Make sure you add the redirect URLs like this
- https://resumeclone.bubbleapps.io/version-test/manage/dashboard
- https://resumeclone.bubbleapps.io/version-test/manage/dashboard?debug_mode=true
- Replace the base URL with your own app’s base URL & ensure to add the live versions above it when you go live
- Load the /manage/dashboard?debug_mode=true page and setup the Authentication with the Connect your Coinbase account button
- Go to https://www.coinbase.com/accounts and select your preferred Bitcoin wallet/account
- Copy the account id from the URL and paste it into the Coinbase send API connector call
- Send at least $2 as a test transaction to complete the setup.
Each user has a referral code created upon sign-up. This code is the same as their resume’s share code and is changed when the share code is changed.
The referral system makes use of HTML5 local storage. Existing users can invite their friends with their referral link which includes their code. When their friends visit this link loads a dedicated page that grabs & stores the referral code to HTML5 storage.
If the visitor proceeds to sign up, a condition is true workflow will retrieve the stored referral code and a custom event will add the referrer to the newly sign up user.
When this newly signed-up user subscribes for a paid plan, a reward is created, with the user’s referrer as a recipient, in the API workflow triggered by Stripe’s Invoice payment successful webhook.
Google Plugin
In order to make the Sign in with Google option work properly, it is required to configure the Google plugin within your Bubble editor.
Google: See the documentation on how to set the Google Plugin in Bubble.
Facebook Plugin
In order to make the Sign in with Facebook option work properly, it is required to configure the Facebook plugin within your Bubble editor.
Facebook: See the documentation on how to set the Facebook Plugin in Bubble.
Note: The permissions requested by the Facebook authentication API will require your app to be reviewed by Facebook.
If you like you can switch to Bubble’s own Facebook plugin or simply reduce the scope of the Oauth setup.
For Facebook, LinkedIn & Google ensure that you add all live & test URLs for these pages /u/signup, /u/signin & /dashboard as authorized redirect URLs. Twitter only requires the base URL.
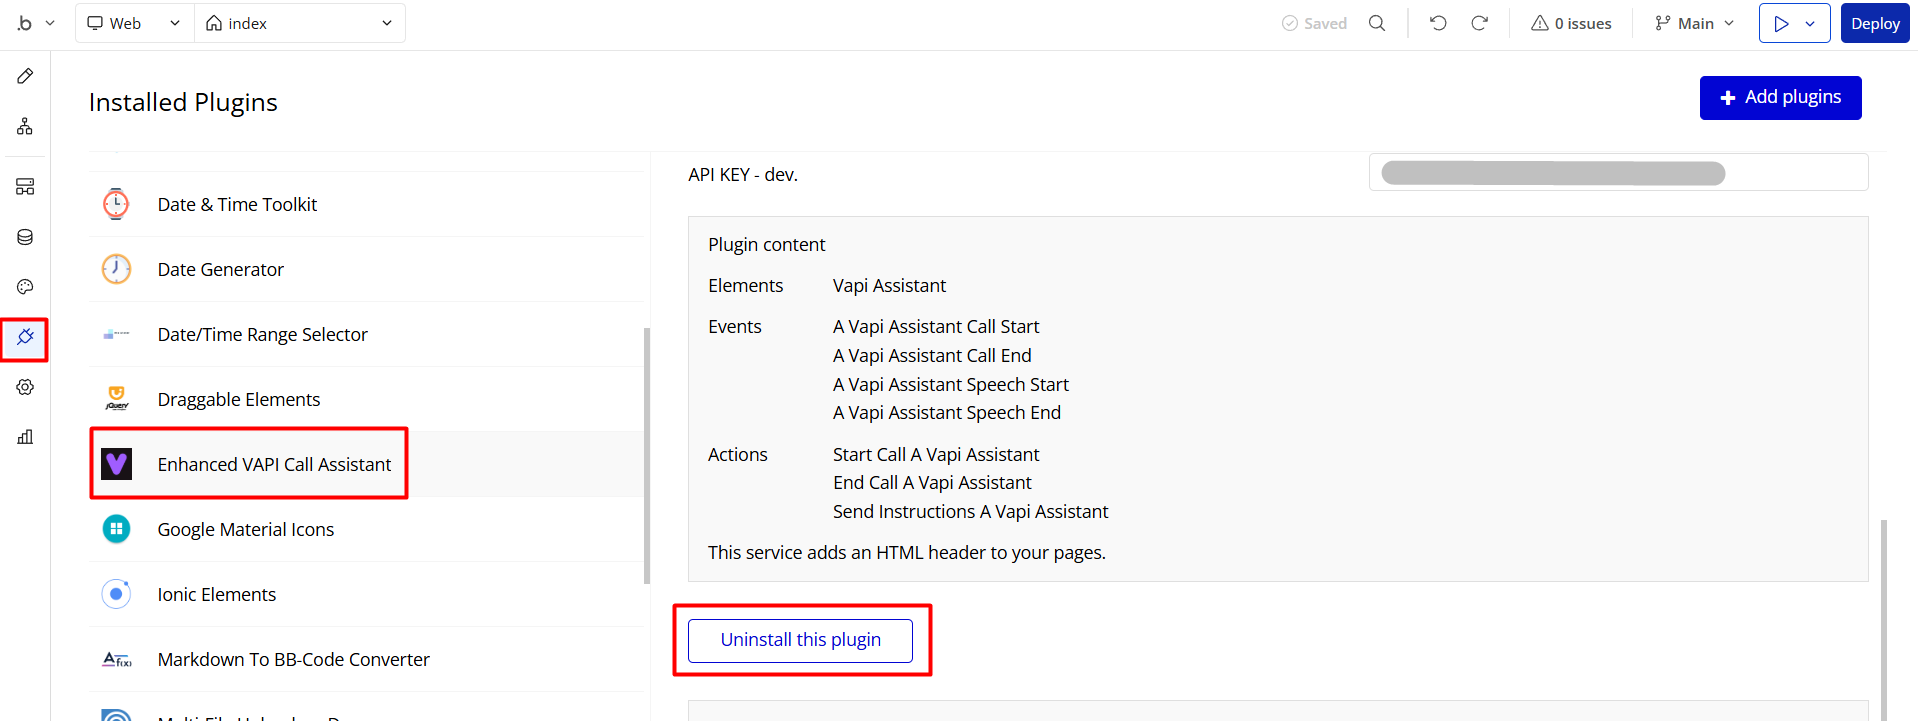
VAPI AI Call Assistant Integration
Check out a new feature that is powered by the VAPI AI Platform.
It allows your application to have a completely customizable voice assistant that will answer any customer’s questions within the framework of the set prompt.
Please note that this is a paid plugin, so to use it, you need to subscribe or buy it.
As for the traffic, you only pay for the minutes you use. Check the pricing details here: https://docs.vapi.ai/pricing
Call Assistant Setup: See the documentation on how to set up the Enhanced VAPI AI Call Assistant in the Bubble App.
If you don't need this feature within your app, feel free to remove it.
In this case, remove the:
- reusable element “AI Assistant” from the index page and reusable elements
- remove the following step in the workflow:
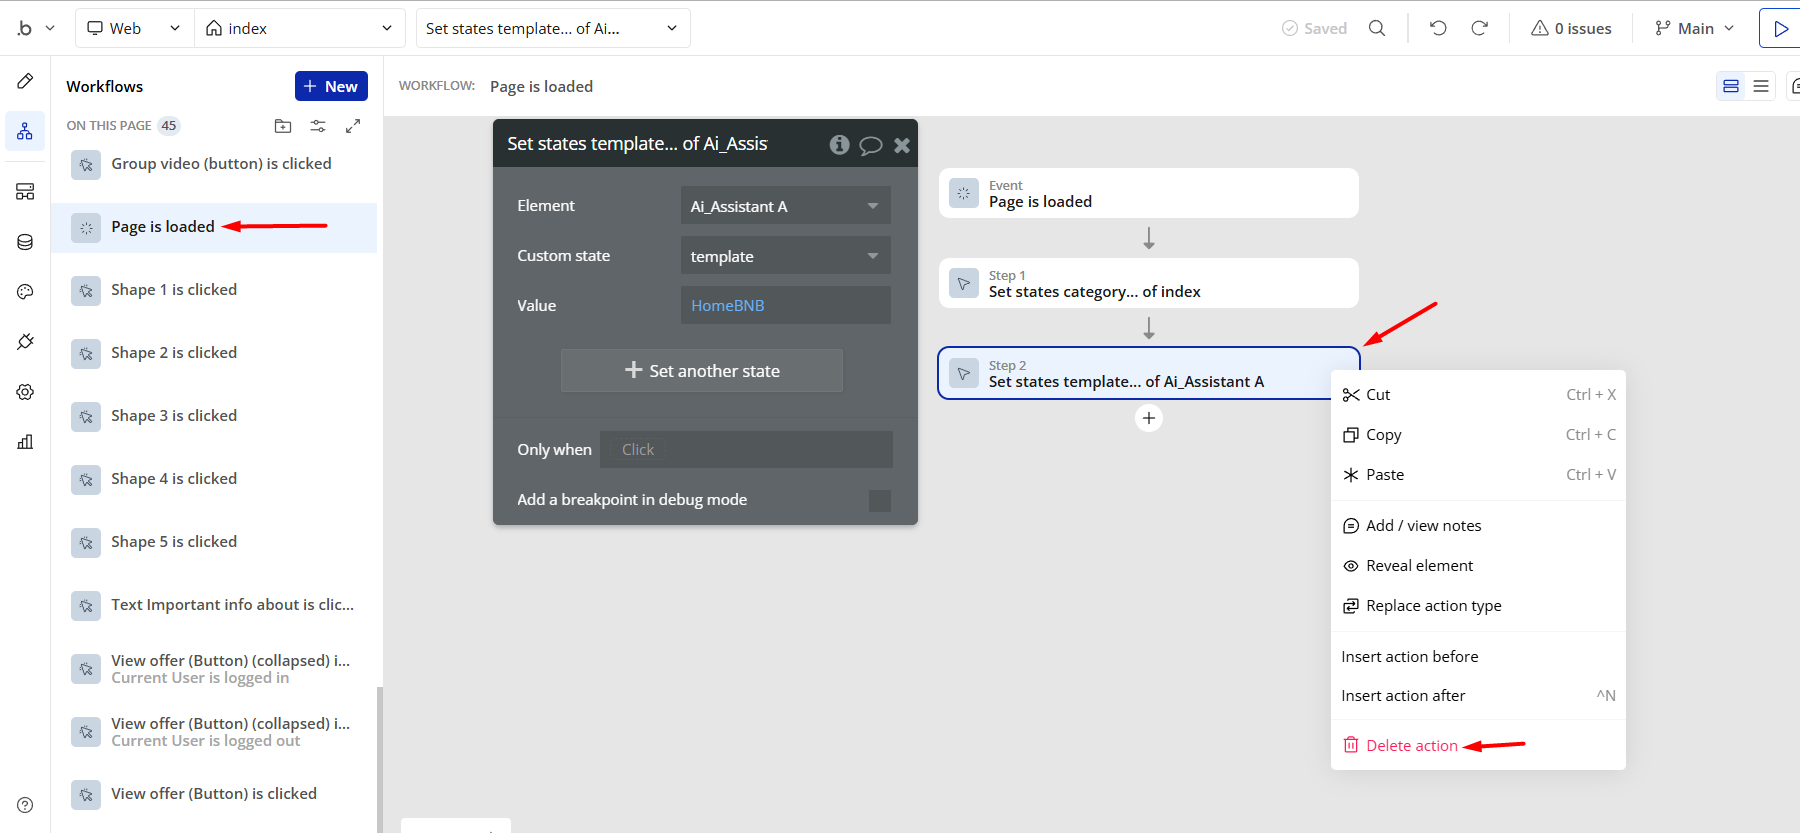
- Remove the Enhanced VAPI Call Assistant plugin from the plugin tab.
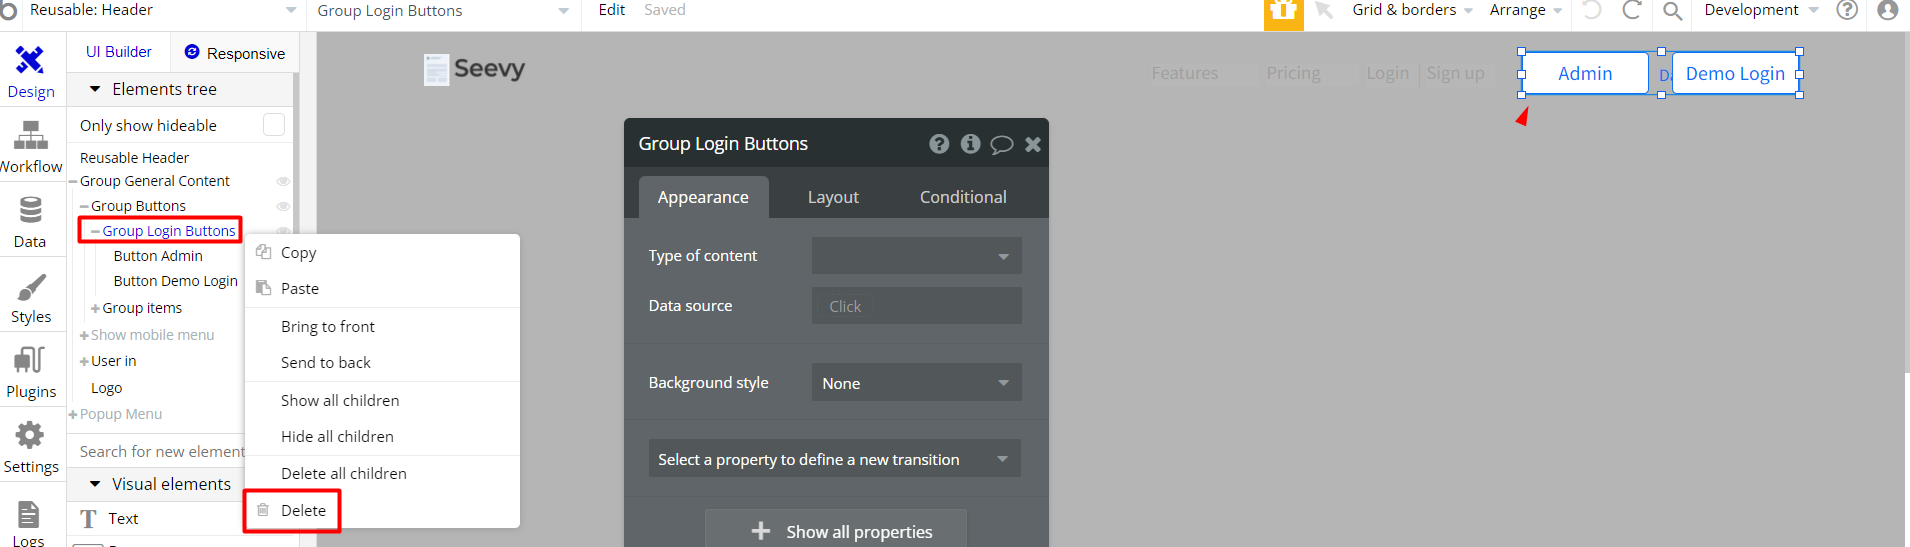
Remove Demo Login
This template comes with demo accounts and demo buttons for testing purposes, which do not require a full sign-up process in order to test the platform features. Feel free to delete these login options in your app.
Tip: Please note that deleting the demo buttons will delete the button workflows as well. Removing these demo options doesn't affect any other aspect of the template.
In order to delete demo items, follow the instructions:
- Delete the Admin and Demo Login buttons from the
Headerreusable element.
- on the
signuppage, delete the Demo Login, Demo Admin, and Demo Affiliate buttons.
Remove Banner
This template comes with a promotional banner above the Header element. Feel free to remove it from your app.