The guide states the things to note, like Admin Access, Custom Code, Notes, APIs, etc.
Admin Rights
Most of the template content is directly pulled from the database. Please do not delete an entire Data Thing unless you are sure of what you are doing. However, feel free to delete any template content you prefer.
For security purposes, this template has limited rights for potential customers. Meaning, you will not be able to use the admin features at its fullest until you purchase the template and enable admin rights.
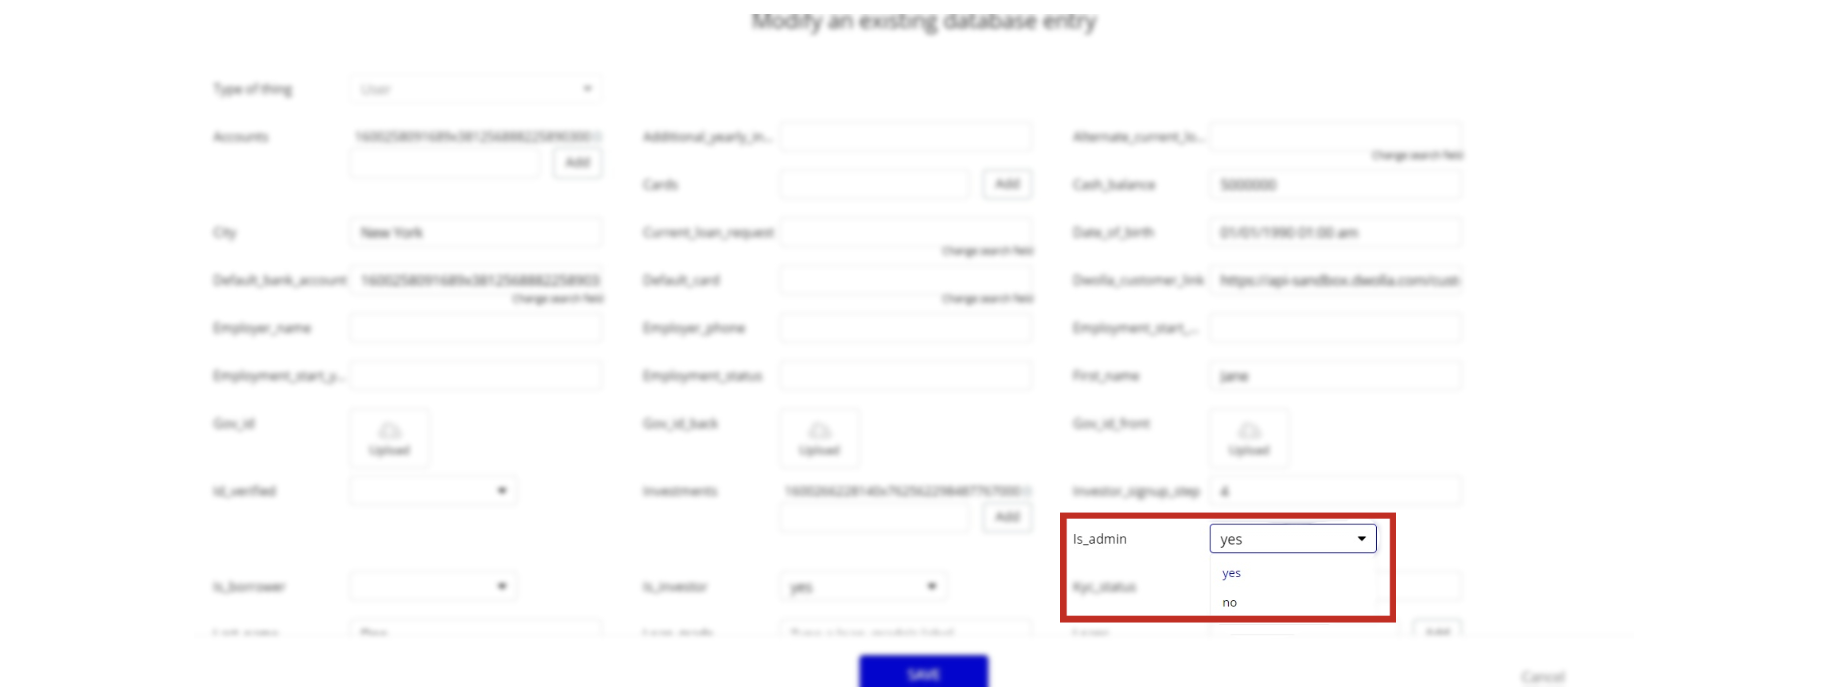
If you want to make someone an admin, have to change the field
is_admin within the User datatype to yes. After you do the changes above, that user becomes admin.
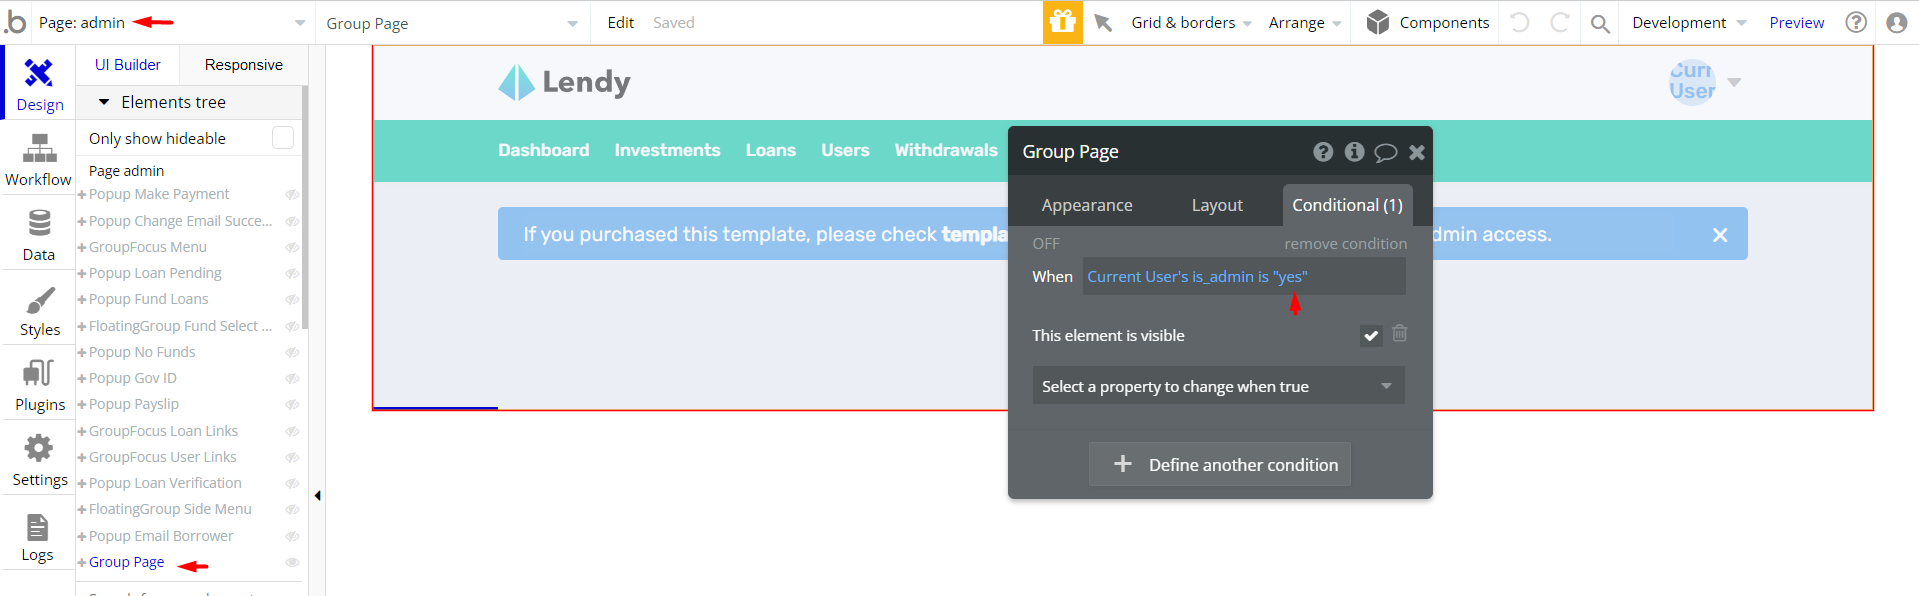
If a non-admin user accesses the admin page, he will not be able to do any manipulations because of the conditions on edit/delete actions, when the userAdmin field value is set no for this particular user.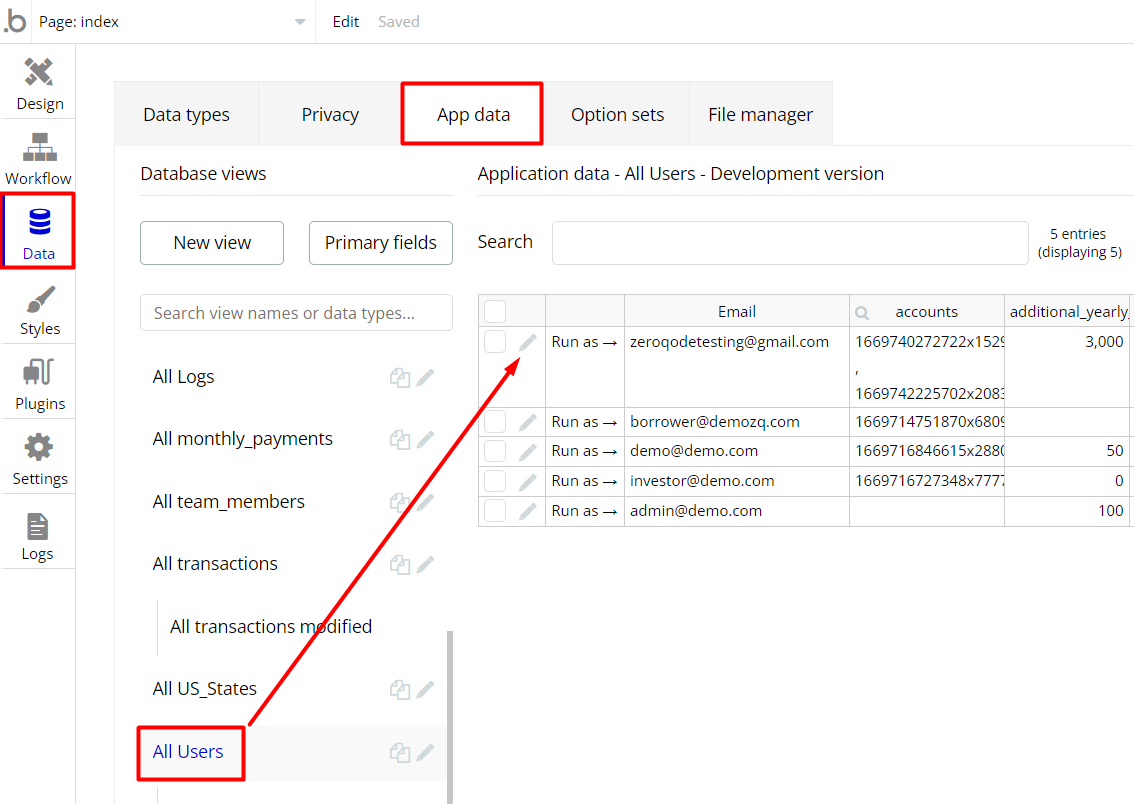
Under the Data tab click the icon in the Editor, go to the Data Type User and look for
is_admin field with Yes/No boolean type, condition for Yes is set the Admin rights for the user are enabled and the user can edit and delete.Remember to hit the SAVE button.
If you have already purchased the template, you will need to enable the elements and activate workflows:
- On the admin page, find Group "Page" element and select Conditional tab:
3. In the workflow tab enable the 3rd workflow
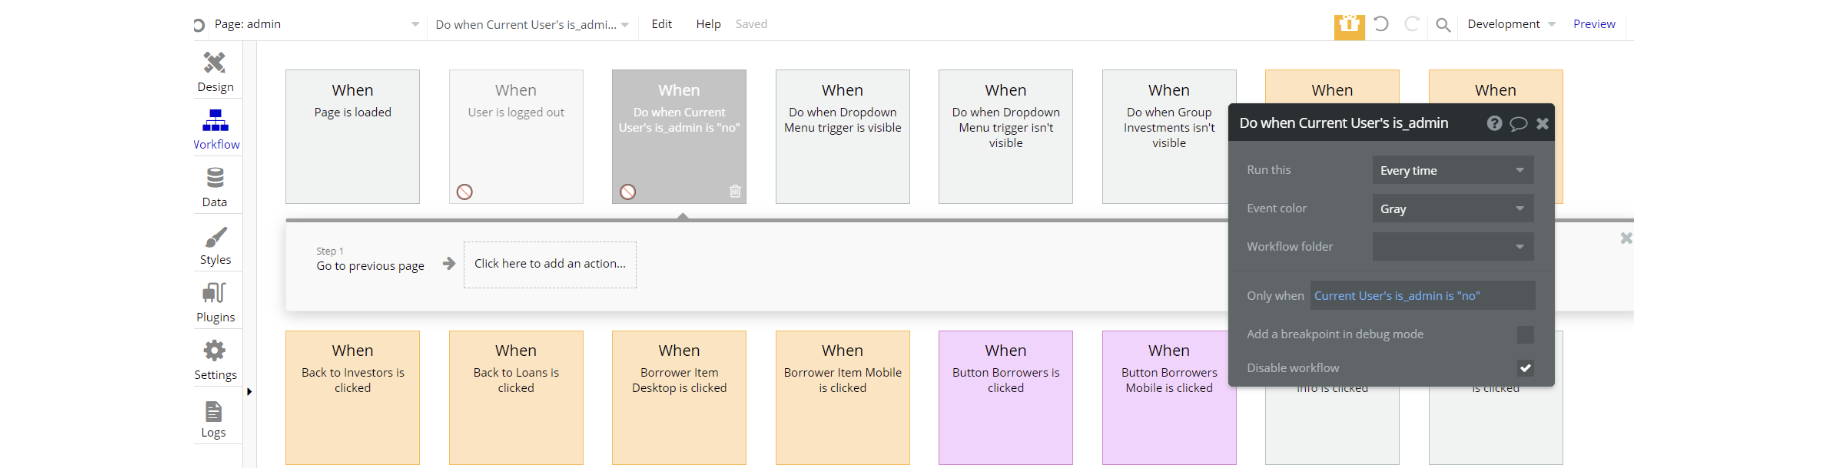
4. Complete. After these changes, you can check the on-page the respective actions.
Congrats! You have successfully granted admin rights. Now you can use all the admin page and its features as an admin user.
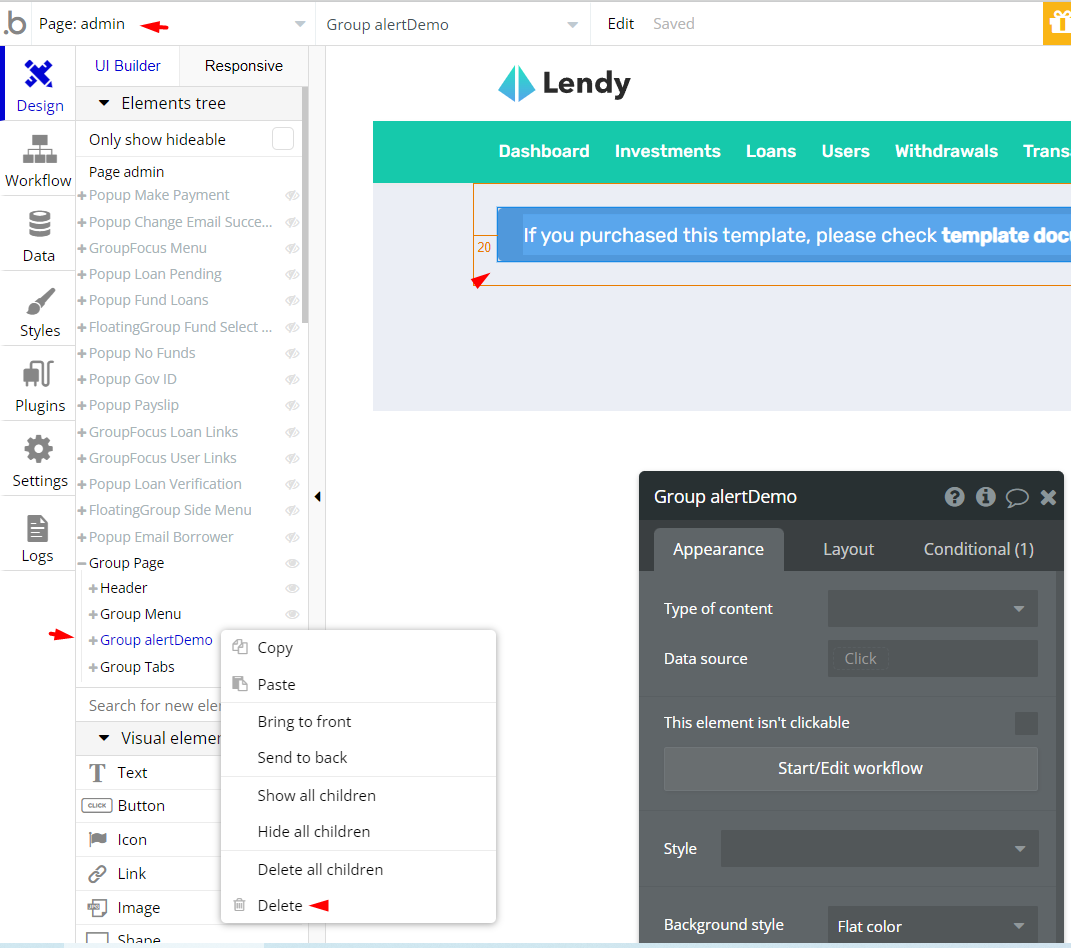
Also, delete the warning group that says to check the template's documentation:
- Locate container "Group alertDemo" and delete it:
API Webhooks
To receive webhooks in Dwolla, you need to subscribe to them with the plugin action "Create webhook subscription".
Ideally, you are going to create 2 subscriptions. The first one is to initialize the API endpoint to fetch the request data.
On a test page in your app add a workflow to create a webhook subscription. The URL to be subscribed should be that of the API endpoint wherein you wish to receive these webhooks.
Tip: There is a page dwolla_setup created in the template on how it was set.
The API workflow endpoint URL should be copied from the detecting request data mode of the API endpoint like below
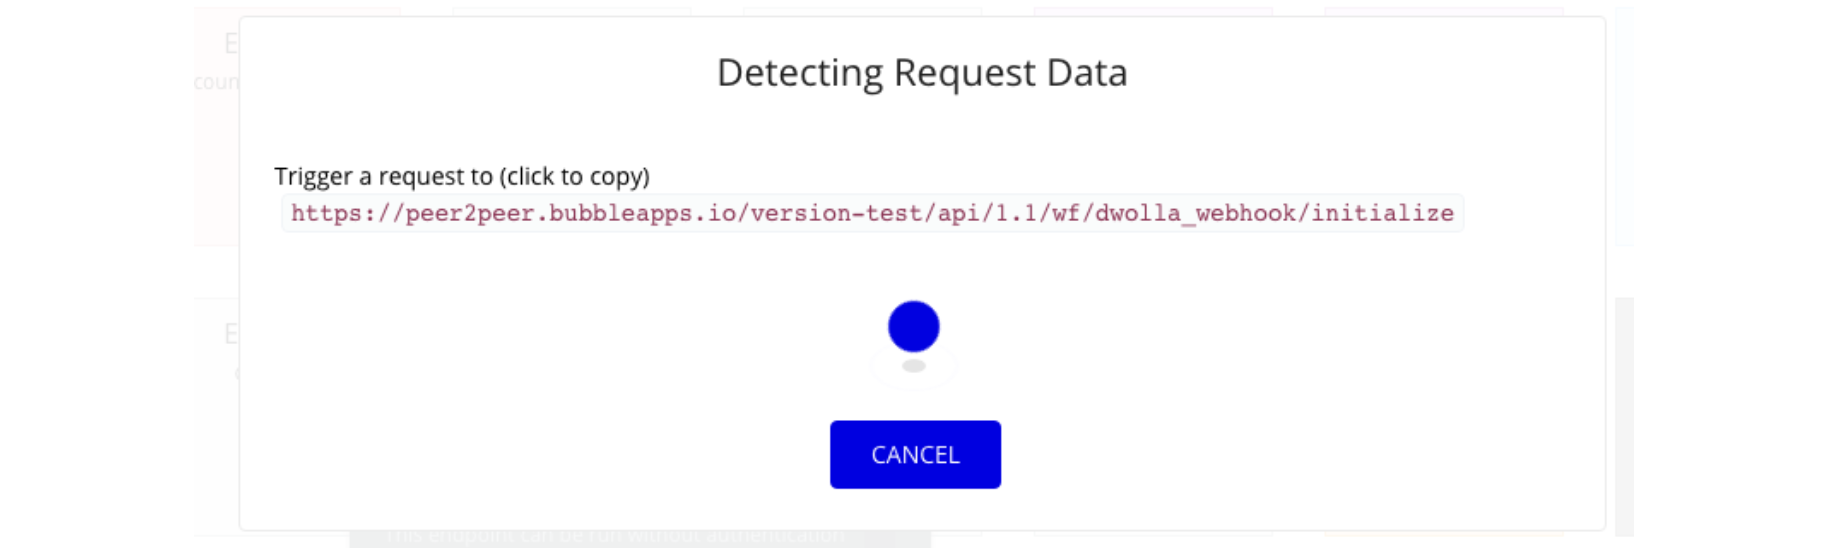
After you have subscribed to the URL gotten above, trigger a webhook event by creating an unverified customer so that your endpoint can detect the request data, and then you can save it.
Once this is done, create another subscription for this URL but without the
/initialize portion.If you want, you can delete the first initialize webhook subscription using the delete webhook subscription plugin action.
Handling Webhook events
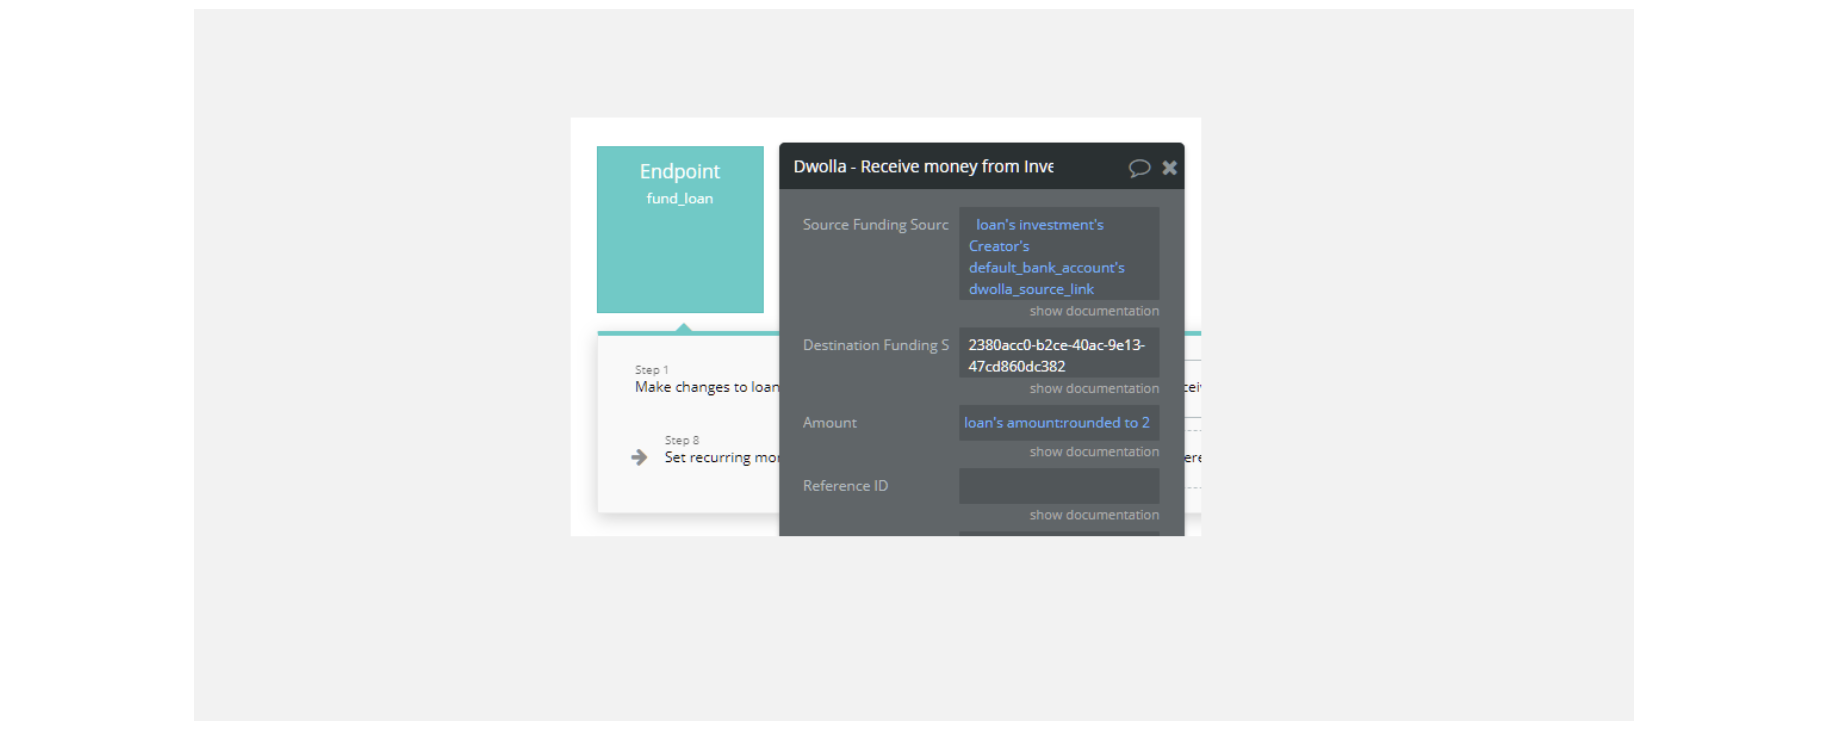
The most common use of webhooks is to confirm the success or failure of transfers to or from users. In your API endpoint which receives all Dwolla webhook events, you can trigger other API workflows depending on the kind of webhook event received.
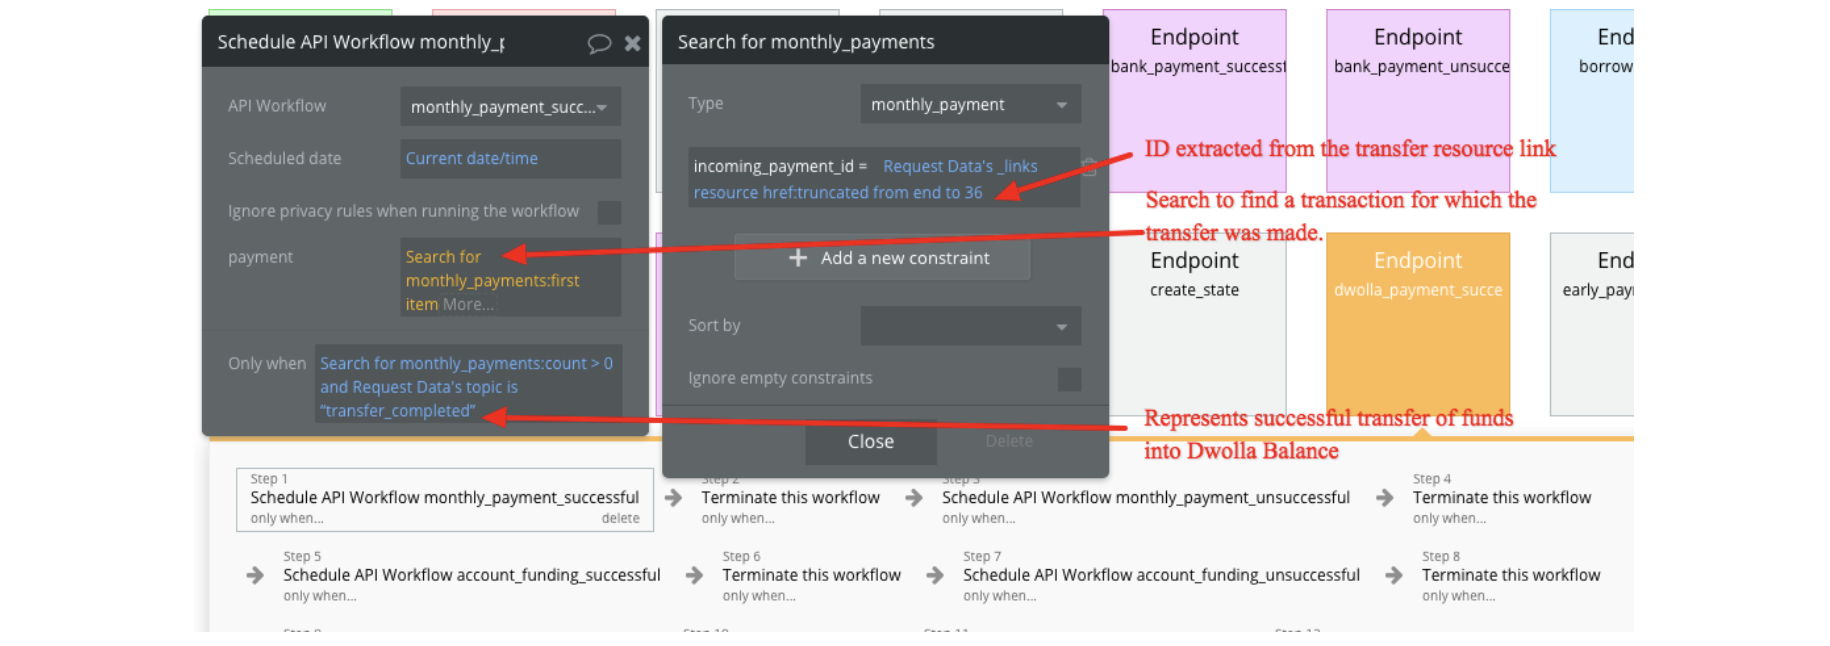
As seen in the image above, an API workflow action - called monthly_payment_successful is triggered. Then there is a search for monthly payment which has the ID fetched from the transfer resource URL and when the webhook event has a topic of transfer_completed.
It terminates the workflow based on the same condition. If this condition is not met, it moves on to the next workflow action whose condition is met.
Plugins
In this section, we describe additional plugins used in templates on pages for different purposes.
Zeroqode Dwolla plugin
Note: The template comes with a paid plugin - Dwolla - that enables ACH/bank payments. You would need to subscribe to it (or buy it) or you can as well replace the payment functionality in any way you wish.
Random String Generator Plugin
This plugin is used for generating random strings. This is a free plugin that requires API key configurations.
Random String Generator: See the instructions on how to set the Random String Generator Plugin in Bubble.
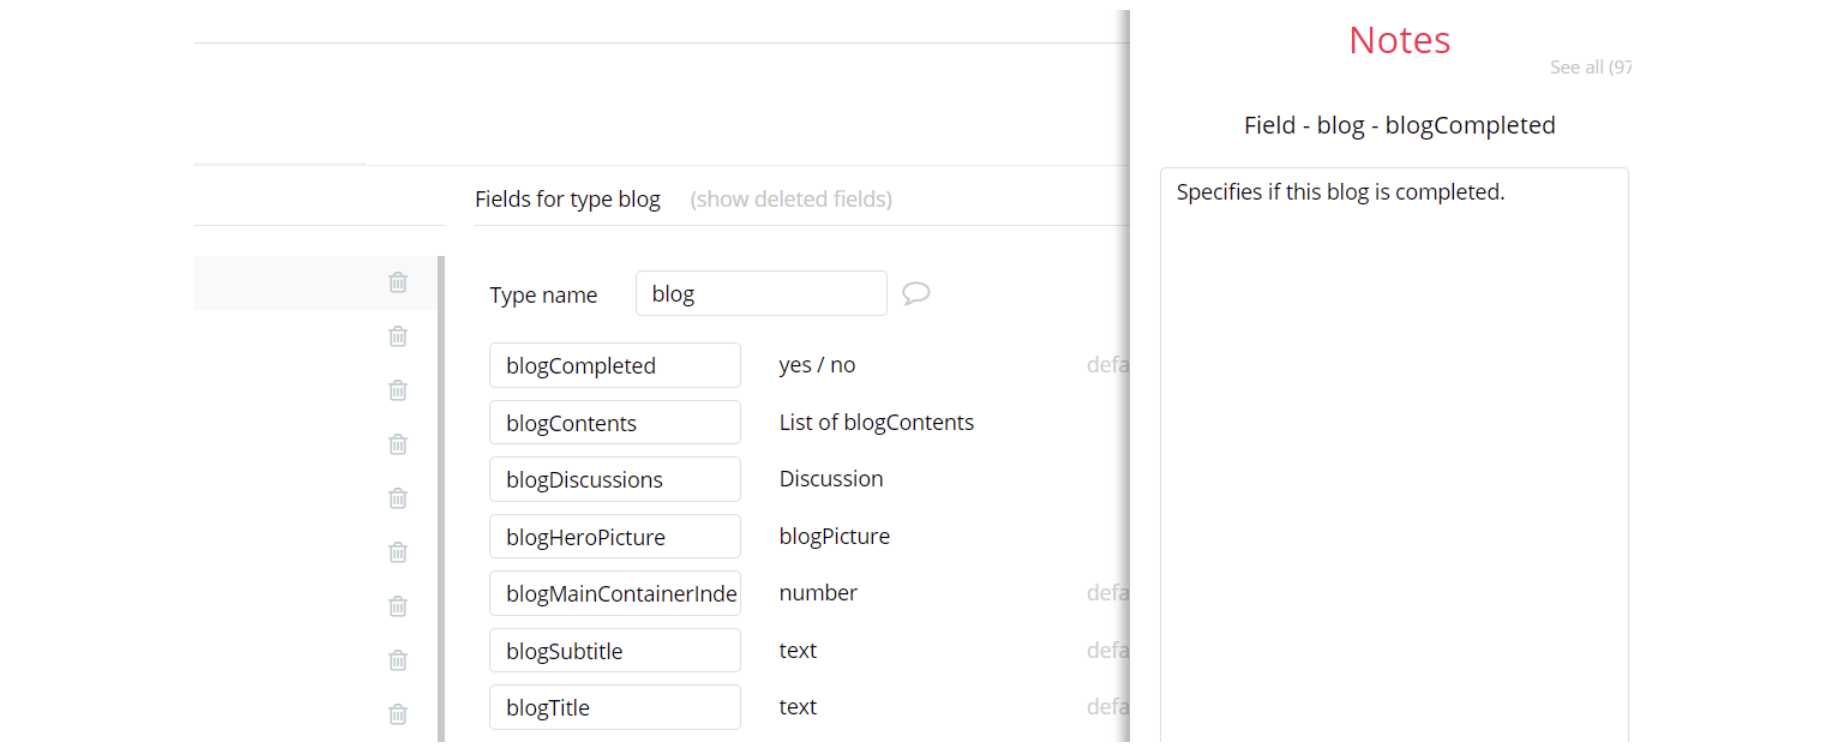
Embedded Notes in Bubble Editor
This template comes with explicit Notes for Database fields, Option sets and their fields, and Privacy rules, which will guide you with the modification process.
In order to preview a Note of any data type or field, click on the 💬 icon.