The guide states the things to note, like Admin Access, Custom Code, Notes, APIs, etc.
Admin Rights
For security purposes, this template has limited rights for potential customers. This means that you will not be able to use the admin features to their fullest until you purchase the template and enable admin rights.
Note: Users will not be able to access the admin page unless granted admin rights.
It is possible to access the admin panel via Demo Admin user. But, for security purposes, the features are not enabled unless purchasing the template and turn this feature on.
In order to grant the admin rights, please follow the instruction below.
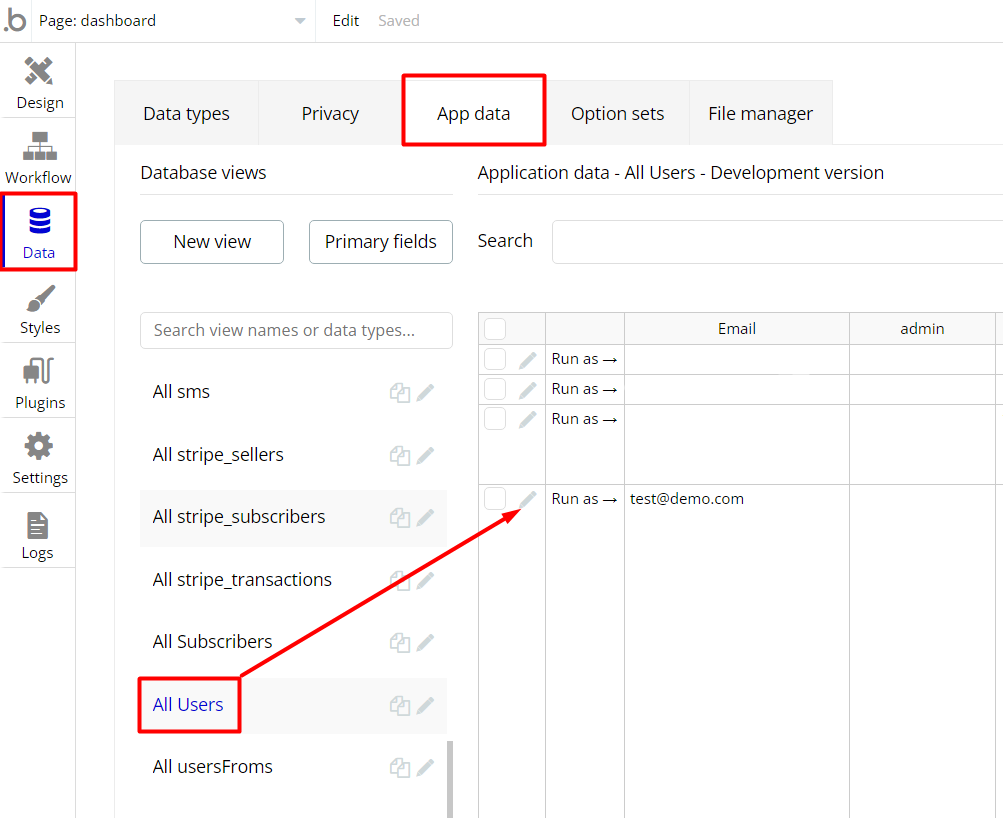
- Go to the
dashboardpage -> Data -> App data -> All Users tab. Select any user record and edit it. Set the Admin field to yes:
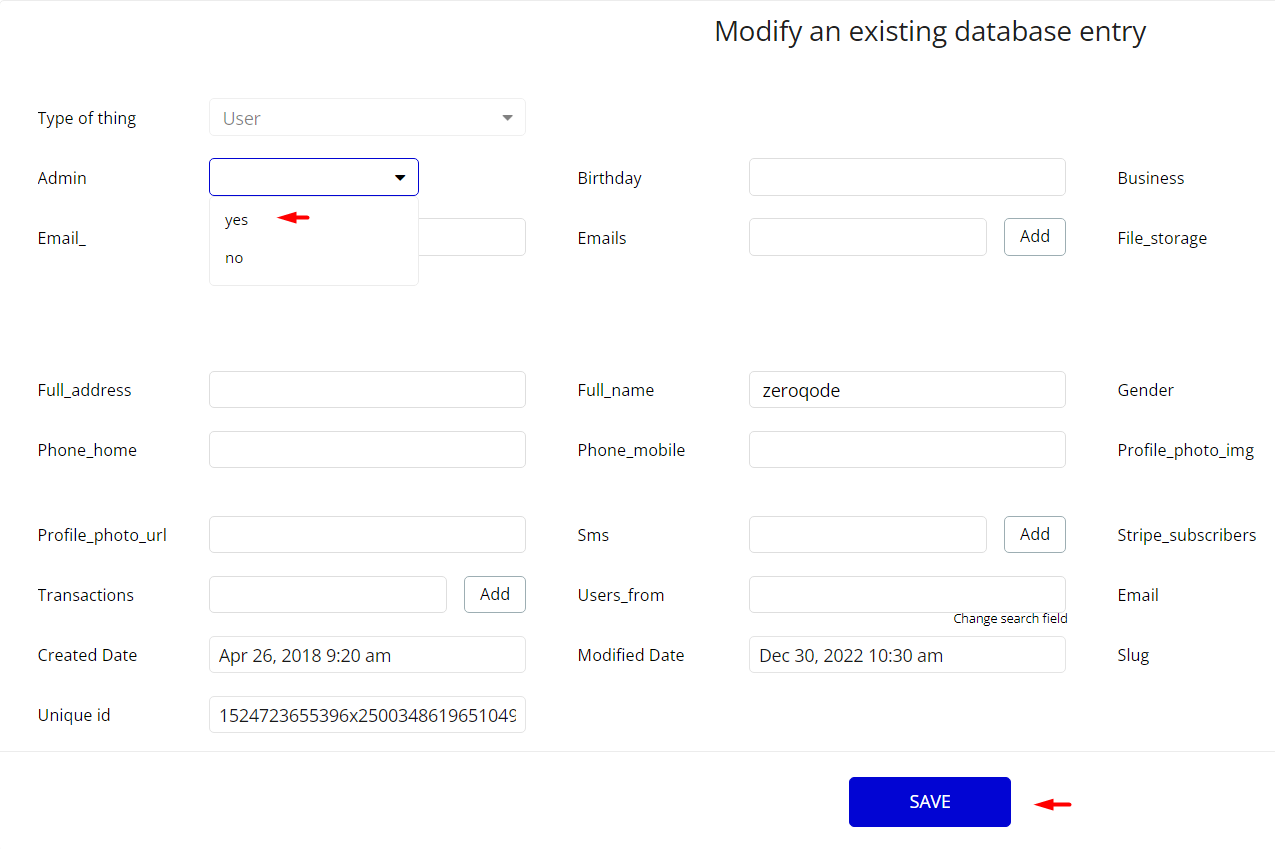
Note: Remember to hit the SAVE button.
An additional limitation is set on the
dashboard page via Variables datatype access_rights field. If a demo user with admin rights gets to this page, he will not be able to access the page or do any manipulations because of the conditions on edit/delete actions.
Under the Data tab click the icon in the Editor, go to the Data Type Variables and look for the
access_rights field with the Yes/No boolean type. 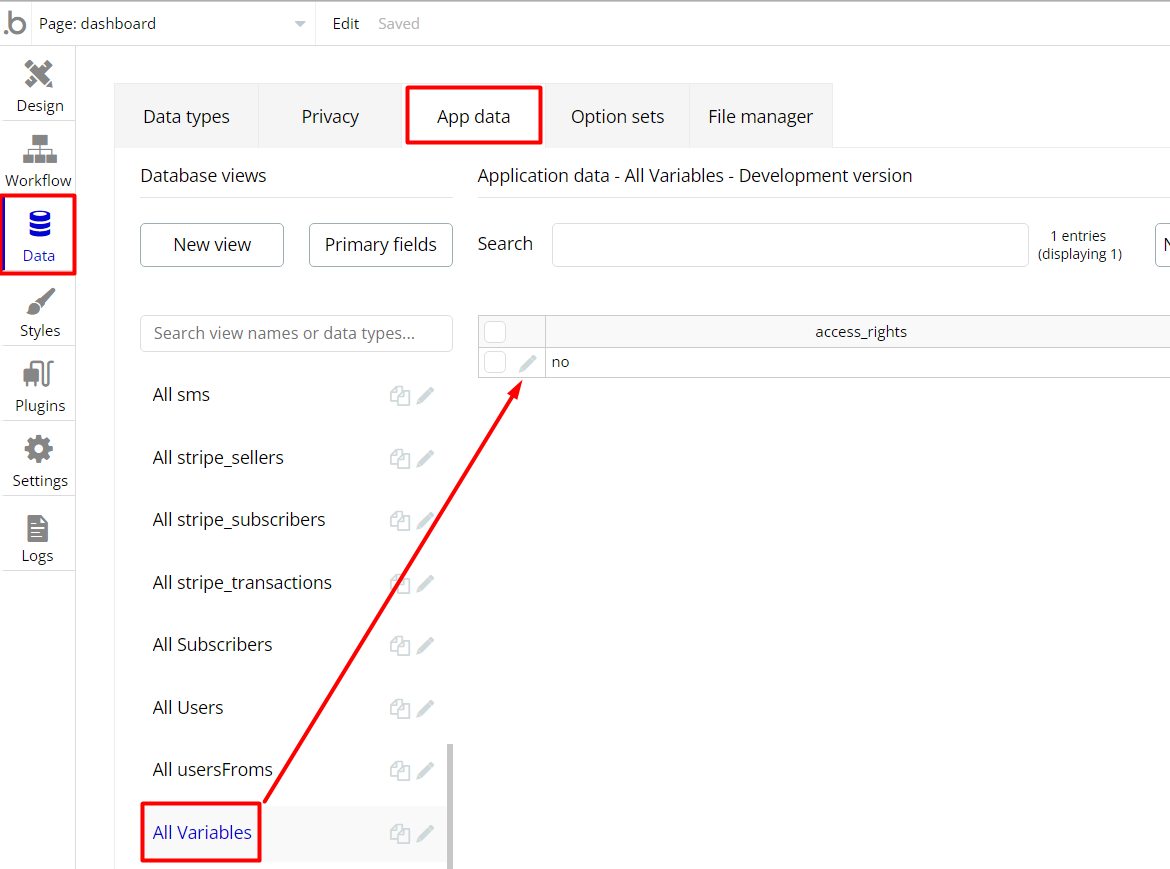
To enable the editing rights set the value to
yes, so the admin user will be able to manage the platform, deleting users, emails, sms and files on the dashboard page.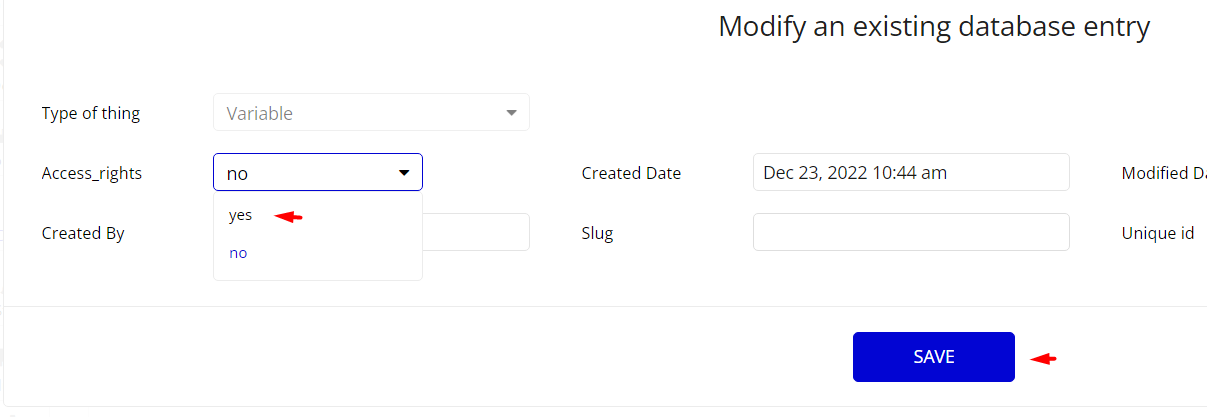
Note: Remember to hit the SAVE button.
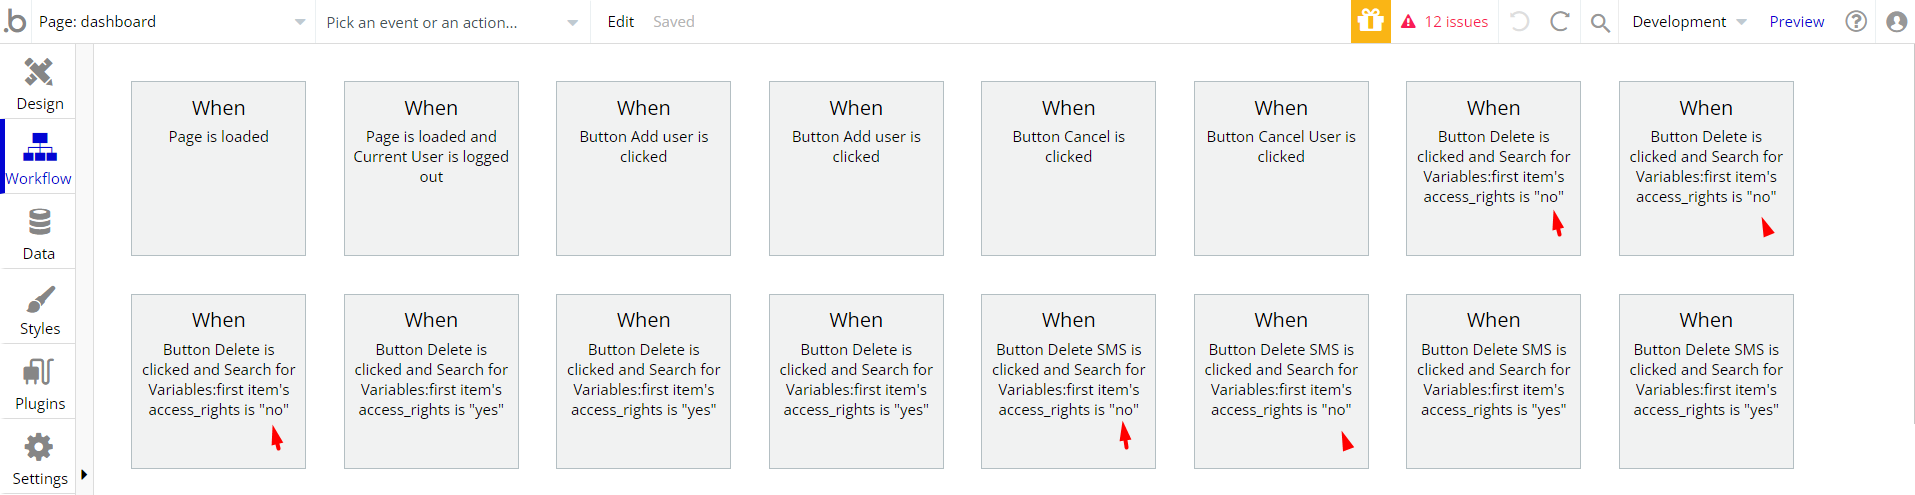
The dashboard page has buttons with admin restriction conditions in the workflow which are locked when
access_rights is no.If you have already purchased the template, you can simply delete the following workflows in order to gain full access to dashboard features:
- Find other variants of Delete buttons in workflows to remove them. Namely with the condition "Search for Variables: first item's
access_rightsis "no".
- Complete. After these changes, you can check the respective actions on page.
Congrats: You have successfully granted admin rights. Now you can use all the admin page and its features as an admin user.
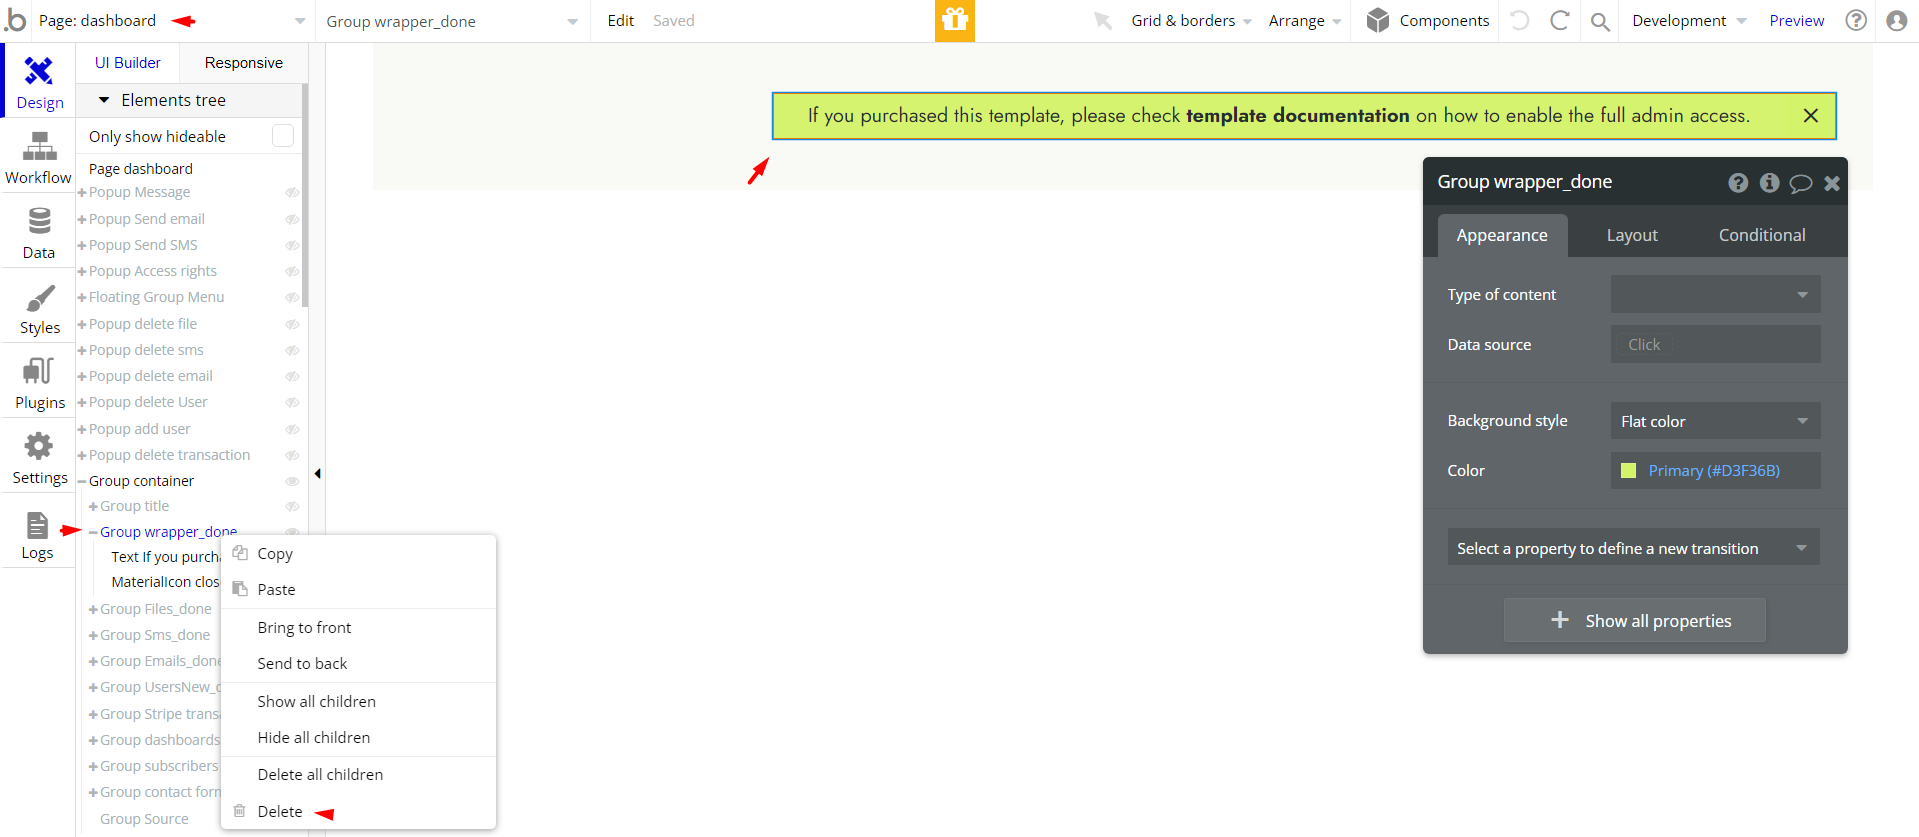
Also, delete the warning group that says to check the template's documentation:
- Locate the container Group "wrapper_done” and delete it:
Custom Code
On certain pages, there are some HTML elements used for some solutions that are not available by default.
You can find these codes on the following pages:
dashboardpage - HTML Download File - this element helps to download the selected file.
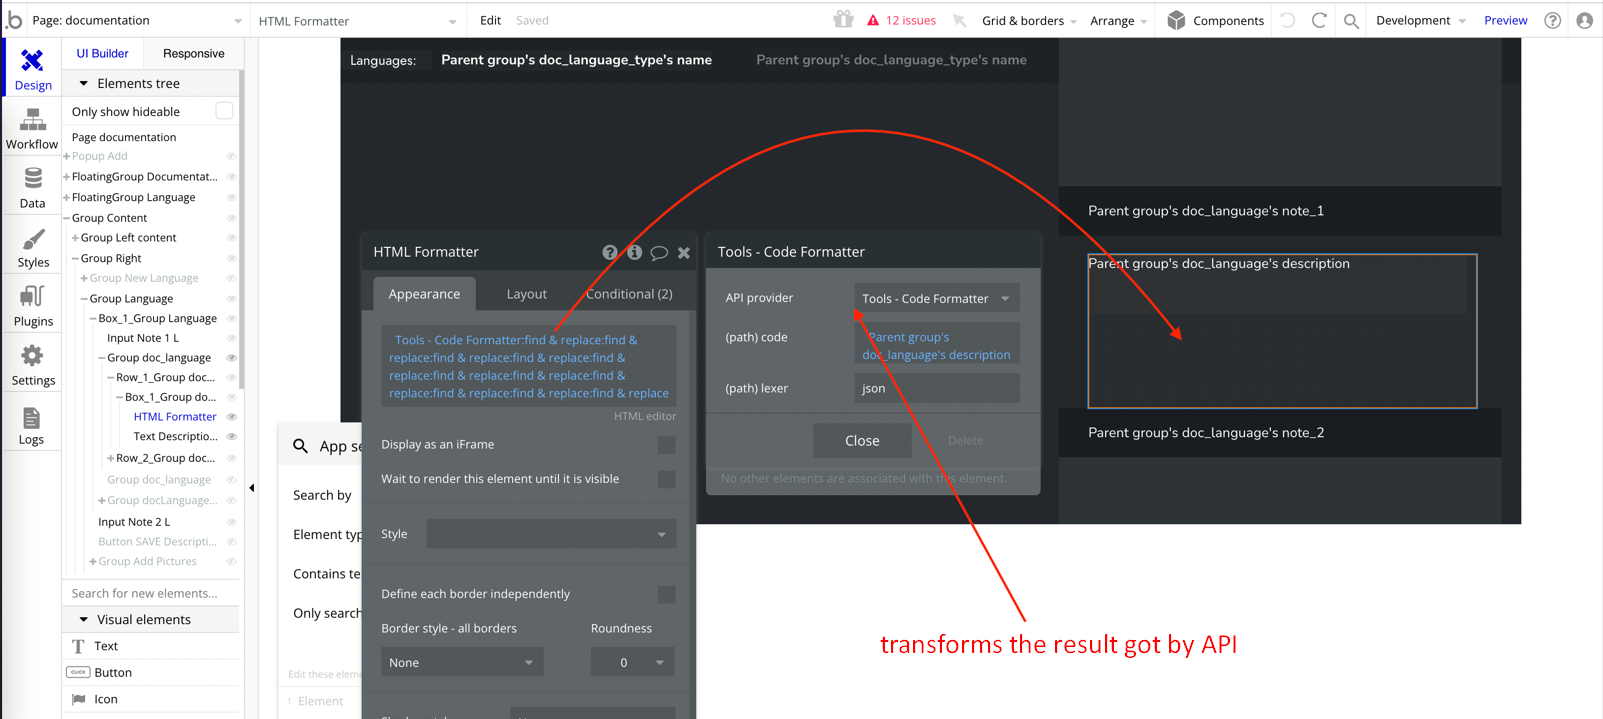
documentationpage - HTML Formatter - this element transforms the result got from API call hilite.me, converting your code snippets into pretty-printed HTML format, easily embeddable into blog posts, emails, and websites.
Important: Feel free to customize the styles, but please note that changing the code may break the described functionality. Strong CSS/Javascript and Bubble skills recommended.
❕For all things Bubble check: https://manual.bubble.io/.
❕For CSS/Javascript check: https://www.w3schools.com/.
API Webhooks
Appstart is using Backend workflows to store all declared features: login/signup users, charge their credit cards, upload and reference files, send emails & text message and much more.
They can be located in the Backend workflows tab in your editor:

The endpoints are the following:
- charge_user - charges the user and creates a
Stripe_transactionthing.
- charge_using_cc - charges the user using saved CC and creates a
Stripe_transactionthing.
- colect_cc - collects the user’s CC information.
- edit_user - stores the user personal information.
- get_al_sms - gets all SMS stored in the
Smsdata type of the current user.
- get_email - gets an email stored in the
Emaildata type of the current user.
- get_emails - gets all emails stored in the
Emaildata type of the current user.
- get_file - gets a file stored in the
File_storageof the current user.
- get_files - gets all files stored in the
File_storageof the current user.
- get_sms - gets an SMS stored in the
Smsdata type of the current user.
- register_seller - register the user in Stripe and create a new
Stripe_sellerthing.
- send_email - sends an email and creates a new
Emailsthing.
- send_sms - sends an SMS through Twilio plugin and creates a new
Smsthing.
- sign_in - logs the user into app.
- sign_up - signs the user into the app and adds changes to the Current
Userthing.
- subscribe_user - subscribes the user to the Stripe subscription plan and creates a new
Stripe_subscribething
- upload_file - stores the file into
File_storagething.
Hidden Design Elements
Tip: Initially, on some pages, design elements in Bubble Editor might be hidden.
Here is an example of how to unhide 👀 them:
Plugins
In this section, we describe additional plugins used on template pages for different purposes.
Twilio Plugin
The template comes with a free Zeroqode plugin - Twilio Plugin - that enables sending SMS through the Twilio platform.
Check the plugin live demo page to see how it works: https://zeroqode.com/plugin/twilio-plugin-for-bubble--1503656632244x684223859905265700
Embedded Notes in Bubble Editor
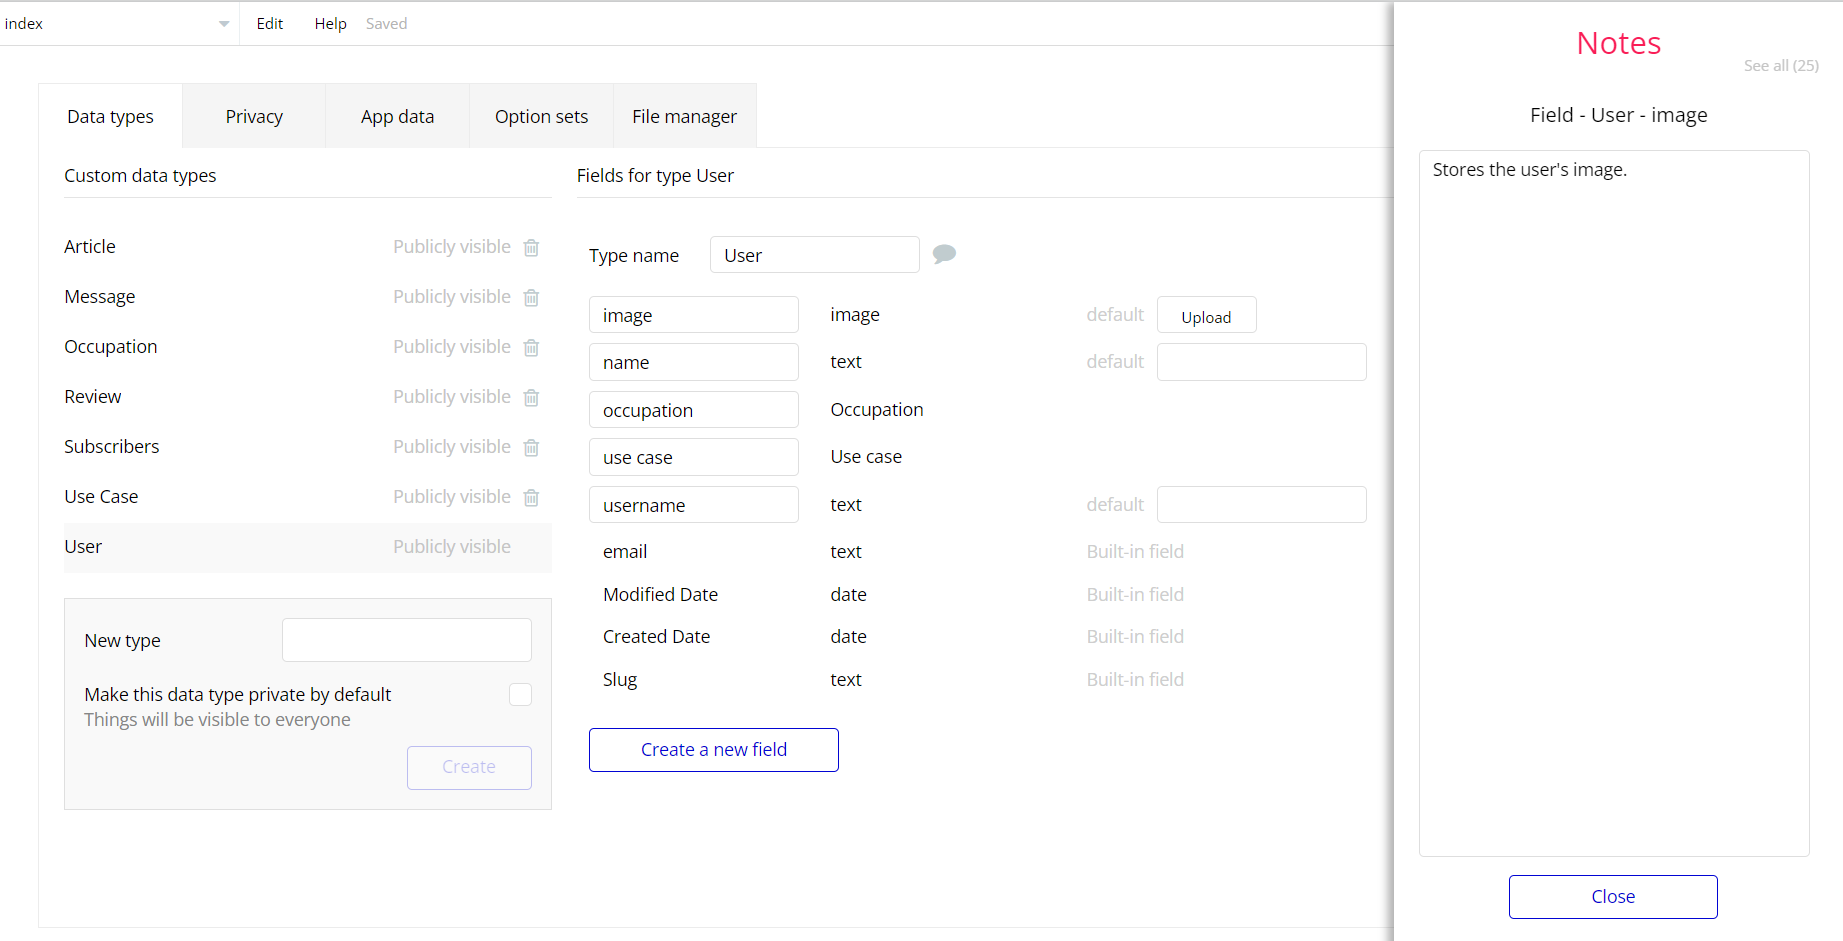
This template comes with explicit Notes for Database fields, Option sets and their fields, and Privacy rules, which will guide you with the modification process.
In order to preview a Note of any data type or field, click on the 💬 icon.