In Wonderful Whiteboard plugin, you can take the current screenshot of the board and save it to the your database.
You need to enable your Backend Workflows. Here is a guide to do it → https://manual.bubble.io/core-resources/application-settings/api#enable-workflow-api-and-backend-workflows
You need to use these:
- Get Image action
- Whiteboard’s image exposed state
- Save file API call
- Backend Workflows
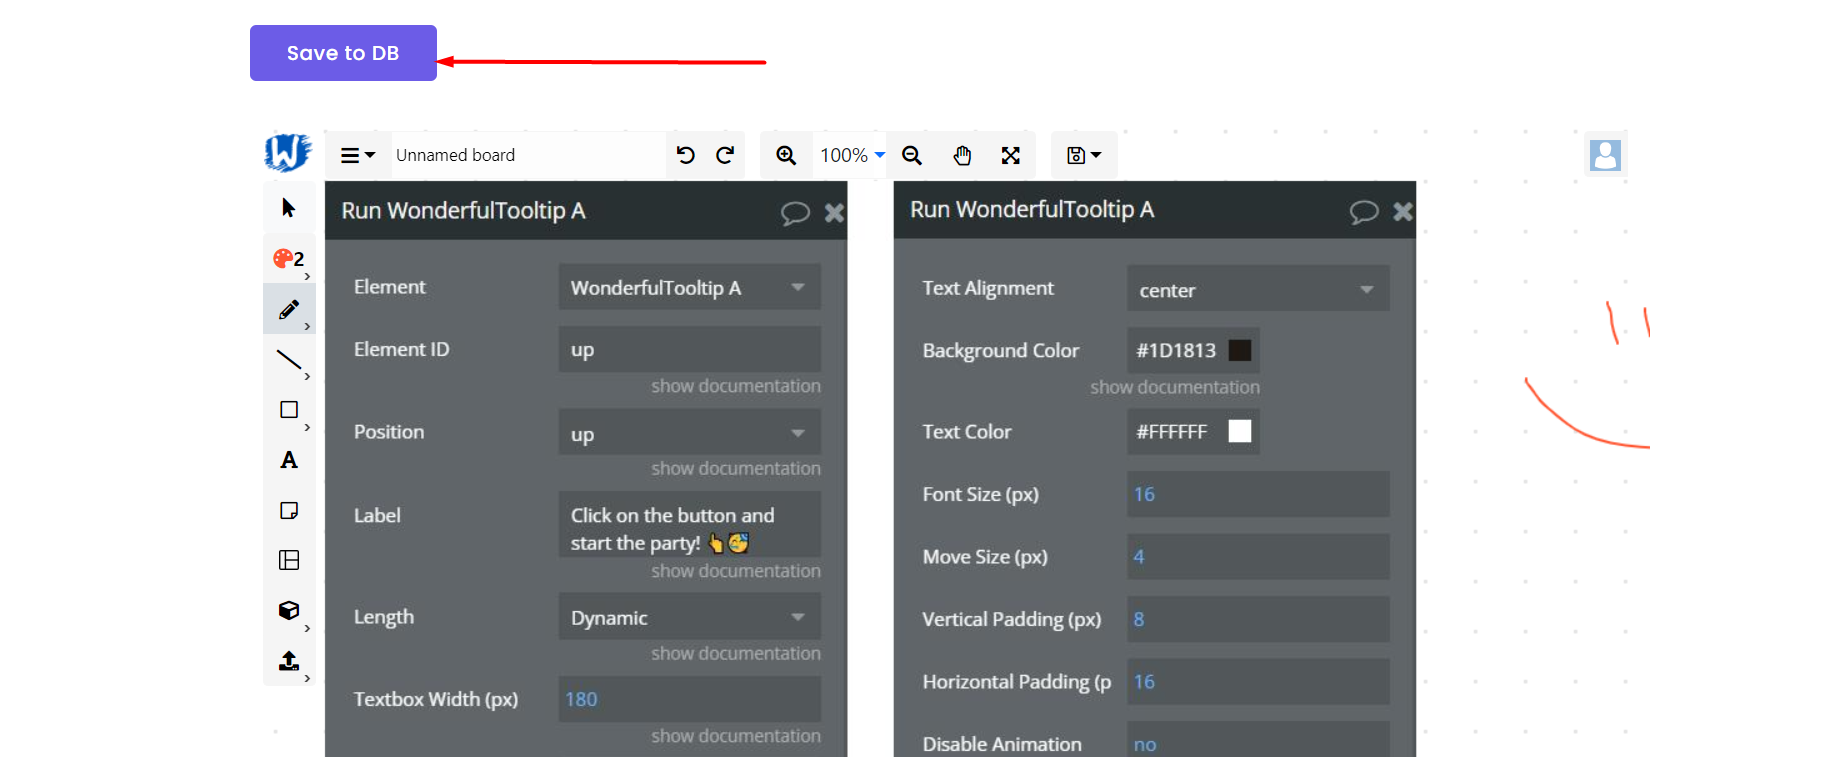
- Draw a button into the page to get current image of the board
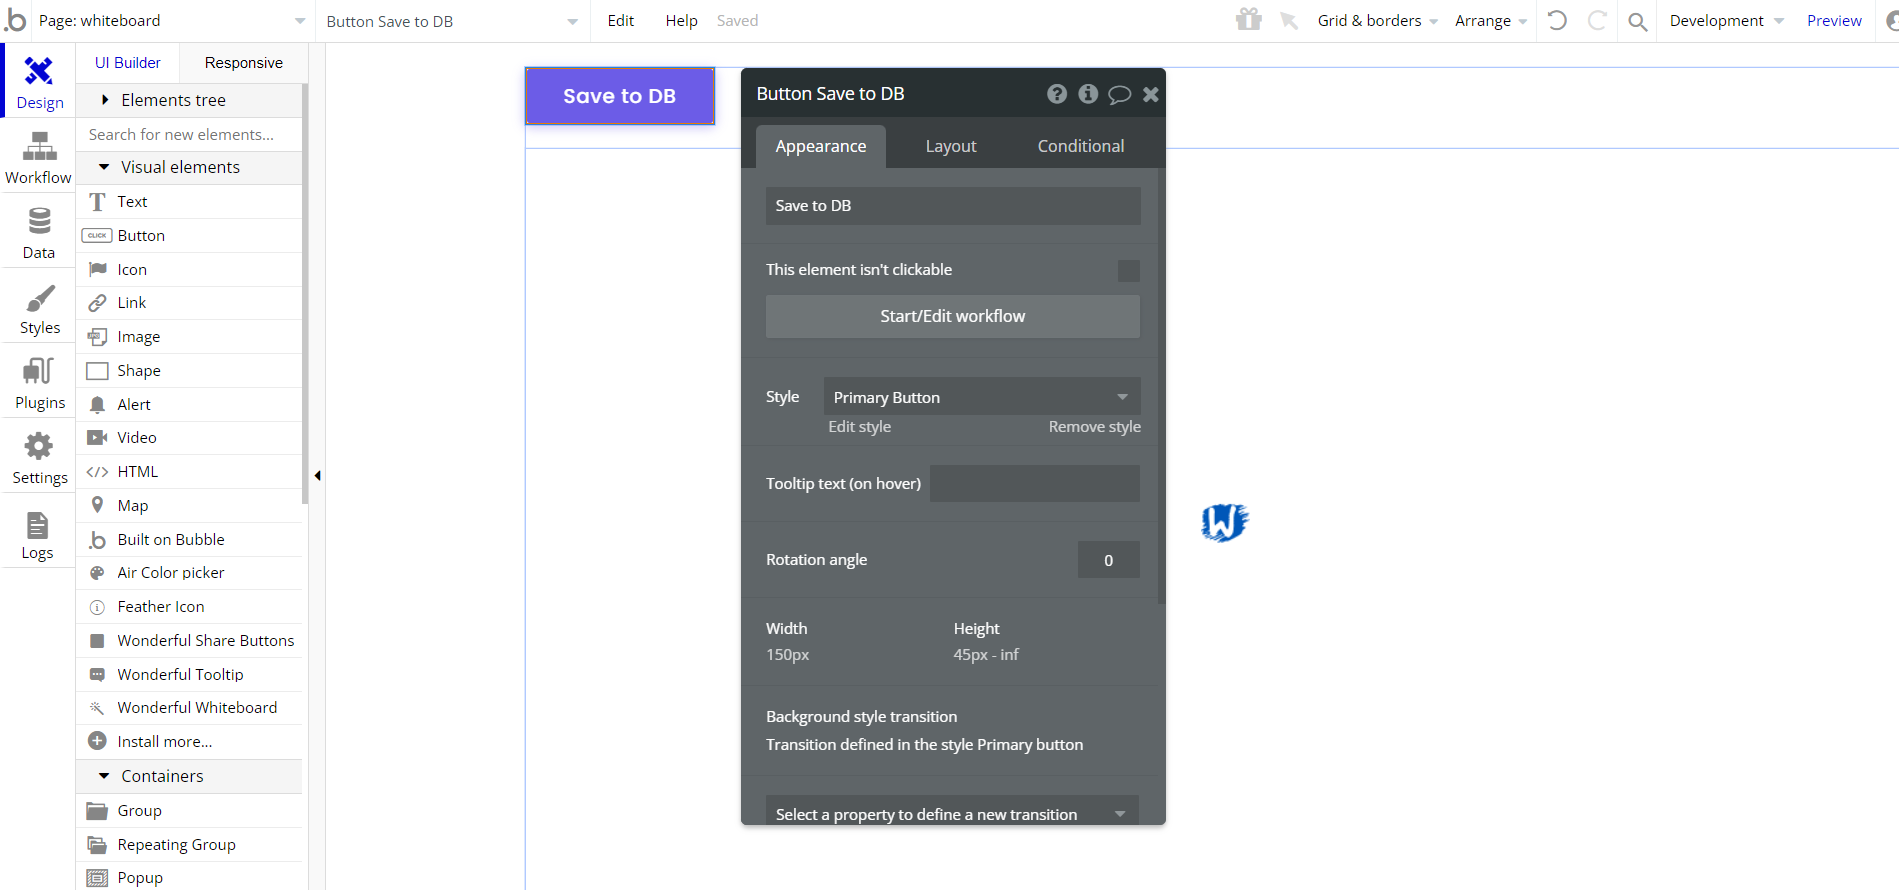
- When the Button is clicked > “Get Image” action will work
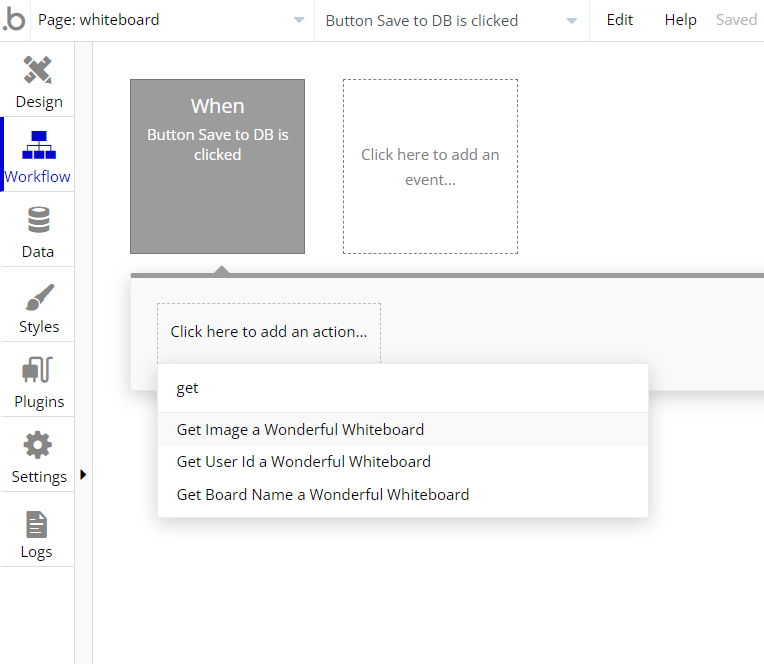
With the Get Image action, the Whiteboards Image exposed state will have a value.
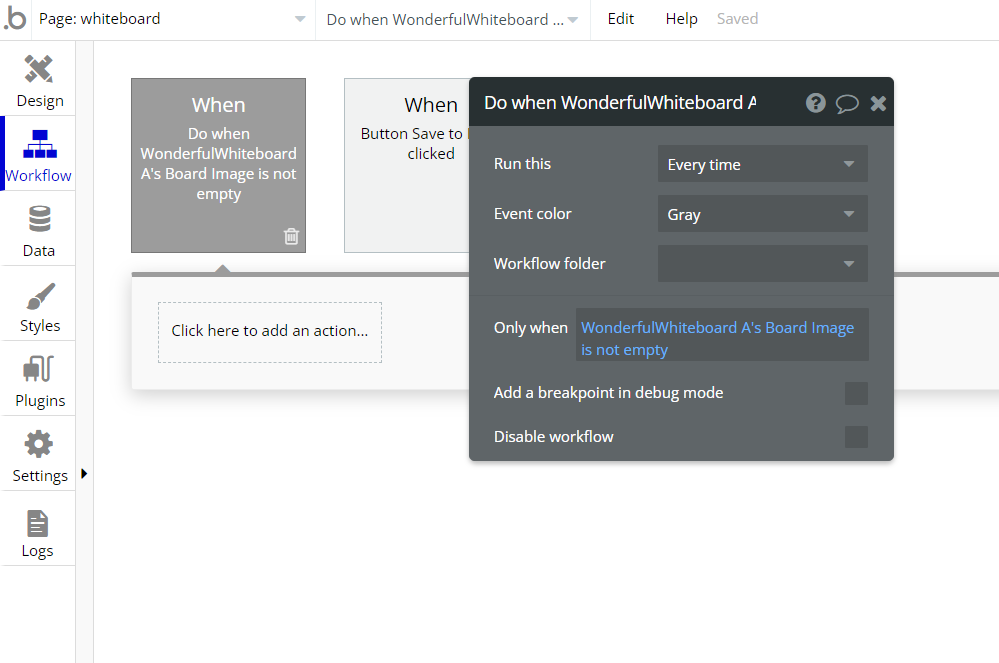
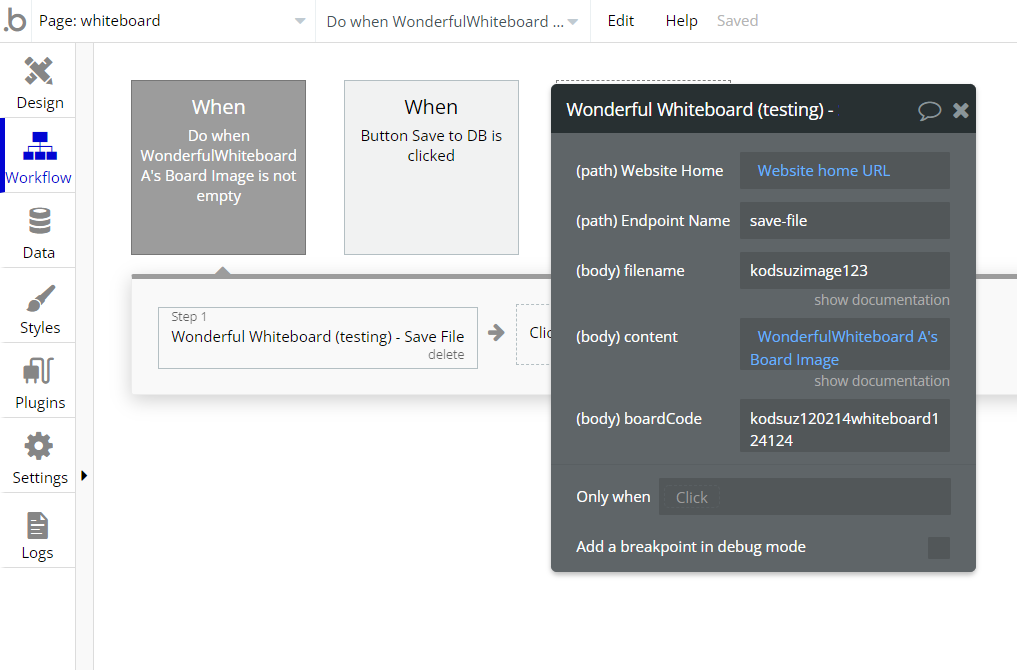
- Add a new event to check that the Wonderful Whiteboard’s Board Image is saved with the “Get Image” action.
- If this condition true, run the “Save File” API Call
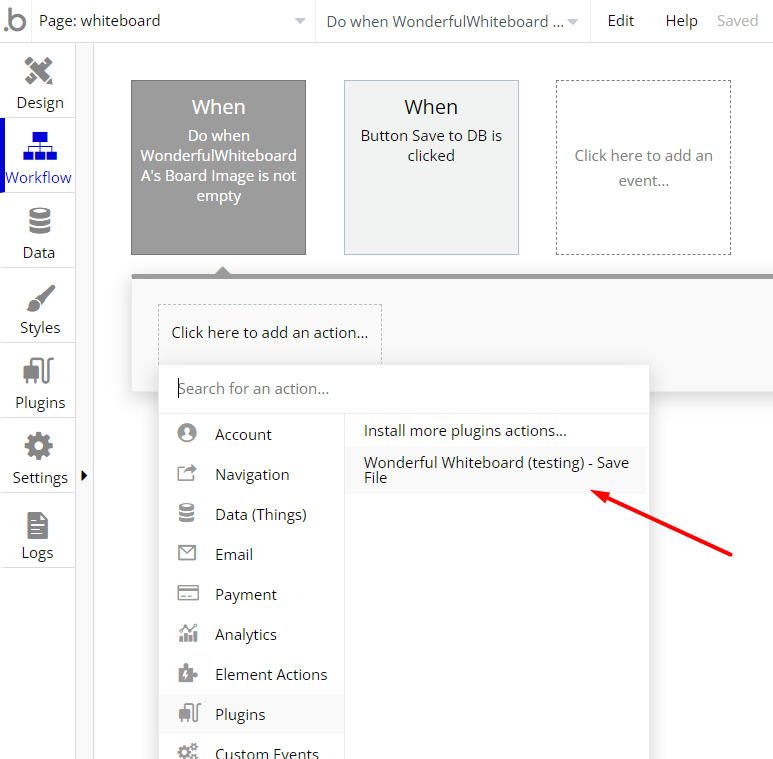
- Enter the values
- Website home: Your Website home URL.
- Endpoint name: The name of the event you will use in the backend workflow.
- filename: Your file’s name.
- content: Wonderful Whiteboard’s board image.
- boardCode: Your whiteboard’s board code.
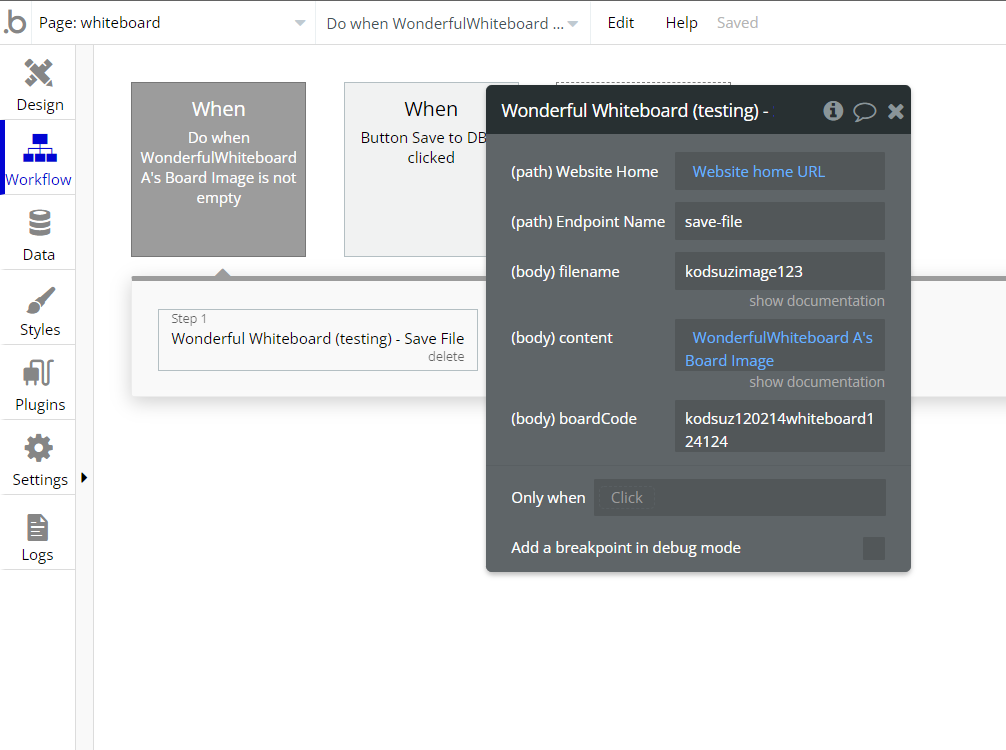
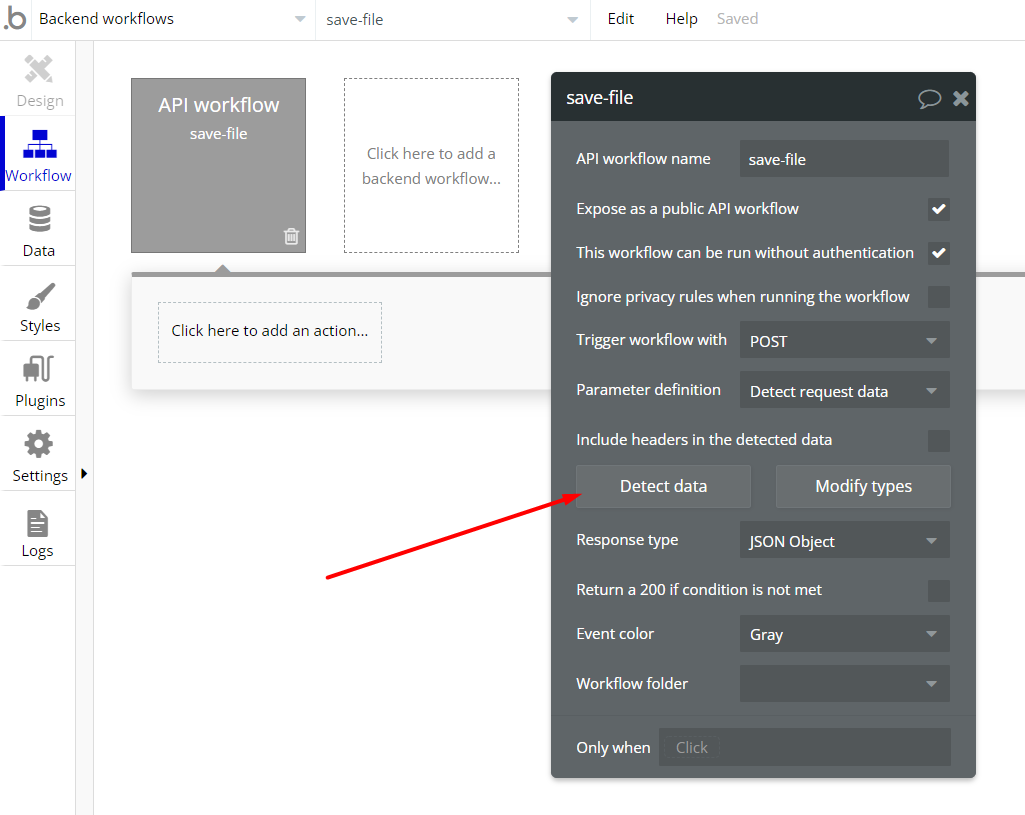
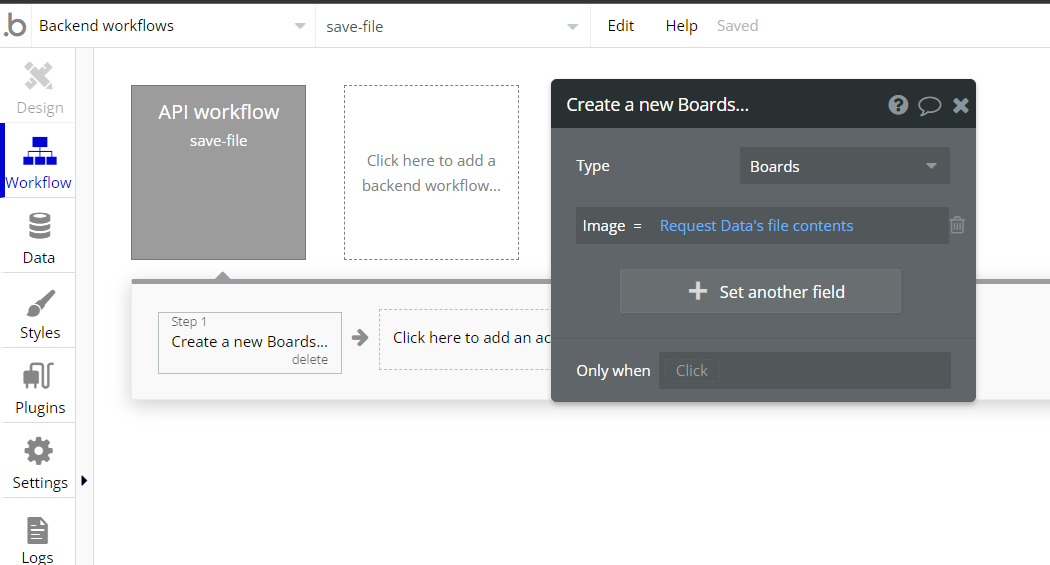
- Go to the Backend Workflows and create a new API workflow with “save-file” name.
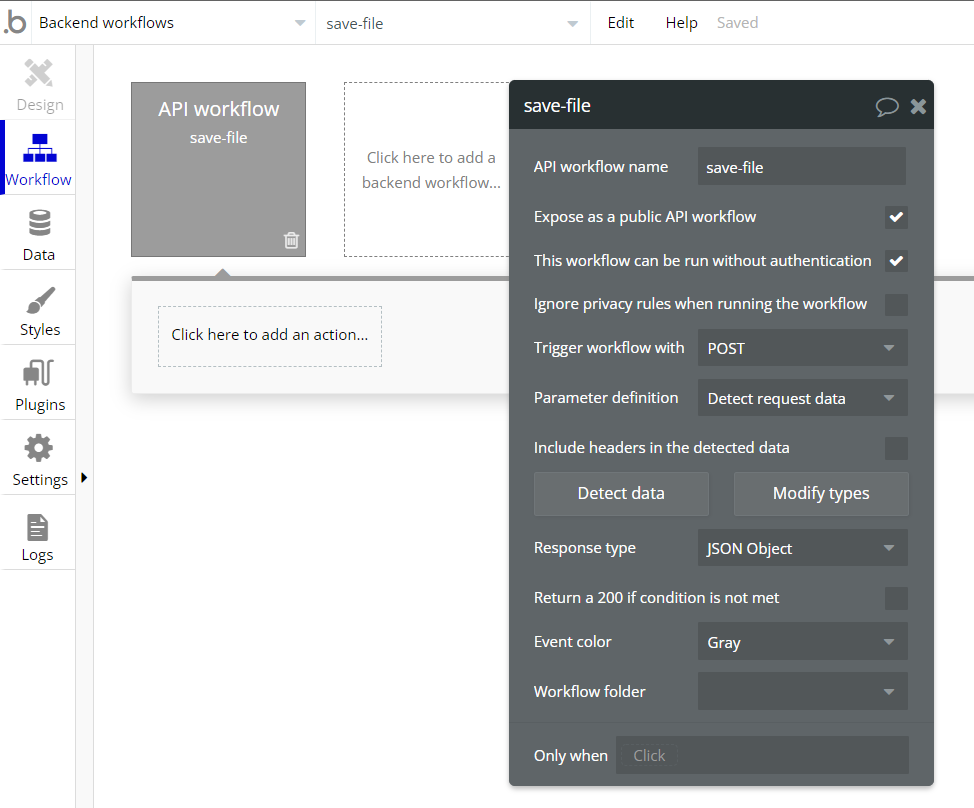
- Click on the “Detect data” button.
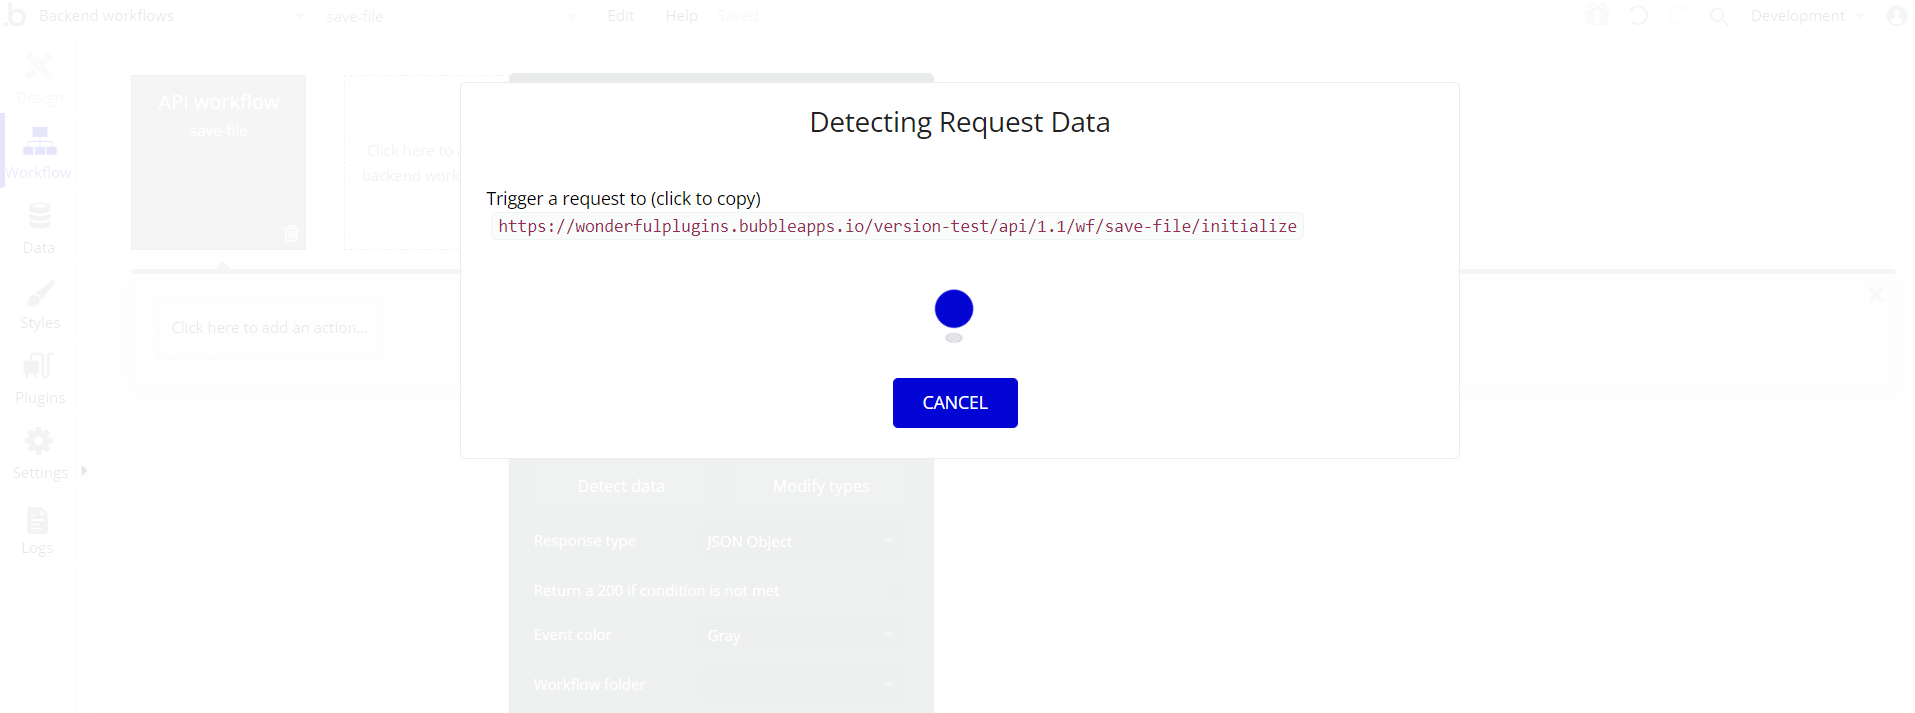
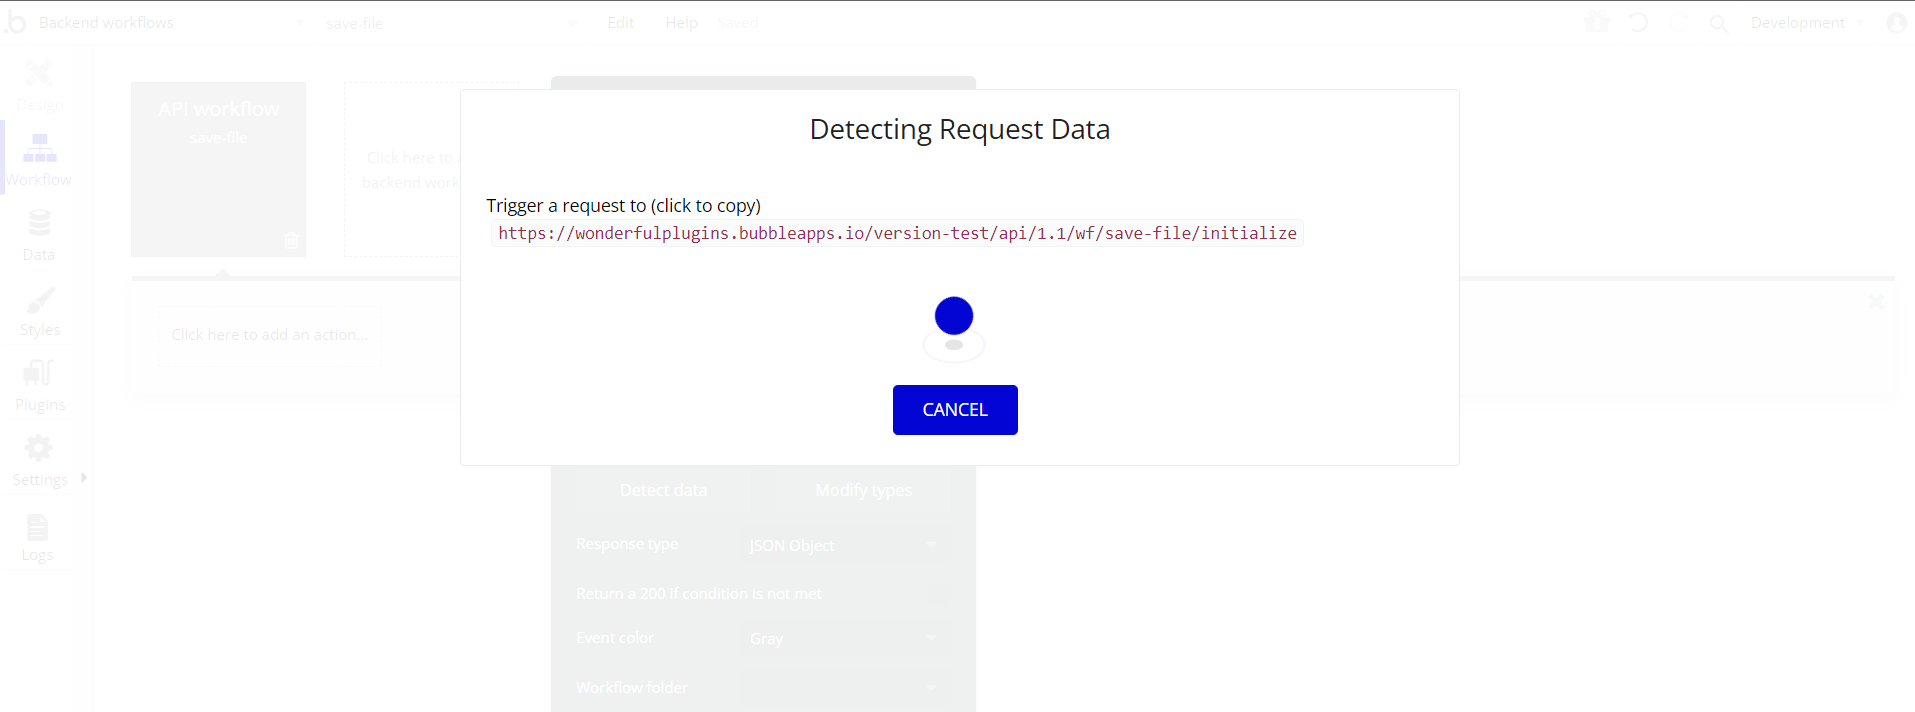
After doing this a window will open and show you a URL. You will see the text "initialize" at the end of the endpoint name in this URL. So we need to go back to where we ran the "Save File" API call and add "initialize" next to the endpoint name just for the first time.
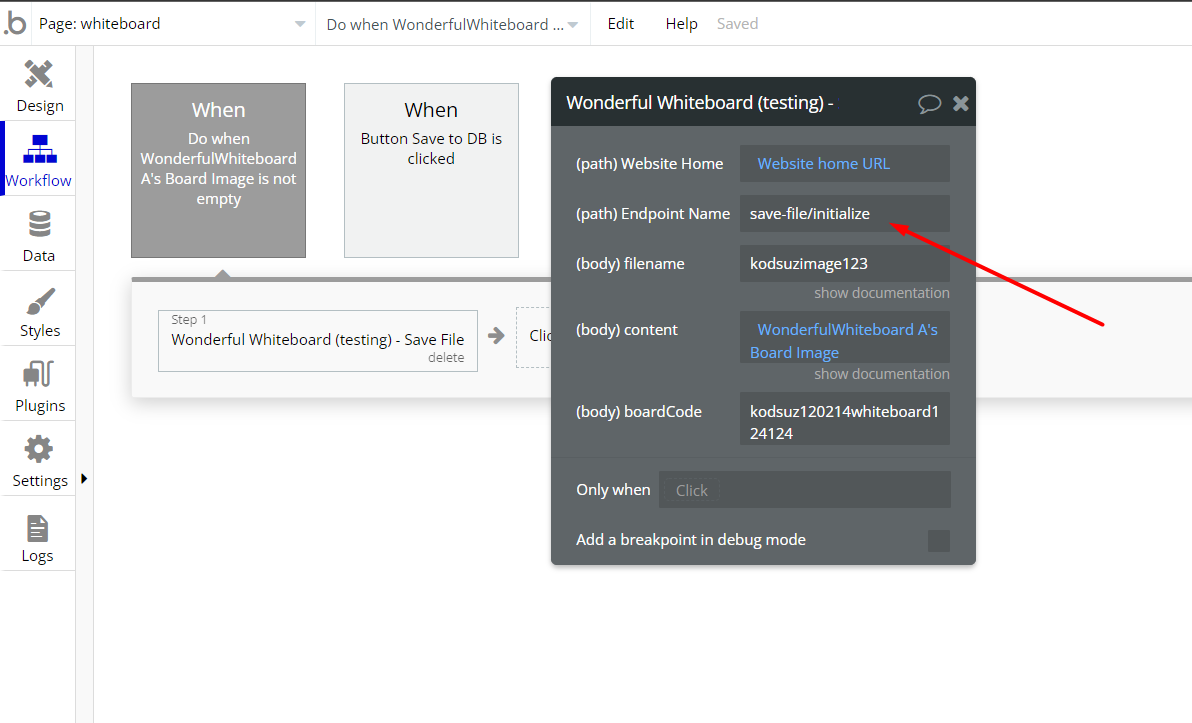
- Go to your whiteboard page and change the endpoint name like this. After detecting data we will delete the “initialize” again.
- Go back to the Backend Workflows and click on the “Detect Data” again.
- While this window open, go to the preview and click on the button to run the action.
- Click on it.
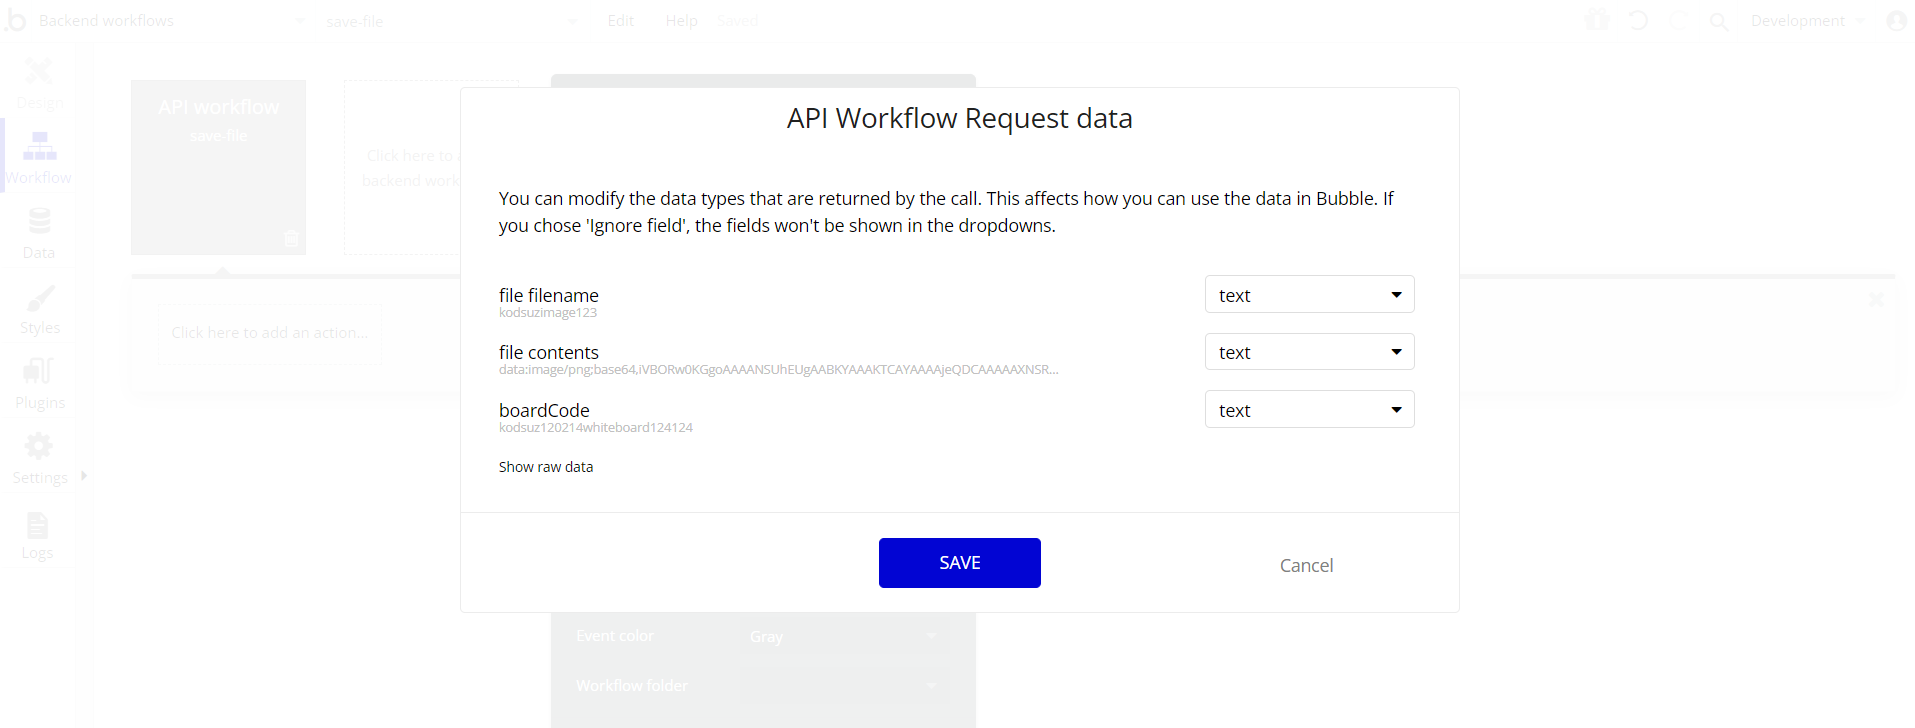
- Back to the backend workflows. You will see the detected data. Click on the “SAVE” button.
- After this, add a new action to save the image.
- Go back to “Save File” API Call and delete the “initiliaze” text.
It’s done! 🎉
